· Todd Martin · Furniture Refinishing · 16 min read
How To Distress Furniture Without Sanding
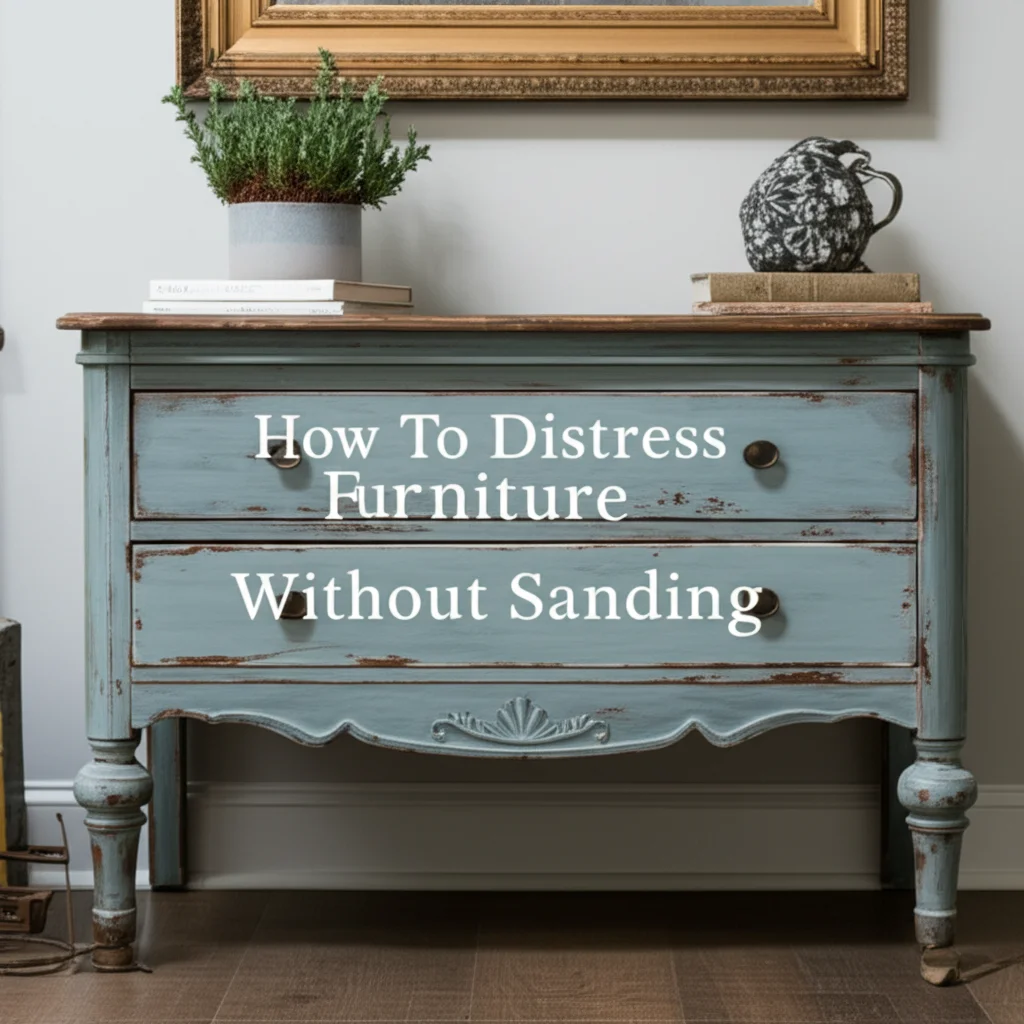
Distress Furniture Without Sanding: Easy Vintage Makeovers
Are you dreaming of giving your furniture a charming, aged appearance but dread the thought of sanding? Many people shy away from distressing projects because they believe sanding is essential. I used to think the same. Fortunately, you can achieve a beautiful distressed look on your furniture without any dusty prep work. This guide will walk you through several effective methods to distress furniture without sanding. We will explore different techniques, materials, and steps to help you transform your pieces. Get ready to create stunning, vintage-inspired furniture with ease.
Takeaway
- Prep furniture properly: Clean and prepare surfaces for best results.
- Choose the right paint: Opt for paints that adhere well without sanding, like chalk paint.
- Explore various distressing methods: Use wax, petroleum jelly, wet distressing, or chipping techniques.
- Protect your distressed finish: Apply a topcoat to ensure durability.
To distress furniture without sanding, you primarily rely on paints with excellent adhesion, such as chalk paint or milk paint, which grip surfaces without prior abrasion. You apply a base coat and then strategically layer or remove paint using methods like wax resist, wet distressing, or chipping techniques to reveal the underlying color or wood, creating an aged, worn appearance effortlessly.
Preparing Your Furniture for a No-Sand Distress Finish
Proper preparation is important, even when you skip sanding. A clean surface ensures your new paint adheres correctly. This step prevents future chipping or peeling of your distressed finish. I always start here to guarantee good results.
First, remove all hardware from your furniture piece. This includes knobs, handles, and hinges. Place them in a labeled bag so you do not lose any parts. Protecting hardware makes the painting process smoother and helps you avoid getting paint on them.
Next, thoroughly clean the entire furniture surface. Use a degreaser or a mild all-purpose cleaner. I often use a mixture of warm water and a small amount of dish soap. Wipe down every inch to remove dirt, grease, and grime. Pay extra attention to areas that collect dust or hand oils. Rinse the surface with clean water and let it dry completely. For more detailed cleaning tips before painting, check out our guide on how to clean furniture before painting.
After cleaning, inspect the furniture for any loose veneer or peeling existing paint. While you are not sanding, you still want a stable surface. Gently scrape away any loose bits with a putty knife. If there are deep gouges or holes, fill them with wood filler. Allow the filler to dry and lightly smooth it if needed with a fine-grit sanding sponge, though heavy sanding is not necessary. A smooth, clean surface is key for even paint application. This careful prep work sets the stage for a beautiful distressed look.
Choosing the Right Paint for Sanding-Free Distressing
Selecting the correct paint is critical when you want to distress furniture without sanding. Not all paints adhere well to slick surfaces without prior sanding. Certain types of paint are formulated specifically for this purpose. I have experimented with many kinds over the years.
Chalk paint is perhaps the most popular choice for no-sanding projects. It offers exceptional adhesion to various surfaces, including laminate, metal, and previously painted or varnished wood. Chalk paint also dries quickly and provides a matte finish, which is ideal for distressing. Its unique texture makes it easy to manipulate for a worn look. You can learn more about using this type of paint in our article about how to chalk paint furniture without sanding.
Milk paint is another excellent option. Traditional milk paint comes in powder form and needs mixing with water. It creates an authentic, chippy, aged look, especially when used with a bonding agent on non-porous surfaces. Modern “all-in-one” milk paints also offer good adhesion and a durable finish. Both types are great for creating a genuinely antique feel.
Mineral paints and some specialty furniture paints are also designed for minimal preparation. Always read the label to confirm if a primer or sanding is required. These paints often contain built-in primers or strong bonding agents. They allow you to bypass the labor-intensive sanding step. Choosing the right paint simplifies the entire distressing process.
Wax Resist Method: Achieving a Worn Look Easily
The wax resist method is a fantastic way to achieve a naturally worn, chippy paint look without sanding. This technique works by preventing paint from adhering to specific areas. It reveals the underlying finish or a contrasting base color. I find this method very effective for creating authentic-looking wear.
First, apply your base coat of paint to the furniture. This base color will show through in the distressed areas. For a traditional look, you might use a darker color or the original wood tone. Allow this coat to dry completely. For instance, if you are painting an old oak piece, you might let the wood show through or paint a dark gray base.
Next, rub a wax candle or a block of beeswax onto the areas where you want the topcoat to chip or wear away. Focus on edges, corners, raised details, and areas that would naturally see a lot of handling. These include drawer pulls, table edges, and chair backs. The wax acts as a barrier, preventing the top paint coat from bonding firmly to the surface.
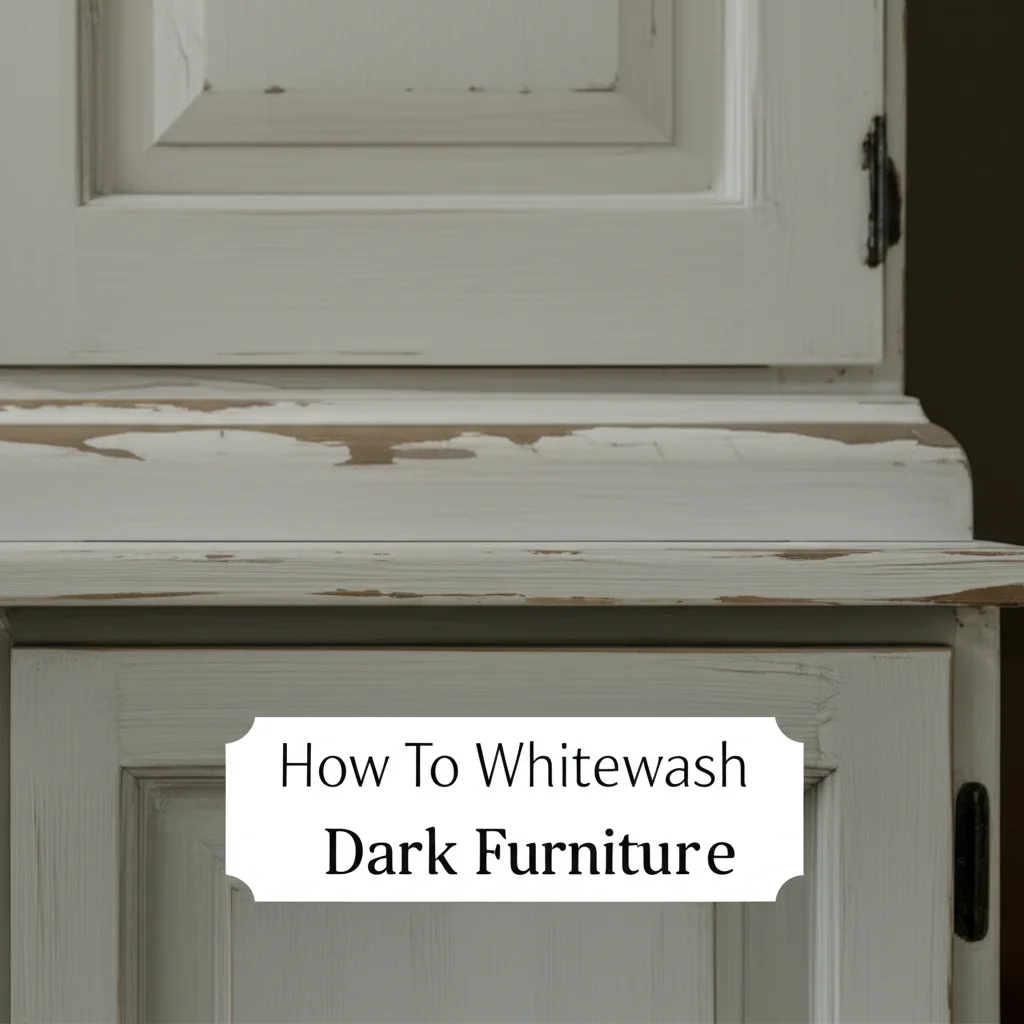
Now, apply your topcoat of paint over the entire piece, including the waxed areas. Choose a contrasting color for this layer. For example, a light cream over a dark blue base creates a striking effect. Once the topcoat is dry, use a putty knife, a paint scraper, or even a credit card to gently scrape at the waxed areas. The paint will easily lift and chip away where the wax was applied. This reveals the base color or original finish underneath. This method provides a controlled yet organic distressed look.
Wet Distressing: A Gentle and Controlled Technique
Wet distressing is a simple and clean way to create a subtly worn look on your furniture without creating dust. This method is especially effective with chalk paint or milk paint, which are water-soluble. I often recommend this technique for beginners because it is very forgiving.
After applying your paint, allow it to dry completely. This is critical for the success of wet distressing. The paint should be dry to the touch but not fully cured. This usually means waiting an hour or two, depending on humidity and paint thickness.
Next, dampen a lint-free cloth or a piece of fine-grit sandpaper (like 220-grit). You do not want the cloth to be dripping wet, just moist. Gently rub the damp cloth or sandpaper over the areas you want to distress. Focus on edges, corners, and raised details. These are the spots that would naturally show wear over time. The water will soften the paint, allowing it to easily rub away.
As you rub, the underlying layer or the original furniture finish will begin to show through. You control the amount of distress by how much pressure you apply and how long you rub. If you want more distressing, apply more pressure. If you want just a hint of wear, use light pressure. This method allows for a very natural and controlled distressed effect. Once you achieve the desired look, wipe away any paint residue with a clean, dry cloth. This technique is perfect for a soft, aged appearance.
Chippy Paint Effect with Petroleum Jelly
Creating a chippy paint effect using petroleum jelly is another excellent way to distress furniture without sanding. This method is similar to the wax resist technique but uses a common household item. It helps achieve a more pronounced, flaky distressed look. I often use this trick for a truly rustic feel.
Start by applying your base coat of paint to the furniture. This layer will show through the distressed areas. Let it dry completely. You can choose a dark color for a dramatic contrast, or a lighter shade if you want a softer effect. Make sure the base coat is fully dry to prevent smudging.
Once the base coat is dry, dab small amounts of petroleum jelly onto the areas where you want the topcoat to chip. Use your finger or a small brush to apply it. Concentrate on edges, corners, and areas that would naturally experience wear and tear. You can also apply it sparingly on flat surfaces for random chips. The petroleum jelly acts as a release agent. It prevents the subsequent paint layer from adhering properly.
Now, apply your topcoat of paint directly over the petroleum jelly and the rest of the furniture. Choose a contrasting color that will stand out against your base coat. Let this topcoat dry fully. Once dry, use a putty knife, a stiff brush, or even your fingernail to gently scrape at the areas where you applied the petroleum jelly. The topcoat will easily lift and chip away, revealing the base color underneath. This method creates a highly textured, aged appearance. It mimics years of natural wear and tear effectively.
Layering Colors for Depth and Age
Layering different colors is a powerful technique to add depth and create an authentic aged look when distressing furniture without sanding. This method mimics the way old furniture might be repainted multiple times over the decades. It reveals glimpses of past finishes. I find that this technique adds a truly unique character to a piece.
Begin by applying a base coat of paint to your furniture. This is your first “historical” layer. It could be a dark color, a vibrant shade, or even just a primer. Let this coat dry completely. Think about what color might have been popular many years ago for your piece.
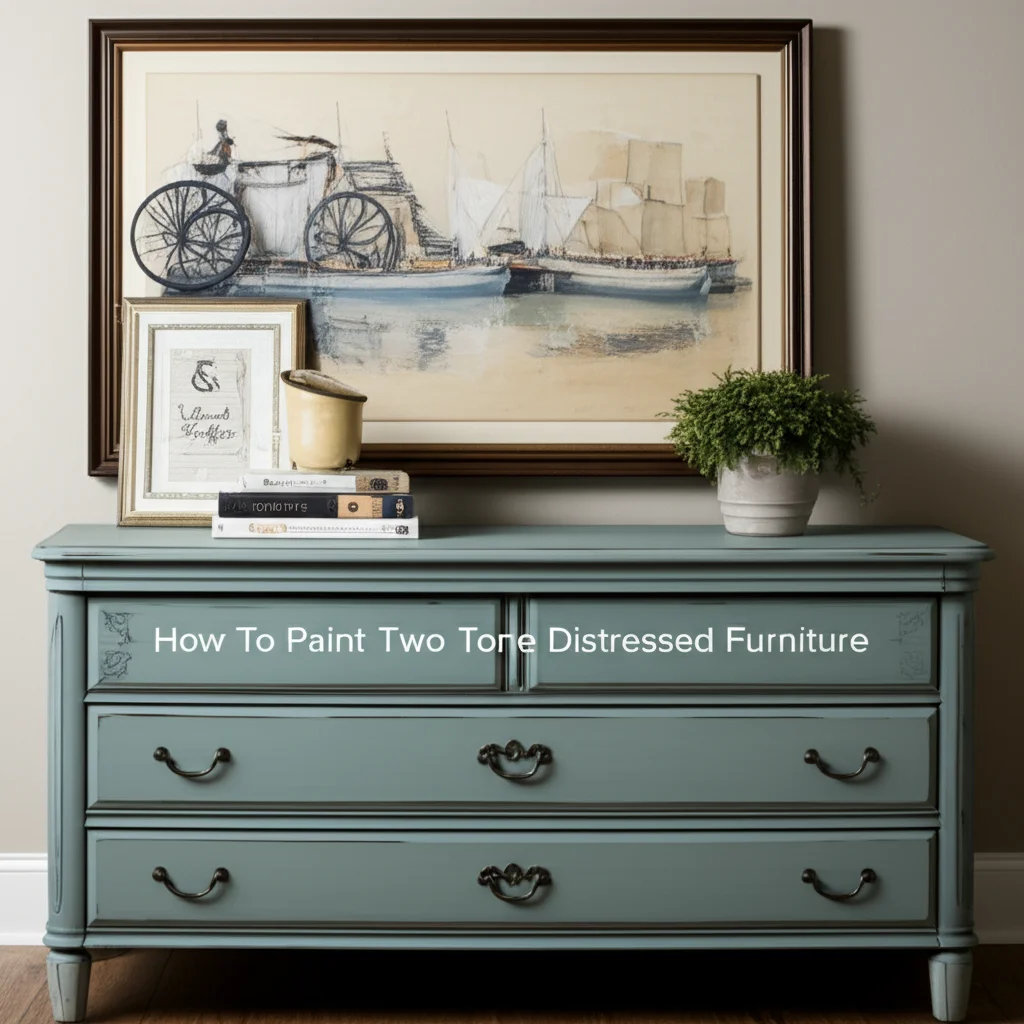
Once the base is dry, apply a second contrasting color over it. This second layer is what will be prominently displayed. For example, if your base was deep blue, your second layer might be a soft cream or white. Ensure this coat dries thoroughly as well. At this point, your furniture looks like a freshly painted piece.
Now, the magic happens. Use a wet distressing method, or gently scrape with a putty knife or fine-grit sandpaper, focusing on edges and high-traffic areas. As you distress, the second layer of paint will reveal glimpses of the base color underneath. This creates a multi-layered, worn appearance. You can even add a third, thinner coat in a complementary color and lightly distress that too, revealing both the first and second layers. This adds even more complexity and realism to the aged effect. The result is a piece that tells a story, showing layers of time and use.
Protecting Your No-Sand Distressed Finish
After all your hard work distressing furniture without sanding, the final step is to protect your beautiful new finish. A protective topcoat ensures durability and longevity. It will guard against everyday wear, spills, and scratches. I never skip this step because it preserves the distressed look.
For chalk paint or milk paint finishes, a clear wax is a popular choice. Apply the wax with a soft, lint-free cloth or a wax brush. Rub it into the surface in small sections, working in circular motions. The wax will deepen the color slightly and create a subtle sheen. It also provides a durable, water-resistant layer. After applying, buff the wax with a clean cloth to achieve your desired level of shine. You may need to apply two or three thin coats of wax for maximum protection, especially on high-traffic pieces like tabletops. Using white wax can also add another layer of aged character; you can explore this option further in our guide on how to use white wax on furniture.
Alternatively, you can use a clear water-based polycrylic or polyurethane. These topcoats offer a very durable finish, making them ideal for furniture that will see a lot of use. Apply polycrylic with a good quality brush in thin, even coats. Allow each coat to dry completely before applying the next. Lightly scuff sanding with a very fine-grit sanding sponge between coats can improve adhesion, but it is not always necessary with water-based products. Avoid oil-based polyurethanes over light-colored paints, as they can yellow over time. Whichever protective layer you choose, ensure it is fully cured before putting your furniture back into use. This final step is crucial for maintaining your distressed masterpiece.
Adding Patina and Character to Distressed Furniture
Beyond just chipping paint, you can add further layers of patina and character to truly make your distressed furniture look ancient. This involves techniques that mimic dirt, age, and natural wear. I enjoy this part because it brings so much life to the piece.
One popular method is using dark wax or antiquing glaze. After your clear protective coat has dried, sparingly apply dark wax into recessed areas, carvings, and along the edges. The dark wax settles into the crevices, creating shadows and accentuating details. It mimics years of grime and dust accumulation. Wipe off excess wax immediately from flat surfaces, leaving just enough to create an aged look. This adds depth and a sense of history.
You can also use a small amount of watered-down dark paint or stain. Apply it to specific areas like corners or legs. Then, wipe it back quickly with a damp cloth. This creates a subtle “grungy” effect that makes the piece look like it has been through years of use. Think about where a piece would naturally get dirty or darkened over time.
Consider adding subtle faux “damage” in a controlled way. This might include light dings with a hammer, small wormholes with an awl, or gently rubbing sandpaper across certain spots to mimic natural abrasion. Remember to be subtle; the goal is to enhance the aged look, not to damage the furniture. These extra steps move your piece from merely distressed to truly character-rich. They make it look like a treasured antique.
Advanced No-Sanding Distressing Techniques
Once you master the basic no-sanding distressing methods, you can explore more advanced techniques to achieve unique effects. These methods often combine elements to create a truly bespoke finish. I love experimenting with these to get distinct results.
One advanced technique is the “resist and layer” method. This involves applying multiple layers of paint, with a resist (like wax or petroleum jelly) between some layers. You might have a base coat, then wax, then a middle color, then a final top coat. When you distress, you can reveal either the middle color or the base coat, depending on how much paint you remove. This creates a more complex, multi-dimensional distressed effect. It suggests a history of repainting over many years.
Another method involves using a crackle medium. Apply a crackle medium between two layers of contrasting paint. The medium causes the top coat to crack as it dries, revealing the base color beneath. This gives a natural, aged crackled finish. You can then lightly distress the piece further by hand. The crackle effect pairs beautifully with traditional distressing.
Consider combining different methods on a single piece. For instance, use the wax resist method on prominent edges and a wet distressing technique on flatter surfaces for a softer overall look. You can also experiment with using different brushes or tools to remove paint. A stiff brush might create a streaky, worn look, while a putty knife yields sharper chips. These advanced techniques require practice but offer endless possibilities for creating truly unique, no-sanding distressed furniture pieces. They allow you to tell a more intricate story with your furniture.
FAQs About Distressing Furniture Without Sanding
What kind of furniture can I distress without sanding?
You can distress many types of furniture without sanding. This includes pieces made of wood, laminate, previously painted wood, and even some metals. The key is using paints specifically designed for adhesion without prior sanding, such as chalk paint or milk paint. Always ensure the surface is clean and free of loose debris before painting.
How do I prepare furniture for distressing without sanding?
Preparation for no-sanding distressing is simple but important. First, remove all hardware. Then, thoroughly clean the entire piece with a degreaser or mild cleaner to remove dirt, grease, and grime. Rinse and let it dry completely. Ensure the surface is stable and free of peeling paint or loose veneer.
Can I distress furniture painted with latex or acrylic paint without sanding?
Distressing directly over latex or acrylic paint without sanding can be tricky. These paints typically require a lightly scuffed surface for good adhesion. While some distressing techniques might work, the paint may not hold up as well. For best results, use paints like chalk or milk paint which are formulated for no-sand application.
What are the easiest methods to distress furniture without sanding?
The easiest methods to distress furniture without sanding include the wax resist method and wet distressing. The wax resist method involves applying wax to areas before painting, causing the topcoat to chip easily. Wet distressing uses a damp cloth to gently rub away paint after it has dried, revealing the base.
Do I need a topcoat after distressing furniture without sanding?
Yes, applying a protective topcoat is essential after distressing furniture without sanding. A topcoat, such as clear wax or a water-based polycrylic, seals the paint and protects your distressed finish from daily wear, scratches, and moisture. This step ensures the longevity and durability of your furniture’s new look.
How do I achieve a specific distressed look, like ‘chippy’ or ‘shabby chic’?
To achieve a chippy look, use the petroleum jelly or wax resist method, which encourages paint to flake off in larger pieces. For a shabby chic style, focus on wet distressing or light sanding on edges and raised areas for a softer, worn appearance. Layering multiple paint colors also enhances the shabby chic aesthetic.
Embrace the Art of No-Sanding Distressing
Transforming your furniture with a distressed finish does not have to be a dusty, labor-intensive process. As we have explored, you can achieve beautiful, authentic aged looks on your pieces without ever picking up a sander. From preparing your furniture by simply cleaning it to choosing the right paints like chalk or milk paint, the process is accessible to everyone.
We covered effective techniques such as the wax resist method, the gentle wet distressing approach, and the rustic petroleum jelly trick. Each method offers a unique way to create that coveted worn, vintage feel. Remember, layering colors adds incredible depth, making your piece tell a unique story. Finally, always protect your distressed masterpiece with a durable topcoat. This ensures your hard work lasts for years to come.
I encourage you to gather your supplies and start your next furniture transformation project. Embrace the creative freedom that comes with distressing furniture without sanding. You will love the charming, character-filled results you can achieve with these simple, effective methods.
- distressing furniture
- no-sanding distressing
- vintage furniture
- shabby chic
- furniture makeover
- DIY furniture
- chalk paint

Todd Martin
Senior Writer
With over 15 years of experience in home renovation and design, I started HEG to share what I’ve learned with homeowners who want to create spaces that are both beautiful and functional. I’ve always believed in a hands-on approach, and over the years, I’ve picked up practical solutions that actually work. Through HEG, I aim to make home improvement more approachable, sharing real tips that help you create a home you truly love.