· Todd Martin · Cooking · 21 min read
How To Position Turkey Breast In Roasting Pan
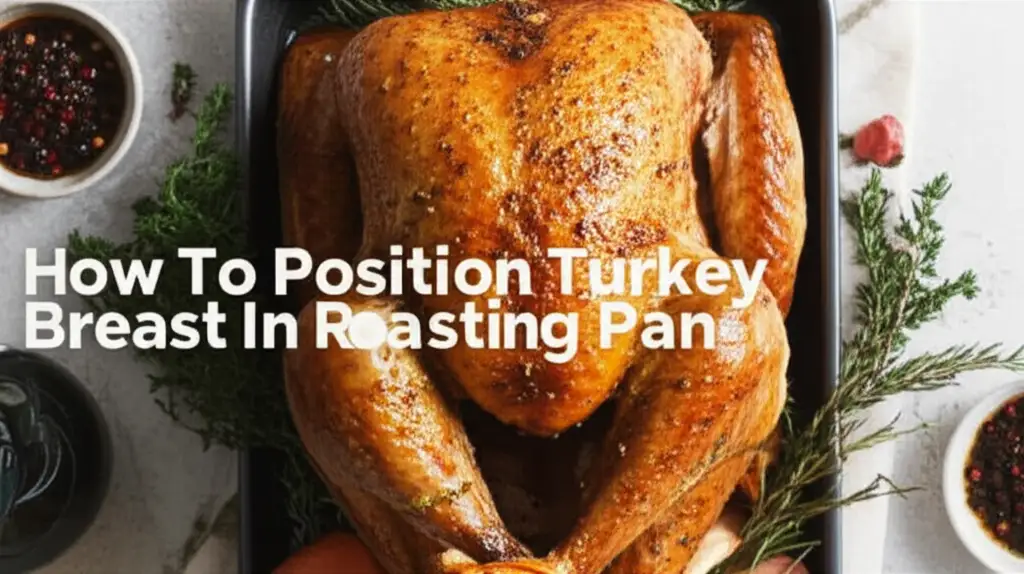
Mastering Turkey Breast Position for Perfect Roasting
Do you dream of a turkey breast that is juicy inside with perfectly crispy skin outside? The secret often lies not just in the seasoning or cooking time. It begins with knowing exactly how to position turkey breast in roasting pan. This simple step can change your roasting game. A good position ensures even cooking and avoids dry spots.
Many home cooks face challenges getting consistent results. Sometimes the skin burns while the meat stays raw. Other times, the breast meat turns dry. This is often because heat does not reach all parts of the turkey equally. Proper placement in the roasting pan makes sure air circulates well. It allows the heat to cook the meat uniformly.
This article will guide you through the best methods. We will look at why position matters so much. You will learn about the right roasting pan for the job. We will explore placing the turkey breast side up and breast side down. We will also cover how to ensure good airflow. Finally, we will discuss prepping your turkey and checking its temperature. Get ready to roast a turkey breast that everyone will love.
Takeaway
Achieving a perfectly roasted turkey breast relies heavily on its placement.
- Breast-Side Up: Use this for crispy skin and easy basting. It is the most common method.
- Breast-Side Down (then Flip): Try this for extra juicy breast meat. It helps protect the breast from drying out early.
- Use a Roasting Rack: This elevates the turkey. It allows hot air to circulate around all sides.
- Ensure Airflow: Do not overcrowd the pan. Leave space around the turkey.
- Monitor Temperature: Always use a meat thermometer. Cook until the internal temperature is safe.
How do you position turkey breast in a roasting pan?
To position turkey breast in roasting pan for best results, place it on a V-rack or flat rack within the pan. For crispy skin, face the breast side up. For juicier meat, start breast side down, then flip it up for the last part of cooking. This ensures even heat and good airflow.
Understanding Why Position Matters for Turkey Breast
The way you place your turkey breast in the roasting pan is very important. It directly affects how the meat cooks. It also influences the skin’s texture. An incorrect position can lead to unevenly cooked meat. Some parts might be dry, while others are undercooked. The skin might not get crispy.
Proper positioning helps heat spread evenly around the turkey. This means the breast meat cooks at a consistent rate. It also allows the skin to brown and crisp up nicely. Think of it like balancing a seesaw. You want all parts to receive equal heat. This prevents one area from drying out too fast.
This initial step sets the stage for a successful meal. It makes sure you get the juicy, flavorful turkey breast you want. It also makes sure the skin is golden and delicious. Pay close attention to this detail before you even turn on the oven.
Heat Distribution Principles
Heat moves through the oven in different ways. Convection circulates hot air. Radiation comes from the hot oven walls. Conduction transfers heat when the turkey touches the pan. When you position the turkey breast correctly, you use these heat types wisely. A roasting rack lifts the turkey off the pan. This allows hot air to move underneath the breast. It cooks from all sides. Without a rack, the bottom of the breast might steam. It could become soggy instead of roasting evenly. The goal is to let heat surround the entire piece of meat. This creates uniform cooking from top to bottom.
Skin Exposure for Crispiness
Crispy skin is a hallmark of a well-roasted turkey. For the skin to crisp, it needs direct exposure to hot, dry air. When the breast is facing up, the skin gets this direct heat. It allows the fat under the skin to render. This makes the skin golden and crisp. If the breast is too close to the pan sides, the air circulation can be poor. This can lead to uneven browning or soft skin. Ensuring good exposure means a better texture. It also adds to the overall flavor of the roasted turkey.
Choosing the Right Roasting Pan and Rack
Selecting the correct roasting pan is as important as the turkey’s position. A good pan provides enough space for your turkey breast. It also allows for proper airflow around the meat. The material of the pan matters too. Heavy-gauge metal pans, like stainless steel or aluminum, conduct heat well. They provide even browning. Thin, flimsy pans can warp or heat unevenly. This leads to inconsistent cooking results.
Many people also wonder if they can use different types of pans. For example, some may ask if they can use an enamel roasting pan on the stove. While some enamel pans are stovetop safe, the focus for turkey breast is oven roasting. A dedicated roasting pan is usually best. It offers the right shape and size for larger cuts of meat.
Using a roasting rack is not optional; it is essential. A rack lifts the turkey breast out of its own juices. This prevents the bottom from boiling or steaming. It ensures that the heat reaches all parts of the turkey. This promotes even cooking and crispy skin all around.
Roasting Pan Size and Shape
The roasting pan size should match your turkey breast. If the pan is too small, the turkey touches the sides. This prevents proper air circulation. It can also lead to uneven cooking. If the pan is too large, the drippings might burn. This is because they spread out too much and evaporate quickly. Choose a pan that leaves about 1-2 inches of space around the turkey breast on all sides. This space is crucial for hot air to circulate freely. A rectangular or oval pan works best for a turkey breast.
Some people also use electric roasting pans. These are great for keeping your main oven free. You can learn more about how to use an electric roasting pan for turkey for specific guidance on those appliances. They often come with their own racks.
The Benefits of a Roasting Rack
A roasting rack is a simple tool with big benefits. It lifts the turkey breast off the bottom of the pan. This allows hot air to circulate all around the meat. This means the underside of the turkey can brown and crisp. Without a rack, the turkey sits in its own juices. This causes the bottom to steam instead of roast. The result is soggy skin and uneven cooking. A V-shaped rack is often best for turkey. It cradles the bird and keeps it stable. A flat rack also works well. Just make sure it is sturdy enough to hold the weight. Using a rack is key to a truly roasted turkey breast.
You might also consider if you can line your roasting pan with parchment paper. While useful for easy cleanup, remember that the rack still needs to be present to elevate the turkey for proper airflow.
The Classic Way: Breast-Side Up for Juicy Meat
The most common way to position turkey breast in roasting pan is breast-side up. This method is popular for good reasons. It ensures the skin on the breast becomes beautifully brown and crispy. The skin acts like a protective layer. It helps keep the delicate breast meat moist. Placing it breast-side up also makes it easy to baste the turkey. You can brush juices or butter directly onto the skin. This adds flavor and helps with browning.
While traditional, this method can sometimes lead to drier breast meat if not managed carefully. The breast cooks faster than the dark meat (if roasting a whole turkey). However, for a turkey breast alone, this concern is less. The main goal is to protect the exposed breast from drying. You achieve this through proper temperature and basting.
I often use this method for holidays. It always produces a stunning presentation. The golden-brown skin looks so inviting on the table. Just remember to monitor the temperature closely. Do not overcook the meat.
Ensuring Even Browning
To get even browning, make sure the turkey breast is centered on the rack. Avoid having it touch the pan sides. Rotate the pan halfway through cooking. This helps if your oven has hot spots. You can also loosely tent the breast with foil if it starts browning too quickly. This protects the skin from burning. It allows the meat to finish cooking. Some people baste frequently. Others argue this cools the oven too much. A simple rub with butter or oil before roasting often does the trick for browning.
Moisture Retention Techniques
Keeping the turkey breast juicy is crucial. Even when roasting breast-side up, moisture can escape. One common technique is brining. Brining helps the meat hold onto more moisture during cooking. You can also rub the turkey with softened butter or olive oil. This creates a barrier. It helps prevent the surface from drying out. Placing aromatic vegetables like onions, carrots, and celery in the bottom of the pan also adds moisture to the oven air. These vegetables also flavor the pan drippings.
Another tip is to avoid opening the oven door too often. Each time you open it, the oven temperature drops. This extends cooking time and can dry out the turkey. Consider using an electric roasting pan with a lid if you want to seal in moisture more effectively. The lid helps trap steam and heat, keeping the meat exceptionally tender.
Considering Breast-Side Down for Enhanced Juiciness
While less common, roasting turkey breast side down first is a great technique. It helps to keep the breast meat exceptionally juicy. When the breast is facing down, the thickest part of the meat is closer to the bottom of the pan. This allows the heat to penetrate the densest part more gently. The layer of fat and skin on the back helps protect the breast meat. It acts as a natural shield against the direct heat of the oven. This prevents the breast from drying out too quickly.
This method does mean you will not get that immediate golden-brown skin on the breast. But you can fix this later. You flip the turkey breast partway through cooking. This allows the skin to crisp up in the final stages. Many chefs use this trick for whole turkeys. It works just as well for a standalone turkey breast.
I find this method especially good for larger, boneless turkey breasts. They tend to dry out more easily. Starting breast-side down gives them a head start on juiciness. It is worth the extra step of flipping for the final result.
Starting Down, Finishing Up
The process for breast-side down roasting is simple. Place the turkey breast on the rack with the breast meat facing down. Roast it in this position for the majority of the cooking time. This is typically about two-thirds to three-quarters of the total cooking time. For example, if your turkey breast needs 2 hours to cook, roast it breast-side down for 1 hour and 20 minutes to 1 hour and 30 minutes.
During this initial phase, the juices from the back and natural fat will seep into the breast meat. This keeps it very moist. The back skin will get very crispy. Then, carefully flip the turkey breast over. The breast will then face up.
When to Flip Your Turkey Breast
You flip the turkey breast when the internal temperature of the thickest part of the breast reaches about 140-150°F (60-65°C). This is typically after the majority of the cooking time has passed. Flipping at this stage allows the exposed breast skin to crisp and brown. Continue roasting the turkey breast-side up until the internal temperature reaches 165°F (74°C). Use a reliable meat thermometer to check.
Flipping can be a bit tricky. Use two sturdy spatulas or clean kitchen towels. Be careful not to tear the skin. Once flipped, you can baste the breast skin with butter or pan drippings. This helps achieve a beautiful golden-brown color. This two-stage cooking method gives you the best of both worlds: juicy meat and crispy skin.
Achieving Optimal Airflow and Heat Circulation
Proper airflow is vital for roasting any meat, especially turkey breast. Air circulation directly impacts how evenly your turkey cooks. It also affects the crispiness of the skin. Think of your oven as a large air fryer. You want hot air to reach every surface of the turkey breast. If air cannot move freely, some parts will cook slower. Other parts might steam instead of roast.
When you prepare your roasting pan, leave enough room. Do not cram the turkey breast into a small pan. This stops air from circulating properly around the sides. It also prevents heat from reaching the underside. The goal is to create an ideal environment for consistent roasting. This ensures a beautiful, all-around golden-brown finish.
I always make sure there is plenty of space. It makes a noticeable difference. Good airflow means a more efficient cooking process. It also delivers better results in terms of texture and taste.
Space Around the Turkey Breast
Ensure there is at least 1-2 inches of space between the turkey breast and the pan walls. This space allows hot air to flow freely. It means the sides of the turkey breast cook evenly. If the turkey is too close to the pan, hot spots can form. This might cause some parts to burn. Meanwhile, other parts remain undercooked. Proper spacing is a simple but critical step. It helps guarantee uniform heat distribution. It contributes to a perfectly roasted product.
If you are using a large roasting pan, you might even consider adding some vegetables around the turkey. These can include carrots, celery, or onions. They elevate the turkey slightly. They also add flavor to the drippings. Remember, these vegetables should not be so high that they block airflow to the turkey itself. They should just fill the empty spaces.
Preventing Steaming
Steaming occurs when moisture gets trapped around the meat. This happens if the turkey breast sits directly on the bottom of the pan. It can also happen if the pan is covered too tightly for too long. Steamed skin becomes soft and rubbery. It will not crisp up. Using a roasting rack prevents steaming on the bottom. It lifts the turkey out of any accumulating juices. For the top, avoid covering the turkey with foil for the entire cooking time. If you do cover it, use foil loosely tented. This allows some steam to escape. It lets the skin crisp. Proper airflow helps dry out the skin surface. This is essential for a crispy texture. Many people use an electric roasting pan to maintain consistent heat and prevent steaming, especially if they are also using a lid. For more information, you can check out details on how to use an electric roasting pan with lid to manage moisture.
Prepping Your Turkey Breast for Roasting Success
Before you even think about how to position turkey breast in roasting pan, proper preparation is key. The way you prepare the turkey breast impacts its flavor, moisture, and cooking time. Good prep ensures the meat is ready to absorb flavors. It also helps it cook evenly. This foundational work sets the stage for a delicious outcome. Do not skip these steps. They are essential for a successful roast.
I always start with a clean turkey breast. I pat it dry. This helps seasoning stick and promotes crispier skin. Thinking ahead about these details makes the whole roasting process smoother. It means less stress and a more enjoyable cooking experience. A well-prepared turkey breast cooks beautifully and tastes amazing.
The Role of Brining
Brining is a fantastic way to ensure a juicy turkey breast. It involves soaking the turkey in a salt water solution. Sometimes sugar, herbs, and spices are added too. This process helps the meat absorb moisture. It also seasons the meat from the inside out. Brined turkey breast stays more moist during roasting. It also tastes more flavorful. Even if you slightly overcook it, a brined turkey is more forgiving.
You can do a wet brine (submerging in liquid). Or you can do a dry brine (rubbing with salt). Both methods work wonders for juiciness. If you opt for a wet brine, remember to pat the turkey very dry before roasting. Dry skin is critical for crispiness. Brining is a step I highly recommend for anyone wanting to guarantee a moist turkey breast.
Seasoning for Flavor and Color
Seasoning is about more than just taste. It also helps with the skin’s color and texture. After brining and drying, rub the turkey breast with butter or olive oil. This helps the seasonings stick. It also promotes browning. Then, apply your chosen seasonings generously. Use salt, black pepper, garlic powder, onion powder, paprika, or herbs like thyme and rosemary. Make sure to get some seasoning under the skin too. This flavors the meat directly.
Paprika often adds a beautiful red hue to the skin. Herbs infuse aromatic flavors. A good seasoning blend enhances the natural taste of the turkey. It also creates that inviting, golden-brown crust. Do not be shy with your seasonings. A well-seasoned turkey breast is a truly memorable dish.
Monitoring Temperature and Resting Your Turkey
The best way to know if your turkey breast is cooked perfectly is to use a meat thermometer. Relying on visual cues alone can be misleading. Overcooking is the quickest way to dry out a turkey breast. Using a thermometer ensures safety and optimal texture. It takes the guesswork out of roasting.
Once cooked, the turkey breast needs time to rest. This step is just as important as the cooking itself. Resting allows the juices to redistribute throughout the meat. This makes the turkey breast incredibly tender and juicy. Skipping this step means juices will run out when you slice it. This leaves you with drier meat.
I always tell people to trust the thermometer. It is your best friend in the kitchen. And never forget the rest. It is crucial for a fantastic result. These two steps are the final touches for a perfectly roasted turkey breast.
Importance of Internal Temperature
The safe internal temperature for turkey is 165°F (74°C). Insert your meat thermometer into the thickest part of the turkey breast. Make sure it does not touch any bones. Bones heat up faster than meat. They can give a false reading. Cook the turkey until it reaches 160°F (71°C) in the oven. It will continue to cook as it rests. This process is called carry-over cooking. The temperature will rise to the safe 165°F (74°C) during resting. Pulling it out slightly early helps prevent overcooking. Always check in multiple spots. This ensures the entire breast is safely cooked.
The Critical Resting Phase
After roasting, remove the turkey breast from the oven. Transfer it to a cutting board. Tent it loosely with foil. Let it rest for at least 15-20 minutes. For larger breasts, you might rest it for up to 30 minutes. During this time, the muscle fibers relax. The juices, which have gathered in the center during cooking, redistribute. They soak back into the meat. This results in a much juicier and more tender slice. If you cut into the turkey immediately, all the delicious juices will run out. The meat will become dry. Resting is a simple step. It makes a huge difference in the final quality of your roasted turkey breast. This applies whether you cook it in a traditional oven or an electric roasting pan. Knowing how to use an electric roasting pan for turkey also includes knowing the proper resting steps.
Roast Turkey Breast Troubleshooting and Tips
Even with the best positioning, sometimes things do not go as planned. Or you might want to achieve an even better result. Roasting a turkey breast involves a few variables. Oven calibration, turkey size, and even pan type can influence cooking. Knowing how to troubleshoot common issues helps. It ensures a perfect roast every time.
These tips address practical concerns. They offer solutions for common pitfalls. They also highlight ways to enhance your roasting process. Learning these extra details makes you a more confident cook. It helps you adapt to different situations in the kitchen.
I have faced my share of roasting challenges. These tips are from real-world experience. They help turn potential problems into perfectly cooked turkey. A little extra knowledge goes a long way in the kitchen.
Dealing with Uneven Browning
If one side of your turkey breast browns faster, rotate the roasting pan. Do this halfway through cooking. Most ovens have hot spots. Rotating helps balance the heat exposure. If the skin is browning too quickly, tent the turkey loosely with foil. This shields the skin from direct heat. It allows the meat to finish cooking. Some people baste frequently. However, excessive basting can cool the oven. This extends cooking time. A good initial rub with butter or oil often provides enough fat for browning.
Preventing Dry Turkey Breast
The best way to prevent dry turkey breast is to not overcook it. Use a meat thermometer. Remove the turkey when it reaches 160°F (71°C) in the thickest part. It will reach 165°F (74°C) during resting. Brining also significantly helps. It keeps the meat moist. Another tip is to rub butter or oil under the skin. This adds moisture and flavor directly to the meat. Some people also cover the turkey with bacon or herbs. This adds a protective layer. It helps retain moisture during roasting.
Using Pan Drippings and Gravy
The juices collected at the bottom of the roasting pan are liquid gold. Do not discard them. These drippings are full of flavor. They are perfect for making gravy. After removing the turkey, drain the drippings. Separate the fat. You can use the remaining defatted drippings as a base for gravy. Whisk in flour or cornstarch for thickening. Add chicken or turkey broth if you need more liquid. Simmer until thickened. This homemade gravy enhances the flavor of your roasted turkey breast. It ties the meal together beautifully.
When a Roasting Pan Isn’t Available
What if you do not have a dedicated roasting pan? You still have options. You can use a large, heavy-duty baking sheet with raised edges. Place a wire rack on top of it. This setup mimics a roasting pan with a rack. Alternatively, you can use an oven-safe Dutch oven if it is large enough. However, a Dutch oven retains more moisture. This might make the skin less crispy. For best results, use a roasting pan. If you’re wondering, can I use roasting pan instead of dutch oven, the answer is often yes, especially for open roasting. But for braising or stews, a Dutch oven is usually superior.
Enhancing Your Roasted Turkey Breast Experience
Making a perfectly roasted turkey breast is a rewarding kitchen skill. It is not just about technique; it is also about maximizing flavor and enjoyment. Beyond position and temperature, other small details can elevate your dish. These tips focus on presentation, carving, and utilizing every part of your delicious creation.
I believe cooking should be an experience. These extra steps contribute to that experience. They turn a good meal into a memorable one. Pay attention to how you serve it. Think about pairing it with other flavors. These small efforts create a big impact.
Presentation and Garnish
A beautiful presentation enhances the dining experience. Once the turkey breast is carved, arrange the slices attractively on a platter. Garnish with fresh herbs. Rosemary sprigs or thyme sprigs add color and aroma. You can also add some roasted lemon slices. Or place fresh cranberries around the platter. These simple additions make the dish look professional. A well-presented turkey breast is a feast for the eyes before it is a feast for the palate.
Carving for Perfection
Carving turkey breast correctly ensures each slice is tender and uniform. First, let the turkey rest fully. Then, remove the breast from the bone, if applicable. Use a sharp carving knife. Slice against the grain of the meat. This shortens the muscle fibers. It makes the meat more tender and easier to chew. Slice evenly. Arrange the slices neatly on your serving platter. Proper carving technique highlights your hard work. It also makes serving easier for your guests.
Pairing with Sides
A roasted turkey breast pairs wonderfully with many classic side dishes. Consider roasted root vegetables like potatoes, carrots, and parsnips. Green bean casserole is a popular choice. Cranberry sauce offers a tart contrast. Mashed potatoes soak up the delicious gravy. A fresh salad can also lighten the meal. Choose sides that complement the rich flavor of the turkey. This creates a balanced and satisfying meal for everyone.
FAQ Section
Should I roast turkey breast with or without a lid?
- Turkey Roasting
- Cooking Tips
- Roasting Pan
- Poultry Prep
- Oven Cooking

Todd Martin
Senior Writer
With over 15 years of experience in home renovation and design, I started HEG to share what I’ve learned with homeowners who want to create spaces that are both beautiful and functional. I’ve always believed in a hands-on approach, and over the years, I’ve picked up practical solutions that actually work. Through HEG, I aim to make home improvement more approachable, sharing real tips that help you create a home you truly love.