· Todd Martin · Cooking Guides · 13 min read
How To Prepare Deep Frying Turkey
Preparing Your Turkey for Deep Frying: A Comprehensive Guide
Deep frying a turkey creates an incredibly crispy skin and juicy meat. It is a fantastic way to cook for holidays or special events. Many people wonder about the best steps to prepare deep frying turkey. This guide will walk you through each important step. You will learn about turkey selection, thawing, brining, and essential safety measures. I will share tips to help you achieve a delicious, perfectly fried bird.
Takeaway: Get Your Turkey Ready for a Golden Fry
- Choose the right turkey size and ensure it is fully thawed.
- Brine your turkey for added moisture and flavor.
- Dry the turkey completely inside and out; this is a must for crispy skin and safety.
- Gather all necessary equipment, including a deep fryer, thermometer, and ample oil.
- Prioritize safety by setting up outdoors, away from structures, with a fire extinguisher nearby.
Quick Answer to “How To Prepare Deep Frying Turkey”
To prepare deep frying turkey, first ensure it is fully thawed and pat it completely dry. Brine the turkey for moisture and flavor. Remove giblets and the neck. Season it well. Finally, make sure all your deep-frying equipment is clean and ready.
Understanding Your Turkey: Size, Type, and Condition
Selecting the right turkey is the first step in successful deep frying. The size of your turkey matters greatly for fryer capacity. Most home deep fryers handle turkeys between 10 and 14 pounds. A smaller turkey cooks faster and fits better. If you use a larger bird, you might need a commercial-grade fryer.
Consider the type of turkey. Fresh turkeys require less preparation than frozen ones. Frozen turkeys need significant thawing time. A good rule of thumb is 24 hours of thawing for every 4-5 pounds of turkey in the refrigerator. Never rush thawing a turkey. It must be completely thawed before deep frying. Any ice remaining can react violently with hot oil. This creates a dangerous situation.
Inspect your turkey upon purchase. Look for a plump, healthy-looking bird. Check the packaging for any tears or damage. Fresh turkeys should feel firm to the touch. Ensure the turkey is whole and ready for cooking. You want a turkey that will cook evenly. A well-chosen turkey sets the stage for a great deep-fried meal.
Thawing and Brining the Turkey: Flavor and Moisture Secrets
Proper thawing is crucial for safety and even cooking. A partially frozen turkey will cause oil to splatter dangerously. Place your frozen turkey in its original wrapper on a tray in the refrigerator. This method is slow but safest. Allow ample time for it to thaw completely. Do not thaw a turkey at room temperature. This can lead to bacterial growth.
Brining your turkey adds incredible moisture and flavor. A brine is a salt and water solution, often with added herbs and spices. Brining helps the turkey meat absorb liquid and seasoning. This results in a juicier, more flavorful bird. Prepare your brine a day or two before frying. You will need a large container or brining bag. Ensure the turkey is fully submerged in the brine.
After brining, rinse the turkey thoroughly with cold water. This removes excess salt from the surface. Pat the turkey dry immediately after rinsing. You want no moisture left on the skin. Brining takes time, but it truly elevates the final dish. It is a step I always recommend for a fantastic deep-fried turkey.
Drying the Turkey: The Crucial Step for Crispy Skin and Safety
Drying the turkey is perhaps the most critical step for deep frying. Any moisture on the turkey’s surface will react with hot oil. This causes dangerous splattering and bubbling. It can even lead to oil overflowing. My top tip here is simple: pat it dry, and then pat it some more.
Use plenty of paper towels. Start by patting the outside of the turkey. Work your way into every crease and cavity. You might be surprised how much moisture you find. Don’t forget the inside of the turkey. Reach into the body cavity and dry it thoroughly. You can even prop the turkey up to allow air circulation. This helps dry the surface even more.
For best results, after patting dry, let the turkey air dry in the refrigerator for a few hours. You can even do this overnight. Place it on a rack over a baking sheet. This allows air to circulate around the entire bird. A dry turkey means safer frying and incredibly crispy skin. It makes all the difference. This step is non-negotiable for a successful deep-fried turkey.
Essential Equipment for Deep Frying Turkey
Having the right tools makes deep frying turkey easier and safer. First, you need a turkey fryer. These are typically large pots with a basket, designed for outdoor use. They come with a sturdy stand and a powerful propane burner. Ensure your fryer pot is large enough to submerge your turkey without overflowing. Test the oil level beforehand (more on this later).
A reliable thermometer is crucial. You will need two types: an oil thermometer and a meat thermometer. The oil thermometer attaches to the side of the pot. It helps you monitor the oil temperature. Maintaining the correct oil temperature is vital for safe and even cooking. A meat thermometer is used to check the turkey’s internal temperature. This ensures it is cooked to a safe level.
Other essential items include:
- Long-handled tongs or hooks: These help lower and lift the turkey safely.
- Heat-resistant gloves or oven mitts: Protect your hands from intense heat.
- Fire extinguisher (Class B or K): This is a must-have safety item.
- Heavy-duty aluminum foil or a large platter: For resting the cooked turkey.
- Oil funnel and containers: For straining and storing oil after frying. After you finish frying, you might need to clean up. Knowing how to clean a deep fryer properly ensures your equipment lasts. Remember to also properly dispose of or filter your oil. Learning how to clean deep fry oil can help you reuse it or dispose of it safely.
Choosing the Right Oil for Deep Frying
Selecting the proper oil is key to a flavorful and safe deep-fried turkey. You need an oil with a high smoke point. This means it can reach high temperatures without breaking down or burning. Common choices include peanut oil, canola oil, and vegetable oil. Peanut oil is often preferred for its neutral flavor and high smoke point. Canola and vegetable oils are good alternatives if peanut allergies are a concern.
Avoid oils with low smoke points, like olive oil or butter. These will burn quickly at frying temperatures. This creates an unpleasant taste and smoke. The amount of oil you need depends on your turkey size and fryer capacity. A good estimate is 3-5 gallons for a typical turkey. You must measure the oil level correctly.
To measure: Place the turkey in the empty fryer pot. Fill with water until the turkey is just covered by about an inch. Remove the turkey. Note the water line. This is your safe oil level. Do not overfill the pot. Overfilling leads to dangerous oil overflow when the turkey is added. Using the right oil and the correct amount ensures a safe and delicious outcome.
Safety First: Your Pre-Frying Checklist
Safety is paramount when deep frying a turkey. Hot oil is dangerous. Always set up your deep fryer outdoors. Place it on a flat, level, non-combustible surface. Patios or driveways work well. Keep the fryer at least 10-15 feet away from any buildings, wooden decks, or flammable materials. Never deep fry indoors or in a garage. I cannot stress this enough.
Have a Class B or Class K fire extinguisher nearby. Water will make an oil fire worse. Do not use water on an oil fire. Keep children and pets far away from the frying area. They might accidentally bump into the fryer. Wear protective clothing. Long sleeves, closed-toe shoes, and heat-resistant gloves are smart choices. This protects you from splashes and heat.
Do not overfill the fryer with oil. Measure the exact amount needed. Ensure the turkey is completely dry before lowering it into the hot oil. Even a tiny amount of water can cause a significant reaction. Lower the turkey slowly and carefully using the lifting hook. Stay calm and focused throughout the entire process. After cooking, you’ll need to clean up. Knowing how to clean frying pans or even tackle how to clean burnt grease from bottom of frying pans will be useful for any spills or splatters. Preparing your space properly keeps everyone safe.
Flavor Infusion: Seasoning and Marinades
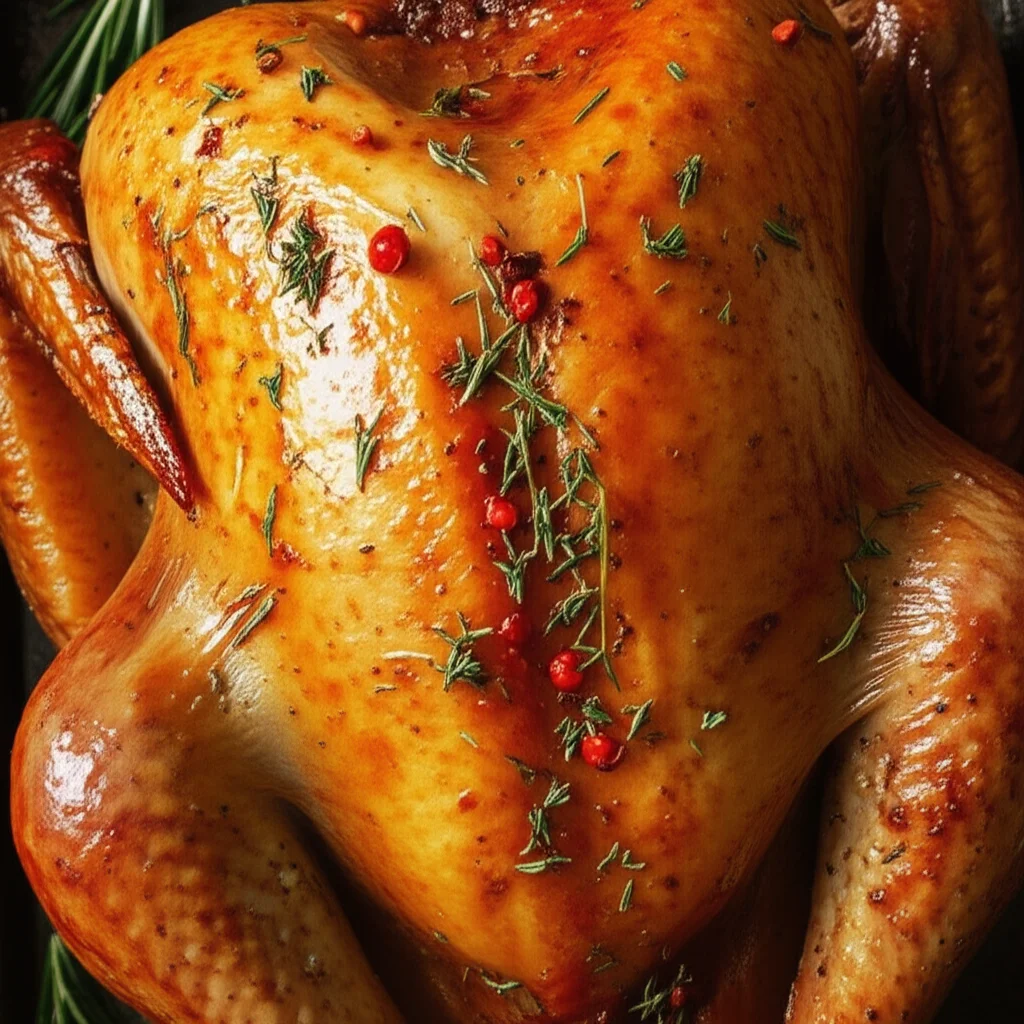
Once your turkey is thawed, brined, and dry, it is time for seasoning. This is where you infuse big flavor into your bird. You have several options for seasoning. Dry rubs are very popular for deep-fried turkeys. They create a wonderful crust and flavor. A simple rub can include salt, black pepper, garlic powder, onion powder, and paprika. You can also buy pre-made turkey rubs.
Apply the dry rub generously all over the turkey. Make sure to get it inside the cavity too. Rub it under the skin where possible. This allows the flavors to penetrate the meat. For an even deeper flavor, consider injecting a marinade. Turkey injectors allow you to infuse liquid marinades directly into the breast, thighs, and drumsticks.
Marinades can be savory, spicy, or a mix of both. Common injection marinades include butter, hot sauce, garlic, and various herbs. If you inject, do it carefully. You want to avoid piercing the skin too much. This could allow too much oil into the meat during frying. Always inject slowly and evenly. Seasoning is the final step before the turkey meets the oil. It guarantees a delicious, flavorful bird.
Monitoring Oil Temperature and Turkey Doneness
Maintaining the correct oil temperature is crucial for deep-frying success. The ideal temperature for deep frying turkey is typically 325-350°F (163-177°C). If the oil is too hot, the outside will burn before the inside cooks. If it is too cool, the turkey will absorb too much oil and become greasy. Use a reliable oil thermometer to monitor the temperature constantly. Adjust the burner as needed.
When you lower the turkey into the hot oil, the temperature will drop. This is normal. Increase the burner slightly to bring the temperature back up to the target range. Be patient; it takes time. Cook the turkey for about 3.5 minutes per pound. A 12-pound turkey will take approximately 42 minutes. This is a guideline, not a strict rule.
The only way to know if your turkey is truly done is with a meat thermometer. Insert the thermometer into the thickest part of the thigh. Do not touch the bone. The internal temperature should reach 165°F (74°C). Check multiple spots to ensure even cooking. Once it hits 165°F, carefully remove the turkey from the oil. Let it rest for at least 20-30 minutes before carving. Resting allows the juices to redistribute. This results in a more tender and juicy turkey.
Post-Frying Care and Cleanup
After the turkey is cooked and removed from the fryer, your work is not quite done. Safely handling the hot oil is the next big task. Let the oil cool completely in the fryer pot. This can take several hours, even overnight. Do not attempt to move hot oil. Once cooled, you can strain the oil. Use a fine-mesh sieve or cheesecloth to remove any food particles. This allows you to reuse the oil for future frying, if desired. Store filtered oil in a sealed container in a cool, dark place.
For oil you do not want to reuse, dispose of it properly. Never pour used cooking oil down the drain. It can clog pipes and harm plumbing systems. Collect it in a sealed container. Many communities have recycling centers or specific drop-off points for used cooking oil. Check with your local waste management services for guidelines.
Finally, clean your deep fryer and surrounding area. Grease can splatter during frying. A thorough cleaning ensures your equipment is ready for its next use. You might also want to do a general clean-up of your kitchen area. Keeping a tidy space is important for food safety and a pleasant cooking experience. Knowing how to deep clean your kitchen can help you tackle all grease and grime effectively.
FAQ Section
Q1: How long does it take to thaw a turkey for deep frying? A1: Thawing a turkey in the refrigerator typically takes about 24 hours for every 4 to 5 pounds. For example, a 15-pound turkey needs around 3 to 4 days. Always thaw your turkey completely in the refrigerator to avoid bacterial growth. A fully thawed turkey ensures even cooking and prevents dangerous oil splatters.
Q2: Can I deep fry a turkey indoors? A2: No, you should never deep fry a turkey indoors. This includes garages, enclosed patios, or any covered areas. The risk of fire is extremely high due to the hot oil and open flame. Always set up your deep fryer outdoors on a level, non-combustible surface, far away from any structures.
Q3: What kind of oil is best for deep frying turkey? A3: The best oils for deep frying turkey are those with high smoke points. Peanut oil is a top choice due to its neutral flavor and ability to withstand high heat. Canola oil and vegetable oil are also excellent alternatives. Avoid oils like olive oil or butter, as they have low smoke points and will burn quickly.
Q4: How do I know how much oil to use in my fryer? A4: To determine the correct oil amount, place the turkey in the empty fryer pot. Fill with water until the turkey is submerged by about 1-2 inches. Remove the turkey. The water level indicates the exact amount of oil needed. This method prevents dangerous oil overflows once the turkey is added.
Q5: What internal temperature should a deep-fried turkey reach? A5: A deep-fried turkey is safely cooked when its internal temperature reaches 165°F (74°C). Insert a meat thermometer into the thickest part of the thigh, ensuring it does not touch any bone. Checking multiple spots guarantees the entire turkey is cooked through and safe to eat.
Q6: What should I do if the oil catches fire while deep frying? A6: If the oil catches fire, do not panic and do not use water. Water will spread the fire and make it worse. Turn off the burner immediately. If safe, cover the pot with its lid or a metal sheet to smother the flames. Use a Class B or Class K fire extinguisher if the fire persists or spreads.
Conclusion
Deep frying a turkey can be a rewarding experience, yielding a bird that is both incredibly moist inside and deliciously crispy outside. To prepare deep frying turkey successfully, remember to follow each step carefully. From selecting the right size and ensuring it is fully thawed, to the vital steps of brining and completely drying the bird, every detail matters. Always prioritize safety by setting up your fryer outdoors and having a fire extinguisher ready.
By paying attention to oil temperature, using a meat thermometer, and allowing your turkey to rest, you are set for success. The unique flavor and texture of a deep-fried turkey make it a standout dish for any occasion. Don’t be afraid to try this method. With this guide, you have the knowledge to prepare a deep-fried turkey that everyone will love. Get ready to impress your guests with this incredible culinary feat!
- Deep Frying Turkey
- Turkey Preparation
- Frying Safety
- Holiday Cooking
- Crispy Turkey

Todd Martin
Senior Writer
With over 15 years of experience in home renovation and design, I started HEG to share what I’ve learned with homeowners who want to create spaces that are both beautiful and functional. I’ve always believed in a hands-on approach, and over the years, I’ve picked up practical solutions that actually work. Through HEG, I aim to make home improvement more approachable, sharing real tips that help you create a home you truly love.