· Katria Melrose · Cooking Guides · 10 min read
How To Use An Electric Roasting Pan For Turkey

Mastering Your Electric Roasting Pan for Turkey
Cooking a turkey can feel like a big challenge. Many people worry about dry meat or uneven cooking. An electric roasting pan offers a simple solution. This appliance takes the stress out of making a perfect turkey.
Using an electric roasting pan for turkey ensures a juicy, flavorful bird every time. It frees up your main oven for other dishes. This guide will walk you through every step. You will learn how to prepare your turkey, set the right temperature, and achieve that beautiful, crispy skin. Get ready to impress your guests with a truly delicious turkey.
Takeaway:
- An electric roasting pan makes cooking turkey easy and reliable.
- It ensures even cooking and keeps the turkey moist.
- The roaster frees up your conventional oven space.
- Proper preparation and temperature control are key steps.
- Follow specific instructions for a delicious, picture-perfect bird.
How do you use an electric roasting pan for turkey?
To use an electric roasting pan for turkey, first thaw and prepare the turkey. Place it on the roasting rack inside the preheated pan. Set the temperature, typically around 325-350°F (160-175°C), and cook until the internal temperature reaches 165°F (74°C) in the thickest part of the thigh, without touching bone. Baste occasionally for a moist, golden bird.
Unlocking the Advantages of Your Electric Roasting Pan
Many home cooks wonder about the best way to roast a turkey. An electric roasting pan offers clear benefits over a traditional oven. It provides consistent heat from all sides. This helps to cook the turkey evenly, reducing dry spots.
One major advantage is freeing up your main oven. During holidays, oven space is often scarce. An electric roaster becomes your second oven, allowing you to bake side dishes simultaneously. This can simplify your cooking process significantly. The roaster’s lid also helps to trap moisture. This results in a juicier, more tender turkey. You avoid the common problem of dry breast meat.
Electric roasters are also energy efficient for long cooking times. They heat up quickly and maintain a steady temperature. This precision control helps you achieve optimal cooking conditions. It ensures your turkey cooks thoroughly without overcooking. A specific benefit of using the lid is discussed further here.
Finally, cleanup is often easier with an electric roaster. Most come with removable inserts that are non-stick. This makes washing up less of a chore after a big meal. You can easily remove residue without scrubbing.
Preparing Your Turkey and Roaster for Success
Proper preparation is essential for a delicious turkey. First, ensure your turkey is fully thawed. A large turkey can take several days in the refrigerator to thaw completely. Do not rush this step.
Next, prepare your electric roasting pan. Most new pans recommend a quick wash before first use. If your pan has a non-stick coating, follow specific instructions for initial cleaning, similar to how you might clean a non-stick pan before first use. Insert the roasting rack into the pan. This rack keeps the turkey elevated, allowing air to circulate around it. Air circulation helps achieve even cooking and crispy skin.
Now, prepare your turkey. Remove the giblets and neck from the turkey cavities. Pat the turkey dry with paper towels. Dry skin helps create a crispier finish. You can then season the turkey generously. Use salt, pepper, herbs, or your favorite turkey rub. You can also rub butter or oil under and over the skin.
Consider brining your turkey for extra moisture and flavor. Brining involves soaking the turkey in a salt-water solution for several hours. This process helps the meat absorb moisture. It results in a more flavorful and juicy bird. Place aromatics like onions, carrots, celery, or herbs inside the turkey cavity. Do not stuff the turkey if you want quicker cooking times. If you stuff, ensure the stuffing also reaches a safe internal temperature of 165°F (74°C).
Achieving Perfect Temperature Control for Your Turkey
Setting the correct temperature on your electric roasting pan is vital. Most recipes suggest roasting turkey at around 325°F to 350°F (160°C to 175°C). This temperature range cooks the turkey safely and evenly. Always preheat your electric roaster before placing the turkey inside. Preheating ensures the turkey starts cooking at the right temperature immediately.
Place the turkey on the roasting rack. Put the lid on the electric roaster. The lid helps to trap heat and moisture inside. This creates a steamy environment that keeps the turkey moist. Check the roaster’s manual for specific instructions on lid usage. The manual may suggest when to remove the lid for browning.
Cooking time varies depending on the turkey’s weight. A general rule is about 15-20 minutes per pound for an unstuffed turkey. A stuffed turkey will take longer, around 20-25 minutes per pound. Always use a meat thermometer to check for doneness. Insert the thermometer into the thickest part of the turkey’s thigh, away from the bone. The turkey is done when the internal temperature reaches 165°F (74°C).
Begin checking the temperature about an hour before the estimated cook time. Different parts of the turkey cook at different rates. The breast meat may cook faster than the thighs. Check both areas to ensure safety.
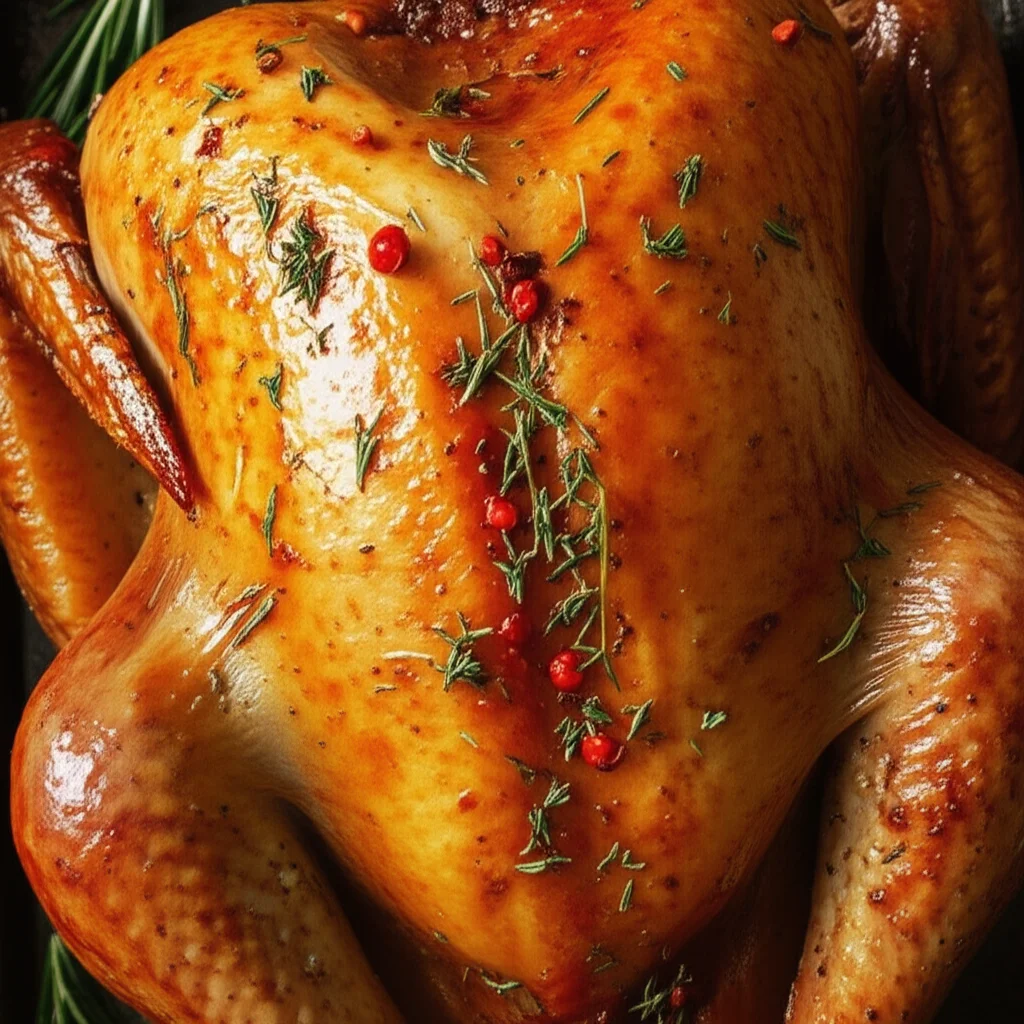
Basting and Browning: Tips for a Golden, Moist Turkey
Basting helps keep your turkey moist and adds flavor. It also contributes to a beautiful, golden-brown skin. During the cooking process, you can open the lid periodically to baste the turkey. Use the pan juices at the bottom of the roaster. A turkey baster works well for this task.
For the crispiest skin, remove the lid of the electric roaster for the last 30-60 minutes of cooking. This allows the skin to dry out and brown. Some electric roasters have a “browning” setting, which increases the heat slightly. If your roaster has this feature, use it during the final stages. You can also brush the turkey with butter or oil during this phase. This promotes further browning.
Monitor the turkey’s color closely during browning. You want a deep golden-brown, not burnt. If one side is browning too quickly, you can rotate the turkey carefully. Ensure the pan is stable before attempting to rotate the bird. Wear oven mitts to protect your hands from the heat.
If you find your turkey browning too fast before it’s cooked through, you can loosely tent it with aluminum foil. This will protect the skin while the inside finishes cooking. Do not cover it tightly, as this will trap steam and prevent crisping. A loose tent allows some air circulation. Achieving a perfectly golden turkey is a hallmark of success.
The Importance of Resting and Carving Your Turkey
Once your turkey reaches 165°F (74°C), it is crucial to let it rest. Remove the turkey from the electric roaster. Transfer it to a clean cutting board or serving platter. Tent the turkey loosely with aluminum foil. Let it rest for at least 20-30 minutes, or even up to an hour for larger birds.
Resting allows the juices in the turkey to redistribute throughout the meat. If you carve the turkey immediately, the juices will run out. This leaves you with dry meat. Resting ensures every slice is moist and tender. This step is as important as the cooking itself. It locks in all the flavor.
After resting, it is time to carve the turkey. Use a sharp carving knife. Start by removing the legs and thighs. Then, slice the breast meat. Cut against the grain for the most tender slices. Place the carved meat on a warm serving platter. You can pour any remaining pan juices over the meat for extra flavor.
Serving your turkey immediately after carving helps maintain its warmth. Pair it with your favorite side dishes. This method ensures your turkey is the star of your meal. Enjoy the fruits of your labor with your family and friends.
Keeping Your Electric Roaster Clean and Ready
Cleaning your electric roasting pan properly ensures its longevity. It also keeps it ready for your next culinary adventure. After the turkey has been removed and served, let the roaster cool completely. Do not attempt to clean a hot roaster. Once cool, remove the roasting rack and the inner pan insert.
Most inner pans are non-stick and dishwasher safe. Check your specific model’s manual for confirmation. If handwashing, use warm, soapy water and a soft sponge. Avoid abrasive cleaners or scrubbing pads. These can damage the non-stick coating. For stubborn baked-on bits, you can soak the pan with warm, soapy water for a while. This helps loosen the residue. Cleaning the bottom of any pan, even a roasting pan, follows similar principles of using appropriate tools and gentle force. You can find more tips on how to clean the bottom of your pan.
The exterior of the electric roaster, which houses the heating element, should never be submerged in water. Use a damp cloth to wipe down the exterior. Ensure no water gets into the electrical components. Dry the exterior thoroughly. Store the roaster in a clean, dry place. Make sure all parts are completely dry before storage. This prevents rust or mildew.
Regular cleaning keeps your electric roasting pan performing its best. It maintains its efficiency for future use. Proper care extends the life of your appliance. A well-maintained roaster is a reliable kitchen tool.
Common Questions About Electric Turkey Roasting
Cooking a turkey in an electric roaster is straightforward. Still, some common questions arise. Understanding these answers helps ensure your success. I will address a few frequently asked questions here. This covers various concerns you might have during the process.
Can I use a turkey bag in an electric roaster?
Yes, you can use a turkey bag in an electric roaster. Using a turkey bag can help keep the turkey even more moist. It can also speed up cooking time slightly. Ensure the bag does not touch the heating elements. Follow the turkey bag manufacturer’s instructions carefully.
Should I add water to the bottom of the electric roaster?
Adding water to the bottom of an electric roaster is generally not needed. The electric roaster’s lid traps moisture effectively. Adding water can steam the turkey instead of roasting it. This might prevent the skin from getting crispy. Rely on the turkey’s natural juices for moisture.
How do I get crispy skin on my turkey in an electric roaster?
To get crispy skin, remove the lid for the last 30-60 minutes of cooking. Increase the temperature to 375°F (190°C) for the last 20-30 minutes if your roaster allows. Basting with butter or oil during this time also helps. Ensure the turkey is patted very dry before seasoning.
Can I stuff a turkey in an electric roaster?
You can stuff a turkey in an electric roaster. However, remember that stuffing increases the overall cooking time. The stuffing must reach 165°F (74°C) for food safety. This often means the turkey meat might be slightly overcooked. Cook stuffing separately for better control and safety.
What size turkey fits in a standard electric roaster?
Most standard 18-quart electric roasters can comfortably fit a 20-22 pound turkey. Larger roasters, like 22-quart models, can accommodate turkeys up to 26 pounds. Always check your specific roaster’s capacity. Ensure there is some space around the turkey for proper air circulation.
How do I know when the turkey is done in an electric roaster?
The turkey is done when its internal temperature reaches 165°F (74°C). Insert a meat thermometer into the thickest part of the thigh. Make sure the thermometer does not touch any bone. The breast meat should also register 165°F (74°C). Juices should run clear when the turkey is pierced.
Conclusion
Using an electric roasting pan for turkey truly simplifies holiday cooking. It ensures a juicy, flavorful bird every time. You gain valuable oven space and precise temperature control. By following the steps outlined here, you can achieve perfect results. From preparing your turkey to cleaning your roaster, you are now equipped with the knowledge for success.
I hope this guide helps you feel confident in your turkey roasting skills. Remember, practice makes perfect. Your guests will love the delicious turkey you create with your electric roasting pan. Get ready to enjoy a stress-free and delicious holiday meal. Start planning your next turkey feast today!
- electric roaster
- turkey recipe
- holiday cooking
- kitchen appliances

Katria Melrose
Cleaning Specialist
With over 12 years of experience in commercial cleaning and a certification in workplace ergonomics, I’ve developed a deep understanding of what makes a workspace truly productive. At HEG, I specialize in helping people transform their home offices into clean, efficient, and comfortable environments. Through smart cleaning routines and strategic organization solutions, I empower readers to create spaces that support focus, comfort, and success—one well-organized desk at a time.