· Todd Martin · Kitchen Appliances · 21 min read
How To Remove Basket From Philips Air Fryer
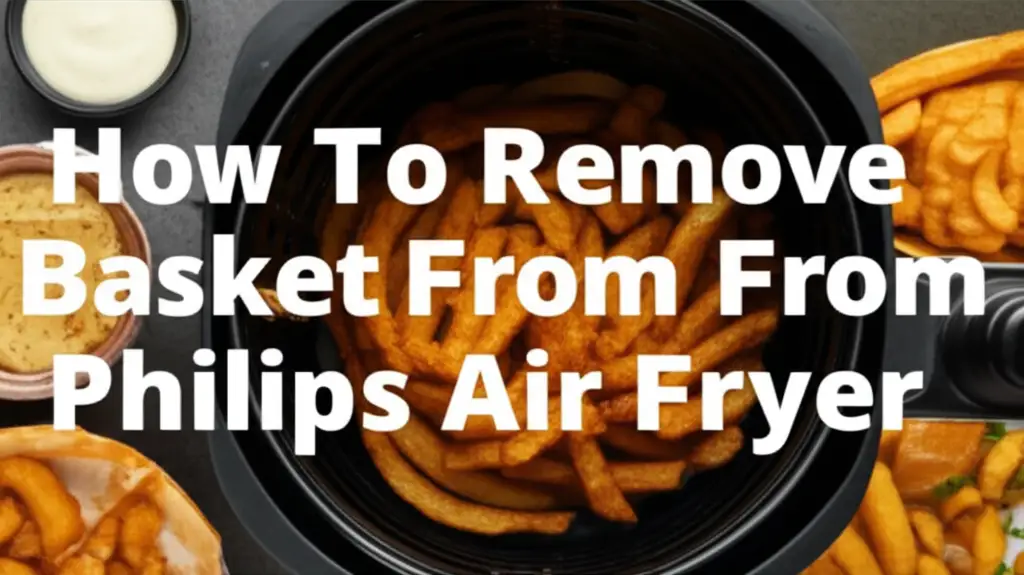
Removing Your Philips Air Fryer Basket with Ease
Are you ready to clean your Philips Air Fryer or swap out an accessory? Knowing how to remove basket from Philips Air Fryer is a basic but important skill. Many people find themselves wondering if they are doing it right. This guide makes the process simple.
I will walk you through each step to safely detach your air fryer basket. We will cover different Philips models and offer useful tips. This information will help you maintain your air fryer well. You will cook better and keep your appliance clean for a long time. Get ready to master this essential air fryer task!
Takeaway
- Ensure the air fryer is off and cool: Safety first before touching hot parts.
- Pull out the main drawer: The entire drawer slides out from the unit.
- Locate and press the release button: This button often has a safety cover.
- Lift the basket away from the pan: The basket separates easily once released.
Clear and Concise Answer
To remove the basket from a Philips Air Fryer, first ensure the unit is unplugged and cool. Then, pull the main drawer out. Locate the handle’s safety cover and slide it forward. Press the visible release button. Lift the inner basket straight up and out from the outer pan.
Understanding Your Philips Air Fryer Basket Design
Philips Air Fryers are popular for their smart design and cooking power. Their basket system is key to this. Most Philips models use a two-part basket system. This system includes an outer pan and an inner cooking basket. The inner basket often has a mesh bottom. This design allows hot air to circulate all around your food.
This two-part system also makes cleaning easier. You can remove the inner basket for washing. The outer pan catches any drips or crumbs. Understanding this design helps you handle the parts correctly. It helps you remove basket from Philips Air Fryer properly.
Some Philips models have a larger drawer with the basket fixed inside. Others have a more classic pull-out drawer. The basic principle for removal is similar across models. You will usually find a button or lever on the handle. This button is designed to release the inner basket from the outer pan. This makes it simple to separate the parts for use or cleaning. Remember that what is the Philips Air Fryer basket made of can vary, which affects its durability and heat retention. Different materials might feel different during removal, but the steps remain the same.
Common Basket Configurations
Philips offers various air fryer models, each with slight design differences. Knowing your model helps you approach the basket removal process correctly. Most popular models, like the Philips XXL or Avance Collection, feature a large pull-out drawer. This drawer contains both the main cooking basket and a grease-reducing bottom.
Smaller daily collection models might have a more compact design. The core function of detaching the basket for serving or cleaning is consistent. Always check your specific model’s user manual if you are unsure. However, the steps I describe apply to most Philips air fryers.
Importance of the Two-Part System
The two-part basket system is a smart feature. It helps drain excess fat and oil from your food. This means your meals are healthier and crispier. The inner basket holds the food, while the outer pan collects grease.
This design also protects your hands from heat. You handle the cool outer pan when removing food. This design promotes better cooking results. It also simplifies the post-cooking cleanup.
Step-by-Step Guide: How To Remove Basket From Philips Air Fryer
Removing the basket from your Philips Air Fryer is a straightforward task. Following these steps ensures safety and prevents damage. I always recommend taking a moment to familiarize yourself with your specific model. This guide covers the most common Philips air fryer designs.
My first rule of thumb is always safety. Make sure your air fryer is unplugged. It must be completely cool before you touch any parts. This prevents burns and electrical hazards.
Once the unit is cool and unplugged, you can start the removal process. You will find that Philips has made this process very user-friendly. It only takes a few simple actions to get the basket out. This process makes cleaning much easier afterward.
1. Ensure the Air Fryer is Off and Cool
This first step is the most important one. Always unplug your Philips Air Fryer from the wall outlet. Do this before you try to remove any parts. Hot components can cause severe burns. Allow the unit to cool down completely after cooking.
Touching hot surfaces can be dangerous. Give it at least 30 minutes to cool, or until it feels cool to the touch. Safety comes first when you handle any kitchen appliance. If you need to quickly check food while cooking, you can remove air fryer basket while cooking. However, always re-insert it quickly and safely. For deep cleaning, cooling is essential.
2. Pull Out the Main Drawer
Once the air fryer is cool, grab the handle of the main drawer. This handle is usually at the front of the unit. Pull the drawer straight out from the air fryer’s body. It should slide out smoothly.
You will now see the outer pan, with the inner basket sitting inside it. The outer pan often has a non-stick coating. This pan collects any grease or food crumbs during cooking. Make sure you have a clear space to place this drawer.
3. Locate and Slide the Safety Cover
Philips air fryers often have a safety cover over the basket release button. This cover prevents accidental detachment. It is usually a small plastic piece. You will find it above the release button on the handle. Slide this cover forward or away from the button.
This action will reveal the actual release button. This safety feature is important. It ensures the basket remains secure during use. I appreciate this design choice from Philips.
4. Press the Basket Release Button
With the safety cover moved, you will see the release button. It is typically a prominent button on the handle. Press this button firmly. You might hear a click as it disengages the basket.
This button releases the inner cooking basket from the outer pan. It is designed for easy and quick separation. Keep the button pressed as you move to the next step. Releasing it too early might cause the basket to re-lock.
5. Lift the Inner Basket Out
While holding the release button, lift the inner basket straight up. It should easily separate from the outer pan. Place the inner basket on a heat-resistant surface. Now you have two separate parts.
You can now easily clean both the inner basket and the outer pan. This two-part design is very convenient. It makes reaching all surfaces for thorough cleaning simple. Remember these steps for quick and safe removal every time.
Tips for Safe and Easy Basket Removal
Removing the basket from your Philips Air Fryer should be a simple task. However, a few tips can make it even easier and safer. I always focus on prevention when handling kitchen appliances. A little care goes a long way in maintaining your air fryer.
The most common issue I see is rushing the process. Take your time with each step. This prevents accidental drops or damage to the basket. You also avoid putting strain on the air fryer’s components. Remember, proper care ensures a longer lifespan for your appliance.
These tips apply whether you are just taking out the basket for food or for a deep clean. They are essential for both new and experienced air fryer users. Adopting these habits makes the removal process second nature.
Always Cool Down Before Handling
This tip is worth repeating. Heat can cause painful burns and damage your hands. Always let your air fryer cool down completely after use. Unplug it and give it at least 30 minutes. The exterior might feel cool, but internal components can retain heat.
If you are in a hurry, use oven mitts. This provides a layer of protection from residual heat. Proper cooling prevents not only burns but also warping of plastic parts over time. A cool basket is a safe basket.
Use Both Hands for Stability
When you pull out the drawer, use both hands if possible. One hand can grip the handle. The other can support the bottom of the drawer. This provides better stability. It reduces the chance of dropping the heavy drawer.
Once the basket is released, lift it with a firm, steady grip. This is especially true for larger models. The basket can be heavy when filled with food. Two hands ensure you have good control. This prevents accidental slips.
Check for Obstructions
Before you slide the drawer back in, check for food debris. Small crumbs or grease can make the drawer stick. They can also prevent the basket from seating properly. A quick wipe down before re-insertion helps.
Ensure nothing is blocking the tracks where the drawer slides. This makes insertion smooth. It also protects the air fryer’s internal mechanisms from damage. A clean pathway means less friction and wear.
Be Gentle with the Release Button
The release button is a mechanical part. Press it firmly but without excessive force. Forcing it can damage the spring or the locking mechanism. If the button feels stuck, do not push harder.
Re-check if the safety cover is fully moved. Sometimes a small piece of food can get lodged. Gentle pressure is usually enough. If it is still stuck, refer to the troubleshooting section later in this article.
Why Removing Your Air Fryer Basket Matters
Removing the basket from your Philips Air Fryer is not just about convenience. It is a critical step for several reasons. Proper basket removal ensures your air fryer stays clean. It also allows for safe and versatile cooking. I find that many users underestimate its importance.
The ability to easily separate the basket from the pan improves hygiene. It also extends the life of your appliance. A clean air fryer performs better and cooks food more efficiently. This means tastier results for you and your family.
Moreover, removing the basket opens up possibilities for using different accessories. Philips offers various inserts like grill pans or baking dishes. These accessories often replace the standard basket. Knowing how to remove basket from Philips Air Fryer makes swapping easy.
Thorough Cleaning and Hygiene
This is perhaps the biggest reason to remove the basket. Food particles and grease build up over time. If not cleaned, they can cause odors and affect food taste. Removing the basket allows you to clean every nook and cranny. You can access the inner mesh and the outer pan properly.
You can wash the parts in the sink with soap and water. Many Philips air fryer baskets are also dishwasher safe. This makes cleaning even easier. A clean basket prevents bacterial growth. It also stops old food residue from smoking during your next cook. For general maintenance, knowing how to clean fryer basket regularly is key.
Optimal Airflow and Cooking Performance
A clean basket ensures optimal airflow. The mesh bottom of the basket is crucial for air circulation. If it is clogged with grease or food debris, air cannot flow freely. This results in unevenly cooked food.
Removing and cleaning the basket restores proper airflow. Your food will cook more evenly and get that desired crispiness. This improves your air fryer’s overall cooking performance. It ensures you get the best results every time you cook.
Damage Prevention and Longevity
Regular removal and cleaning help prevent damage. Built-up grease can become sticky. This makes the basket harder to remove over time. Forcing a sticky basket can damage the handle or the locking mechanism.
Proper care also extends the lifespan of your non-stick coating. A well-maintained basket resists wear and tear better. This means your Philips Air Fryer will serve you for many years. It is a small effort for a big return on your appliance investment.
Using Accessories and Versatility
Philips Air Fryers are versatile appliances. They offer various accessories like baking dishes, grill pans, or skewer racks. To use these, you first need to remove the standard basket. This simple action transforms your air fryer.
You can bake cakes, grill meats, or even roast vegetables with ease. Removing the basket allows you to expand your cooking options. It makes your air fryer an even more powerful tool in your kitchen. Mastering basket removal unlocks your air fryer’s full potential.
Common Issues When Removing the Basket & Troubleshooting
Sometimes, you might face a small challenge when trying to remove basket from Philips Air Fryer. It is not uncommon for things to get a little stuck. Do not panic if this happens. Most issues are minor and easy to fix. I have encountered these myself and found simple solutions.
Understanding what causes these issues can help prevent them in the future. Often, it comes down to food residue or a slight misalignment. Rarely is it a major problem with the appliance itself. My advice is always to approach troubleshooting calmly.
You will find that a little patience and a gentle touch solve most problems. Avoid forcing anything. Forcing parts can lead to damage. Remember, your Philips Air Fryer is a durable appliance. It just needs a little understanding from you.
Basket Feels Stuck or Is Difficult to Remove
If your basket feels stuck, it is usually due to food residue or a dirty outer pan. Grease or crumbs can dry and create a sticky bond. This makes separating the inner basket difficult.
- Check for Food Residue: Look closely around the edges of the inner basket and the outer pan. Are there any dried food bits or thick grease?
- Warm Water Trick: If it is very sticky, pour a small amount of warm, soapy water into the outer pan. Let it sit for 5-10 minutes. This can loosen the residue. Do not submerge the entire drawer. Only let water sit in the outer pan.
- Gentle Wiggle: Instead of pulling hard, try a gentle side-to-side wiggle. While pressing the release button, gently twist the basket. This can break the sticky seal.
- Ensure Proper Cooling: If the air fryer was recently used, heat can cause components to expand slightly. Wait longer for it to cool down completely. A fully cooled air fryer will have parts at their normal size.
Release Button Not Working
If the release button does not seem to work, or it feels jammed, check these points. The button mechanism is designed to be simple. Issues are usually external.
- Safety Cover Position: Double-check that the safety cover is fully slid back. Sometimes it might be halfway, preventing the button from fully depressing.
- Obstruction in the Button Slot: Use a toothpick or a small brush. Gently clear any visible debris around the button or in its slot. Food crumbs can wedge themselves in there.
- Press Firmly and Straight Down: Ensure you are pressing the button straight down. Angled pressure might not engage the release mechanism correctly. Apply firm, steady pressure.
- Handle Alignment: Make sure the handle is correctly aligned with the drawer. If the handle has shifted slightly, it might misalign the button. A gentle push or pull on the handle itself might re-align it.
Basket Does Not Seat Properly When Re-inserting
This happens if the basket is not aligned correctly before pushing it in. It is not a major issue. You just need to re-align it.
- Align the Grooves: Look for the grooves or slots on the inner basket and the outer pan. They need to match up perfectly.
- Push Straight Down: Apply even pressure when pushing the inner basket back into the outer pan. Do not force it at an angle.
- Listen for the Click: You should hear a clear click when the basket locks into place. If you do not hear it, it is not fully secured.
- Test the Handle: Once re-inserted, lift the basket by its handle. If it feels wobbly or detaches easily without pressing the button, it is not properly secured. Remove and re-insert.
Maintaining Your Philips Air Fryer Basket for Longevity
Proper maintenance extends the life of your Philips Air Fryer basket. It also ensures consistent cooking performance. Cleaning and care are not just about hygiene. They are about protecting your investment. I believe a well-maintained appliance serves you better for years.
Neglecting the basket can lead to wear and tear. The non-stick coating can degrade. Food can stick more easily. This makes future cleaning harder. A little regular attention makes a big difference.
Taking care of your air fryer basket is straightforward. It involves simple cleaning routines. It also means handling the parts with care. These habits will keep your Philips Air Fryer in top shape.
Regular Cleaning After Each Use
This is the most important maintenance step. Clean the basket and outer pan after every use. Do not let food residues dry and harden. This prevents stubborn stains and sticking.
- Warm Soapy Water: Use warm water and a non-abrasive dish soap. A soft sponge or cloth is best.
- Avoid Abrasive Cleaners: Do not use metal scouring pads or harsh chemicals. They can scratch the non-stick coating. This damage makes food stick more in the future.
- Dishwasher Safe: Many Philips air fryer baskets are dishwasher safe. Check your model’s manual to confirm. If it is, this makes cleaning very convenient. Just place it on the top rack. Can you put air fryer basket in dishwasher is a common question, and for Philips, the answer is often yes.
Dealing with Stubborn Residues
Sometimes, food might get really stuck. Do not scrape it vigorously. This will damage the coating.
- Soak: Fill the outer pan with warm, soapy water. Place the inner basket inside. Let it soak for 15-30 minutes. This softens the residue.
- Baking Soda Paste: For tough spots, mix baking soda with a little water to form a paste. Apply it to the residue. Let it sit for a few minutes. Then gently scrub with a soft brush or sponge.
- Nylon Brush: A soft nylon brush can help dislodge food from the mesh. Use gentle circular motions.
Inspecting for Wear and Tear
Periodically inspect your basket for signs of wear. Look for scratches on the non-stick coating. Check if the handle feels loose.
- Coating Integrity: If the non-stick coating is heavily scratched or peeling, it might be time for a replacement basket. Damaged coating can release particles into food.
- Handle Security: Ensure the handle is firmly attached. If it wiggles excessively, it could be a safety risk when carrying hot food.
- Rubber Feet: Some baskets have small rubber feet on the bottom of the outer pan. Check if they are still present. They protect your countertops from scratches and heat. Also, ensuring you know how to use Philips Air Fryer for the first time includes proper setup and initial care which impacts longevity.
Proper Storage
Store the basket and pan dry and clean. Do not stack heavy items inside the basket when stored. This can warp its shape.
- Airtight Storage: Store in a dry place to prevent mold or mildew growth.
- Prevent Scratches: If storing multiple baskets, place a paper towel between them. This prevents scratching the non-stick surfaces.
Re-inserting the Basket Correctly
After you have removed, cleaned, or cooked with your Philips Air Fryer basket, you need to put it back. Re-inserting the basket correctly is as important as removing it. A properly seated basket ensures safe operation. It also allows the air fryer to cook efficiently. I always make sure the basket is firmly in place before starting any cooking cycle.
If the basket is not correctly inserted, the air fryer might not start. Or, it could cause uneven cooking. Sometimes, a poorly seated basket can even lead to error messages on digital models. This section guides you through the process. It helps you avoid common pitfalls.
Take your time during re-insertion. It is usually a quick and smooth process once you get the hang of it. You will feel a positive click when it locks into place. This gives you confidence that your air fryer is ready for its next task.
1. Ensure Both Parts Are Clean and Dry
Before re-inserting, make sure both the inner basket and the outer pan are clean. They should also be completely dry. Any water residue can cause issues. It could lead to rust over time or affect electrical components.
A quick wipe with a clean towel is often enough. If you have washed them, let them air dry fully or towel dry thoroughly. This step is crucial for hygiene and the appliance’s lifespan.
2. Align the Inner Basket with the Outer Pan
Hold the inner cooking basket over the outer pan. Look for the guides or grooves on both parts. These ensure the basket fits perfectly. Philips designs its baskets to fit in only one correct way.
You will see slots on the sides of the inner basket that match up with ridges inside the outer pan. Take a moment to align them carefully. Do not force it if it does not go in easily. Misalignment is the most common reason for resistance.
3. Lower the Basket Until It Locks
Gently lower the inner basket into the outer pan. You should feel it slide into place. Once the grooves align, push down firmly. You will hear a distinct “click” sound.
This click means the basket’s locking mechanism has engaged. It confirms the inner basket is securely attached to the outer pan. Test it by gently lifting the handle. The inner basket should remain attached.
4. Slide the Main Drawer Back into the Air Fryer
Once the inner basket is secure in the outer pan, slide the entire drawer back into the air fryer unit. Push it in completely until it clicks into place. This click confirms the drawer is fully closed.
A fully closed drawer is essential for the air fryer to operate. If it is not fully closed, the air fryer will not turn on. This is a safety feature to prevent hot air from escaping. Make sure it feels snug and secure.
5. Confirm Proper Engagement (Optional but Recommended)
For peace of mind, give the drawer a gentle tug after inserting it. It should not budge easily. Also, check the display if your model has one. It should indicate it is ready for use, or at least not show an error about an open drawer.
This final check ensures everything is in place. You can now use your Philips Air Fryer with confidence. It is ready for your next culinary creation.
FAQ Section
Can I remove the basket while the air fryer is on?
No, I do not recommend removing the basket while the air fryer is actively heating. While some models may pause, it is unsafe. Hot air and steam can cause burns. Always turn off the unit and allow it to cool down before removing the basket. This ensures your safety and prevents damage to the appliance.
Why is my Philips air fryer basket stuck?
A stuck basket often indicates dried food residue or grease build-up. These can create a sticky bond between the inner basket and outer pan. Try soaking the drawer in warm, soapy water for a few minutes. Then, gently wiggle the inner basket while pressing the release button. Ensure the safety cover is fully disengaged.
How do I clean my Philips air fryer basket after removing it?
After removing the basket, wash both the inner basket and outer pan in warm, soapy water. Use a soft sponge or cloth. Many Philips baskets are dishwasher safe for convenience. Avoid abrasive scrubbers to protect the non-stick coating. Rinse thoroughly and dry completely before re-assembly.
What are the common parts of a Philips air fryer basket?
The typical Philips air fryer basket system includes two main parts. There is an inner cooking basket, usually with a mesh bottom. This holds your food. Then, there is an outer pan or drawer. This pan catches drips and houses the inner basket. A handle with a safety release button connects these parts.
Is it okay if the basket wobbles a little after re-insertion?
A slight wobble can be normal if the basket is not fully loaded. However, if the inner basket feels loose or detached from the outer pan when you lift it, it is not properly secured. Remove it and re-insert it, ensuring you hear a distinct “click” to confirm it is locked into place.
Conclusion
Knowing how to remove basket from Philips Air Fryer is a fundamental skill for any owner. This simple action goes beyond just taking out food. It is essential for thorough cleaning, proper maintenance, and unlocking your air fryer’s full potential. By following the steps I have shared, you can confidently detach the basket every time.
Remember, safety comes first. Always ensure your air fryer is cool and unplugged before handling the basket. Regular cleaning and careful re-insertion will extend the life of your appliance. It will also ensure consistently delicious results. Embrace these simple habits to keep your Philips Air Fryer running efficiently. Your air fryer will serve you well for many meals to come. Enjoy your perfectly cooked, healthy dishes!
- Philips Air Fryer
- Air Fryer Basket
- Remove Basket
- Air Fryer Maintenance
- Cleaning Air Fryer

Todd Martin
Senior Writer
With over 15 years of experience in home renovation and design, I started HEG to share what I’ve learned with homeowners who want to create spaces that are both beautiful and functional. I’ve always believed in a hands-on approach, and over the years, I’ve picked up practical solutions that actually work. Through HEG, I aim to make home improvement more approachable, sharing real tips that help you create a home you truly love.