· Todd Martin · Home Appliances, DIY Repair, Refrigerators · 19 min read
How To Replace Ge Refrigerator Condenser Fan Motor
Replace Your GE Refrigerator Condenser Fan Motor Easily
Is your GE refrigerator making strange noises? Perhaps you hear a loud buzzing, rattling, or squealing sound coming from the back. Even worse, maybe your food is not staying cool, or the refrigerator feels unusually warm. These symptoms often point to a failing GE refrigerator condenser fan motor.
This small but mighty component is vital for your refrigerator’s cooling system. When it fails, it disrupts airflow over the condenser coils and compressor, leading to inefficiency and potential overheating. Replacing it yourself can save you money on professional service calls. This article will guide you through diagnosing the issue, gathering the right tools, and executing a safe, step-by-step replacement of your GE refrigerator condenser fan motor.
Takeaway
- Identify Symptoms: Listen for unusual noises or notice poor cooling.
- Prioritize Safety: Always unplug the refrigerator before starting any work.
- Gather Essentials: Have the correct tools and the exact replacement motor ready.
- Follow Steps Carefully: Access, remove, and install the new motor systematically.
- Test Thoroughly: Plug in and monitor your refrigerator’s performance after the repair.
Replacing a GE refrigerator condenser fan motor involves safely unplugging the appliance, gaining access to the motor usually located at the rear or bottom, disconnecting its wiring and mounting hardware, and then installing the new part. This DIY repair restores proper cooling and airflow, preventing further damage to your refrigerator’s compressor.
Recognizing a Failing GE Refrigerator Condenser Fan Motor
Your refrigerator relies on several components to keep food cold. The condenser fan motor plays a crucial role in this process. It helps dissipate heat generated by the compressor and condenser coils. When this motor starts to fail, your GE refrigerator will likely show clear signs.
One of the most common indicators is unusual noise. You might hear a loud hum, a grinding sound, or a high-pitched squeal. These noises happen because the motor’s bearings are wearing out or the fan blade is hitting something. Another significant symptom is poor cooling inside the refrigerator compartment. If the fan cannot move air over the coils, heat builds up, and the refrigerator struggles to maintain its set temperature.
Common Noises and Their Meanings
Strange sounds are often the first sign that something is wrong. A buzzing or humming sound can indicate the motor is working harder than it should. A grinding or squealing noise often points to worn bearings within the motor itself. These sounds are distinct from the normal hum of a working refrigerator.
Listen closely to pinpoint the sound’s origin. If it comes from the back or bottom of the refrigerator, near the compressor, it is likely the condenser fan. Addressing these noises early can prevent further damage. Understanding typical fan behavior can help you diagnose issues, similar to how understanding why an RV refrigerator fan goes on and off helps with RV cooling.
Cooling Performance Issues
When the condenser fan motor fails, the refrigerator’s ability to cool drops significantly. You may notice food spoiling faster than usual. The freezer section might not be as cold as it should be, or ice cream might feel soft. The main issue is heat trapped near the compressor and coils.
This trapped heat prevents the refrigerant from cooling properly before it circulates through the system. A warm refrigerator interior is a direct consequence. This also makes the compressor work harder, which can shorten its lifespan.
Visual Inspection Tips
Sometimes, a quick visual check can offer clues. Unplug the refrigerator first for safety. Look at the condenser fan motor and blade, usually located behind a rear access panel. Check if the fan blade spins freely by hand. If it is stiff, wobbly, or obstructed by debris, it indicates a problem.
Dust and pet hair can accumulate on the fan blade and condenser coils, impeding airflow. While cleaning can solve some issues, a visibly worn or seized motor often requires replacement. A thorough inspection helps confirm your suspicions.
Safety First: Preparing for Your GE Refrigerator Repair
Before you touch any internal components of your GE refrigerator, safety must be your top priority. Appliance repair involves electrical parts and moving components, even when the appliance is off. Taking proper precautions protects you from injury and prevents damage to your refrigerator. Do not skip these steps.
Working with appliances can be risky if you are unprepared. Electrical shocks are a real danger. Moving heavy appliances can cause strains or drops. Preparing your workspace and yourself ensures a smooth and safe repair process. This careful approach is essential for any home appliance project.
Disconnecting Power Safely
This is the most critical safety step. Always unplug your GE refrigerator from the wall outlet before starting any work. Simply turning it off at the control panel is not enough. The outlet provides direct power to the internal components, and even a small amount of residual current can cause a shock.
If the power cord is difficult to reach, trip the circuit breaker that controls the refrigerator’s outlet. Double-check that the power is off by trying to turn on the refrigerator or checking if the internal light comes on. Confirming power disconnection prevents electrical hazards.
Essential Personal Protective Equipment
Wearing the right safety gear protects you from unexpected hazards. Safety glasses guard your eyes from dust, debris, or unexpected sparks. Gloves protect your hands from sharp edges, dirt, or grease. I always wear tough work gloves for appliance repairs.
You might also consider wearing closed-toe shoes to protect your feet. Loose clothing or jewelry can get caught in moving parts. Make sure your attire is appropriate for working around machinery. Just like when you clean a blower motor, personal protection is key.
Organizing Your Workspace
A clear and well-lit workspace makes the repair easier and safer. Move the refrigerator away from the wall to give yourself ample room to work around the back and sides. Ensure there is enough light to see all components clearly. Using a headlamp can be very helpful.
Keep your tools organized and within easy reach. This prevents fumbling and potential accidents. Remove any clutter from the floor around the refrigerator. A tidy area reduces the chance of tripping or dropping tools.
Gathering Tools and the Right GE Condenser Fan Motor Part
Performing a successful GE refrigerator condenser fan motor replacement requires the correct tools and, most importantly, the exact replacement part. Using the wrong tools can damage fasteners or components. Installing an incorrect motor can lead to compatibility issues or even further appliance problems. Taking the time to gather everything beforehand saves you hassle during the repair.
I always make a checklist before I start. This helps ensure I have all necessary items and avoid multiple trips to the hardware store. Being prepared means the repair process goes smoothly and efficiently.
Specific Tools You Will Need
Most GE refrigerator condenser fan motor replacements require a few basic hand tools. You will likely need a set of nut drivers or sockets to remove the access panel and motor mounting screws. Screwdrivers, both Phillips and flat-head, are also essential for various fasteners. Sometimes, pliers are useful for disconnecting wire harnesses or stubborn clips.
A multimeter can be helpful for diagnosing whether the motor truly has no continuity, but it is not strictly necessary for the replacement process itself if you are confident it is faulty. I also recommend a small container to hold any removed screws so they do not get lost. These simple tools are often found in most home toolkits.
Finding Your GE Refrigerator Model Number
The most crucial step in getting the right part is knowing your refrigerator’s exact model number. GE manufactures many refrigerator models, and condenser fan motors are not universal. The model number is usually found on a sticker or plate inside the refrigerator compartment. Look on the interior wall, near the top, or sometimes on the side wall or behind the kick plate at the bottom.
Once you have the model number, you can search for “GE [Your Model Number] condenser fan motor” online. Appliance part suppliers typically have schematics that show the correct part for your specific model. This ensures compatibility and proper fit.
Sourcing the Correct Replacement Part
With your model number in hand, purchase the new condenser fan motor. You can buy parts from GE appliance parts websites, online retailers specializing in appliance components, or local appliance parts stores. It is important to buy a motor specifically designed for your GE model. Using a motor from another brand, like an LG, even if it looks similar, can cause issues, just as replacing an LG fan motor requires specific parts for that brand. How to replace an LG refrigerator condenser fan motor provides similar guidance for LG models.
Compare the new motor to your old one if possible. Check the physical dimensions, the number and type of wire connectors, and the fan blade attachment. Some motors come with the fan blade attached, others require you to transfer the old blade. Make sure the new part matches the old one as closely as possible to ensure proper fit and function. This careful selection prevents headaches during installation.
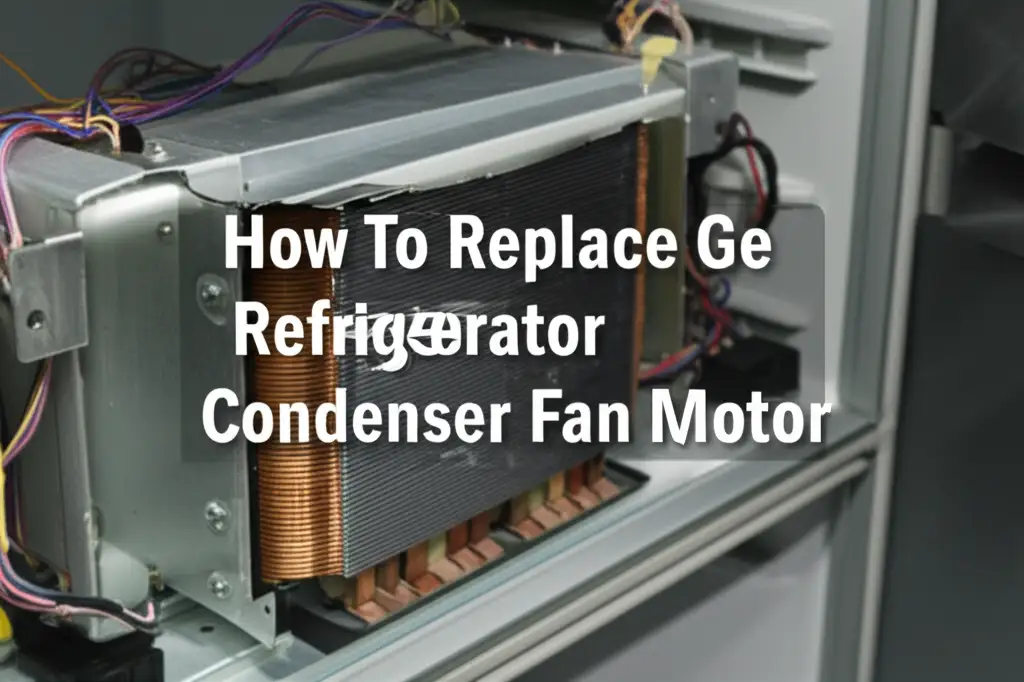
Accessing the Condenser Fan Motor on Your GE Refrigerator
The condenser fan motor on most GE refrigerators is located at the back or bottom of the unit. It sits near the compressor and condenser coils. Gaining access to this area is the next major step in the replacement process. This often involves moving the refrigerator and removing a rear access panel.
Do not rush this part of the repair. Take your time to safely position the appliance and expose the components. A clear view and easy access make the actual motor replacement much simpler. Proper access sets the stage for a smooth repair.
Moving the Refrigerator
A refrigerator is a heavy appliance. Before you start, carefully pull your GE refrigerator away from the wall. You will need enough space to work comfortably behind it. Be mindful of the flooring, as wheels can sometimes scratch softer surfaces. If your refrigerator does not have wheels, you may need a furniture dolly or assistance from another person to move it safely.
Ensure the power cord is clear and does not get pinched or tangled. Give yourself at least two to three feet of clearance from the wall. This space allows for better maneuverability and safer access to the back panel.
Identifying the Access Panel
Most GE refrigerators have a large metal or cardboard access panel on the lower back of the unit. This panel covers the compressor, condenser coils, and the condenser fan motor. It protects these components from dust and damage. The panel is usually secured with several screws.
Some models might have the condenser fan located beneath the refrigerator, requiring access from the front by removing a kick plate or from the bottom after tipping the unit back slightly. Always consult your refrigerator’s service manual or a parts diagram for your specific model if you are unsure about the access location.
Safely Removing the Panel
Once you have identified the access panel, use your nut driver or screwdriver to remove the screws holding it in place. Keep these screws in a small container so they do not get lost. They are usually small and easy to misplace. Some panels may have clips in addition to screws; gently pry these open if necessary.
Once all fasteners are removed, carefully pull the panel away from the refrigerator. You might need to gently maneuver it around hoses or wires. Place the panel in a safe spot where it will not be stepped on or damaged. This reveals the compressor, condenser coils, and the condenser fan motor.
Step-by-Step: Removing the Old GE Condenser Fan Motor
With the access panel off, you can now see the faulty condenser fan motor. This part of the repair requires careful attention to detail, especially when disconnecting wires and identifying mounting points. Taking pictures before you disconnect anything is a wise practice. This visual reference will be invaluable when installing the new motor.
I always take photos with my phone before I disconnect wires. This simple step has saved me from wiring headaches many times. Proper removal prevents damage to surrounding components.
Documenting Wiring Connections
Before disconnecting any wires from the old motor, take a clear photograph of how they are connected. Note the color of each wire and where it plugs into the motor or its housing. Some GE condenser fan motors have a simple two-wire connector, while others may have more complex harnesses. You must connect the new motor exactly the same way.
Some wires might be secured with small plastic clips or zip ties. Carefully unclip or cut these. Do not pull on the wires themselves; grasp the connector firmly and pull it straight off. Damaging the wire harness can create a bigger problem.
Detaching the Fan Blade
In many cases, the fan blade is separate from the motor and needs to be transferred to the new motor. The fan blade is usually held onto the motor shaft with a small retaining clip, a nut, or by being press-fit. If it is a clip, gently pry it off with a flat-head screwdriver. If it is a nut, loosen it with a wrench or pliers.
If the blade is press-fit, you may need to gently wiggle and pull it off the shaft. Be careful not to bend or damage the fan blade during removal, as you will reuse it. A damaged blade can cause vibration and noise, defeating the purpose of the repair.
Unmounting the Motor
The GE condenser fan motor is typically mounted to the refrigerator frame using screws or bolts. These fasteners usually go through rubber grommets that help dampen vibration. Use the appropriate nut driver or screwdriver to remove these mounting screws. Sometimes, the motor is held in a bracket that then screws onto the frame.
Keep track of the screws and grommets; you will need them for the new motor. Once the fasteners are removed and the fan blade is detached, carefully pull the old motor out of its position. It might be snug due to the grommets. A bad motor often looks rusty or shows signs of bearing wear, which is similar to how you might tell if a GE dryer motor is bad.
Installing Your New GE Refrigerator Condenser Fan Motor
With the old motor removed, you are ready to install the new one. This is essentially the reverse of the removal process. Careful attention to detail here ensures the new motor functions correctly and quietly. Make sure your new part matches the old one. This step will bring your GE refrigerator back to full cooling capacity.
I find that double-checking each connection as I go prevents frustration later. This careful approach ensures everything is in its proper place. The goal is to have the new motor spin freely and effectively cool the condenser.
Attaching the Fan Blade Correctly
If your new condenser fan motor did not come with a blade, you will need to attach the old one. Carefully slide the fan blade onto the shaft of the new motor. Make sure it goes on the correct way; often, there is a flat side on the shaft or a D-shaped hole in the blade that needs to align. If there was a clip or nut holding the blade on the old motor, secure it on the new one.
Ensure the fan blade is pushed on firmly but not too far, allowing clearance to spin freely without hitting anything. The blade should not wobble or be loose on the shaft. Proper blade attachment is crucial for efficient airflow and quiet operation.
Securing the New Motor
Position the new GE condenser fan motor in the same spot where the old one was located. Align the mounting holes on the motor or its bracket with the screw holes on the refrigerator frame. If your motor came with rubber grommets, make sure they are properly seated between the motor bracket and the frame. These grommets absorb vibrations and reduce noise.
Insert and tighten the mounting screws. Do not overtighten them, as this can damage the grommets or the motor housing. The motor should feel secure and stable, with no excessive movement. Its firm mounting prevents rattling during operation.
Reconnecting Electrical Wires
Refer to the photograph you took earlier to reconnect the wiring harness to the new condenser fan motor. Match the wire colors and connectors exactly as they were on the old motor. Push the connectors firmly into place until they click or feel secure. If you removed any zip ties or clips that held the wires in place, replace them to prevent wires from interfering with the fan blade.
Ensure all connections are tight and there are no loose wires. Loose connections can lead to intermittent operation or electrical shorts. Correct wiring is vital for the motor to receive power and function as intended. Just like resetting a GE side-by-side refrigerator can fix certain electronic glitches, proper electrical connection here is key for mechanical function.
Testing and Finalizing Your GE Refrigerator Fan Motor Replacement
You have replaced the old GE refrigerator condenser fan motor with a new one. Now it is time to put everything back together and test your work. This final phase confirms that your repair was successful and your refrigerator is operating correctly again. Do not skip these steps, as they are crucial for validating the repair.
I always take a few minutes to clean up after any repair. This ensures the appliance is ready for normal use. A clean area also helps you spot any lingering issues.
Initial Power-Up and Sound Check
Before plugging in the refrigerator, make sure the access panel is securely reinstalled. Replace all screws you removed to hold the panel in place. Then, carefully slide your GE refrigerator back into its original position, ensuring the power cord is not pinched. Plug the refrigerator back into the wall outlet.
Listen carefully as the refrigerator powers on. You should hear the compressor kick in and the new condenser fan motor begin to spin. The sound should be smooth and quiet, a clear improvement from the previous noisy operation. If you hear new or unusual noises, immediately unplug the refrigerator and recheck your installation, especially the fan blade.
Monitoring Cooling Performance
Allow the refrigerator several hours, perhaps even a full day, to return to its optimal operating temperature. Check the temperature inside both the fresh food and freezer compartments. Use a refrigerator thermometer for an accurate reading. The fresh food section should typically be around 37°F (3°C), and the freezer at 0°F (-18°C).
If the temperatures are stable and food feels properly chilled, your repair was successful. Monitor the refrigerator over the next few days to ensure consistent performance. A well-functioning condenser fan motor will help your refrigerator maintain its temperature more efficiently.
Post-Repair Cleaning and Maintenance
After replacing the condenser fan motor, it is a great time to perform some general maintenance. While the access panel was off, you likely noticed dust and debris on the condenser coils. Use a vacuum cleaner with a brush attachment or a coil cleaning brush to gently remove this buildup. Clean coils improve airflow and efficiency.
Regular cleaning of the condenser coils, usually every 6-12 months, helps prevent the condenser fan motor from overworking and failing prematurely. This simple maintenance extends the life of your refrigerator. Also, remember to check other maintenance items, like whether your GE refrigerator has an air filter that needs changing. Keeping all components clean ensures your refrigerator runs smoothly for years.
FAQ Section
How long does a GE condenser fan motor last?
A GE refrigerator condenser fan motor typically lasts between 5 to 10 years. Its lifespan depends on usage, maintenance, and environmental factors like dust or pet hair accumulation. Regular cleaning of the condenser coils can help extend the motor’s life. Harsh operating conditions or continuous running can reduce its longevity.
Can I use a universal fan motor for my GE refrigerator?
Using a universal fan motor is not recommended for your GE refrigerator. Specific GE models require motors with precise voltage, RPM, physical size, and mounting configurations. A universal motor might not fit properly, provide adequate airflow, or have compatible wiring. Always use the exact replacement part recommended for your GE model number.
What if my GE refrigerator is still not cooling after replacing the fan motor?
If your GE refrigerator still does not cool after replacing the condenser fan motor, other components might be faulty. Issues could include a bad compressor, a malfunctioning evaporator fan motor, a refrigerant leak, or a faulty defrost system. You may need to call a qualified appliance technician for further diagnosis and repair.
Is it normal for the condenser fan to run constantly?
The condenser fan motor should run when the compressor is operating, which is typically on and off in cycles. If it runs constantly, it may indicate that the refrigerator is struggling to cool, possibly due to blocked coils, a failing compressor, or a faulty thermostat telling it to run too much. This also uses more energy.
How often should I clean my GE refrigerator’s condenser coils?
You should clean your GE refrigerator’s condenser coils at least once every 6 to 12 months. If you have pets that shed a lot of hair, or if your refrigerator is in a dusty environment, you might need to clean them more frequently. Cleaning helps maintain airflow and prevents the condenser fan motor from overworking.
What causes a GE refrigerator condenser fan motor to fail?
GE refrigerator condenser fan motors often fail due to worn-out bearings, which cause friction and lead to noise or seizure. Dust, dirt, and pet hair can accumulate on the fan blade and motor, leading to overheating and premature wear. Electrical issues like power surges or continuous operation can also shorten the motor’s lifespan.
Conclusion
Successfully replacing your GE refrigerator condenser fan motor is a rewarding DIY project. You have now learned how to diagnose the common signs of a failing motor, gather the right tools and parts, and execute the replacement safely and efficiently. This repair is a practical step for any homeowner to save money and extend the life of their appliance.
By addressing this issue promptly, you restore proper cooling to your GE refrigerator, prevent further strain on other components like the compressor, and eliminate annoying noises. I encourage you to use this guide as your blueprint for tackling this repair with confidence. If you encounter any challenges or feel unsure at any point, remember that professional help is always an option. Keep your GE refrigerator running smoothly by understanding its needs and performing necessary maintenance.
- GE refrigerator
- condenser fan motor
- refrigerator repair
- DIY repair
- appliance maintenance

Todd Martin
Senior Writer
With over 15 years of experience in home renovation and design, I started HEG to share what I’ve learned with homeowners who want to create spaces that are both beautiful and functional. I’ve always believed in a hands-on approach, and over the years, I’ve picked up practical solutions that actually work. Through HEG, I aim to make home improvement more approachable, sharing real tips that help you create a home you truly love.