· Davia Murnell · Home Improvement · 22 min read
How To Take The Carpet Out Of Tile Floor

Transform Your Space: Remove Carpet from Tile Floor
Imagine a hidden treasure beneath your worn-out carpet. Many homes have beautiful tile floors covered by old carpeting. Removing carpet from tile floor can seem like a big job. However, it is a project you can do yourself. This guide will help you uncover your tile floor. I will walk you through each step for a successful transformation.
Taking carpet out of tile floor can refresh any room. It improves the look and hygiene of your home. Tile is durable and easy to clean. If you are ready for a change, this article is for you. We will cover safety, tools, and all removal steps. I will also explain how to clean the tile afterward. Let’s get started on revealing your tile.
Takeaway:
- Gather essential safety gear and tools before starting.
- Cut carpet into manageable strips for easier removal.
- Carefully remove tack strips and padding.
- Use appropriate methods to clean adhesive residue from the tile.
- Thoroughly clean and inspect your tile floor after removal.
How to take the carpet out of tile floor?
To take the carpet out of tile floor, first gather tools like utility knives, pliers, and a floor scraper. Cut the carpet into strips, then pull it up along with the padding. Next, remove the tack strips. Finally, clean any adhesive or residue from the tile surface using appropriate methods for a clean finish.
Step-by-Step Preparation: Getting Ready to Remove Carpet from Tile
Before you dive into removing carpet, preparation is very important. This step helps ensure safety and efficiency. Taking time to prepare saves you trouble later. It makes the whole process smoother. My goal is for you to work safely and effectively.
Safety First: Essential Gear and Precautions
Your safety is a top priority when removing carpet. This project involves sharp tools and can create dust. Protecting yourself from harm is simple. Make sure you have the right gear. I always start by putting on my safety equipment.
- Work Gloves: These protect your hands from sharp edges. They also prevent blisters.
- Safety Glasses: Dust and debris will fly. Eye protection is non-negotiable.
- Dust Mask or Respirator: Old carpet holds a lot of dust, dirt, and allergens. A mask protects your lungs.
- Long Sleeves and Pants: These protect your skin from scrapes and potential adhesive contact.
- Knee Pads: You will be on your knees a lot. Knee pads save you from soreness.
Also, ensure the area is well-ventilated. Open windows or use fans. If working with chemical solvents for adhesive removal, ventilation is even more critical. Keep children and pets away from the work zone. This ensures their safety from tools and debris.
Gathering Your Tools: What You Need
Having the right tools ready makes the job much easier. Trying to do this without proper equipment can be frustrating. I recommend having everything laid out before you begin. This saves time and keeps you from stopping mid-task.
Here is a list of tools you will likely need:
- Utility Knife or Carpet Cutter: Essential for cutting carpet into manageable sections. Keep extra blades handy as they dull quickly.
- Pliers or Pry Bar: For pulling up tack strips and stubborn carpet sections. A pry bar offers good leverage.
- Floor Scraper or Putty Knife: Very useful for removing old padding and adhesive residue from the tile.
- Heavy-Duty Work Gloves: As mentioned, for protection.
- Trash Bags: Large, heavy-duty bags for disposing of carpet and padding.
- Vacuum Cleaner: To clean up dust and debris as you go, and for the final cleanup.
- Bucket of Warm Water and Soap: For initial cleaning of adhesive or dirt.
- Adhesive Remover (optional): If you expect a lot of glue residue. Choose one safe for tile.
- Heat Gun (optional): Can help soften some types of adhesive.
- Work Light (optional): To see clearly in dimly lit areas.
Make sure your utility knife blades are sharp. Dull blades can be dangerous and make cutting harder. You might need a few new blades for a large room.
Clearing the Area: Furniture and Obstacles
Before any demolition, you must clear the room. This step provides a safe and open workspace. Trying to work around furniture is cumbersome and unsafe. I always remove everything from the room.
- Remove all furniture: Move chairs, tables, couches, and any other items out of the room. If an item is too large, move it to one side of the room. Then do half the floor, and move the item to the cleaned side to do the rest.
- Remove wall hangings: Pictures or decorative items might fall or get damaged. Take them down.
- Remove baseboards (optional but recommended): While not always necessary for just removing carpet, taking off baseboards can make the job cleaner. It prevents damage and gives better access to tack strips. If you plan to reinstall new flooring or simply want a perfect edge, this is a good idea. Use a pry bar and block of wood to protect the wall.
Once the room is clear, you have an open space. This allows you to move freely and work efficiently. It also protects your belongings from dust and damage. A clear area is a safe area.
The Initial Attack: Efficiently Cutting and Rolling the Carpet
With your safety gear on and tools ready, it is time to start removing the carpet itself. This part of the process involves cutting the carpet into manageable pieces. Large sections of carpet are heavy and hard to move. Smaller sections make disposal much easier. I usually start in a corner or along a wall.
Making the First Cuts: Sections for Easier Handling
You cannot just pull up an entire room’s carpet at once. It is too big and too heavy. The best method is to cut the carpet into strips. This makes it easy to roll and carry. I prefer strips about 2-3 feet wide.
- Locate a corner: Start by finding a loose edge or a corner of the carpet. If the carpet is tightly installed, you might need to make a small cut to get started.
- Make an initial relief cut: Using your utility knife, carefully make a cut across the carpet. Go about a foot or two from a wall. Cut through the carpet and the padding underneath. Be careful not to cut into the tile below. The blade only needs to go deep enough to sever the carpet backing and padding.
- Pull up an edge: Once you have a cut, you can often pull up an edge to expose the subfloor or, in this case, the tile.
- Cut strips: From this initial edge, make long, parallel cuts across the room. Aim for strips that are about 2 to 3 feet wide. This width is easy to roll up and carry. Always cut away from your body. Use a straightedge or a long piece of lumber as a guide for cleaner lines. This helps keep your cuts straight.
Work systematically across the room. Cut one strip, then move to the next. This keeps the process organized. Remember to change your utility knife blades often. Dull blades are frustrating and unsafe. A sharp blade glides through the carpet easily.
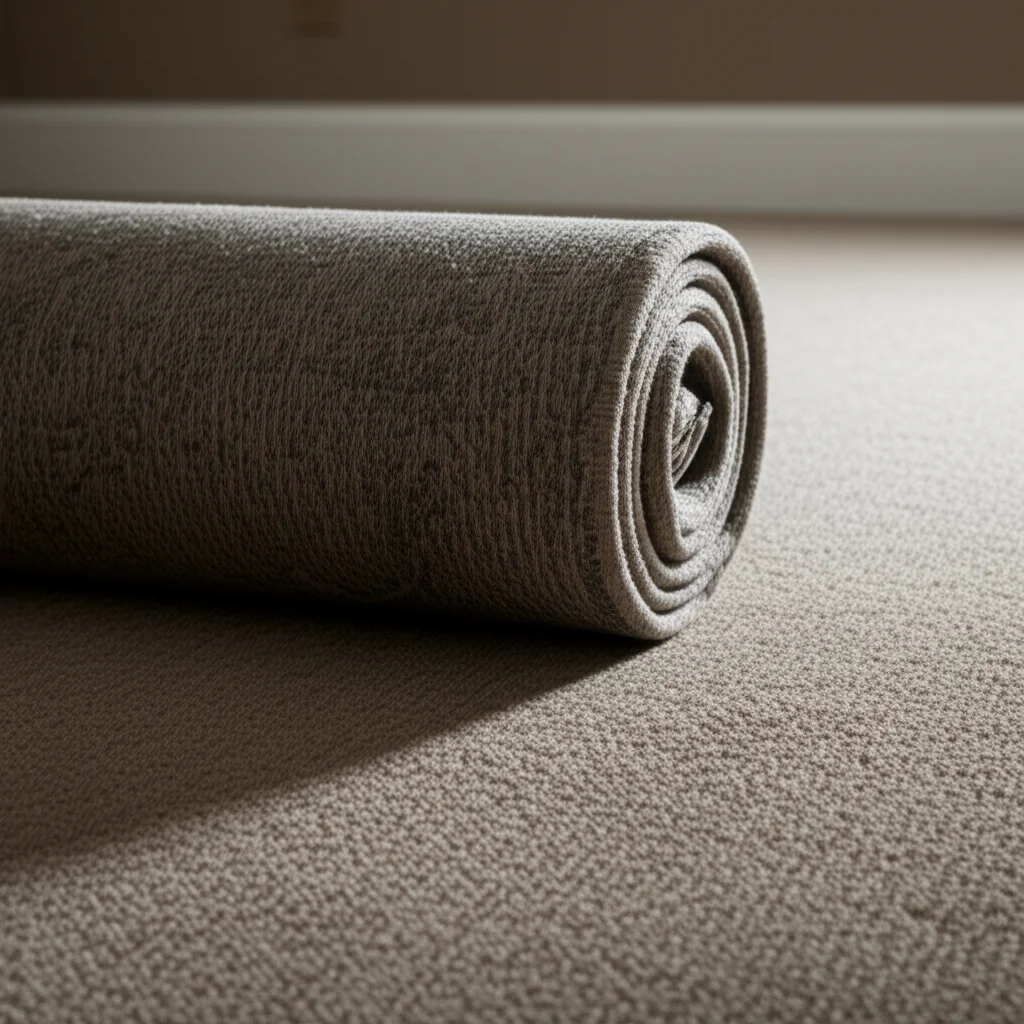
Rolling It Up: Managing Carpet Sections
Once you cut a strip, roll it up. This contains the dirt and makes it easier to transport. Rolling carpet also takes up less space for disposal. I always roll tightly to save space.
- Roll tightly: Start from one end of a cut strip. Roll the carpet tightly towards the other end. Try to keep the roll as compact as possible.
- Secure the roll: Once rolled, you can use duct tape or old rope to secure it. This prevents the carpet from unrolling. Securing the rolls makes them much easier to handle.
- Stack in a designated area: Move the secured rolls to a corner or outside the room. This keeps your workspace clear. Do not leave them in the way.
- Address stubborn areas: Some parts of the carpet might be more difficult to pull up. This is often due to adhesive or old staples. Use your pliers or pry bar to get leverage. Work slowly and patiently. Avoid using excessive force that could damage the tile.
As you remove the carpet, you will notice the padding underneath. This usually comes up with the carpet. If not, you will deal with it in the next step. Keeping the area clean as you go is also helpful. Use your vacuum to pick up small pieces of carpet and dust. This makes the next steps easier and reduces airborne particles.
Tackling the Tack Strips and Padding
With the carpet rolls out of the way, your tile floor is starting to show. Now, you will face the underlayment. This includes the carpet padding and the tack strips. These components are usually firmly attached. Removing them requires a bit more finesse. My goal is to get them up without damaging your beautiful tile.
Prying Up Tack Strips: A Careful Approach
Tack strips are thin pieces of wood. They have sharp tacks pointing upwards. These tacks hold the carpet in place around the room’s perimeter. They are often nailed into the subfloor, or in your case, possibly directly into the grout lines or along the edge of the tile. Extreme care is needed to avoid chipping your tile.
- Locate the tack strips: They run along the perimeter of the room. You will see them where the carpet met the wall.
- Use a pry bar or pliers: Position the flat end of a pry bar under one end of a tack strip. Place a thin piece of wood or cardboard under the pry bar’s fulcrum. This protects your tile from scratches or cracks.
- Apply gentle, even pressure: Slowly lift the tack strip. If it resists, try moving the pry bar along the strip. Do not force it. Prying too hard can chip the tile or damage the grout.
- Work systematically: Go around the entire room. Remove all tack strips. Collect them immediately. The tacks are very sharp.
- Dispose safely: Wrap removed tack strips in old carpet pieces or cardboard. This prevents the sharp tacks from poking through trash bags. Safety here is paramount.
Sometimes, the tack strips are glued down instead of nailed. If so, a scraper and possibly a heat gun (on a low setting, with extreme caution) might be needed to loosen the adhesive. Test a small, hidden area first if using a heat gun. Heat can damage some types of tile or grout.
Removing Padding: Layers Beneath the Carpet
Carpet padding provides cushioning and insulation. It is usually stapled or glued to the floor. When you pulled up the carpet, some padding might have come up with it. Any remaining padding needs removal.
- Identify remaining padding: Look for any sections of foam or fiber padding still attached to the tile.
- Pull up by hand or scrape: For stapled padding, you can often pull it up by hand. Small pieces might need a floor scraper to loosen them.
- Address glued padding: If the padding is glued down, this can be more challenging.
- Scraping: Use a floor scraper or a sturdy putty knife. Push the blade under the padding. Work slowly to lift it.
- Warm water and soap: For light adhesive, a mixture of warm water and a little dish soap can help. Apply it to the padding, let it soak briefly, then scrape.
- Adhesive remover: For stronger glues, you might need a commercial adhesive remover designed for flooring. Always test it on an inconspicuous area of your tile first. Ensure it does not discolor or damage the tile or grout. Follow product instructions carefully.
As you remove padding, small pieces of foam or adhesive residue will remain. Keep a vacuum cleaner nearby. Regularly vacuum up debris. This prevents it from being tracked around and makes the final cleanup easier. Be thorough in this step. Any leftover padding or adhesive will impact the look and feel of your tile.
Conquering Adhesive and Residue on Tile
After the carpet, padding, and tack strips are gone, you will likely find adhesive residue. This residue can be glue, tape, or a sticky film. It needs to be removed. A clean tile surface is essential for its appearance and future use. Dealing with adhesive requires patience and the right methods. I have found different types of residue need different approaches.
Identifying the Adhesive: Glue or Tape?
Before you start scrubbing, determine what type of adhesive is on your tile. This affects the removal method you choose. Looking closely will give you clues.
- Carpet Glue: Often looks like a yellowish or brownish dried substance. It might be spread across large areas. It can be hard and brittle or gummy and sticky. Glues are often strong and require specific removers.
- Carpet Tape: This usually appears as distinct, sticky lines or patches. It might be clear, white, or double-sided. Tape residues can be very stubborn and leave a gummy mess.
- Old Padding Residue: Sometimes, only a thin, dusty, or flaky layer of old padding material remains. This might not be adhesive but simply dried-out foam or fiber. This is usually easier to remove.
Knowing what you are up against helps you pick the most effective and safest removal method for your tile. For instance, some harsh chemicals might be fine for ceramic but damaging for natural stone tile.
Methods for Glue Removal: Heat, Solvents, or Scraping
Removing dried carpet glue from tile can be challenging. I usually start with the least aggressive method. If that does not work, I move to stronger options.
- Scraping (Manual): For brittle or dried-out glue, a floor scraper or a sharp putty knife can work. Hold the scraper at a low angle. Push firmly but carefully to avoid scratching the tile. This is best for small, thicker patches.
- Heat Gun (Controlled Heat): A heat gun can soften some glues. Set it to a low or medium heat. Wave the gun over a small section of glue for 10-20 seconds. Test if it softens. Once soft, quickly scrape it away. Be very careful with heat. Too much heat can damage tile or grout. Always test in a hidden spot first. Do not aim the heat gun at one spot for too long.
- Warm Water and Soap: For lighter or water-soluble glues, a bucket of warm water with a few drops of dish soap can help. Mop the area, letting the water sit on the glue for 5-10 minutes. Then, try scraping or scrubbing with a stiff brush. This method is gentle and always worth trying first.
- Commercial Adhesive Removers: For stubborn glues, a specialized adhesive remover is often necessary.
- Types: Look for removers designed for flooring adhesives. Many are citrus-based or petroleum-based.
- Application: Always read the product instructions. Apply to a small, hidden area of the tile first. This checks for discoloration or damage.
- Ventilation: Use in a well-ventilated area. Wear gloves and a mask.
- Process: Apply the remover as directed. Let it sit for the recommended time. Then, scrape off the softened glue. You might need multiple applications.
- Rinse: After removal, thoroughly rinse the tile surface with clean water. This removes any chemical residue.
When using any solvent, be mindful of your grout. Some chemicals can stain or degrade grout lines. If possible, avoid letting strong solvents sit on grout for extended periods.
Dealing with Carpet Tape Residue
Carpet tape residue is often sticky and gummy. It can be tricky to remove. It often pulls apart, leaving tiny sticky pieces. I have found several methods effective here.
- Scraping: Similar to glue, a sharp scraper or putty knife can help. The stickiness can gum up the blade quickly.
- Mineral Spirits or Goo Gone: These products are excellent for sticky residues. Apply a small amount to a clean cloth. Rub the residue vigorously. It often starts to roll up into little balls.
- Test first: Always test on an inconspicuous spot of your tile.
- Ventilation: Use in a well-ventilated area.
- Safety: Wear gloves.
- Rubbing Alcohol: For lighter tape residues, rubbing alcohol can also work. Apply to a cloth and rub. It evaporates quickly.
- Hot Water and Soap: For fresh or very light tape residue, hot water with dish soap can sometimes help. Apply with a sponge and scrub.
- Ice: For thick, gummy tape residue, sometimes freezing it can help. Place an ice pack over the residue until it becomes brittle. Then, chip or scrape it off. This works by making the tape less sticky and more solid.
After removing adhesive, clean the tile. Even if the tile looks clean, there will be residue. You can use a general tile cleaner or warm water and soap. Cleaning your tile floors thoroughly is an essential next step. This prepares your tile for whatever comes next. It also ensures a truly clean finish.
Restoring Your Tile: Cleaning and Inspecting the Floor
Once the carpet, padding, tack strips, and most of the adhesive are gone, your tile floor is exposed. This is an exciting part of the process! However, it is not completely finished. Your tile will likely be dusty and might still have some stubborn residue. Now is the time to restore its shine. I always follow up with a thorough cleaning and inspection.
Deep Cleaning the Tile Surface
A standard mop and bucket might not be enough for this job. You need to deep clean the tile. Decades of dirt and grime might have settled on it. This step brings out the true beauty of your tile.
- Vacuum Thoroughly: Start by vacuuming the entire floor. Use a powerful vacuum with a brush attachment. Get into corners and along edges. Remove all loose dirt, dust, and tiny debris. Any small grit left will turn into muddy streaks when you start wet cleaning.
- Choose a Tile Cleaner: Select a cleaner suitable for your type of tile.
- General Purpose: For most ceramic or porcelain tiles, a pH-neutral cleaner works well. You can also use a mixture of warm water and a few drops of dish soap.
- Specific Tiles: If you have natural stone tile (like marble, granite, or travertine), use a cleaner specifically formulated for stone. Acidic cleaners can etch or damage natural stone.
- Homemade Solutions: A mixture of white vinegar and water (1:1 ratio) can be effective for ceramic/porcelain, but avoid it on natural stone as the acid can cause damage.
- Apply and Scrub: Apply the cleaner according to product instructions. Let it sit for the recommended time to break down dirt. Use a stiff-bristled brush or a grout brush for scrubbing. Focus on areas with remaining haze or residue. You might need to put some effort into this.
- Rinse Thoroughly: This is crucial. After scrubbing, rinse the floor with clean water multiple times. Use a clean mop or sponge. Change the rinse water often. You want to remove all cleaner residue. Leftover cleaner can leave a sticky film that attracts dirt.
- Dry Completely: Allow the floor to air dry, or use clean, dry towels to speed up the process. Ensure no moisture remains, especially in grout lines.
For stubborn grime or adhesive haze, you might need to repeat the deep cleaning process. If you want to go even further, consider how to deep clean tile floors. This will make them sparkle.
Addressing Grout Lines
Grout lines collect a lot of dirt. They are porous and absorb grime over time. After removing carpet, grout lines can look very dirty. Bringing them back to life will significantly improve your floor’s appearance.
- Grout Brush: A small, stiff-bristled brush is perfect for cleaning grout. You can find brushes specifically designed for grout.
- Grout Cleaner: Use a specialized grout cleaner. Many are oxygen-based or contain mild bleaches. Again, check if it is safe for your specific tile type, especially if it is natural stone.
- Baking Soda Paste: For a natural option, make a paste with baking soda and water. Apply it to the grout lines. Let it sit for 10-15 minutes. Then, scrub with a grout brush.
- Hydrogen Peroxide: For tougher stains, a mix of baking soda and hydrogen peroxide can work wonders. Apply the paste, scrub, and rinse well.
- Steam Cleaner (Optional): A steam cleaner with a nozzle attachment can effectively clean and sanitize grout lines. The hot steam loosens dirt and grime without chemicals.
After cleaning, consider sealing your grout lines. Sealing protects them from future stains and makes them easier to clean. This is an excellent preventative step after all your hard work. You can learn more about how to clean kitchen floor tile grout for more specific tips on this area.
Inspecting for Damage
Once your tile floor is clean and dry, take time to inspect it. This step ensures you have not missed anything. It also helps you spot any hidden issues.
- Check for Leftover Residue: Look closely for any remaining adhesive, tape, or padding bits. Sometimes, a thin, hazy film remains. If you find any, repeat the appropriate removal and cleaning steps.
- Inspect Tile Condition:
- Cracks or Chips: Look for any new cracks or chips in the tile that might have occurred during removal. While rare if done carefully, it is possible.
- Loose Tiles: Gently tap on tiles. A hollow sound might indicate a loose tile. If you find loose tiles, you might need to re-grout or re-set them.
- Grout Condition: Check the grout for cracks, crumbling, or missing sections. Repairing damaged grout is important for the longevity and appearance of your floor.
- Assess Overall Appearance: Step back and look at the entire floor. Does it look uniformly clean? Does it match your vision?
Taking the time for this final inspection is important. It ensures your hard work results in a beautiful, ready-to-use tile floor. Now, your formerly hidden tile is ready to shine!
Disposal and Next Steps: Finishing the Job
You have done a lot of hard work. The carpet is out, the tile is clean, and your space feels new. The final part of the project involves proper disposal of the old materials and planning what is next for your uncovered tile floor. This last step ensures a complete and tidy transformation.
Properly Disposing of Old Carpet and Materials
Old carpet, padding, and tack strips cannot just go into regular household trash. They are bulky and often require specific disposal methods. Understanding local regulations is key.
- Check Local Waste Management Rules: Contact your local waste management facility or visit their website. They will have specific guidelines for carpet disposal.
- Bulk Waste Pickup: Many cities offer scheduled bulk waste pickup days. You might need to call ahead to arrange this.
- Drop-off Centers: Some areas have recycling or waste transfer stations where you can drop off bulky items for a fee.
- Landfill: As a last resort, you might need to take it directly to a landfill.
- Prepare for Disposal:
- Rolls: Ensure carpet and padding are rolled tightly and secured with tape or twine. This makes them easier to handle.
- Tack Strips: As mentioned before, wrap tack strips securely in old carpet scraps, cardboard, or a thick plastic bag. This prevents the sharp tacks from injuring waste handlers or tearing trash bags.
- Small Debris: Place smaller scraps of carpet, padding, and dust into heavy-duty trash bags.
- Consider Recycling: Some communities have carpet recycling programs. This is a more environmentally friendly option. Check if this is available in your area.
Improper disposal can lead to fines. It is worth taking a few minutes to confirm the correct way to get rid of the materials. Responsible disposal is part of finishing the project correctly.
Considering New Flooring or Enjoying Your Tile
Now that your tile floor is exposed and clean, you have choices. You can enjoy the natural beauty and practicality of your tile. Or, you might decide to lay down new flooring.
- Embrace Your Tile:
- Benefit from Durability: Tile is incredibly durable. It withstands heavy foot traffic, spills, and wear.
- Easy Maintenance: Tile is very easy to clean. Regular sweeping and mopping keep it looking great. This is a major benefit over carpet.
- Allergen Reduction: Unlike carpet, tile does not trap allergens, dust mites, or pet dander. This makes it a healthier choice, especially for allergy sufferers.
- Visual Appeal: Appreciate the design, color, and pattern of your tile. It might be a classic look you had forgotten.
- Add Rugs: You can always add area rugs for warmth, softness, or a splash of color. They can be changed out easily. Ensure you use anti-slip rug pads to keep rugs from moving on your tile. You can find more information about how to keep rugs from slipping on tile.
- Plan New Flooring (If Desired):
- Subfloor Ready: Your clean, level tile floor might serve as an excellent subfloor for new flooring.
- Consider Options: If you decide against the tile, you now have a clean slate. You could install laminate, luxury vinyl plank (LVP), engineered wood, or even new carpet.
- Professional Advice: If installing new flooring over existing tile, research specific requirements. Some flooring types require the tile to be perfectly level. Others might need a specific underlayment.
- DIY vs. Professional: Decide if you will install the new floor yourself or hire a professional.
My experience shows that many people love their tile once it is uncovered. It offers a fresh, clean, and practical surface. Whether you keep the tile or install new flooring, you have successfully transformed your space. You have completed a significant home improvement project.
Frequently Asked Questions About Removing Carpet from Tile Floor
Q1: Is it hard to remove carpet from tile?
Removing carpet from tile floor is a job most homeowners can do themselves. It requires manual labor and patience. It is not overly complex, but it can be time-consuming, especially when dealing with old adhesive. Having the right tools makes the process much easier. Breaking the job into steps helps manage the work.
Q2: What tools do I need to take carpet off tile?
You will need a utility knife with extra blades, a pry bar or pliers for tack strips, and a floor scraper or putty knife for adhesive. Safety gear like gloves, safety glasses, and a dust mask are also essential. For stubborn glue, you might need a heat gun or a commercial adhesive remover.
Q3: How do you get old carpet glue off tile?
To remove old carpet glue from tile, start by scraping with a floor scraper. For tougher glue, you can gently heat it with a heat gun to soften it, then scrape. Alternatively, use a commercial adhesive remover designed for flooring. Always test any cleaner or solvent in a hidden area of your tile first to prevent damage or discoloration.
Q4: Will removing carpet damage my tile floor?
If done carefully, removing carpet should not damage your tile floor. The main risks are chipping tiles when prying up tack strips or scratching the tile when scraping adhesive. Using proper techniques, like placing protective material under a pry bar, and being patient will help prevent damage.
Q5: How long does it take to remove carpet from a room with tile underneath?
The time it takes to remove carpet from a tiled room varies based on room size, carpet type, and adhesive amount. A small room might take a few hours. A large room could take a full day or more. Adhesive removal often takes the most time. Being prepared and working steadily speeds up the process.
Conclusion
Taking the carpet out of tile floor is a rewarding project.
- carpet removal
- tile flooring
- DIY

Davia Murnell
Room Cleaning Expert
Before joining HEG, I spent over a decade running my own window cleaning business, where I perfected streak-free techniques and learned the ins and outs of specialty glass care. Now, I bring that expertise to a broader mission—helping homeowners maintain sparkling windows and beautiful outdoor spaces. From skylights and sliding doors to patio glass and outdoor furniture, I believe every surface deserves attention and care. I share practical tips and proven methods that make even the toughest cleaning jobs feel manageable. Whether you're battling pollen on the porch or smudges on high windows, I’m here to help you see your home in a whole new light—literally.