· Todd Martin · Home Improvement Tools · 20 min read
How To Turn On Craftsman Air Compressor

Mastering Your Craftsman Air Compressor: Simple Startup Steps
Imagine getting that tire inflated or completing your carpentry project without a hitch. It all starts with knowing how to turn on your Craftsman air compressor correctly. Many people find themselves wondering about the proper steps to power up their unit. A Craftsman air compressor is a powerful tool for many tasks. Understanding its startup process ensures safety and efficiency. This guide will walk you through every step. We will cover initial checks, power connection, and daily operation. You will gain confidence in operating your compressor.
Takeaway
- Inspect Before Use: Always check for damage, oil levels, and power cord integrity.
- Prioritize Safety: Ensure proper ventilation and a stable surface.
- Connect Correctly: Use a grounded outlet with appropriate voltage.
- Perform First Startup: Follow break-in procedures for new, oil-lubricated models.
- Operate Confidently: Turn the pressure switch to “ON” or “AUTO” for standard use.
- Troubleshoot Issues: Know basic steps if the compressor does not start.
To turn on a Craftsman air compressor, ensure it is plugged into a grounded outlet. Locate the power switch or pressure switch lever, typically marked ‘ON/OFF’ or ‘AUTO/OFF’. Flip it to the ‘ON’ or ‘AUTO’ position. The compressor will then begin to pressurize the tank to its cut-off pressure.
Understanding Your Craftsman Compressor Components
Before you even think about how to turn on your Craftsman air compressor, you must understand its basic parts. Knowing these components helps you operate the machine safely. It also helps in troubleshooting any issues that might come up. Each part plays a role in the compressor’s function.
Your air compressor has a motor that drives the pump. The pump compresses air and sends it into the storage tank. This tank holds the pressurized air for your tools. A pressure switch monitors the air pressure in the tank. It turns the motor on and off automatically. This switch maintains the correct pressure range.
The regulator controls the air pressure delivered to your tools. You can adjust it to suit different applications. Gauges show the tank pressure and the regulated output pressure. A safety relief valve is crucial; it releases excess pressure if the primary system fails. Lastly, a drain valve sits at the bottom of the tank. It allows you to remove moisture. Regular draining prevents rust inside the tank.
Familiarizing yourself with these parts ensures you can use your compressor effectively. Always consult your specific model’s user manual. Manuals provide detailed diagrams and instructions unique to your unit. This knowledge forms the foundation for proper operation.
Key Components to Locate:
- Pressure Switch: This is your primary on/off control. It often has settings like “OFF,” “AUTO,” or “ON.”
- Tank Pressure Gauge: This gauge displays the current air pressure inside the storage tank.
- Regulator Knob: This knob adjusts the working pressure for your air tools.
- Output Pressure Gauge: This gauge shows the air pressure being sent to your tools.
- Drain Valve: Located at the bottom of the air tank, it drains condensation.
- Power Cord: The cable connects your compressor to the electrical outlet.
- Air Filter: This protects the pump from dust and debris.
Knowing where these parts are helps you follow all startup steps. It also makes maintenance easier. For example, if your compressor does not build pressure, you might check the pressure switch or other components. Why won’t my Craftsman air compressor build pressure explains more about pressure issues. Understanding these parts is the first step toward confident use.
Prioritizing Safety: Essential Checks Before Powering On
Safety is not just a suggestion; it is a requirement. Before you attempt to turn on your Craftsman air compressor, you must perform several safety checks. Ignoring these steps can lead to damage to the unit or, more importantly, injury to yourself. I always take a few moments to look over my compressor. This quick inspection ensures a safe start.
First, check the area around the compressor. Make sure it is clear of clutter and debris. The compressor needs good ventilation. Do not operate it in a confined space. Poor ventilation can cause the motor to overheat. This leads to early component failure. Place the compressor on a stable, level surface. Uneven ground can cause the unit to tip over. This is a safety hazard, especially when the tank is full of air.
Next, inspect the compressor unit itself. Look for any visible damage. Check hoses, fittings, and the power cord. A damaged power cord can cause electrical shock. Ensure all connections are secure. If you see frayed wires or damaged parts, do not proceed. Repair or replace them first.
For oil-lubricated models, check the oil level. Running the compressor with low oil can severely damage the pump. Many models have a sight glass or a dipstick for easy checking. Add oil if the level is low. Make sure you use the correct type of oil as specified in your manual. Finding the right oil is simple once you know what to look for. What kind of oil does my Craftsman air compressor use provides more details on oil types.
Finally, ensure the drain valve is closed. The drain valve is at the bottom of the air tank. If it is open, the compressor cannot build pressure. Air will simply escape. Closing it is a simple but critical step. Following these safety checks makes sure your compressor starts up safely.
Pre-Power Checklist:
- Clear the Area: Ensure good ventilation and no obstructions around the compressor.
- Stable Surface: Place the compressor on a flat, solid ground to prevent tipping.
- Inspect for Damage: Check the power cord, hoses, and general unit for any visible wear or damage.
- Check Oil Level (Oil-Lubricated Models): Verify the oil is at the recommended level. Add more if needed.
- Close Drain Valve: Ensure the drain valve at the bottom of the tank is fully closed.
These precautions help prevent accidents. They also prolong the life of your Craftsman air compressor. Taking these few minutes makes a big difference.
Connecting to Power: Electrical Requirements and Considerations
Connecting your Craftsman air compressor to power is not just about plugging it in. You must consider electrical requirements. Using the wrong power source can damage the compressor. It can also trip breakers or create fire hazards. I always double-check the power source. This ensures a smooth start and safe operation.
First, identify the voltage and amperage requirements of your specific Craftsman model. This information is usually on a label near the motor or in the owner’s manual. Most smaller Craftsman compressors run on standard 120-volt household current. Larger units might require 240-volt power. Using a compressor designed for 240V on a 120V outlet will not work. Plugging a 120V compressor into a 240V outlet will damage it.
Always plug the compressor into a grounded outlet. A grounded outlet has three holes. The third hole is for grounding. This protects you from electrical shock. Never use an adapter that defeats the grounding plug. Extension cords should be avoided if possible. If you must use an extension cord, it needs to be heavy-duty. It must have the correct wire gauge for the compressor’s amperage. A thin cord can overheat. This creates a fire risk. It can also cause a voltage drop. This damages the compressor motor over time.
Consider the circuit breaker capacity. A compressor draws a high amount of current during startup. This surge can trip a breaker if the circuit is not strong enough. If your Craftsman air compressor keeps tripping the breaker, it often points to an overloaded circuit or an electrical issue. Why does my Craftsman air compressor keeps tripping breaker offers detailed solutions for this problem. Ensure the circuit breaker is rated for the compressor’s requirements. Dedicated circuits are best for larger compressors.
Once you confirm the electrical setup, plug the power cord firmly into the correct outlet. Do not force the plug. It should fit easily. Your compressor is now ready for the next step. Proper electrical connection is a foundational step for safe and effective use.
Electrical Setup Steps:
- Verify Voltage: Match compressor voltage (e.g., 120V or 240V) to the outlet.
- Grounded Outlet: Always use a three-pronged, grounded electrical outlet.
- Avoid Adapters: Do not use adapters that remove the grounding pin.
- Use Proper Extension Cord (If Needed): Select a heavy-duty cord with the correct wire gauge and length for the compressor’s amperage.
- Check Breaker Capacity: Ensure the electrical circuit can handle the compressor’s startup current.
This careful approach to power connection safeguards both you and your equipment.
Initial Startup Sequence: First-Time Use and Break-In
Turning on your Craftsman air compressor for the very first time involves a special sequence. This is especially true for oil-lubricated models. This initial startup is called the “break-in” period. It is crucial for the longevity and performance of your compressor. I made sure to follow these steps with my first oil-lubricated unit. It helps the internal components settle properly.
For new oil-lubricated compressors, the break-in process typically involves running the compressor without a load. “Without a load” means the tank should not build pressure. You achieve this by leaving the tank drain valve open. This allows air to escape. The compressor runs continuously. This helps seat the piston rings and other moving parts. It also allows the oil to properly lubricate all internal surfaces. Check your manual for the exact break-in duration. It is often 30 minutes to an hour.
During this break-in period, listen to the compressor. It should run smoothly. Watch for any unusual noises or smells. If you notice anything strange, shut it off immediately. The purpose of break-in is to ensure all parts wear in correctly. It minimizes future problems. Skipping this step can lead to premature wear. This reduces the compressor’s lifespan.
After the break-in time, close the drain valve. Then, allow the compressor to build full tank pressure. It should reach its cut-off pressure and shut off automatically. Listen for the automatic shut-off. This confirms the pressure switch is working correctly. Now, your new Craftsman air compressor is ready for normal operation. You have completed its essential first run.
If your Craftsman air compressor does not turn on after these initial steps, there could be underlying issues. Sometimes, it might be a power problem. Other times, it might be a component failure. Understanding common causes can help. Why won’t my Craftsman air compressor turn on provides a comprehensive guide to troubleshooting startup failures. This article can help identify problems if your new compressor fails to start.
Steps for First-Time Startup (Break-In):
- Read the Manual: Always consult your specific Craftsman model’s manual for precise break-in instructions.
- Open Drain Valve: Locate the drain valve at the bottom of the tank and fully open it. This prevents pressure buildup during break-in.
- Power On: Plug in the compressor and turn the pressure switch to the “ON” or “AUTO” position.
- Run Unloaded: Allow the compressor to run for the specified break-in time (e.g., 30-60 minutes) without building pressure.
- Monitor: Listen for normal operation; shut down if unusual noises occur.
- Close Drain Valve: After break-in, turn off the compressor, close the drain valve, and then restart it to build pressure.
- Verify Auto Shut-Off: Confirm the compressor shuts off automatically once it reaches its maximum pressure.
This careful initial startup lays the groundwork for years of reliable use.
Regular Operation: Turning On for Everyday Tasks
Once your Craftsman air compressor has completed its initial setup or break-in, turning it on for daily tasks becomes straightforward. This process is much simpler. You will follow a few quick steps. These steps get your compressor ready for any job. I follow these steps every time I need to use my compressor.
First, ensure the area around your compressor is clear. Good airflow is still important. Check the power cord connection again. Make sure it is secure in a grounded outlet. Confirm the drain valve is fully closed. This prevents air from escaping. The compressor needs to build pressure efficiently. If the tank is already partially pressurized, the compressor will not immediately start until the pressure drops below a certain threshold. This is normal.
Next, locate the pressure switch. This is your main control for turning the unit on and off. Most Craftsman air compressors have a lever or knob on the pressure switch. It usually has “OFF” and “AUTO” or “ON” positions. To start the compressor, simply move the switch to the “AUTO” or “ON” position. The motor will begin to run. The pump will start compressing air. You will hear the familiar hum and feel vibrations.
The compressor will continue to run until the tank reaches its maximum preset pressure. At this point, the pressure switch will automatically turn off the motor. This is its cut-off point. It means the tank is full of compressed air. When you use air, the pressure in the tank drops. Once it drops below a certain level, the pressure switch will automatically turn the motor back on. This maintains consistent pressure for your tools. This automatic cycling is a key feature. It saves energy. It also extends the life of the motor.
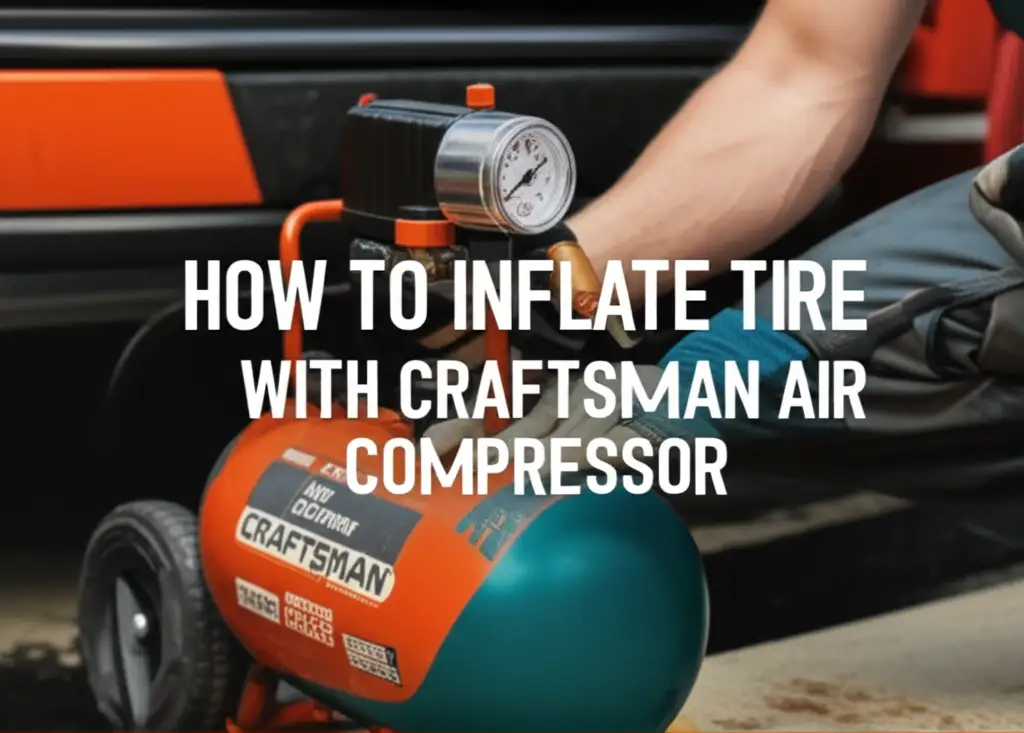
Before connecting any air tools, adjust the pressure regulator. Turn the knob to set the desired working pressure for your tool. Your tool’s manual will specify this pressure. Now your Craftsman air compressor is ready for work. You can connect your air hose and begin your project. For specific tasks like inflating tires, there are further considerations. How to use Craftsman air compressor for tires provides detailed instructions for such applications.
Daily Startup Steps:
- Area Clear: Confirm the compressor area is well-ventilated and free of obstructions.
- Power Check: Ensure the power cord is securely plugged into a proper grounded outlet.
- Close Drain Valve: Verify the tank drain valve is completely closed to allow pressure buildup.
- Locate Pressure Switch: Find the main on/off switch, typically on the pressure switch.
- Turn to “ON” or “AUTO”: Flip the switch to the designated power-on position.
- Wait for Pressure Buildup: Allow the compressor to run until it reaches full pressure and shuts off automatically.
- Adjust Regulator: Set the output pressure using the regulator knob for your specific air tool.
These simple steps make turning on your Craftsman air compressor for regular use a quick and efficient process.
Troubleshooting Common Startup Issues
Sometimes, you try to turn on your Craftsman air compressor, and nothing happens. Or, it starts but acts strangely. This can be frustrating. However, many common startup issues have simple solutions. Knowing what to check can save you time and money. I have encountered a few of these myself. Identifying the problem quickly makes a big difference.
One common issue is that the compressor does not turn on at all. First, check the power supply. Is the compressor plugged in? Is the outlet working? Try plugging another appliance into the same outlet. Check the circuit breaker. A tripped breaker is a frequent cause. If the breaker trips immediately when you try to start the compressor, it might indicate an overload or a short circuit within the compressor itself. For more in-depth solutions to this, consult Why won’t my Craftsman air compressor turn on. This resource covers various reasons for startup failure.
Another problem might be a faulty pressure switch. The pressure switch is crucial. It senses tank pressure. It also acts as the primary power control. If it is stuck or damaged, the compressor might not start. Sometimes, you can hear a click but no motor action. This could mean the motor is getting power but not engaging. Inspect the pressure switch for visible damage. You might hear a hiss if it is leaking air. For more advanced troubleshooting on this part, How to fix Craftsman air compressor pressure switch offers repair steps.
The compressor might start but not build pressure. This usually points to an open drain valve. Ensure it is tightly closed. Other causes include a leaky check valve or a worn pump. If air is escaping from somewhere, the pump cannot pressurize the tank. Listen for hissing sounds.
Lastly, consider the motor’s thermal overload protector. If the motor overheats, this protector shuts it down. This prevents permanent damage. Allow the compressor to cool down. Then, press the reset button, usually a small red button near the motor. Overheating can be caused by poor ventilation, low voltage, or a failing motor. Always ensure adequate airflow.
These checks cover most common startup problems. Systematic troubleshooting helps you pinpoint the exact issue. With a little patience, you can often get your Craftsman air compressor running again.
Common Startup Problem Solutions:
- No Power:
- Check if the compressor is plugged in securely.
- Test the electrical outlet with another device.
- Reset the circuit breaker if it has tripped.
- Compressor Runs but No Pressure:
- Confirm the tank drain valve is fully closed.
- Listen for air leaks from the tank, hoses, or fittings.
- Check the check valve for proper function (requires disassembling the check valve).
- Motor Hums but Doesn’t Start:
- Check for a seized pump or motor.
- Verify correct voltage supply.
- Consider a faulty capacitor (for certain motor types).
- Compressor Shuts Off Quickly / Overheats:
- Ensure proper ventilation around the motor.
- Check for a tripped thermal overload protector and reset it after cooling.
- Verify correct oil level if oil-lubricated.
By following these troubleshooting steps, you can often resolve issues quickly.
Post-Operation Care: Turning Off and Maintenance Tips
Knowing how to turn on your Craftsman air compressor is important, but knowing how to turn it off properly and maintain it is equally vital. Proper shutdown and regular care extend the life of your unit. It also ensures the compressor is ready for your next project. I always dedicate a few minutes to these steps after each use.
To turn off your Craftsman air compressor, first disconnect any air tools. Then, move the pressure switch lever from “ON” or “AUTO” to the “OFF” position. This stops the motor. The compressor will no longer build pressure. However, compressed air remains inside the tank.
It is crucial to drain the air from the tank after each use. This serves two purposes. First, it relieves pressure from the tank. This protects the tank from constant stress. Second, and more importantly, it removes moisture. Air compression creates condensation. This water collects at the bottom of the tank. If left inside, this moisture can cause rust. Rust weakens the tank over time. This creates a dangerous condition. To drain the tank, slowly open the drain valve located at the bottom. You will hear air and water escape. Keep it open until all air and water are expelled. Then, close the valve tightly. Detailed instructions on maintaining the drain valve can be found in How to replace drain valve on Craftsman air compressor.
Regular maintenance also includes checking the air filter. A clogged filter reduces efficiency. It makes the motor work harder. Clean or replace the filter as recommended in your manual. For oil-lubricated models, check and change the oil periodically. Dirty or low oil levels cause excessive wear. How to check oil in Craftsman air compressor offers guidance on this critical task.
Finally, store your compressor in a clean, dry place. Protect it from extreme temperatures. Keeping it covered prevents dust and debris buildup. These simple post-operation steps and maintenance routines ensure your Craftsman air compressor remains reliable. They also keep it safe for years to come.
Essential Post-Operation Steps:
- Disconnect Tools: Remove any air hoses or tools attached to the compressor.
- Turn Off Power: Move the pressure switch to the “OFF” position.
- Drain Tank Air: Slowly open the drain valve to release all air and condensation.
- Close Drain Valve: Once the tank is empty, securely close the drain valve.
Ongoing Maintenance Tips:
- Check Air Filter: Inspect and clean or replace the air filter regularly.
- Monitor Oil Level: For oil-lubricated units, check oil before each use and change it as recommended.
- Inspect Hoses and Fittings: Look for cracks or leaks in hoses and tighten loose fittings.
- Clean Exterior: Keep the compressor clean and free of dust and debris.
- Proper Storage: Store in a dry, protected area away from extreme temperatures.
Consistent maintenance prevents breakdowns and maintains performance.
Enhancing Longevity: Advanced Tips for Your Craftsman Compressor
Beyond basic startup and shutdown, a few advanced practices can significantly extend the life and efficiency of your Craftsman air compressor. These are habits I picked up over years of using various compressors. They help avoid common wear and tear issues.
First, ensure your electrical supply is stable. Voltage fluctuations can stress the motor. If you notice lights flickering or other power inconsistencies, address them before using the compressor. This is especially true for larger units that draw significant power. A stable power supply prevents the motor from overheating. It also stops it from struggling to start.
Consider the ambient temperature. Air compressors operate best within a specific temperature range. Extreme cold can make the oil too thick. This makes startup difficult. It increases motor strain. Extreme heat can lead to overheating. This triggers the thermal overload. Store and operate your compressor in a moderate environment. If working in cold conditions, you might need special low-temperature compressor oil.
Regularly check for air leaks. Even small leaks force the compressor to run more often. This increases wear on the motor and pump. Listen for hissing sounds. You can also spray soapy water on fittings and hoses. Bubbles indicate a leak. Repair any leaks promptly. This saves energy. It also reduces compressor runtime.
Maintain proper oil levels consistently for oil-lubricated models. As mentioned before, How to check oil in Craftsman air compressor is a good reference. But beyond just checking, use only the specific type of compressor oil recommended by Craftsman. Automotive oils are not suitable. They lack the necessary additives for compressor pumps. Incorrect oil can lead to excessive wear. It can also cause carbon buildup.
Finally, do not overwork your compressor. Respect its duty cycle. This means avoiding continuous, prolonged use beyond its design limits. If your task requires constant airflow, consider taking breaks. This allows the compressor motor to cool down. It also prevents the unit from straining. Pushing the compressor beyond its limits drastically reduces its lifespan. Understanding these advanced tips helps ensure your Craftsman air compressor provides reliable service for many years.
Advanced Maintenance Practices:
- Stable Power: Ensure your electrical supply is consistent and meets compressor requirements.
- Optimal Temperature: Operate and store the compressor within its recommended temperature range to prevent motor strain.
- Leak Detection: Periodically check for air leaks using soapy water and repair them immediately.
- Correct Oil: Always use the specific type of compressor oil recommended by Craftsman for oil-lubricated models.
- Respect Duty Cycle: Avoid overworking the compressor; allow it to rest to prevent overheating and premature wear.
- Air Filter: Clean or replace the air filter regularly to maintain efficiency and prevent motor strain.
- Check Belts: For belt-driven models, inspect belt tension and condition periodically.
These additional steps contribute significantly to the long-term health of your compressor.
When Your Craftsman Air Compressor Won’t Cooperate: Beyond Basic Startup
Sometimes, even after following all the startup and troubleshooting steps, your Craftsman air compressor refuses to cooperate. This can be frustrating. It indicates a deeper issue than a simple oversight. Knowing when to seek professional help or delve into more complex diagnostics is important. I learned this through experience. Not every problem has an easy fix.
If your compressor still won’t turn on after checking power, the pressure switch, and the thermal overload, the problem might be with the motor itself. The motor could be seized. It could have burnt windings. Or, it could have a faulty start capacitor. A humming sound without the motor turning often points to a capacitor issue. Replacing a capacitor is a job for someone comfortable with electrical work. If your compressor makes a loud click but doesn’t start, the motor relay might be failing.
Another complex issue is if the compressor builds pressure very slowly or not at all, even after you close the drain valve. This could indicate worn piston rings. It could be a damaged valve plate. These issues reduce the pump’s ability to compress air. These repairs often require disassembling the pump. This is a more involved repair.
If your compressor keeps tripping the breaker, and you have ruled out an overloaded circuit, the motor might be drawing too much current. This happens if the motor is failing.
- Craftsman Air Compressor
- Air Compressor Startup
- Powering Air Compressor
- Compressor Operation

Todd Martin
Senior Writer
With over 15 years of experience in home renovation and design, I started HEG to share what I’ve learned with homeowners who want to create spaces that are both beautiful and functional. I’ve always believed in a hands-on approach, and over the years, I’ve picked up practical solutions that actually work. Through HEG, I aim to make home improvement more approachable, sharing real tips that help you create a home you truly love.