· Todd Martin · Tools · 20 min read
How To Turn On Husky Air Compressor 8 Gallon
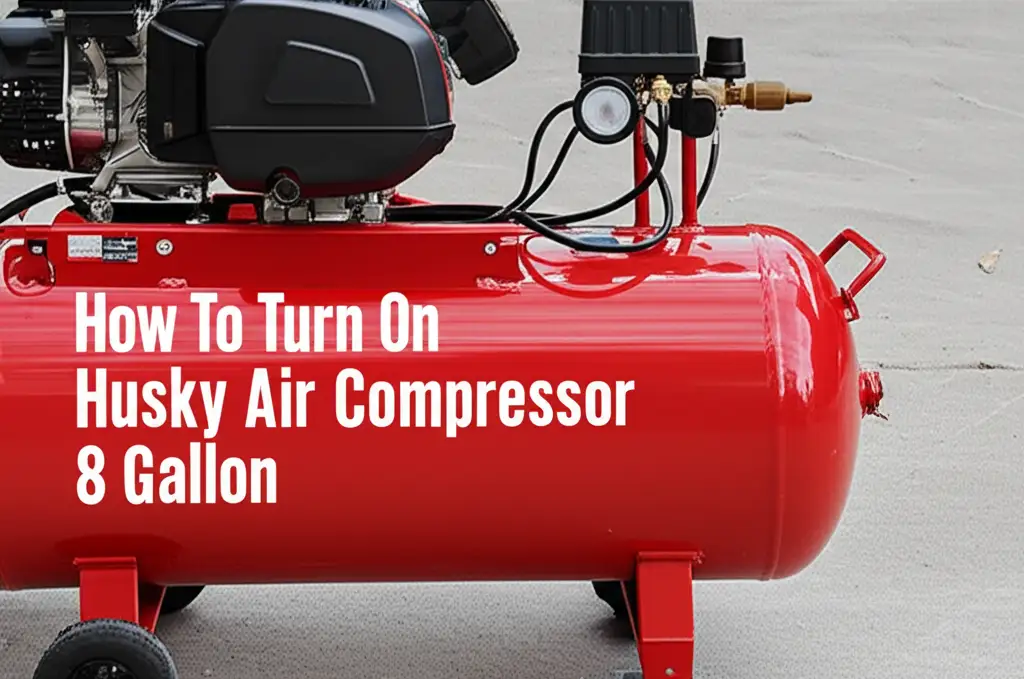
Unlock Power: How To Turn On Your Husky Air Compressor 8 Gallon
An air compressor is a must-have tool for many home projects. Whether you inflate tires, power nail guns, or use other air tools, your Husky Air Compressor 8 Gallon provides reliable power. But how do you get started? Learning to turn on your new Husky compressor correctly is key to safe and effective operation.
This article guides you through the process. We cover everything from initial setup and safety checks to the exact steps for starting your compressor. You will learn about important components, troubleshooting common issues, and essential maintenance. Proper startup ensures your compressor works well for many years. Let’s get your Husky Air Compressor 8 Gallon ready for work.
Takeaway
- Place the compressor on a stable, level surface.
- Ensure the power switch is in the “OFF” position before plugging it in.
- Plug the compressor into a grounded electrical outlet.
- Close the tank drain valve and ensure all connections are secure.
- Turn the power switch to the “ON” position.
- Allow the tank to pressurize fully before use.
Answer to the Main Query
To turn on your Husky Air Compressor 8 Gallon, first place it on a stable surface. Ensure the power switch is off. Plug the compressor into a grounded outlet. Close the drain valve. Then, flip the power switch to the “ON” position. The motor will start and fill the tank with air.
Understanding Your Husky 8 Gallon Air Compressor
Your Husky 8-gallon air compressor is a powerful machine. It stores compressed air to power various tools. Knowing its parts helps you use it safely. This understanding is the first step before you turn on your Husky Air Compressor 8 Gallon. It helps ensure everything works as it should.
Each part of the compressor has a specific job. The motor creates power. The pump compresses air. The tank stores the compressed air. There are also gauges and valves that control its operation. Learning these parts makes you a more confident user. You will handle your tool with greater knowledge.
Key Components to Identify
Before starting, identify the main parts of your Husky compressor. These parts are important for safe operation. You must know where each one is located. This knowledge prepares you for effective use.
- Power Switch: This switch turns the compressor motor on or off. Always ensure it is in the “OFF” position before plugging in the unit. It controls all power to the compressor.
- Air Tank: This is the large cylinder that stores compressed air. The 8-gallon tank holds enough air for many tasks. It needs regular draining to prevent rust.
- Pressure Gauge (Tank): This gauge shows the current air pressure inside the tank. It tells you how much air is stored. You use this to monitor tank fill.
- Pressure Gauge (Regulated/Outlet): This gauge shows the air pressure being delivered to your tools. You adjust this pressure using the regulator. It ensures tools receive correct pressure.
- Pressure Regulator: This knob adjusts the air pressure that exits the compressor. Turn it to set the working pressure for your air tools. It controls output.
- Quick-Connect Coupler: This is where you attach your air hose. It allows for quick and easy connection of air tools. It provides a secure link.
- Drain Valve: This valve is usually located at the bottom of the air tank. You open it to release condensation from the tank. Regular draining prevents rust and extends tank life.
- Safety Valve: This valve automatically releases air if the tank pressure exceeds a safe limit. It is a critical safety feature. Do not tamper with this valve.
Essential Safety Precautions
Safety is very important when operating any power tool, especially an air compressor. High-pressure air can be dangerous. Following safety rules protects you and others. Always read your owner’s manual before using the compressor.
- Read the Manual: Always read the owner’s manual thoroughly before operating your Husky Air Compressor 8 Gallon. The manual contains specific safety information and operating instructions for your model.
- Wear Eye Protection: Always wear ANSI-approved safety goggles or a face shield when operating the compressor or air tools. Air can blow debris.
- Wear Hearing Protection: Air compressors can be noisy. Wear hearing protection to prevent hearing damage, especially during extended use.
- Ensure Proper Ventilation: Operate the compressor in a well-ventilated area. The motor generates heat. Adequate airflow prevents overheating.
- Check for Damage: Before each use, inspect the compressor for any visible damage, loose parts, or leaks. Do not operate a damaged compressor.
- Use Grounded Outlets: Always plug the compressor into a properly grounded electrical outlet. This prevents electrical shock. Do not remove the grounding prong.
- Maintain Clear Work Area: Keep your work area clean and free of clutter. This prevents tripping hazards. Ensure hoses are not a danger.
- Do Not Direct Air at People or Animals: Never point the air nozzle at yourself or others. High-pressure air can cause serious injury.
- Depressurize Before Servicing: Always turn off the compressor, unplug it, and release all air pressure from the tank before performing any maintenance or adjustments.
Preparing Your Husky Compressor for First Use
Proper preparation ensures a smooth first operation. This step also extends the life of your machine. Before you turn on your Husky Air Compressor 8 Gallon, you must set it up correctly. This includes choosing the right spot and checking power needs. Doing these steps helps prevent problems later.
Many people skip preparation steps. This can lead to inefficient operation or even damage. Take your time with this part of the process. A well-prepared compressor works better and lasts longer. It makes your projects easier to complete.
Choosing the Right Location
The place where you set up your compressor matters. A good location ensures safety and performance. Choose a spot that meets specific requirements. This helps your compressor run efficiently.
- Stable Surface: Place the compressor on a stable, level surface. This prevents the unit from tipping over during operation. A concrete floor is ideal.
- Ventilation: Ensure the area has good ventilation. The compressor motor generates heat, and proper airflow helps to cool it. Do not place it in a confined space.
- Away from Walls: Keep the compressor at least 12 inches away from any walls or obstacles. This allows for adequate air circulation around the motor and pump.
- Dry Area: Operate and store the compressor in a dry area. Moisture can damage electrical components and lead to rust. Avoid damp basements or outdoor exposure.
- Away from Flammable Materials: Never operate the compressor near gasoline, paint fumes, or other flammable liquids or gases. Sparks from the motor can ignite them.
- Near Power Outlet: Position the compressor close to a grounded electrical outlet. Avoid using long extension cords, as they can cause voltage drop and overheat. If an extension cord is needed, use one specifically rated for the compressor’s power requirements.
Power Requirements and Connections
Connecting your compressor to power correctly is vital. Incorrect power can damage the unit or create a fire hazard. Understand the power needs of your Husky Air Compressor 8 Gallon. Always use the right type of outlet and cord.
- Voltage: Check the voltage requirements listed on your compressor’s data plate. Most Husky 8-gallon compressors operate on standard 120-volt household current. Ensure your outlet matches this requirement.
- Amperage: Note the amperage draw of your compressor. It typically requires a dedicated 15-amp or 20-amp circuit. Plugging it into an overloaded circuit can trip the breaker.
- Grounded Outlet: Always plug the compressor into a properly grounded, three-prong electrical outlet. The grounding prong protects against electrical shock. Do not modify the plug or use an adapter.
- Extension Cords (Use with Caution): If an extension cord is absolutely necessary, use one that is heavy-duty and rated for outdoor use. It should have a gauge (AWG) thick enough to handle the compressor’s amperage without overheating. A 12-gauge or 10-gauge cord is often recommended for longer runs. Shorter cords are better.
- Dedicated Circuit: Whenever possible, use a dedicated electrical circuit for your compressor. This means no other major appliances are sharing that circuit. This prevents voltage drops and circuit overloads.
- Inspect Power Cord: Before each use, inspect the compressor’s power cord for cuts, frayed wires, or damaged insulation. Replace any damaged cords immediately. A damaged cord is a fire hazard.
Step-by-Step Guide to Turning On Your Husky Air Compressor 8 Gallon
Starting your Husky 8-gallon air compressor is simple once you know the steps. Follow this guide for a safe and effective startup. This process ensures your compressor builds pressure correctly. You can then use it for your projects.
I find these steps easy to remember. They help me get my compressor ready quickly. Always double-check each step. This prevents any issues during startup.
Connecting to Power
The initial connection is very important. It sets the stage for the compressor’s operation. Make sure the power connection is secure and safe. This step prevents electrical problems.
- Ensure Power Switch is OFF: Locate the power switch on your Husky Air Compressor 8 Gallon. It often looks like a rocker switch. Make sure it is in the “OFF” (or “0”) position before proceeding. This is a critical safety check.
- Inspect Power Cord and Outlet: Visually check the compressor’s power cord for any damage like cuts or frayed insulation. Also, ensure the electrical outlet is clean and free of debris. A damaged cord or outlet can be dangerous.
- Plug in the Compressor: Insert the compressor’s three-prong plug firmly into a properly grounded 120-volt electrical outlet. Ensure the connection feels secure. Do not force the plug if it does not fit.
Setting the Pressure Regulator
The pressure regulator controls the air pressure delivered to your tools. You need to set it correctly for the specific tool you are using. This protects your tools and ensures proper function. Setting it wrong can damage sensitive tools.
- Locate the Regulator Knob: Find the pressure regulator knob on your compressor. It is usually a round knob near the outlet air gauge. This knob controls the output pressure.
- Turn Knob Counter-Clockwise: Before starting the compressor, turn the regulator knob fully counter-clockwise until it is completely open (or the pressure is at its lowest setting). This reduces resistance during initial fill.
- Attach Air Hose (Optional for Startup): While not strictly required for turning on the compressor, you can attach your air hose to the quick-connect coupler at this stage. Ensure it is securely fastened. This is if you plan to use it immediately.
Activating the Power Switch
This is the final step to start the compressor. Once you flip the switch, the motor will engage. It will begin compressing air into the tank. Listen for the sound of the motor starting up.
- Close the Drain Valve: Ensure the drain valve, located at the bottom of the air tank, is fully closed. Turn it clockwise until it is tight. If it is open, air will escape, and the tank will not pressurize.
- Turn On the Power Switch: Flip the power switch from the “OFF” position to the “ON” (or “I”) position. The compressor motor will start running immediately.
- Monitor Pressure Build-Up: Watch the tank pressure gauge. The compressor will start filling the air tank. It will run until it reaches its maximum cut-out pressure, then the motor will automatically shut off. This indicates the tank is full.
- Adjust Regulator for Tools: Once the tank is full and the compressor has shut off, you can adjust the pressure regulator. Turn the knob clockwise slowly while watching the regulated air gauge until you reach the desired pressure for your air tool.
Initial Run-In Procedures for Longevity
When you first get a new air compressor, especially a piston-driven one like the Husky 8-gallon model, a “run-in” period is important. This helps parts seat properly. It prepares the compressor for a long working life. Skipping this can affect performance and durability.
This process lets the internal components wear in evenly. It helps to lubricate parts and remove any manufacturing residues. Think of it as breaking in a new car engine. I always do this with new equipment.
Understanding the Break-In Period
The break-in period allows the piston rings and cylinder walls to wear against each other. This creates a good seal. It ensures the compressor works efficiently. It also circulates any initial lubrication.
- Purpose: The run-in process helps “seat” the piston rings inside the cylinder. This creates an optimal seal for efficient air compression. It also allows internal components to wear together smoothly.
- Procedure (General):
- Ensure the tank drain valve is fully open. You do not want the tank to build pressure during this period.
- Turn the power switch to the “ON” position. The compressor motor will run continuously.
- Let the compressor run for 20-30 minutes without building pressure in the tank. This allows the moving parts to acclimate.
- After the run-in, turn off the compressor. Close the drain valve.
- Allow the compressor to cool down for at least 10-15 minutes.
- The compressor is now ready for normal operation. It can build pressure.
Monitoring During Initial Operation
Even after the run-in, pay attention during the first few uses. This helps catch any early problems. You want to ensure everything is working correctly. Early detection can prevent bigger issues.
- Listen for Unusual Noises: Pay attention to any grinding, knocking, or excessive rattling sounds. A new compressor might have minor unusual sounds, but loud or persistent noises indicate a problem.
- Check for Leaks: Listen for hissing sounds, which indicate air leaks from fittings or hoses. You can also spray a soap-and-water solution on connections; bubbles show a leak. Address any leaks promptly.
- Monitor Temperature: Feel the motor and pump housing. They will get warm, but they should not be excessively hot. Overheating can be a sign of motor strain or poor ventilation.
- Observe Pressure Build-Up: After the run-in, allow the tank to fill completely and observe how quickly it reaches maximum pressure. Compare this to specifications in your manual.
- Automatic Shut-Off: Ensure the compressor automatically shuts off when it reaches its maximum pressure. This confirms the pressure switch is working correctly. It should then cycle back on when pressure drops.
Troubleshooting Common Startup Issues
Sometimes, your Husky Air Compressor 8 Gallon might not turn on as expected. Or, it might have issues after starting. Knowing how to troubleshoot can save you time and frustration. Most problems have simple solutions. Always follow safety steps before troubleshooting.
I’ve had my compressor not start a few times. Usually, it’s something simple I overlooked. Checking these common issues usually fixes it quickly.
Compressor Not Starting
If your compressor does not turn on, check these common points. Many startup problems relate to power or basic connections. Go through this list systematically.
- Is it Plugged In? First, ensure the power cord is securely plugged into a live, grounded electrical outlet. A loose connection can prevent power.
- Is the Outlet Working? Plug another appliance into the same outlet to confirm it has power. The circuit breaker for the outlet might be tripped. Reset the breaker if needed.
- Power Switch Position: Double-check that the power switch on the compressor is firmly in the “ON” (or “I”) position. Sometimes it gets bumped to “OFF.”
- Extension Cord Issues: If using an extension cord, ensure it is rated for the compressor’s power and is fully uncoiled. An undersized or coiled cord can cause voltage drop or overheating, preventing startup.
- Overload Protector: Many compressors have a thermal overload protector button. If the compressor overheated, this button might pop out. Push it back in to reset the unit. Allow time for cooling before resetting.
- Motor Hum, No Start: If you hear a hum but the motor does not turn, the compressor might be trying to start under too much pressure. Depressurize the tank completely by opening the drain valve, then try starting again.
- Damaged Cord/Plug: Inspect the power cord and plug for any visible damage. Frayed wires or bent prongs can prevent electrical flow. Replace if damaged.
Pressure Building Slowly or Not At All
If the compressor motor runs but the tank does not fill with air, or fills very slowly, it points to different issues. This indicates air is escaping or not being compressed efficiently. Check these points to find the problem.
- Drain Valve Open: The most common cause is the drain valve at the bottom of the tank being open. Close it completely by turning it clockwise.
- Loose Fittings/Hoses: Listen for hissing sounds around the quick-connect coupler, air hose, or any other fittings. Tighten any loose connections. A leaky connection will prevent pressure build-up.
- Air Filter Blockage: A dirty or clogged air filter restricts airflow into the pump. Check the filter and clean or replace it if it is dirty. Reduced airflow means less air gets compressed.
- Head Gasket/Valve Plate Leak: If you hear air leaking from the cylinder head area, it might be a damaged head gasket or valve plate. This requires professional repair.
- Check Valve Malfunction: The check valve prevents air from flowing back from the tank to the pump when the compressor shuts off. If it fails, air can leak out. This often causes continuous running.
- Low Oil (if applicable): While many 8-gallon Husky compressors are oil-free, some older or larger models might use oil. If so, low oil levels can hinder compression. Check the oil level if your model has a dipstick.
Unexpected Shutdowns
A compressor that turns on but then shuts off unexpectedly has specific causes. This often relates to overheating or motor protection. Understanding these can help you keep it running. For more details on why portable air compressors shut off, you can refer to our guide on Why does my portable air compressor keep shutting off?
- Thermal Overload: The most common reason is that the compressor motor has overheated. The built-in thermal overload protector trips to prevent damage. This usually means you used it too long.
- Solution: Turn off the compressor, unplug it, and allow it to cool down for at least 30 minutes. Then, press the reset button (if present) and try restarting.
- Insufficient Ventilation: Poor airflow around the motor can lead to overheating. Ensure the compressor is in a well-ventilated area, away from walls or obstructions.
- Low Voltage: If the compressor receives insufficient voltage, it struggles to operate and can overheat. This might be due to a long or undersized extension cord, or a circuit with too many devices.
- Over-pressurization: While rare, a faulty pressure switch could cause the compressor to over-pressurize and shut down for safety. The safety valve should release air before this happens.
- Faulty Pressure Switch: A malfunctioning pressure switch might not tell the motor to shut off at the correct pressure, leading to continuous running and eventual overload. Or, it might shut it off too soon.
- Motor Problems: In some cases, internal motor issues, such as worn bearings or a faulty capacitor, can cause the motor to draw too much current and trip the overload. This needs professional repair.
Maintenance Tips for Optimal Compressor Performance
Proper maintenance extends the life of your Husky Air Compressor 8 Gallon. It also ensures it runs efficiently. Regular care prevents major breakdowns. Simple tasks keep your compressor in top shape.
I make sure to do these checks regularly. It saves me money and hassle in the long run. A well-maintained compressor is a reliable compressor.
Draining the Tank Regularly
Water accumulates in the air tank due to condensation. This water causes rust inside the tank. Rust can weaken the tank and lead to leaks or even ruptures. Regular draining is essential. For more information on air compressor tank cleaning, visit How to clean air compressor tank.
- Frequency: Drain the tank after each use, or at least daily if you use the compressor frequently. If humidity is high, drain it more often.
- Procedure:
- Turn off the compressor and unplug it from the power outlet.
- Place a bucket or container under the drain valve at the bottom of the air tank.
- Slowly open the drain valve by turning it counter-clockwise. Air and water will spray out.
- Allow all air and water to escape.
- Once the tank is fully depressurized and all water is out, close the drain valve tightly.
- Importance: This prevents rust buildup inside the tank, which can compromise its structural integrity and contaminate your air tools. It extends the tank’s life.
Checking Oil Levels (if applicable)
Many smaller Husky compressors, including some 8-gallon models, are “oil-free.” This means they do not have oil in the pump and require no oil changes. However, if your specific model uses oil, regular checks are crucial.
- Identify Oil-Free vs. Oiled: Check your compressor’s manual. “Oil-free” models have no dipstick or oil fill port. If your compressor has a dipstick or sight glass, it is an oiled model.
- Checking Procedure (for oiled models):
- Ensure the compressor is off, unplugged, and depressurized.
- Locate the oil fill cap/dipstick or sight glass on the pump.
- If using a dipstick, remove it, wipe it clean, reinsert it (do not screw in), then remove again to check the level. It should be between the “add” and “full” marks.
- If using a sight glass, the oil level should be visible within the marked range.
- Adding Oil: If the oil level is low, add only the type of oil specified in your owner’s manual. Using the wrong oil can damage the pump. Do not overfill.
- Frequency: Check oil levels before each major use or at least weekly for regular use. Change oil according to the manufacturer’s recommendations.
Air Filter Inspection
The air filter keeps dirt and debris out of the compressor’s pump. A clean filter ensures efficient operation and protects internal components. A dirty filter reduces airflow and makes the compressor work harder.
- Frequency: Inspect the air filter regularly, especially if you work in a dusty environment. Replace or clean it every few months, or more often if it looks dirty.
- Procedure:
- Turn off the compressor and unplug it.
- Locate the air filter, usually a small housing near the pump.
- Remove the filter element. Some are paper, some are foam.
- For Foam Filters: Wash gently with warm, soapy water, rinse thoroughly, and let it dry completely before reinserting.
- For Paper Filters: Tap it gently to dislodge dust. If it is heavily soiled, replace it. Do not wash paper filters.
- Reinstall the clean or new filter element.
- Importance: A clean air filter ensures the compressor breathes freely. This helps it run cooler and more efficiently. It also prevents abrasive particles from entering the pump, which can cause premature wear.
Safe Shutdown and Storage Practices
Proper shutdown and storage are as important as correct startup. This protects your Husky Air Compressor 8 Gallon. It keeps the unit ready for next use. It also extends its overall lifespan. Following these steps helps prevent damage and ensures safety.
I always make sure to put my compressor away properly. It is a valuable tool. Taking these extra few minutes pays off over time.
Depressurizing the Tank
Never store or move an air compressor with air pressure inside the tank. This is a safety hazard. Releasing the pressure prevents accidental discharge and stress on the tank. It also protects the safety valve.
- Procedure:
- Turn the compressor’s power switch to the “OFF” position.
- Unplug the compressor from the electrical outlet.
- If an air hose is attached, remove any air tools.
- You can release pressure in two ways:
- Open the Drain Valve: Slowly open the tank drain valve at the bottom of the tank. Air will escape with a hissing sound. Let all air escape until the tank pressure gauge reads zero.
- Use an Air Nozzle: If an air nozzle is attached to a hose, press the trigger until all air has escaped from the tank. This is quicker.
- Once the tank is at zero pressure, close the drain valve tightly.
- Importance: This step relieves stress on the tank and components. It prevents accidental release of high-pressure air. It is a critical safety measure before moving or storing the unit.
Disconnecting Power
Always disconnect power after use. This prevents accidental startup. It also protects the compressor from power surges. It is a simple but vital safety measure.
- Procedure:
- After turning off the compressor, grasp the plug firmly.
- Pull the plug straight out from the wall outlet. Do not pull by the cord, as this can damage the wires.
- Do not leave the compressor plugged in when not in use.
- Importance: This eliminates any electrical hazards. It ensures the compressor cannot accidentally start if the power switch is bumped.
- Husky compressor
- air compressor
- 8 gallon compressor
- air tools
- DIY projects

Todd Martin
Senior Writer
With over 15 years of experience in home renovation and design, I started HEG to share what I’ve learned with homeowners who want to create spaces that are both beautiful and functional. I’ve always believed in a hands-on approach, and over the years, I’ve picked up practical solutions that actually work. Through HEG, I aim to make home improvement more approachable, sharing real tips that help you create a home you truly love.