· Todd Martin · Home Improvement · 15 min read
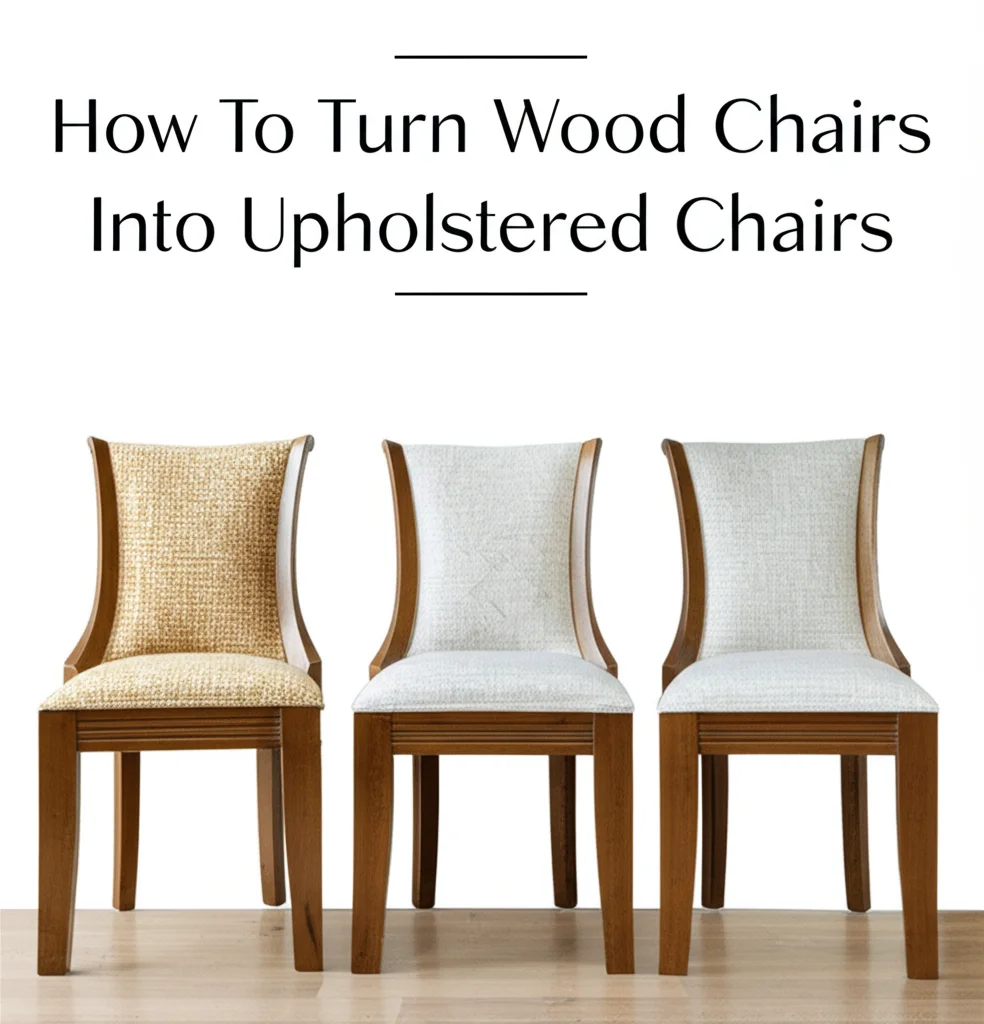
How To Turn Wood Chairs Into Upholstered Chairs

Transform Wood Chairs: DIY Upholstery Guide
Do you look at your plain wood chairs and wish they offered more comfort and style? I understand that feeling. Turning wood chairs into upholstered chairs is a simple way to upgrade your home decor. This project adds softness and visual appeal to any room. It allows you to personalize your furniture and save money too.
This guide will show you how to give old wood chairs a new life. We will cover planning, preparing the frame, adding padding, and applying fabric. You will learn about choosing materials, using tools, and finishing your work. Get ready to create beautiful, comfortable upholstered chairs yourself.
Takeaway
- Plan Carefully: Choose the right chair, fabric, and foam.
- Prepare the Frame: Clean, repair, and reinforce the wood base.
- Build the Foundation: Install webbing or springs for support.
- Add Comfort: Layer foam and batting for softness.
- Apply Fabric: Secure the chosen material smoothly.
- Finish Details: Add trim and protect the chair.
- Maintain Regularly: Keep your new upholstered chairs clean.
Answer to the Main Query
To turn wood chairs into upholstered chairs, you first prepare the wood frame. Then you add support like webbing or springs. Next, you apply layers of foam and batting for comfort. Finally, you cover the chair with your chosen upholstery fabric. This process transforms a hard wood chair into a soft, comfortable, and stylish upholstered piece.
Why Transform Your Wood Chairs? Benefits of Upholstery
Converting your wood chairs offers many great benefits. You add comfort to hard seating surfaces. An upholstered chair feels much softer to sit on. This makes it a good choice for dining rooms or living areas where people spend a lot of time.
Upholstery also brings a new look to your furniture. You can pick any fabric color or pattern. This lets you match the chair to your room’s existing decor. It also lets you create a bold statement piece. A simple wood chair becomes a focal point with the right fabric.
Doing this project yourself saves money. Buying new upholstered chairs can be expensive. Re-upholstering an existing wood chair costs less. You only pay for materials like fabric, foam, and fasteners. This project uses your creativity and skills. You create something unique and functional.
This project also supports sustainable living. You reuse an old chair instead of buying new. This reduces waste and gives an item a second life. It also keeps good furniture out of landfills. Making things by hand is a rewarding experience. It gives you pride in your home and abilities.
Planning Your Chair Upholstery Project
Good planning makes your upholstery project easier. First, choose the right wood chair. Simple chair designs are best for beginners. Chairs with flat seats and backs are easier to work with. Avoid chairs with complex curves or carvings for your first project.
Next, decide on your fabric. Consider how you will use the chair. Dining chairs need durable, stain-resistant fabric. Accent chairs allow for more decorative fabrics. Measure the chair carefully to estimate how much fabric you need. It is always better to buy a little extra.
You also need foam and batting. Foam provides the main cushioning. Batting adds a smooth layer over the foam. It also gives a soft, rounded look. Check the chair dimensions to buy the correct foam thickness and density. Firmer foam works better for seats. Softer foam works well for backs.
Gather all your tools before you start. You will need a staple gun, staples, fabric scissors, and a screwdriver. A fabric marker, measuring tape, and pliers are also helpful. Some projects may need a web stretcher or tack hammer. Having all tools ready prevents delays. Thinking about your design and color scheme early helps too.
Assessing Your Wood Chair
Before you begin, inspect your wood chair closely. Look for any loose joints or broken pieces. A sturdy frame is important for a lasting upholstered chair. If the frame feels wobbly, you must fix it first. Use wood glue and clamps to secure loose joints. Let the glue dry completely.
Check the chair’s finish. Do you want to keep the wood exposed? If so, clean and sand it. Apply new stain or paint if the finish looks bad. For very dirty chairs, you can clean wood furniture with vinegar for a gentle but effective clean. If there are stubborn marks, learn how to clean stains on wood to ensure a pristine base. This preparation ensures the exposed wood looks its best. A clean, smooth surface is important for a good final look.
Remove any existing upholstery or padding. Use pliers or a staple remover to pull out old staples. Be careful not to damage the wood frame. Keep any old fabric pieces. They can serve as templates for your new fabric. This step is messy. Protect your workspace with a drop cloth. Taking photos of the chair before disassembly helps you remember how it was put together.
Essential Materials and Tools
Having the right materials and tools is important for success. Your main material is upholstery fabric. Choose a fabric that suits the chair’s use and your style. Velvet adds elegance, while cotton duck offers durability. Consider patterns that hide minor imperfections.
You will need upholstery foam for cushioning. Foam comes in various densities. High-density foam is best for seats. It holds its shape well. Low-density foam works for chair backs. It provides softer comfort. Measure your chair’s seat and back areas to get the right foam pieces.
Polyester batting gives a smooth finish. It wraps around the foam. Batting adds a soft layer and prevents foam from showing through the fabric. You also need strong spray adhesive to bond foam layers. A good quality staple gun is essential. Use 1/2-inch or 3/8-inch staples. These staples hold the fabric securely.
Other tools include:
- Fabric scissors: Sharp scissors cut fabric cleanly.
- Measuring tape: Accurate measurements are key.
- Pliers and staple remover: For taking out old staples.
- Screwdriver/Drill: For disassembling chair parts.
- Webbing stretcher (if using webbing): Helps pull webbing tight.
- Sewing machine (optional): For sewing seams or piping.
Having everything ready saves time and frustration during the project.
Disassembling and Preparing the Wood Frame
The first physical step is taking the chair apart. This often means removing the old seat, back, or any armrests. Most dining chairs have a removable seat that sits in a frame. Use a screwdriver to undo screws holding these parts. Keep all screws and hardware in a small bag. This prevents losing them.
If your chair has existing fabric, remove it. Use a staple remover or flat-head screwdriver. Pry up staples one by one. Pull them out with pliers. Work slowly to avoid damaging the wood. Old fabric can be dusty. Wear gloves and a mask if needed. Once all fabric is off, you will see the bare wood frame.
Now, clean the wood frame thoroughly. Use a damp cloth to wipe away dust and grime. If the wood has stains or old finish, clean wood furniture with vinegar to prepare it for new finishes or simply to refresh its appearance. For deeper cleaning or to remove tough marks, consider techniques on how to clean stains on wood. A clean surface helps new finishes or glue stick better. Sand any rough spots. Use fine-grit sandpaper for a smooth feel. This step ensures the exposed wood looks good.
Finally, check for any structural weaknesses. Tighten any loose joints with wood glue and clamps. Let the glue dry for at least 24 hours. If there are small cracks, use wood filler. Sand it smooth after it dries. A strong, stable frame is vital for a durable upholstered chair. This preparation work is important. It ensures your finished chair lasts a long time.
Building the Foundation: Webbing and Springs
The foundation of your upholstered chair provides support. This usually involves webbing or springs. Webbing is a strong, woven strap material. It creates a supportive grid for the seat and back. Springs offer more bounce and comfort. Most DIY projects use webbing for simplicity.
For webbing, turn your chair frame upside down. Measure and cut strips of webbing. They should be long enough to span the opening. Start by stapling one end of a webbing strip to the frame. Use three to five staples. Pull the webbing tightly across the opening. A webbing stretcher helps you pull it very taut. Staple the other end to the opposite side of the frame. Cut off any excess.
Criss-cross the webbing strips. Place them about 1 to 2 inches apart. Weave the second set of strips over and under the first set. This creates a strong, interlocking pattern. Staple each end of these strips securely. This webbing grid provides firm support for the foam. It ensures the seat will not sag over time.
Some chairs may use coil springs or zig-zag springs. Coil springs are tied in place. Zig-zag springs attach with clips. Working with springs is more complex. It often requires special tools and techniques. For beginners, webbing is a simpler, effective solution. Ensure the webbing is evenly spaced and very tight. A loose foundation leads to a saggy chair.
Adding Layers of Comfort: Foam and Batting
Once the webbing is in place, it is time for padding. This is where your chair gains comfort. First, cut your upholstery foam. Measure the exact size of the seat and back areas. Use a sharp utility knife or electric carving knife to cut the foam. Make sure the cuts are clean and straight. Foam should fit snugly on top of the webbing or solid seat base.
Next, attach the foam. Use spray adhesive to secure the foam to the webbing or wood seat base. Press down firmly to create a strong bond. If you are doing a backrest, attach foam to the back panel as well. For extra comfort, you can add a second, thinner layer of foam on top of the first. This creates a softer feel.
Now, add the polyester batting. Batting goes over the foam. It smooths out any bumps in the foam. It also adds a soft layer right under the fabric. Cut the batting larger than your foam pieces. It needs to wrap around the edges of the foam and reach the chair frame.
Wrap the batting around the foam. Pull it taut but not so tight that it compresses the foam too much. Use spray adhesive to hold the batting in place. For the seat, the batting should extend slightly over the edges. This creates a rounded, professional look. For the back, make sure the batting covers all foam areas. These layers are crucial for a comfortable, inviting chair.
Fabric Application: Bringing Your Chair to Life
Applying the fabric is an exciting step. This is where your chair truly transforms. First, lay your fabric face down on a clean, flat surface. Place your padded seat or backrest on top of the fabric. Make sure the fabric pattern is straight. Cut the fabric, leaving at least 4-6 inches of excess around all sides. This extra fabric allows for pulling and stapling.
Start by stapling one side of the fabric to the chair frame. Use a staple gun. Place staples every 1-2 inches. Do not pull the fabric too tight yet. Move to the opposite side. Pull the fabric taut across the foam and staple it. Make sure the tension is even. Then, repeat this process for the remaining two sides. Work on opposite sides to keep the fabric centered and smooth.
For corners, you need to fold the fabric neatly. Create clean, crisp pleats or gathers. Trim away excess fabric to reduce bulk. Staple these folds securely. The goal is a smooth, tight finish with no wrinkles. Ensure all staples are fully driven into the wood.
If your chair has a separate backrest, follow the same steps. Apply fabric to the front of the backrest first. Then, you may need a separate piece of fabric for the back of the backrest. This piece covers the raw edges and staples. You can attach it with a blind stitch or decorative tacks. Take your time with this step. A smooth fabric application makes a big difference in the final look.
Attaching the Seat and Back to the Frame
After upholstering the seat and back components, it is time to reattach them. This step connects the newly padded pieces to the main wood chair frame. Locate the screw holes from when you disassembled the chair. Align the upholstered seat base with these holes on the chair frame.
Use the original screws to reattach the seat. Drive the screws firmly but do not overtighten them. Overtightening can strip the wood. Make sure the seat is centered and stable. Wiggle the seat gently to check for any looseness. If it wobbles, check the screws again.
For chairs with separate backrests, reattach them in the same way. Align the upholstered backrest with its designated spot on the frame. Use the screws to secure it tightly. Some chairs might have dowels or special clips instead of screws. Use the appropriate fasteners for your chair’s design.
If your chair design allows, you can also add decorative tacks or cording. These details can cover staple lines. They add a professional finish. This final assembly makes your chair usable. It also lets you see your hard work come together. Always check for stability before using the chair.
Finishing Touches and Maintenance
The last steps involve adding decorative elements and preparing for long-term care. After the fabric is stapled, you might see exposed staple lines. You can hide these with decorative trim. Upholstery trim, cording, or gimp tape works well. Use hot glue or small tacks to attach the trim. This gives the chair a clean, professional finish.
Check the chair’s legs. If they are scratched, you can sand and re-stain or paint them. Add felt pads to the bottom of the legs. These pads protect your floors from scratches. They also help the chair slide smoothly. This small detail adds to the overall quality and longevity of your chair.
Now, enjoy your newly upholstered chair! To keep it looking great, regular maintenance is key. Vacuum your upholstered chairs regularly to remove dust and crumbs. Use a soft brush attachment. This prevents dirt from embedding in the fabric.
If spills happen, clean them quickly. Blot liquid spills with a clean cloth. Do not rub. For general cleaning, you can learn how to clean upholstered chairs effectively. This article provides detailed steps for spot cleaning and deeper cleaning. Following care instructions helps maintain the fabric’s appearance. Avoid direct sunlight to prevent fabric fading. Rotate chairs if possible to ensure even wear. With good care, your transformed chair will last for many years.
FAQ Section
Can any wood chair be upholstered?
Not every wood chair is a good candidate for upholstery. Chairs with simple, flat seat and back panels are easiest. Chairs with complex curves, intricate carvings, or very delicate frames are harder. They require advanced skills and tools. Always check the chair’s stability first. The frame must be strong enough to support new padding and fabric.
What is the best fabric for DIY upholstery?
The best fabric depends on how you use the chair. For high-traffic areas like dining rooms, choose durable fabrics. Cotton duck, linen blends, or synthetic blends work well. For accent chairs, you can use more delicate fabrics. Velvet, silk, or chenille add luxury. Always check the fabric’s rub count for durability. Higher numbers mean more wear resistance.
How much fabric do I need to upholster a chair?
The amount of fabric varies by chair size and design. A simple dining chair seat might need 1-2 yards. A full armchair could require 5-7 yards. Always measure the seat, back, and any arms. Add 25-30% extra for mistakes and pattern matching. It is safer to buy more than less.
Do I need special tools for upholstery?
Yes, some basic tools are essential. A heavy-duty staple gun is a must-have. You will also need upholstery staples (1/2 or 3/8 inch). Fabric scissors, a measuring tape, and a staple remover are important. Pliers, a screwdriver, and spray adhesive are also very useful. Some projects might require a web stretcher.
How do I clean my new upholstered chair?
Regular vacuuming with a brush attachment helps keep your upholstered chair clean. For spills, blot them immediately with a clean, dry cloth. Do not rub, as this can spread the stain. For general cleaning or tougher spots, refer to specific guides on how to clean upholstered chairs for different fabric types. Always test cleaning solutions on a hidden area first.
Can I paint or refinish the wood frame before upholstering?
Yes, it is a good idea to paint or refinish the wood frame first. This step happens after disassembly and cleaning, but before adding padding and fabric. A fresh coat of paint or stain makes the exposed wood look new. It also protects the wood. This ensures your entire chair looks cohesive and finished.
Conclusion
Turning wood chairs into upholstered chairs is a rewarding project. You take an ordinary piece of furniture and give it new life. This transformation adds comfort, style, and a personal touch to your home. We covered everything from choosing the right chair to applying the final fabric. You now know the steps to create beautiful, comfortable seating.
Remember, patience and good preparation are key. Select quality materials. Take your time with each step. Your efforts will result in a unique piece of furniture you can enjoy for years. Ready to start your own chair makeover? Gather your materials and begin this exciting DIY adventure. Your home will thank you for the added comfort and beauty.
- chair upholstery
- DIY furniture
- wood chair makeover
- furniture transformation


