· Katria Melrose · Kitchen Appliances · 20 min read
How To Use Ge Oven For First Time
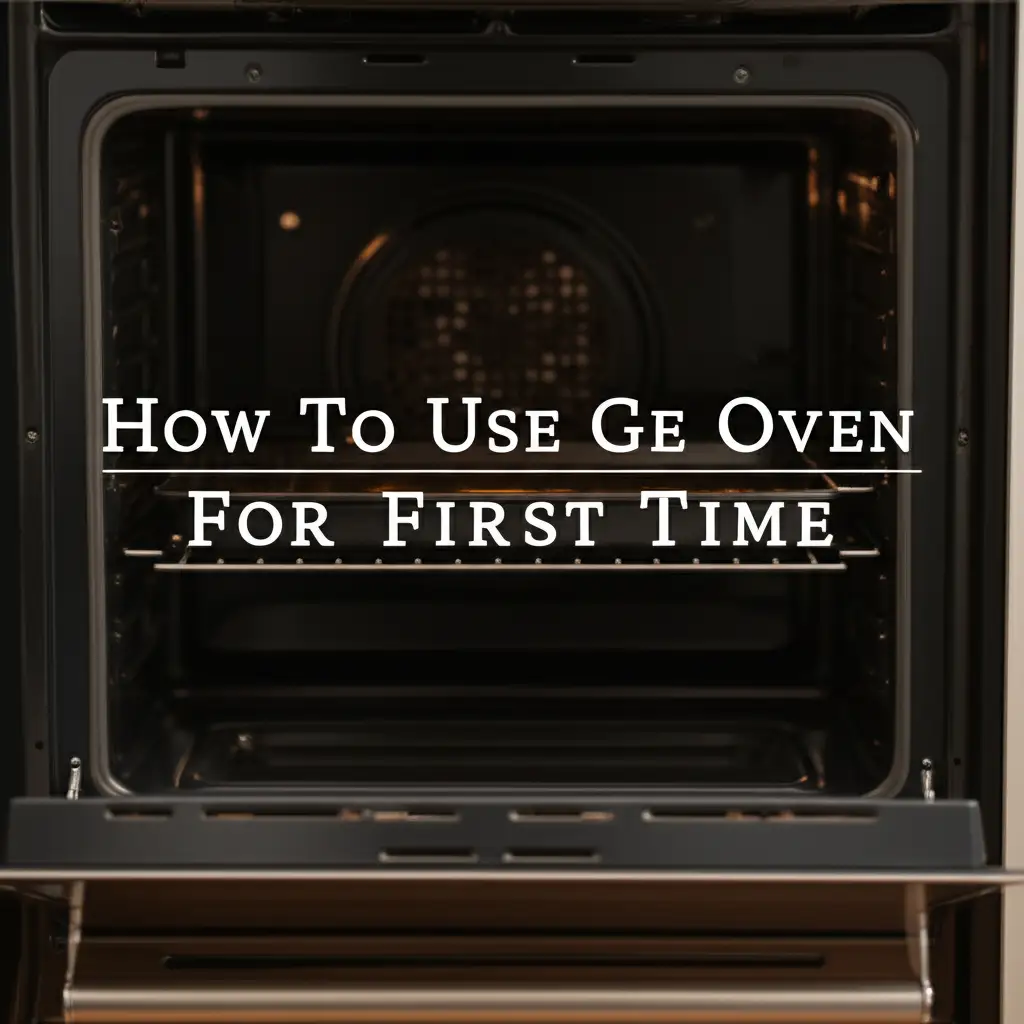
How To Use Your GE Oven for the First Time: A Simple Guide
Getting a new GE oven is exciting. You are ready to bake your favorite cookies or roast a family dinner. However, using a new appliance, especially an oven, for the very first time can feel overwhelming. There are specific steps to follow to ensure safety and optimal performance. This guide will walk you through everything you need to know about how to use your GE oven for the first time. I will explain initial preparations, the critical burn-off process, how to navigate the control panel, understand cooking modes, and crucial safety tips. My goal is to make your first baking experience smooth and successful.
Takeaway
- Prepare Your Oven: Unpack, inspect, clean thoroughly, and ensure proper connection (gas or electric).
- Perform Initial Burn-Off: This removes manufacturing oils and odors, essential for safe food preparation.
- Master the Controls: Learn your specific model’s control panel, setting the clock, and basic functions.
- Understand Cooking Modes: Differentiate between bake, broil, convection, and specialized features.
- Prioritize Safety and Maintenance: Follow safety guidelines, clean regularly, and troubleshoot common issues.
Concise Answer
To use a GE oven for the first time, unpack and clean it thoroughly. Then, perform an initial burn-off cycle to eliminate manufacturing odors. Familiarize yourself with the control panel to set the clock and select cooking modes. Always preheat properly and follow safety guidelines for a successful initial cooking experience.
Initial Preparations for Your New GE Oven
Starting with a new appliance always involves some groundwork. Your GE oven is no different. Before you even think about preheating, you need to perform a few important preparatory steps. These steps ensure your oven is safe, clean, and ready for its first culinary adventure. Proper preparation prevents issues later. It also helps your oven perform at its best from day one.
Unpacking and Inspecting Your GE Oven
When your new GE oven arrives, it comes securely packaged. Carefully remove all external and internal packing materials. This includes any tape, plastic wraps, or cardboard inserts. I always recommend keeping the packaging for a few days. This is helpful in case you need to return or move the oven.
Next, conduct a thorough visual inspection. Look for any signs of damage during shipping. Check the exterior finish, the oven door, and the interior cavity. Ensure all racks, trays, and accessories are present. Refer to your GE oven’s user manual to confirm you have everything listed. Contact the retailer or GE customer service immediately if you find damage or missing parts.
Essential Cleaning Before First Use
A brand new oven may look clean, but it often has residues from the manufacturing process. These include oils, dust, and tiny metal particles. It is crucial to clean your GE oven before its first use. This prevents unpleasant odors and potential issues when you start cooking. I always clean my new appliances before using them.
Start by removing all oven racks and accessories. Wash them in warm, soapy water. Rinse them thoroughly and dry them completely. Some GE oven racks are dishwasher safe. You can check if you can put GE oven racks in the dishwasher for your specific model. For the oven interior, use a damp cloth with mild soap and water. Wipe down all surfaces, including the walls, bottom, and ceiling. Pay close attention to corners and crevices. Avoid harsh chemical cleaners for this initial wipe. They can leave residues that will burn off later. This cleaning step is essential for removing any lingering manufacturing debris. For a detailed guide, you can learn more about how to clean GE oven before first use.
Connecting Your GE Oven: Gas or Electric
GE ovens come in two main types: electric and gas. The connection process differs significantly between them. Proper installation is vital for safety and function. I always ensure correct connection.
If you have a GE electric oven, it requires a dedicated 240-volt electrical circuit. This connection usually involves plugging into a specific outlet or a hardwired connection by an electrician. Ensure the circuit breaker is correctly sized for your oven’s power requirements. An improperly wired electric oven poses a fire risk.
For a GE gas oven, it needs a gas line connection and an electrical outlet for the igniter and controls. Gas connections must be done by a qualified professional. Gas leaks are very dangerous. Never attempt to connect a gas oven yourself unless you are a certified gas technician. Always check for gas leaks using a soap and water solution after connection. Bubbles indicate a leak. Ensure your gas oven has proper ventilation. This step is key for safe operation, whether you are learning how to use electric oven for the first time or how to use gas oven for the first time.
The Critical Initial Burn-Off Process
After you have unpacked, inspected, and cleaned your new GE oven, there is one more vital step before cooking. This is the initial “burn-off” process. Many new oven owners skip this step. However, it is crucial for health and safety. I always perform this with new ovens. This process removes any remaining manufacturing oils and protective coatings that might be on the oven’s interior surfaces. These substances produce smoke and odors when heated. You do not want them transferring to your food.
Understanding the “New Oven Smell”
When you first turn on a new oven, you might notice a distinct smell. This is often described as a chemical, plastic, or burning oil odor. This smell comes from the residues left over from the manufacturing process. Manufacturers apply protective coatings and use various lubricants during assembly. When these materials are heated for the first time, they vaporize. This creates the “new oven smell.”
The smell is normal for a brand-new appliance. It is not harmful in small amounts. However, breathing too much of it or having it infuse into your food is not desirable. The burn-off process actively removes these odors and residues. This leaves your oven fresh and ready for cooking. Do not be alarmed by the smell during this process. It will dissipate.
Step-by-Step GE Oven Burn-Off
Performing the initial burn-off for your GE oven is straightforward. It requires time and good ventilation. Follow these steps carefully:
- Remove All Contents: Ensure the oven cavity is completely empty. Remove all racks, trays, and any other accessories that you put back in after cleaning.
- Open Windows: Open nearby windows and doors. Turn on your kitchen range hood fan to full power. Good ventilation is key to dissipate the smoke and odors.
- Set High Temperature: Set your GE oven to its highest temperature setting. This is usually around 450°F to 550°F (232°C to 288°C).
- Allow to Run: Let the oven run at this high temperature for at least 30 minutes to an hour. Some GE manuals recommend up to an hour. Consult your specific model’s user manual for the exact recommended time.
- Monitor: During this time, you will likely see light smoke and smell the “new oven smell.” This is normal. Monitor the oven, but do not open the door frequently.
- Cool Down: After the recommended time, turn the oven off. Keep the oven door closed for a while as it cools down naturally. Continue to ventilate your kitchen until the smell completely dissipates.
- Final Wipe Down: Once the oven is cool, give the interior a quick wipe down with a damp cloth. This removes any final residue or soot that may have settled.
Proper Ventilation During Burn-Off
Ventilation during the initial burn-off is not just a recommendation; it is a necessity. The smoke and fumes released can be irritating to your eyes, throat, and lungs. They are generally non-toxic, but they are certainly unpleasant. I always ensure maximum airflow.
Make sure your kitchen has adequate airflow. Open multiple windows if possible, not just one. Use exhaust fans to pull air out of the room. If you have pets or young children, it is a good idea to keep them out of the kitchen area during the burn-off. The same applies to individuals with respiratory sensitivities. The stronger the ventilation, the faster the smell will clear. Do not rush this step. It sets the stage for clean, fresh cooking in your new GE oven.
Getting Familiar with Your GE Oven Control Panel
Your GE oven’s control panel is its brain. It is how you tell the oven what to do. Modern GE ovens feature electronic control panels, often with touch screens or digital displays. Understanding these controls is essential for using your oven effectively. I suggest taking a few minutes to explore your panel. This section helps you navigate basic functions and settings.
Identifying Key Buttons and Settings
GE oven control panels vary slightly by model. However, many common buttons and functions exist. Look for these standard controls:
- Bake: This button starts the standard baking function. You will usually enter a temperature after pressing it.
- Broil: This function uses the top heating element for intense, direct heat. It is perfect for browning or searing.
- Convection Bake/Roast: Many GE ovens have convection. This setting uses a fan to circulate hot air, promoting even cooking.
- Self Clean: This button initiates the oven’s self-cleaning cycle. Be sure to remove all racks before using it.
- Timer On/Off: This sets a countdown timer for your cooking. It often beeps when time is up but does not turn off the oven.
- Clock: This button allows you to set the current time of day.
- Start/Enter: You press this to confirm a setting or start a function.
- Cancel/Off: This button stops any active oven function.
- Light: This turns the interior oven light on or off.
Your oven might also have specific buttons for modes like “Warm,” “Proof,” “Air Fry,” or “Delay Start.” Consult your GE oven’s user manual for an exact description of each button on your model. It is the best resource for specific functions.
Setting the Clock and Timer
Setting the clock is often one of the first things people do with a new appliance. It is useful for telling the time, and some oven features, like delayed start, rely on the correct time being set.
To set the clock on most GE ovens:
- Press the “Clock” button. The display will likely start flashing or prompt you to enter the time.
- Use the number pad or +/- buttons to enter the current time of day.
- Press “Start” or “Enter” to confirm the time.
The timer function is different from the clock. It acts as a kitchen timer. It counts down and beeps when done. It does not control oven operation.
To use the timer:
- Press the “Timer On/Off” button.
- Enter the desired time using the number pad. For example, “1,” “0,” “0” for 1 hour.
- Press “Start/Enter.” The timer will begin counting down.
- To cancel the timer, press “Timer On/Off” again or “Cancel.”
While this guide focuses on ovens, setting time on GE appliances often follows similar logic. You might find similarities if you’ve ever wondered how to set time on GE microwave with no clock button.
Navigating Basic Cooking Modes
Once you know the buttons, using the basic cooking modes is simple. The most common mode is “Bake.”
To Bake:
- Press the “Bake” button.
- Enter your desired temperature using the number pad.
- Press “Start/Enter.” The oven will begin preheating to your set temperature. It will usually beep when it reaches the temperature.
To Broil:
- Press the “Broil” button.
- Some GE ovens let you select a broil intensity (Hi/Lo). Choose your setting if prompted.
- Press “Start/Enter.” Broiling typically does not require preheating.
To Convection Bake/Roast:
- Press the “Convection Bake” or “Convection Roast” button.
- Enter your desired temperature. Note that convection cooking often uses a lower temperature than conventional baking. Reduce the recipe temperature by 25°F (15°C).
- Press “Start/Enter.” The fan will begin circulating air immediately.
Always allow your oven to fully preheat before placing food inside for baking or roasting. This ensures even cooking and accurate results. Preheating is crucial for proper temperature.
Understanding GE Oven Cooking Modes and Features
Modern GE ovens offer more than just basic bake and broil functions. They come equipped with various cooking modes designed to give you better results for different types of food. Knowing what each mode does helps you utilize your oven’s full potential. I find it exciting to explore these options. Understanding these features ensures you cook your food perfectly every time.
Bake and Roast Functions
The “Bake” function is your go-to for most everyday cooking. It uses heat primarily from the bottom element, with some heat from the top. This creates an even, consistent temperature suitable for casseroles, cakes, cookies, and most baked goods. When you select “Bake” and set a temperature, the oven heats up until it reaches that temperature. It then cycles the heat elements on and off to maintain it.
The “Roast” function is similar to bake but often uses a combination of heat from both the top and bottom elements. It is designed for larger cuts of meat and poultry. Roasting provides more intense heat, which helps brown the exterior of your food while keeping the interior tender and juicy. Some GE ovens have a dedicated “Roast” button. Others use the “Bake” setting at higher temperatures for roasting. Always use a roasting pan for best results. This allows air to circulate around the food.
Broiling for Perfect Browning
The “Broil” function uses only the top heating element, delivering intense, direct heat. This mode is excellent for quickly browning the tops of casseroles, toasting bread, melting cheese, or searing meats. Broiling cooks food very fast due to the high, direct heat. You must watch food closely when broiling to prevent burning. I never walk away from food under the broiler.
Most GE ovens offer “Hi” and “Lo” broil settings. “Hi” broil provides maximum heat for quick searing. “Lo” broil offers a gentler heat, suitable for thicker items or when you need more control. Place food on an upper rack, close to the broil element, for best results. Always use an oven-safe pan. A broiler pan with a slotted top helps drain fats. This prevents smoking and flare-ups.
Leveraging Convection Cooking
Many GE ovens feature convection technology. Convection uses a fan, typically located at the back of the oven, to circulate hot air throughout the cavity. This circulating air helps cook food more evenly and often faster than conventional baking. It also creates a more consistent temperature. I love my convection oven for roasting vegetables.
GE ovens may have different convection settings:
- Convection Bake: Ideal for multiple racks of cookies or cakes. The fan ensures even browning.
- Convection Roast: Excellent for meats and poultry. The circulating hot air creates a crisp exterior and juicy interior.
- Convection Convert: Some GE ovens automatically reduce the set temperature by 25°F (15°C) when using convection. This compensates for the faster cooking. If your oven does not have this, manually reduce the temperature.
Convection cooking can reduce cooking times by 25% or more. Always check your food earlier than the recipe suggests. Convection is a powerful tool once you learn to use it.
Advanced Features: Air Fry and Self-Clean
Some newer GE oven models come with advanced features, like a built-in “Air Fry” mode. This feature uses a high-speed fan and a dedicated heating element to create crispy foods with little to no oil. It mimics the results of a standalone air fryer. If your GE oven has this feature, it is a game-changer for healthier fried foods. You can learn more about how to use GE electric oven air fryer. Remember that you might also need to consider how to use air fryer pan in oven for optimal results with this feature.
Another common advanced feature is “Self Clean.” This mode uses very high temperatures to burn off food spills and grime into a fine ash. You can then wipe this ash away easily. Always remove oven racks and large food debris before starting a self-clean cycle. The high heat can damage rack finishes. The oven door locks during the cycle for safety. This feature greatly simplifies oven maintenance.
Safe and Efficient Operation of Your GE Oven
Operating your GE oven safely and efficiently is paramount. Once you understand the basic functions, it is time to focus on best practices. These practices ensure your safety, maximize cooking performance, and help extend your oven’s lifespan. I always prioritize safety in my kitchen. Following these guidelines will make your cooking experience better.
Preheating for Accuracy
One of the most common mistakes new oven users make is not preheating properly. Preheating is not just about getting the oven hot. It is about allowing the oven to reach and stabilize at the set temperature. This process creates a consistent cooking environment from the moment you place food inside. I always wait for the preheat indicator.
Most GE ovens will beep or display a message when they have reached the set temperature. Wait for this signal before putting your food in. For precise baking, wait an additional 5-10 minutes after the initial beep. This allows the internal temperature to fully equalize. Placing food in a cold or partially preheated oven can lead to uneven cooking, longer cook times, and disappointing results. For example, bread might not rise properly, or cookies might spread too much. Consistent preheating is vital for consistent results.
Optimal Rack Placement
Where you place your oven racks significantly impacts how your food cooks. Heat distribution varies within the oven cavity. Choosing the right rack position can make a big difference in your dish’s outcome. I adjust racks for every dish.
- Center Rack: This is the most common and versatile position. It offers the most even heat distribution for general baking, roasting, and casseroles.
- Lower Rack: Placing food on the lower rack brings it closer to the bottom heating element. This is good for browning the bottom of pies, pizzas, or crusty breads. It can also be useful if you want to prevent the top of your dish from over-browning.
- Upper Rack: The upper rack is closest to the top heating element. This position is ideal for broiling, melting cheese, or browning the tops of dishes like gratins. Use caution, as food can burn quickly on the upper rack.
If you are cooking multiple items, ensure there is enough space between them for air to circulate. Overcrowding the oven can lead to uneven cooking. Your GE oven manual might also offer specific rack placement recommendations for certain functions or types of food.
Important Safety Precautions
Ovens are powerful appliances that generate high heat. Safety must always be your top priority. Following basic safety precautions prevents accidents and injuries. I always double-check these.
- Keep Oven Clean: Regular cleaning prevents grease buildup and food spills, which can cause smoke or even fires. Address spills immediately once the oven cools.
- Use Oven Mitts: Always use dry oven mitts when reaching into a hot oven. Wet mitts conduct heat, which can lead to burns.
- Avoid Overloading: Do not place excessively heavy items on oven racks, as they could bend or break. Do not overload the oven with too many dishes, which can impede airflow.
- Do Not Use as Storage: Never store flammable items like dish towels, paper, or plastic containers in your oven. They can ignite if the oven is accidentally turned on.
- Supervise Children and Pets: Keep children and pets away from a hot oven. The exterior surfaces, especially the door, can become very hot.
- Ventilation: Ensure good ventilation when cooking, especially when broiling or when initial odors are present. A working range hood is essential.
- Check for Gas Leaks (Gas Ovens): If you have a gas oven, be aware of gas odors. If you smell gas, turn off the oven, open windows, and leave the area. Call your gas company immediately.
Energy-Saving Tips for Oven Use
Using your GE oven efficiently not only saves energy but also helps your wallet. Small habits can make a big difference. I try to be mindful of energy use.
- Minimize Door Opening: Every time you open the oven door, the temperature inside drops significantly. This forces the oven to work harder to reheat, using more energy. Use the oven light and window to check on food.
- Cook Multiple Dishes: If you are planning to use the oven, try to cook multiple items at once. This maximizes the energy used for a single heating cycle.
- Use Convection: If your GE oven has a convection feature, use it. Convection cooks food faster and often at lower temperatures, saving energy.
- Turn Off Early: For dishes with long cooking times, you can often turn off the oven 5-10 minutes before the end. The residual heat will continue to cook the food.
- Thaw Frozen Food: Thaw frozen food before putting it in the oven. This reduces cooking time and energy consumption.
- Use Proper Cookware: Dark, dull pans absorb heat better than shiny, reflective pans. This can lead to more efficient cooking. Glass or ceramic dishes can also retain heat well.
Troubleshooting Common First-Time GE Oven Issues
Even with careful preparation, you might encounter minor issues when using your GE oven for the first time. Most of these are normal and easily resolved. Knowing what to do can save you frustration. I find troubleshooting empowers me. This section covers common first-time problems and their solutions.
Addressing Initial Smoke and Odors
It is common to see some light smoke and smell a strong odor during the initial burn-off process. This is the manufacturing oils and protective coatings burning off. It is perfectly normal. However, if smoke and odors persist significantly after the initial burn-off, or if they appear during normal cooking, it indicates a different problem.
- Food Spills: The most common cause of smoke and odors during normal use is food spills on the oven bottom or heating elements. These will burn when the oven heats up. Clean spills promptly once the oven cools.
- Grease Buildup: If you have been cooking greasy foods, accumulated grease on the oven walls or racks can cause smoke. A thorough cleaning of the oven interior is required.
- New Pan Residues: Sometimes new bakeware can have coatings that burn off. Wash new pans before their first use.
- Ventilation: Always ensure good ventilation. Turn on your range hood. Open windows to clear the air.
If the smoke is excessive, or you smell gas (for gas ovens), turn off the oven immediately and investigate. If it is a gas smell, evacuate and call your gas company.
Handling Uneven Cooking
One of the most frustrating oven issues is uneven cooking. Your cookies might be burnt on one side and raw on the other. This can be caused by several factors, especially in a new oven.
- Oven Not Leveled: If your GE oven is not perfectly level, heat can concentrate on one side. Use a spirit level on an oven rack to check. Adjust the leveling legs at the bottom of the oven if needed.
- Incorrect Rack Placement: As discussed, rack placement matters. Ensure you are using the correct rack for your dish. Foods too close to an element will cook faster on that side.
- Pan Placement: Do not push pans right against the oven walls. Leave space for air to circulate around them. Avoid overcrowding the oven.
- Hot Spots: All ovens have minor hot spots. Rotate your dishes halfway through cooking for more even results. This is especially true for baking delicate items like cakes.
- Preheating Issues: If the oven is not fully preheated, it may not distribute heat evenly from the start. Always wait for the preheat signal and allow a few extra minutes for stabilization.
If uneven cooking persists despite these checks, your oven’s temperature calibration might be off. This might require professional service.
Display and Control Panel Glitches
Modern GE ovens rely on electronic control panels. Occasionally, you might experience minor glitches with the display or controls. These are often temporary.
- Blank Display: If the display is completely blank, check the power supply. Ensure the oven is plugged in firmly
- GE oven first use
- new GE oven
- oven setup guide


