· Todd Martin · Home Care · 20 min read
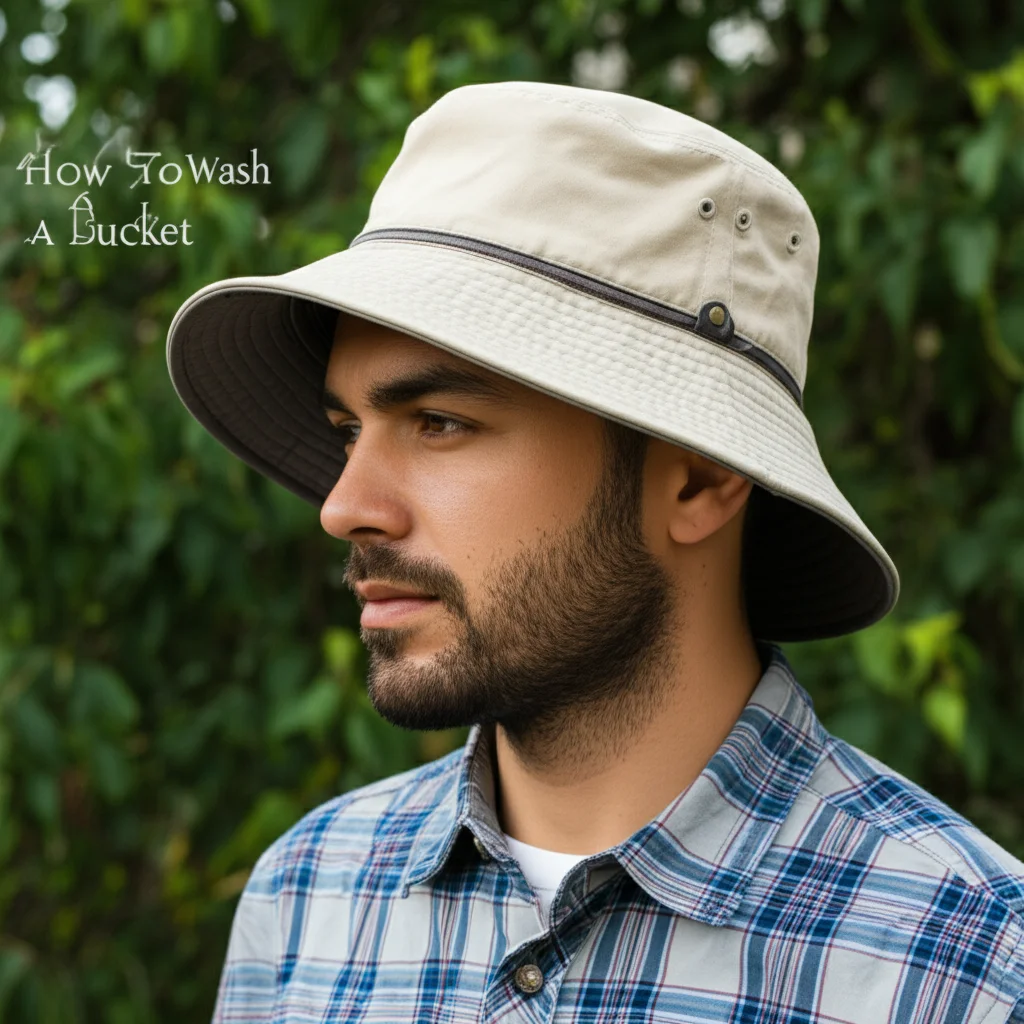
How To Wash A Bucket Hat
Restore Your Bucket Hat’s Freshness: A Complete Washing Guide
My favorite bucket hat is always with me. It protects me from the sun. It also adds a cool touch to my outfit. But like any item I wear often, it collects dirt, sweat, and sometimes even stains. I know many people wonder how to wash a bucket hat correctly. It is important to keep your hat looking good. Proper washing also helps extend its life.
This guide will show you how to clean your bucket hat effectively. We will cover checking your hat’s material and care tag. You will learn about pre-wash treatments and both hand washing and machine washing methods. We will also discuss the best ways to dry your hat to keep its shape. You will find tips for different materials. By the end, your bucket hat will be fresh and ready for your next adventure.
Takeaway:
- Always check the care tag before washing your bucket hat.
- Hand washing is the safest method for most bucket hats.
- Address any visible stains with a spot treatment before the main wash.
- Always air dry your bucket hat to prevent shrinking and keep its shape.
Washing a bucket hat involves checking the care label first. Hand washing with mild soap and cool water is generally best to preserve shape. For machine-washable hats, use a gentle cycle in a laundry bag. Air dry completely to prevent mildew and maintain form.
Understanding Your Bucket Hat: Material & Care Tag
Before you start washing your bucket hat, you must know what it is made from. Different materials need different care. Checking the care label is the first and most important step. This label often tells you if you can machine wash, hand wash, or if it needs special cleaning. Ignoring the care tag can damage your hat.
The care tag usually has symbols or written instructions. These symbols guide you on temperature, drying methods, and bleaching. For example, a tub with a hand means hand wash only. A crossed-out tub means do not wash. Take a moment to find and read this tag. It provides the best advice for your specific hat.
Decoding the Care Label
The care label is like a secret code for hat cleaning. It gives vital instructions about washing temperature. It also shows you if tumble drying is safe. Look for symbols related to washing, bleaching, drying, and ironing. A square with a circle inside often refers to drying instructions. A triangle symbol shows bleaching information.
If your hat does not have a care tag, or if it is faded, you will need to guess. Consider what material your hat feels like. Most bucket hats are made from common fabrics. We will discuss these common materials next. Always choose the gentlest washing method if you are unsure.
Common Bucket Hat Materials and Their Needs
Bucket hats come in many fabrics. Each fabric needs slightly different care. Knowing your hat’s material helps you choose the best washing method.
- Cotton and Canvas: These are common materials for bucket hats. They are durable and usually easy to clean. You can often hand wash them. Some cotton hats might even be machine washable on a gentle cycle. Cotton can shrink in hot water, so always use cool water.
- Polyester and Nylon: These synthetic fabrics resist wrinkles and water. They are quite durable. They also dry quickly. Polyester and nylon bucket hats often tolerate machine washing well. Use a cool water cycle.
- Denim: Denim bucket hats are like denim jeans. They are sturdy. However, denim can bleed dye, especially when new. Wash denim hats separately or with similar dark colors. Hand washing helps prevent color loss.
- Wool: Wool bucket hats are warmer and softer. Wool is a delicate fiber. It can shrink and lose shape easily with heat. You must always hand wash wool hats in cold water. Use a mild detergent made for wool.
- Other Materials: Some bucket hats have unique blends or materials like corduroy or even delicate straw. Always check the tag first for these. If no tag, hand washing with extreme care is your safest option.
Understanding the material and checking the care tag sets you up for success. It helps you keep your bucket hat looking its best.
Pre-Wash Prep: Spot Treatment and Initial Steps
Before you dunk your bucket hat into water, a little preparation goes a long way. This step focuses on removing loose dirt and treating any specific stains. Proper pre-wash steps make the overall cleaning process easier and more effective. Skipping this part can leave your hat looking less than clean. I always find that a few minutes of pre-treatment saves a lot of effort later.
Start by examining your hat. Look for visible dirt, dust, or specific spots. Many hats get dirty around the brim from sweat or makeup. Other common spots are from food or drinks. Addressing these problem areas first ensures a cleaner result. This also prevents stains from setting deeper into the fabric during the wash.
Addressing Visible Stains
Sweat stains are very common on hats. They appear as yellow or white marks, especially on lighter fabrics. Makeup, oil, or food spots also show up easily. To treat these, you need a mild stain remover or a gentle detergent. Apply a small amount directly to the stain. You can use a soft brush or a clean cloth to gently rub it in.
For sweat stains, mixing baking soda with a little water to form a paste works well. Apply this paste to the stain. Let it sit for about 15-30 minutes. This helps break down the oils and salts from sweat. For other stains, a dab of dish soap or laundry pre-treatment can be effective. Always test your chosen product on an unseen part of the hat first. This ensures it does not cause discoloration. For detailed guidance on tackling tough sweat stains, you can learn more about how to clean sweat stains from hat.
Brushing Off Loose Dirt
After treating the stains, it is time to remove any loose dirt. Dust, lint, and dry mud can cling to the fabric. Use a soft-bristled brush or a lint roller for this. Gently brush the entire surface of the hat. This step prevents dirt from spreading during the wash. It also helps the cleaning solution work better on the actual fabric.
If your hat has any detachable parts, like a chin strap or decorative pins, remove them now. This prevents them from getting damaged or damaging the hat during washing. Make sure to shake the hat upside down. This helps dislodge any crumbs or debris trapped inside. Completing these pre-wash steps will ensure your bucket hat gets the best possible clean.
The Gentle Touch: Hand Washing Your Bucket Hat
Hand washing is often the safest and most recommended method for cleaning a bucket hat. It gives you control over the process. You can be gentle with delicate fabrics or hats with unique shapes. This method helps maintain the hat’s structure and prevents shrinkage. I prefer hand washing for most of my hats. It simply provides the best results for preserving quality.
This method works well for all types of bucket hats. It is especially good for wool, denim, or hats with structured brims. It also works for hats that say “hand wash only” on their care tag. Hand washing ensures the hat does not get stretched or twisted. It also keeps colors from fading quickly.
Step-by-Step Hand Washing Process
Follow these steps for a thorough hand wash:
- Fill a Basin: Find a clean sink or a small basin. Fill it with cool or lukewarm water. Hot water can cause shrinking or color fading.
- Add Detergent: Pour a small amount of mild liquid laundry detergent into the water. About a teaspoon or two is usually enough. You want just enough to create a little suds. Avoid harsh chemicals or bleach unless specifically stated on the care tag.
- Submerge the Hat: Place your bucket hat into the soapy water. Gently press it down to make sure it is fully soaked. Let it sit for about 10-15 minutes. This allows the detergent to loosen dirt and grime.
- Gently Clean: After soaking, gently agitate the hat in the water. Use your hands to softly rub any soiled areas. Pay attention to the sweatband and brim. Avoid harsh scrubbing or twisting the hat. If you treated specific stains, gently work those areas.
- Rinse Thoroughly: Drain the dirty water. Refill the basin with clean, cool water. Rinse the hat by pressing out the soapy water. Repeat this step several times until all detergent is gone. You will see no more suds.
- Remove Excess Water: Gently press the hat against the side of the basin. Do not wring or twist it. You can also roll the hat in a clean, dry towel. This helps absorb a lot of the water without distorting the shape.
Hand washing is a simple and effective way to keep your bucket hat clean. If you are ever without a washing machine, knowing how to wash clothes without a washer can be very helpful for various items, including hats.
Products for Hand Washing
Choosing the right products is important for hand washing your bucket hat. You do not need many special items. Simple, mild options work best.
- Mild Laundry Detergent: Choose a gentle, liquid laundry detergent. Look for one that is free of dyes and perfumes. Baby laundry detergents or those marketed for delicate items are good choices. These are less likely to damage fabric or leave residue.
- Dish Soap: In a pinch, a small drop of mild dish soap can work for spot treatments or light hand washes. Ensure it is a basic, non-concentrated formula. It should not contain strong degreasers or moisturizers.
- White Vinegar: For lingering odors or to help remove detergent residue, a quarter cup of white vinegar can be added to the rinse water. Vinegar also acts as a natural fabric softener. It helps keep colors bright.
- Soft Brush or Cloth: For scrubbing stains, use a soft-bristled brush. An old, clean toothbrush works well. A clean microfiber cloth is also good for gentle rubbing. Avoid anything abrasive that could damage the hat’s fabric.
Using these simple tools and products helps ensure your bucket hat gets a gentle, effective clean. Always remember that less is more when it comes to cleaning agents for delicate items like hats.
Machine Washing a Bucket Hat: When and How
While hand washing is often preferred, some bucket hats can go into the washing machine. This method saves time and effort. However, it is crucial to know if your specific hat is suitable for machine washing. Not all materials or hat constructions can handle the agitation of a washing machine. I only machine wash my hats when I am sure they can withstand it.
Machine washing is best for sturdy bucket hats. These include hats made from cotton, canvas, polyester, or nylon without any cardboard inserts in the brim. Always check the care label first. If it explicitly says “machine wash,” then you are good to go. If it says “hand wash only” or “dry clean only,” stick to those methods.
Is Your Bucket Hat Machine Washable?
The first rule is always the care tag. If your bucket hat’s tag permits machine washing, then you can consider it. Look for symbols like a washing machine icon or text saying “machine wash.”
Also, check the hat’s construction. Some bucket hats have a firm brim made of cardboard or other non-washable material. These hats should never go into a washing machine. Water can warp or dissolve the cardboard. Flexible, all-fabric brims are usually fine. Inspect any embellishments, such as patches, embroidery, or metal hardware. Make sure they are securely attached. They should not get damaged by machine agitation. If you are unsure, it is always safer to hand wash.
Washing Machine Settings for Hats
If your bucket hat is machine washable, follow these settings for the best results:
- Use a Laundry Bag: Place your bucket hat inside a mesh laundry bag. This protects the hat from getting snagged or stretched. It also keeps it from hitting against the washing machine drum. This helps maintain its shape.
- Cold Water: Always use cold water. Cold water prevents shrinking and helps maintain the hat’s color. Hot water can cause dyes to run and materials to warp.
- Gentle Cycle: Select the “delicate” or “gentle” cycle on your washing machine. This setting uses less agitation. It mimics the gentle action of hand washing. A normal or heavy-duty cycle is too harsh for most hats.
- Mild Detergent: Use a small amount of mild liquid laundry detergent. Avoid powder detergents, as they may not dissolve completely in cold water and can leave residue. Do not use bleach unless the care tag explicitly allows it and your hat is white cotton.
- Wash Alone or with Similar Items: It is best to wash the hat by itself. If you must wash it with other items, choose similar colors and delicate fabrics. Avoid washing with heavy items like jeans or towels. These can put too much stress on the hat.
Once the cycle finishes, immediately remove your hat from the washing machine. This prevents it from sitting in dampness, which can cause mildew. For more general advice on washing hats in a machine, you can check out this guide on how to wash a hat in washing machine.
Drying Your Bucket Hat: Preserving Its Shape
The drying process is just as important as washing for a bucket hat. Improper drying can cause your hat to shrink, warp, or lose its iconic shape. My rule of thumb is always “no dryer.” High heat from a machine dryer is a hat’s worst enemy. It can ruin the fabric and structure of almost any bucket hat.
Air drying is the only safe method for bucket hats. This allows the hat to dry slowly and naturally. It also lets you control its shape during the drying process. Patience is key here. Rushing the drying can lead to permanent damage.
Air Drying Techniques
To air dry your bucket hat effectively and maintain its shape, follow these steps:
- Remove Excess Water Gently: After washing, gently press out as much water as you can. Do not wring or twist the hat. You can roll it inside a clean, dry towel. Press firmly to absorb moisture.
- Reshape the Hat: Place the hat on a suitable form. An upside-down bowl works well. A balloon slightly inflated to the hat’s size is also good. You can also stuff the crown with clean, dry towels or crumpled paper. Make sure the paper is not newsprint, as ink can transfer. The goal is to fill the crown and support the brim evenly. This helps the hat dry in its original shape.
- Air Dry in a Well-Ventilated Area: Place the hat in a spot with good air circulation. A drying rack is perfect. Avoid direct sunlight, as this can fade colors or weaken fabric over time. Do not dry near direct heat sources like radiators.
- Flip and Rotate: Periodically check the hat as it dries. Flip it or rotate it to ensure even drying. This prevents one side from staying damp too long. Depending on humidity and hat thickness, drying can take 12 to 24 hours.
- Ensure Complete Dryness: Make sure the hat is completely dry before storing it or wearing it. Even slight dampness can lead to mildew growth. This causes unpleasant odors and can damage the fabric. If the hat feels cool to the touch, it might still contain moisture.
Avoiding Heat Damage
Machine dryers are a major no-go for bucket hats. The high heat can cause several problems:
- Shrinkage: Most fabrics, especially cotton and wool, will shrink significantly in a hot dryer. This makes the hat too small to wear.
- Warping: The structure of the brim can warp or become wavy. This is common for hats with any stiffening material. The hat may lose its original shape permanently.
- Fabric Damage: Heat can weaken elastic fibers. It can also make fabrics brittle. This shortens the hat’s lifespan. Synthetic materials can even melt or develop shiny spots.
- Color Fading: High heat can cause dyes to fade rapidly. This leaves your hat looking dull and old.
Always remember that air drying is the safest and most effective way to dry your bucket hat. It helps preserve its shape, color, and fabric integrity.
Special Care for Specific Bucket Hat Materials
While general washing rules apply, some bucket hat materials need specific attention. Understanding these differences helps you avoid damage and keep your hat looking new. I always consider the fabric type when deciding on the best cleaning approach. This ensures I give each hat the care it deserves.
Ignoring material-specific advice can lead to common washing mistakes. For instance, treating a wool hat like a polyester one will likely result in a shrunken, misshapen item. Knowing the quirks of each fabric is vital for successful cleaning.
Cotton and Canvas Care
Cotton and canvas bucket hats are generally robust. They are also among the most common types. These hats can usually withstand more vigorous cleaning than other materials.
- Washing: Both cotton and canvas can be hand washed or, if the care tag permits, machine washed on a gentle cycle. Always use cold water to prevent shrinking and color fading. Mild detergent is best. If machine washing, place the hat in a laundry bag to protect its shape.
- Stains: These materials are good for spot treating. You can use a soft brush and a stain remover. For tough dirt, a slightly more abrasive scrub might be okay, but still be gentle.
- Drying: Air dry is essential. Cotton and canvas are prone to shrinking in high heat. Reshape the hat while damp. You can place it over an inverted bowl or stuff it with towels.
Polyester and Nylon Durability
Polyester and nylon are synthetic fabrics. They are known for being durable, water-resistant, and quick-drying. These hats are often very low maintenance.
- Washing: Most polyester and nylon bucket hats are machine washable. Use a gentle cycle with cold water. A mesh laundry bag is still a good idea to prevent snags. A mild detergent is all you need. These materials are less likely to shrink than cotton.
- Stains: Polyester and nylon are good at resisting stains. Most spots can be wiped away with a damp cloth and mild soap. For oil-based stains, a little dish soap can help.
- Drying: These fabrics dry very quickly. Air drying is still recommended to preserve the hat’s shape. You can hang them to dry. Avoid machine drying, as excessive heat can melt or distort synthetic fibers.
Wool and Delicate Blends
Wool bucket hats offer warmth and a soft feel. However, wool is a delicate natural fiber. It needs special care to prevent shrinking and felting. Blended fabrics that contain wool or other delicate fibers should be treated similarly.
- Washing: Always hand wash wool bucket hats. Use cool or cold water only. Use a specialized wool detergent or a very mild, pH-neutral soap. Never use hot water, as it causes wool to shrink irreversibly. Gently squeeze the hat in the soapy water. Do not rub, twist, or agitate aggressively.
- Stains: Spot treat wool hats very carefully. Use a clean cloth dabbed with wool detergent. Blot the stain gently. Avoid rubbing vigorously, as this can cause the wool fibers to felt.
- Rinsing: Rinse thoroughly with cool water until all soap is gone. Again, do not wring. Gently press out excess water.
- Drying: Lay the hat flat on a clean, dry towel. Roll the towel and hat together to absorb more water. Then, reshape the hat. Lay it flat on a fresh dry towel or a drying rack. Allow it to air dry completely. Turn it periodically to ensure even drying. Never hang a wet wool hat, as it can stretch out of shape. Avoid any heat source for drying.
By tailoring your washing approach to the specific material, you can ensure your bucket hat remains in excellent condition for many years of wear.
Maintaining Your Bucket Hat’s Freshness Between Washes
Washing your bucket hat correctly is important. But what about keeping it fresh between washes? Regular, light care can greatly extend the time between deep cleans. This also helps your hat look good every day. I often use these quick methods to keep my hats feeling clean and ready to wear.
Think of it like brushing your teeth versus going to the dentist. Regular brushing keeps things good. A full wash is like a deep cleaning. Both are important for different reasons. Small daily habits make a big difference for your hat’s longevity and freshness.
Regular Cleaning Habits
You do not need to wash your bucket hat after every single wear. But a few simple habits can keep it fresh.
- Air It Out: After wearing your hat, especially if you have been sweating, let it air out. Hang it on a hook or place it on a flat surface. Do not store it immediately in a closed space. This prevents moisture buildup and odors.
- Light Brushing: Use a soft-bristled brush or a lint roller to remove loose dust, lint, and hairs. Do this regularly, especially if your hat is dark colored. This keeps the surface looking neat.
- Wipe Down Sweatband: The sweatband inside the hat is where most sweat and oils collect. Use a damp cloth with a tiny bit of mild soap to wipe down the sweatband after a few wears. This helps prevent sweat stains from setting in. Rinse with a clean damp cloth.
- Spot Clean Small Marks: If you notice a small smudge or mark, clean it immediately. Use a damp cloth or a gentle spot cleaner. Addressing small spots quickly stops them from becoming larger stains.
- Avoid Perfumes Directly on Hat: Sprays like hairspray or perfumes can leave residue or stains. Try to put these on before you put your hat on.
These small actions prevent dirt from building up. They also keep your hat smelling clean.
Proper Storage Tips
How you store your bucket hat also affects its cleanliness and shape. Poor storage can lead to crushing, dust, or mildew.
- Keep its Shape: Store your bucket hat so it keeps its round form. You can place it on a hat stand. Or, you can place it over an upside-down bowl. Avoid folding or creasing the brim, especially for hats with a firm structure.
- Clean and Dry Before Storing: Always make sure your hat is completely clean and dry before putting it away for a long time. Storing a damp hat can lead to mildew and a musty smell. Dust and dirt can become harder to remove over time.
- Protect from Dust: Store hats in a clean closet or drawer. You can also put them in a breathable fabric hat bag. This protects them from dust accumulation. Avoid plastic bags, as they trap moisture and can cause mildew.
- Away from Direct Sunlight: Store hats away from direct sunlight. Sunlight can fade colors over time. It can also weaken fabric fibers. A cool, dark place is ideal.
- Avoid Crushing: Do not stack heavy items on top of your bucket hat. This will flatten and distort its shape. Give your hats their own space.
By following these simple maintenance and storage tips, your bucket hat will stay cleaner and look newer for much longer. This reduces the need for frequent deep washes. It helps your hat always be ready when you want to wear it.
FAQ Section
Can I put my bucket hat in the dryer?
No, you should not put your bucket hat in a machine dryer. High heat can cause the hat to shrink, warp, or lose its shape. It can also damage the fabric, especially cotton, wool, or synthetic materials. Always air dry your bucket hat by reshaping it and allowing it to dry naturally.
How often should I wash my bucket hat?
The frequency depends on how often you wear it and how dirty it gets. For regular use, washing it once every 1-3 months might be sufficient. If you sweat a lot, wear it during outdoor activities, or notice visible stains or odors, wash it more often. Spot clean as needed between full washes.
- Hat Washing
- Fabric Care
- Laundry Tips

Todd Martin
Senior Writer
With over 15 years of experience in home renovation and design, I started HEG to share what I’ve learned with homeowners who want to create spaces that are both beautiful and functional. I’ve always believed in a hands-on approach, and over the years, I’ve picked up practical solutions that actually work. Through HEG, I aim to make home improvement more approachable, sharing real tips that help you create a home you truly love.