· Davia Murnell · Appliance Troubleshooting · 19 min read
Why Does My Electric Oven Burn The Bottom Of Everything
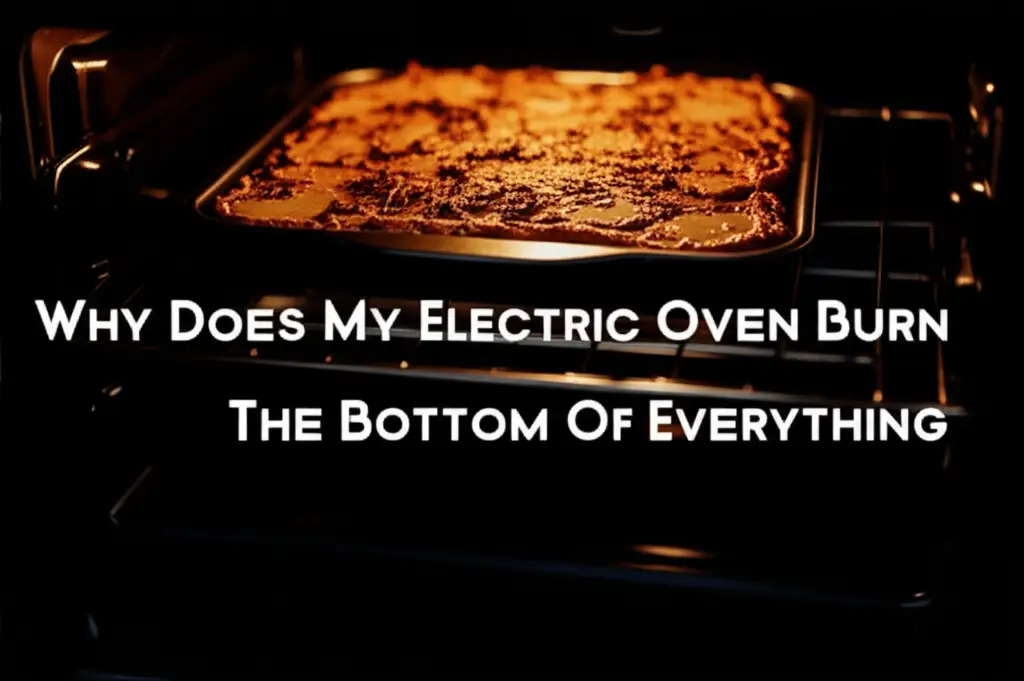
Why Does My Electric Oven Burn The Bottom Of Everything: Causes and Cures
It is frustrating when your culinary creations turn out with a burnt bottom. I have been there many times myself. You spend time preparing a delicious meal or a batch of cookies, only to find the bottom charred while the top is perfect. This common problem often plagues electric oven owners. It makes you wonder, “Why does my electric oven burn the bottom of everything?”
This issue goes beyond simple overcooking. It suggests an imbalance in your oven’s heating system. Uneven heat distribution can ruin your food and your cooking experience. We will explore the common reasons your electric oven burns the bottom. We also provide clear steps to fix this problem. Get ready to bake evenly and enjoy your food again.
Takeaway
- Check Oven Calibration: Your oven temperature might be inaccurate. Use an oven thermometer to verify. Adjust settings if needed.
- Inspect Heating Elements: Look for visible damage or signs of uneven glow in the bottom element. A faulty element needs replacement.
- Optimize Rack Position: Move food to higher racks to reduce direct heat exposure. Adjust based on what you bake.
- Use Proper Cookware: Light-colored, heavy-gauge baking sheets and dishes reflect heat better, preventing bottoms from burning.
- Ensure Proper Preheating: Always let your oven fully preheat. This allows heat to distribute evenly throughout the oven cavity before you add food.
- Keep Your Oven Clean: Spills and debris on the oven bottom can absorb heat unevenly. Regular cleaning improves heat reflection and distribution.
Clear Answer to the Main Query
Your electric oven likely burns the bottom of everything due to uneven heat distribution. Common causes include a miscalibrated thermostat, a faulty lower heating element, incorrect rack placement, or using dark, thin cookware. Food debris on the oven floor can also intensify heat, leading to burning.
Understanding Your Electric Oven’s Heating System
An electric oven uses heating elements to generate heat. Most electric ovens have two main elements: one at the top (broil element) and one at the bottom (bake element). The bake element is responsible for most of the cooking heat. It cycles on and off to maintain the set temperature.
When you preheat your oven, the bake element activates. It heats the air inside the oven. This heat then circulates, cooking your food. If this bottom element becomes too hot or stays on too long, it can cause the bottom of your food to burn. This direct heat contact is often the main reason for charred bottoms.
The oven also uses insulation to keep heat inside. Good insulation helps maintain a stable temperature. If the insulation is faulty, heat can escape, leading to the oven working harder and potentially overheating certain areas. This constant cycling can also contribute to uneven heating. This means hot spots can develop, especially near the bottom element.
The design of your oven helps distribute heat. Some ovens use a fan for convection cooking. This fan moves hot air around, aiming for more even results. Without convection, ovens rely on natural heat rise. Hot air rises, so the top of the oven might be hotter than the middle. The bottom, being closest to the element, gets intense radiant heat. You can maintain overall oven health by learning how to clean your electric oven.
Heat reflection from the oven walls and racks also plays a part. A dirty oven bottom, covered in burnt-on food, can absorb heat instead of reflecting it. This makes the surface directly above it hotter. Keeping the bottom of your oven clean is important. This ensures heat reflects properly for even baking. Learn how to clean the bottom of your oven for better results.
Common Culprits: Why Food Burns on the Bottom
There are several common reasons why your electric oven might be burning the bottom of your dishes. Identifying the exact cause is the first step toward finding a solution. We will look at temperature accuracy, element health, and the oven door seal. These issues are often overlooked but can greatly affect your baking.
Inaccurate Thermostat or Calibration Issues
Your oven’s thermostat controls the temperature. If it is faulty, it will not read the internal temperature correctly. This means your oven might run hotter than the setting indicates. For example, you set it to 350°F, but it heats to 400°F. This extra heat directly impacts the bottom of your food. It is vital to check your oven’s accuracy.
An inexpensive oven thermometer is a great tool for this. Place it inside your oven. Set the oven to a specific temperature and let it preheat fully. After 20-30 minutes, read the thermometer. If it shows a different temperature, your oven needs calibration. Many modern ovens allow for manual temperature adjustments. Refer to your oven’s manual for specific instructions on how to calibrate it.
Faulty Lower Heating Element
The lower heating element is key for baking. It provides the main heat source for the oven cavity. Over time, these elements can wear out. A faulty element might not heat evenly across its surface. It might have “hot spots” where it gets excessively hot. This leads to burning in specific areas of your food.
Sometimes, a lower element might stay on too long. This happens if the thermostat sends a continuous signal. Inspect your lower element visually. Look for any visible damage, such as cracks or bubbles. Also, observe its glow during operation. It should glow evenly. If parts are dark or glow much brighter, the element might be failing. Replacing a faulty element can resolve severe burning issues.
Oven Door Seal Problems
The oven door seal, or gasket, is a crucial component. It creates a tight seal around the oven opening. This seal keeps the hot air inside the oven. If the seal is worn, torn, or loose, heat escapes. This causes the oven to work harder to maintain the set temperature. This constant cycling can lead to the lower element becoming overheated.
An inefficient seal also creates temperature fluctuations inside the oven. These fluctuations can lead to hot spots, particularly near the door. You can test your oven seal. Place a piece of paper in the oven door. Close the door firmly. If you can pull the paper out easily, the seal is not tight enough. Replacing a damaged door gasket is a simple repair that can significantly improve oven performance.
The Role of Oven Rack Position and Cookware
Achieving evenly baked goods involves more than just a functioning oven. Where you place your food inside the oven and the type of cookware you use are equally important. These factors directly influence how heat transfers to your food. Understanding their impact can prevent common burning issues. I have learned this the hard way with many batches of burnt cookies!
Optimizing Oven Rack Position
The position of your oven rack significantly impacts how your food cooks. Heat rises in an oven. The bottom heating element radiates intense heat upwards. If your baking pan is too close to this element, it receives direct, strong heat. This causes the bottom of your food to cook much faster and often burn.
For most baking, the middle rack is the ideal position. It provides the most even heat distribution. If you are baking something delicate or prone to burning on the bottom, move it to a higher rack. This distance from the direct heat source helps prevent charring. Some recipes specify rack positions. Always follow those recommendations. Experimenting with rack placement can make a big difference in preventing burnt bottoms.
Choosing the Right Cookware
The type of bakeware you use also plays a crucial role. Different materials conduct and reflect heat differently. Using the wrong kind of pan can exacerbate the problem of a burning bottom.
- Dark-colored pans: Dark metal pans absorb more heat. They conduct heat quickly and intensely. This can lead to rapid browning and burning on the bottom of your food. If you must use dark pans, consider lowering your oven temperature by 25°F (15°C). You can also reduce baking time.
- Light-colored, reflective pans: Light-colored, shiny aluminum or stainless steel pans reflect heat. This allows for more even cooking and browning. They are generally preferred for cakes, cookies, and other delicate baked goods.
- Glass and ceramic dishes: Glass and ceramic retain heat well. They can lead to a darker bottom crust. If using these, place them on a higher rack. You can also reduce the oven temperature slightly.
- Insulated baking sheets: Some baking sheets have an air layer between two metal sheets. These insulated sheets are designed to prevent over-browning. They provide a barrier against direct heat. They are excellent for cookies and pastries.
Using a baking stone or an empty baking sheet on the rack below your food can also help. This creates a barrier. It diffuses the intense radiant heat from the bottom element. This simple trick can prevent direct heat from scorching the bottom of your dishes.
Preheating and Overcrowding Your Electric Oven
Proper preheating and avoiding oven overcrowding are vital steps for even baking. These practices ensure stable temperatures and adequate air circulation. Ignoring them often leads to unevenly cooked food, including burnt bottoms. I have seen many dishes ruined simply because the oven was not ready.
The Importance of Proper Preheating
Preheating your oven means bringing it to the target temperature before you put food inside. This step is critical for consistent baking. When you first turn on an electric oven, the bottom heating element works at full power to reach the set temperature quickly. If you place food in too soon, it will be exposed to this intense, direct heat from the element. This causes the bottom to cook much faster than the rest of the food, leading to burning.
Always allow your oven to preheat fully. Most ovens take 15 to 20 minutes to reach the desired temperature. Some might need more time, especially if they are larger or older. Your oven’s preheat indicator light or chime will signal when it is ready. For best results, I often add an extra 5-10 minutes after the signal. This ensures the oven walls and racks are also heated thoroughly. A fully preheated oven ensures stable, consistent heat from the moment your food goes in. This reduces the risk of scorching the bottom.
Air Circulation and Overcrowding Issues
Air circulation is essential for even baking. Hot air needs to move freely around your food to cook it uniformly. Overcrowding your oven obstructs this airflow. When too many pans are crammed together, they block the movement of heat. This creates cold spots and hot spots within the oven cavity. The areas directly above the heating element, especially with restricted airflow, can become excessively hot.
Avoid placing multiple large pans side-by-side on the same rack. Leave several inches of space between pans and the oven walls. This allows hot air to circulate freely. If you need to bake multiple items, consider using two racks. Stagger the pans so they are not directly above each other. This allows heat to reach all surfaces of the food. You might also need to rotate your pans halfway through baking. This helps compensate for any subtle temperature variations within your oven. Adequate air circulation ensures that heat distributes evenly. It prevents the intense radiant heat from directly scorching the bottom of your dishes.
Keeping Your Oven Clean for Even Baking
A clean oven is not just for appearances. It plays a significant role in how well your food bakes. Over time, spills, drips, and food particles accumulate on the oven floor and walls. These residues can cause your electric oven to burn the bottom of everything. I found this out when I neglected my oven for too long.
Food Spills and Debris: Heat Traps
Imagine your oven’s interior as a reflective chamber. The heating elements generate heat, and the oven walls and bottom reflect it. This reflection helps distribute heat evenly. Now, consider a layer of burnt-on food, grease, or sauce on the oven floor. This debris acts as a heat trap. It absorbs the radiant heat from the lower element instead of reflecting it.
This absorbed heat makes the oven floor directly under the debris much hotter. Any baking dish placed above these hot spots will experience intensified heat on its bottom. This results in uneven cooking and, often, a charred base. Even small crumbs can create localized hot spots. These areas become little heat furnaces. They directly transfer excessive heat to your bakeware. Keeping your oven clean improves heat distribution. It ensures your food cooks evenly. You can find useful tips on how to clean electric oven.
Impact on Heat Reflection and Absorption
The material of your oven interior, typically enamel, is designed to reflect heat efficiently. When this surface is covered by baked-on grime, its reflective properties diminish. Instead, the dark, carbonized food acts as an absorbent layer. This means more heat is concentrated at the bottom. Less heat moves into the upper parts of the oven cavity. This imbalance leads to overcooked bottoms and potentially undercooked tops.
Regular cleaning prevents this issue. After every few uses or whenever you notice significant spills, wipe down the oven interior. For tougher, baked-on messes, specialized oven cleaners or natural methods like baking soda and vinegar work well. Pay special attention to the oven floor. This area gets the most direct heat. It also collects the most spills. A clean oven floor ensures heat reflects properly. It helps your food cook consistently from top to bottom. If you need to tackle specific stains, learn how to clean burn marks off stove. This applies to the oven floor as well.
Consider running your oven’s self-cleaning cycle if it has one. This feature burns off food residue at very high temperatures. It makes cleanup easier. Be aware that the temperature gets extremely high during this process. You can learn how hot does an electric oven get when self-cleaning to understand the process better. After a self-clean cycle, simply wipe away the ash. A clean oven is an efficient oven, helping you achieve perfect baking results every time.
When to Call a Professional: Advanced Oven Issues
While many common burning issues can be fixed with simple adjustments or cleaning, some problems require professional attention. These advanced issues often involve the oven’s electrical components or complex internal systems. Attempting to fix them yourself can be risky and may cause further damage. I know I would call for help if I suspected these issues.
Thermostat and Temperature Sensor Malfunctions
The thermostat and temperature sensor work together. They ensure your oven maintains the correct temperature. The sensor reads the internal temperature. It sends this data to the thermostat. The thermostat then tells the heating elements to turn on or off. If either component malfunctions, your oven’s temperature control becomes erratic.
A faulty temperature sensor might consistently provide incorrect readings. This can cause the oven to overheat, leading to burnt bottoms. Similarly, a broken thermostat might fail to regulate the heat properly. It could keep the bottom element on for too long. These components require specialized tools and knowledge to diagnose and replace correctly. If your oven consistently bakes hotter than set, even after calibration attempts, a professional appliance technician should inspect the thermostat and sensor. They can accurately diagnose and repair these parts.
Wiring and Electrical Component Problems
An electric oven relies on a complex network of wiring and electrical components. These include relays, circuit boards, and connections to the heating elements. Over time, wiring can fray or become loose. Electrical components can fail due to age, power surges, or manufacturing defects.
Problems with wiring or electrical parts can lead to inconsistent power delivery to the heating elements. This might cause the bottom element to receive too much power, or to stay on continuously. This results in severe and persistent burning on the bottom of food. Signs of electrical issues might include:
- The oven not heating at all.
- The oven repeatedly tripping your circuit breaker.
- Strange smells, like burning plastic or ozone.
- Elements that do not glow properly or spark.
If you suspect electrical issues, do not attempt to fix them yourself. Working with high voltage electricity is dangerous. An appliance repair professional or a certified electrician has the expertise and equipment to safely diagnose and repair these problems. They can ensure all wiring and connections are secure and functioning correctly. For installation or serious electrical issues, it’s wise to consider if does an electric oven need to be installed by an electrician in the first place. This can prevent many future problems.
When Repairs Are Not Cost-Effective
Sometimes, the cost of repairing an older oven can exceed the cost of buying a new one. This is especially true for major component failures. These include problems with the main control board or multiple heating elements. A technician can provide an estimate for repairs. Compare this cost to the price of a new, energy-efficient oven. If your oven is very old, or if repairs are frequent, investing in a new appliance might be a more sensible long-term solution. A professional can help you decide if repair or replacement is the best path forward.
Troubleshooting Steps for a Burning Oven
When your electric oven consistently burns the bottom of everything, it is time to troubleshoot. You can follow a systematic approach. This helps pinpoint the exact problem. You can start with simple checks and move to more complex diagnostics. I always start with the easiest fixes first.
Step-by-Step Diagnostic Process
Verify Oven Temperature Accuracy:
- Action: Buy an oven thermometer. Place it on the middle rack.
- Process: Set your oven to 350°F (175°C). Let it preheat for 20-30 minutes. Check the thermometer reading.
- Outcome: If the thermometer shows a different temperature (e.g., 375°F), your oven runs hot.
- Solution: Adjust your oven’s calibration. Most modern ovens have a setting in the control panel to offset the temperature. Consult your owner’s manual for instructions. If not, simply lower the baking temperature by 25°F (15°C) for most recipes.
Inspect the Lower Heating Element:
- Action: Open your oven door. Look at the lower heating element.
- Process: Turn on your oven to a bake setting. Watch the element as it heats up.
- Outcome: It should glow red evenly across its entire length. Look for any visible breaks, cracks, or areas that do not glow. If it looks damaged or does not glow uniformly, it may be faulty.
- Solution: A damaged element needs replacement. This is a repair that many homeowners can do. Make sure to turn off power to the oven first.
Check Oven Door Seal (Gasket):
- Action: Inspect the rubber or silicone seal around the oven door frame.
- Process: Look for tears, gaps, or areas that are loose. Perform the “paper test”: close the door on a dollar bill or a piece of paper. If you can pull it out easily, the seal is weak.
- Outcome: A compromised seal lets heat escape. This forces the oven to work harder, leading to potential hot spots.
- Solution: Replace a damaged or worn gasket. These are typically easy to replace and can be ordered online or from appliance parts stores.
Evaluate Cookware and Rack Position:
- Action: Consider your baking practices.
- Process: Are you using dark, thin metal pans? Is your food on the lowest rack?
- Outcome: Dark pans absorb more heat. Low racks get more direct heat.
- Solution: Switch to light-colored, reflective bakeware. Always use the middle rack for general baking. For items prone to burning, move to a higher rack. You can also place an empty baking sheet on the rack below your food to act as a heat shield.
Clean Your Oven Thoroughly:
- Action: Look inside your oven for spills and baked-on food.
- Process: Pay close attention to the oven floor. Any dark, crusted debris can absorb heat and cause hot spots.
- Outcome: A dirty oven bottom traps heat and prevents even distribution.
- Solution: Clean your oven regularly. Use a commercial oven cleaner or a paste of baking soda and water. For tough stains, consider using the self-cleaning cycle if your oven has one. Ensure the oven is completely cool before cleaning.
Practical Adjustments and Best Practices
- Adjust Recipes: If you cannot fix the underlying issue immediately, make small adjustments to your recipes. Lower the baking temperature by 25°F (15°C). Reduce the baking time.
- Rotate Dishes: If you are baking multiple items or a large dish, rotate it halfway through the baking time. This helps ensure more even exposure to heat.
- Use a Baking Stone or Pizza Stone: Place a baking stone on the lowest rack. It will absorb and radiate heat more evenly, creating a consistent baking surface above it.
- Aluminum Foil Shield: If a specific part of your food is browning too quickly, you can loosely tent it with aluminum foil. This helps deflect some of the direct heat.
- Do Not Overcrowd: Ensure adequate space between baking dishes and oven walls for proper air circulation.
- Monitor Baking: Do not just set a timer and walk away. Check your food often, especially towards the end of the baking time. Use your eyes and nose to gauge doneness.
By systematically going through these steps, you can identify and often resolve why your electric oven burns the bottom of everything. If these steps do not fix the issue, then it is time to consider calling a professional technician.
Frequently Asked Questions
Q1: Why does my oven burn things only on the bottom?
Your electric oven often burns only the bottom of food due to direct, intense radiant heat from the lower heating element. This happens if the pan is too close to the element, the element is faulty, or the oven thermostat is miscalibrated and running too hot. Food debris on the oven floor can also create hot spots.
Q2: Can oven calibration fix burning?
Yes, oven calibration can often fix burning. If your oven thermostat is inaccurate, it might run hotter than the set temperature. Calibrating the oven adjusts this offset, ensuring the internal temperature matches your setting. This helps prevent overbaking and burning, especially on the bottom.
Q3: How do I test my oven’s temperature accuracy?
To test your oven’s temperature accuracy, buy an inexpensive oven thermometer. Hang it on the middle rack of your cold oven. Preheat the oven to a standard baking temperature, like 350°F (175°C). Let it heat for at least 20 minutes. Then, read the thermometer. Compare it to your oven’s display.
Q4: What kind of bakeware prevents burning?
Light-colored, shiny bakeware like aluminum or stainless steel pans helps prevent burning. These materials reflect heat away from the food, promoting even baking. Insulated baking sheets are also excellent. Avoid dark-colored, thin metal pans, as they absorb more heat and can cause bottoms to scorch.
Q5: Does a dirty oven cause food to burn?
Yes, a dirty oven can definitely cause food to burn. Spilled food and grease on the oven floor absorb
- electric oven
- burning food
- uneven baking
- oven repair
- kitchen tips
- appliance maintenance
- cooking problems
- baking solutions

Davia Murnell
Room Cleaning Expert
Before joining HEG, I spent over a decade running my own window cleaning business, where I perfected streak-free techniques and learned the ins and outs of specialty glass care. Now, I bring that expertise to a broader mission—helping homeowners maintain sparkling windows and beautiful outdoor spaces. From skylights and sliding doors to patio glass and outdoor furniture, I believe every surface deserves attention and care. I share practical tips and proven methods that make even the toughest cleaning jobs feel manageable. Whether you're battling pollen on the porch or smudges on high windows, I’m here to help you see your home in a whole new light—literally.