· Katria Melrose · Appliance Repair · 19 min read
Why Is My Kitchenaid Dishwasher Leaking From Bottom Of Door
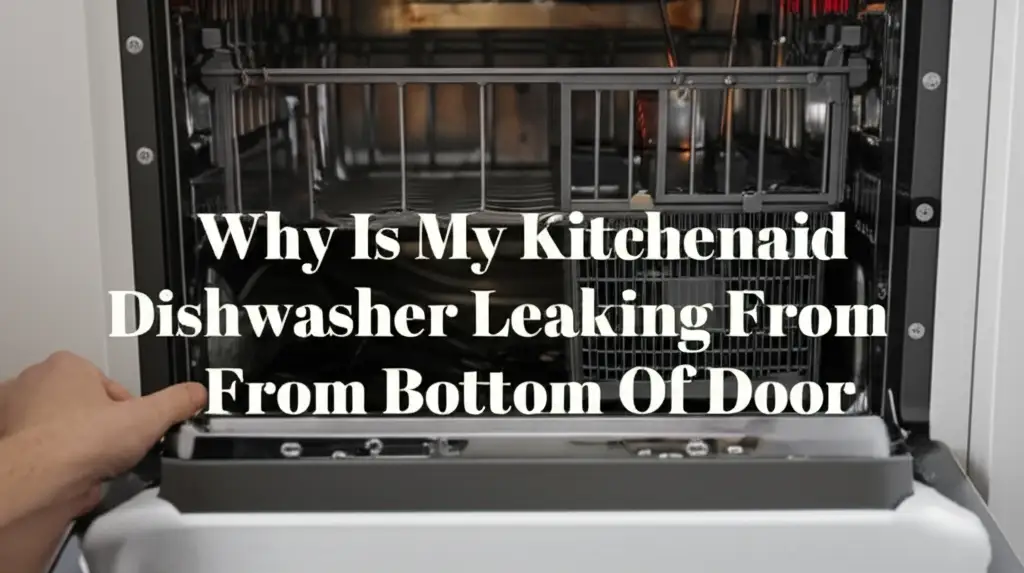
Why Your KitchenAid Dishwasher Leaks From The Bottom Door
There are few household problems as frustrating as a leaking appliance. Imagine the scene: you open your KitchenAid dishwasher after a cycle, expecting sparkling dishes, but instead, you find a puddle of water seeping from the bottom of the door. This issue not only creates a mess on your kitchen floor but can also lead to significant water damage if left unaddressed. Many homeowners experience this specific problem, and it’s a common concern for KitchenAid dishwasher owners.
I know how annoying it is to see water where it shouldn’t be. This guide will help you understand the common causes behind your KitchenAid dishwasher leaking from the bottom of the door. We will explore various culprits, from simple loading errors to more complex component failures. You will learn practical troubleshooting steps and effective solutions to get your dishwasher back in perfect working order. Let’s dive in and identify the source of that unwanted leak.
Takeaway
- Check the door gasket for wear or dirt.
- Ensure proper dish loading to avoid spray arm obstruction.
- Use correct detergent amounts and types to prevent oversudsing.
- Verify your dishwasher is level.
- Inspect the float switch and spray arms for proper function.
- Examine drain and water inlet hoses for clogs or damage.
Your KitchenAid dishwasher typically leaks from the bottom of the door due to a compromised door seal, excessive suds from incorrect detergent use, improper loading that deflects water, or a faulty component causing overfilling. Identifying the exact cause requires careful inspection of several key areas, from gaskets to internal parts like spray arms or the float switch.
Understanding Dishwasher Leaks and Your KitchenAid
Dishwashers are essential appliances in many homes. They simplify daily chores, but sometimes they cause unexpected problems. A leak, especially from the bottom of the door, can be a sign of various underlying issues. Understanding how your KitchenAid dishwasher operates helps diagnose the problem. Water is contained within the wash tub during cycles, and seals and sensors keep it there.
KitchenAid dishwashers are known for their quality, but like any appliance, parts can wear down over time. Leaks often stem from components that lose their effectiveness in containing water. This includes seals that harden or crack, or sensors that fail to regulate water levels properly. Addressing a leak quickly prevents floor damage and mold growth. Timely repairs save you money in the long run.
Your dishwasher’s door is a critical barrier. It must seal tightly to prevent water escape. Any issue with the door’s integrity or the system designed to contain water can lead to a leak. We will look at these specific areas closely. Catching a leak early helps you avoid a bigger repair job. It also helps prevent potential issues with your flooring or cabinetry.
Common Culprits: Door Gasket and Seals
One of the most frequent reasons your KitchenAid dishwasher leaks from the bottom of the door involves the door gasket. This critical rubber seal lines the perimeter of the dishwasher opening. Its job is to create a watertight seal when the door closes. Over time, these gaskets can degrade, become dirty, or shift out of place.
Worn or Damaged Door Gasket (Seal)
The door gasket on your KitchenAid dishwasher is under constant stress. It experiences repeated closing, exposure to hot water, and detergent chemicals. This can cause the rubber to harden, crack, or tear. A damaged gasket cannot form a proper seal. When the cycle runs, water will inevitably seep through these compromised areas, appearing at the bottom of the door.
To inspect the gasket, open your dishwasher door fully. Run your hand along the entire length of the gasket, feeling for any tears, nicks, or brittle spots. You might also notice discoloration or mold buildup, which can also prevent a tight seal. Make sure to clean the gasket regularly with a damp cloth to remove food debris or grime that can interfere with its sealing ability. If you find significant damage, replacement is often the best solution. Many times, you can how to repair a leaking dishwasher yourself, starting with simple fixes like replacing a gasket. This is a common and relatively easy DIY repair for many homeowners.
Replacing a door gasket usually involves simply pulling out the old one from its channel and pressing a new one into place. Ensure the new gasket is properly seated all the way around the door opening. A correctly installed gasket will feel snug and provide uniform pressure against the door. This simple fix often solves persistent leaks.
Loose or Misaligned Door Seal
Sometimes, the door seal itself is not damaged but simply not sitting correctly. The gasket can get partially dislodged from its groove. This happens during loading or unloading dishes, or just from regular wear and tear. A misaligned gasket leaves small gaps. Water can then escape through these gaps during the wash cycle.
Check the gasket’s alignment by visually inspecting it. Look for any sections that seem to stick out or are folded. You can often gently push the gasket back into its channel. Use your fingers to press it firmly into place all around the door frame. Ensure it sits flush and creates a continuous barrier.
Test the seal by running a short cycle and watching for leaks. A proper seal ensures water stays inside. This minor adjustment can prevent significant water damage to your kitchen floor. Regularly check the gasket to ensure it remains in its correct position.
Spray Arm Issues and Detergent Problems
Beyond the door seal itself, internal components play a crucial role in preventing leaks. The spray arms and your detergent choice directly influence how water behaves inside the tub. Problems with either can lead to water escaping from the door. Understanding these internal dynamics helps in precise troubleshooting.
Clogged or Damaged Spray Arms
Your KitchenAid dishwasher uses spray arms to distribute water throughout the tub. These arms have small jets that forcefully spray water onto your dishes. Over time, food particles, hard water deposits, or debris can clog these jets. If a jet is clogged, water pressure may redirect or intensify in unintended ways. This can cause water to spray directly at the door seal.
Inspect your dishwasher’s spray arms for any visible blockages. You might see small pieces of food stuck in the holes. Remove the spray arms, usually by unscrewing a cap or lifting them off a central post. Clean the jets using a toothpick or a small brush to dislodge any debris. Ensure all holes are clear and unobstructed. Some spray arms can also crack or become damaged. A damaged spray arm might spray water erratically, causing it to hit the door seal at an odd angle. If you find cracks or significant damage, replace the spray arm. A properly functioning spray arm ensures water stays contained within the tub’s design.
Too Much Detergent or Incorrect Detergent Type
Using too much dishwasher detergent, or the wrong type, is a surprisingly common cause of leaks. Dishwasher detergents are specifically formulated to produce minimal suds. If you use too much, or accidentally use dish soap meant for handwashing, it creates excessive suds. These suds expand and can fill the entire dishwasher tub.
When the tub fills with too many suds, they can overflow. The suds push past the door seal, even if the seal itself is in perfect condition. They foam out from the bottom of the door, carrying water with them. Always use only detergent specifically designed for dishwashers. Read the detergent’s instructions carefully. Most dishwashers only need a small amount, often just one tablespoon or a single pod. Avoid overfilling the detergent dispenser.
If you suspect oversudsing, run an empty rinse cycle to clear out any remaining suds. Then, restart your dishwasher using the correct amount of proper dishwasher detergent. This simple adjustment can often solve a leaking problem quickly. Using the right detergent and the right amount protects your appliance and your floor.
Loading Habits and Leveling Concerns
How you load your KitchenAid dishwasher and whether the appliance itself sits level can significantly impact water containment. Many leaks from the bottom of the door are not due to a faulty part, but rather poor operational habits or installation issues. These are often easy to correct once you identify them.
Improper Dish Loading
The way you load dishes might seem trivial, but it affects water circulation. Overloading your dishwasher can prevent spray arms from rotating freely. This causes water to spray directly onto the door or escape through gaps. Large items, like baking sheets or platters, placed in the lower rack can block the lower spray arm. They can also prevent water from draining properly or deflect water towards the door.
Make sure dishes do not block the detergent dispenser. Also, ensure they do not protrude too far from the racks. These can interfere with the door sealing properly, creating small gaps. Always follow your KitchenAid dishwasher’s loading guidelines, typically found in the owner’s manual. Space dishes out to allow water to reach all surfaces. This also ensures water drains efficiently and stays within the tub. Proper loading helps the dishwasher perform its job without creating unexpected leaks.
Unlevel Dishwasher
A dishwasher that is not perfectly level can also cause water to escape from the door. If your KitchenAid dishwasher tilts even slightly forward, water might collect at the front of the tub. This puts extra pressure on the lower part of the door seal. Over time, this constant pressure or slight pooling can cause water to seep out. It often appears as a leak from the bottom of the door.
To check if your dishwasher is level, use a carpenter’s level. Place it on the top edge of the open dishwasher door or inside the tub. Adjust the dishwasher’s leveling feet until the bubble in the level is centered. Most dishwashers have four adjustable feet that you can turn to raise or lower each corner. You may need a wrench or pliers for this task. Ensure all four feet are making firm contact with the floor. This provides stability and maintains the appliance’s proper alignment. A level dishwasher ensures water distributes evenly and stays contained within the wash tub. This small adjustment can resolve mysterious leaks.
Float Switch and Water Inlet Valve Malfunctions
Internal components like the float switch and water inlet valve are crucial for regulating water levels inside your KitchenAid dishwasher. If either of these parts malfunctions, your dishwasher might overfill. An overfilled tub will inevitably lead to water leaking out, often from the bottom of the door. These issues require a bit more detailed inspection.
Faulty Float Switch Assembly
The float switch is a safety mechanism designed to prevent your dishwasher from overfilling. It consists of a small, buoyant float that rises with the water level inside the tub. When the water reaches a certain height, the float activates a switch. This switch then signals the water inlet valve to close, stopping water flow. If the float switch is faulty, stuck, or obstructed by debris, it may not signal properly. This causes the dishwasher to continue filling with water beyond the safe level.
To check the float switch, locate it at the bottom of the dishwasher tub, usually under the lower spray arm. It looks like a small plastic cap or cone. Lift it manually with your hand. It should move freely up and down. If it feels sticky or doesn’t move, clean around its base to remove any food particles or grease buildup. If the float moves freely but your dishwasher still overfills, the switch itself might be defective and require replacement. A proper functioning float switch prevents costly leaks by maintaining the correct water level.
Defective Water Inlet Valve
The water inlet valve controls the flow of water from your home’s supply line into the dishwasher. It is an electronically controlled valve that opens to let water in and closes to shut it off. If this valve becomes defective, it might get stuck in the open position. This would allow water to continuously flow into the dishwasher. As a result, the tub overfills, and water eventually escapes through the door seal.
Signs of a defective water inlet valve include a dishwasher that keeps filling even when turned off, or one that constantly runs water during a cycle. You might also hear a faint humming sound if the valve is trying to close but cannot. Replacing a water inlet valve is a more involved repair. It typically requires disconnecting the dishwasher from its power and water supply. It’s often located behind the lower access panel of your dishwasher. If you suspect this part is failing, it’s a good idea to consult your KitchenAid dishwasher’s service manual or consider professional assistance. When your KitchenAid dishwasher has water in the bottom even after a cycle, it points to a filling or draining issue that could relate to this valve. This can certainly lead to leaks.
Drain Issues and Hose Connections
While a leak from the bottom of the door often points to issues directly related to the door or water level, problems with the dishwasher’s drainage system can also indirectly contribute. If water cannot drain properly, it can build up inside the tub. This over-accumulation might then force water out through the door seal. This highlights the interconnectedness of dishwasher components.
Clogged Dishwasher Drain Hose
The drain hose carries dirty water away from your dishwasher and into your sink’s drain or a garbage disposal. If this hose becomes clogged, water cannot exit the dishwasher efficiently. Food particles, grease, and soap scum can accumulate inside the hose over time. A kink in the hose can also restrict flow. When the dishwasher attempts to drain but cannot, the water level inside the tub remains high. During the next fill cycle, this already high water level can lead to overfilling and subsequent leakage from the bottom of the door.
To check the drain hose, first, ensure the dishwasher is off and unplugged. You might need to pull the dishwasher out from its cabinet to access the hose. Look for any visible kinks or bends. Disconnect the hose from both the dishwasher and the drain connection (usually under the sink). Use a flashlight to peer inside and check for blockages. You can also try flushing water through it. If you find a blockage, carefully clear it out. Sometimes, you can use a plumber’s snake or a straightened wire hanger. Reconnect the hose securely, ensuring no new kinks are created.
Loose or Damaged Hose Connections
Beyond blockages, the integrity of the hose connections themselves is vital. Your KitchenAid dishwasher has several hoses: the water inlet hose bringing clean water in, and the drain hose taking dirty water out. A loose clamp or a crack in any of these hoses, particularly where they connect to the dishwasher tub or the water supply, can lead to leaks. While these leaks might first appear under the dishwasher, they can also contribute to a general overfilling scenario that then forces water out the door.
Inspect all hose connections, both at the back of the dishwasher and under your sink. Feel around the connections for any dampness. Ensure that clamps are tight and hoses are not brittle or cracked. Over time, rubber hoses can degrade. If you find a crack or tear, the hose needs replacement. Replacing a damaged hose or simply tightening a loose clamp can resolve a leak. This ensures water travels only where it should. I find these small checks often prevent big headaches.
Advanced Diagnostics and Professional Help
Sometimes, a KitchenAid dishwasher leak from the bottom of the door isn’t due to the common issues. The problem might involve more complex internal components or general wear. Knowing when to call a professional can save you time and prevent further damage. It is important to assess the situation thoroughly before deciding on a course of action.
For instance, leaks might stem from a failing pump seal. This seal prevents water from escaping the wash pump. If it wears out, water can leak from the pump area. This water might then travel underneath the dishwasher tub and appear at the front, mimicking a door leak. Diagnosing a pump seal requires disassembling parts of the dishwasher. Similarly, though less common for door leaks, a crack in the wash tub itself can cause water to escape. This is a more severe issue, often indicating the need for a new appliance. While similar issues can affect other brands, for example, a Samsung dishwasher leaking from the bottom of the door or a Frigidaire dishwasher leaking from the bottom of the door often share these common failure points, the specifics of repair can vary by model.
Consider the age of your KitchenAid dishwasher. If it’s an older model, the cost of complex repairs might outweigh the cost of a new, more energy-efficient appliance. Newer models often come with better warranties and advanced features. You should also check how long is the warranty on a KitchenAid dishwasher before proceeding with a costly repair. This information is usually in your owner’s manual or on KitchenAid’s website. If your dishwasher is still under warranty, professional repair might be covered, saving you money. For issues beyond simple adjustments or part replacements, a certified appliance technician has the tools and expertise to properly diagnose and fix the problem. They can efficiently pinpoint the exact source of the leak and perform the necessary repairs safely.
Maintaining Your KitchenAid Dishwasher to Prevent Leaks
Preventing leaks is always better than fixing them. Regular maintenance can significantly extend the life of your KitchenAid dishwasher and prevent common problems like leaks from the bottom of the door. Simple habits can make a big difference. I always advocate for proactive care; it saves headaches later on.
First, routinely clean your dishwasher’s interior. Food particles, grease, and hard water deposits can build up. This grime can clog spray arms, obstruct the float switch, or even collect on the door gasket. Use a dishwasher cleaner or a mixture of vinegar and baking soda to run an empty cycle once a month. This keeps the internal components free of debris and ensures proper water flow. A clean machine is a happy machine, and it helps maintain efficiency.
Second, pay attention to your door gasket. Regularly wipe it down with a damp cloth to remove any food debris or sticky residues. Inspect it for cracks, tears, or hardening every few months. If it feels stiff or shows signs of wear, consider replacing it before it causes a leak. A new gasket is a relatively inexpensive part that can prevent major water damage. These simple checks take only minutes but offer great peace of mind.
Third, always use the correct type and amount of dishwasher detergent. Only use detergents specifically labeled for dishwashers. Avoid using too much, as this can lead to oversudsing and leaks. If you live in a hard water area, consider using a rinse aid. This helps prevent mineral buildup and improves drying performance, which can also contribute to a cleaner internal environment. Following these simple maintenance tips will help your KitchenAid dishwasher run smoothly for years. It minimizes the chances of unexpected leaks and keeps your kitchen floor dry.
FAQ Section
How do I stop my KitchenAid dishwasher from leaking?
To stop a KitchenAid dishwasher leak, first identify the source. Check the door gasket for damage or dirt, ensuring it seals properly. Verify correct dish loading to prevent water deflection. Use the right amount of dishwasher detergent to avoid oversudsing. Also, confirm the dishwasher is level. For internal issues, inspect the float switch and spray arms.
Can a dirty door seal cause a dishwasher to leak?
Yes, a dirty door seal can absolutely cause a dishwasher to leak. Food particles, grease, or grime can accumulate on the rubber gasket, preventing it from forming a tight seal when the door closes. This allows water to seep out, often from the bottom of the door. Regular cleaning of the door gasket is crucial for preventing leaks.
Why is there water under my dishwasher?
Water under your dishwasher can indicate various issues. It might be a leak from the bottom of the door due to a faulty door seal or oversudsing. Other causes include a leaky water inlet valve, a cracked drain hose, a loose hose connection, or a failing pump seal. Identifying the exact source usually requires inspecting under and around the appliance.
How much does it cost to fix a leaking KitchenAid dishwasher?
The cost to fix a leaking KitchenAid dishwasher varies significantly based on the problem. Simple fixes like cleaning a gasket or adjusting leveling feet might cost nothing. Replacing a door gasket or spray arm might be $20-$100 for parts if you do it yourself. More complex repairs like a faulty water inlet valve or pump could range from $150 to $400 or more with professional labor.
Can I fix a dishwasher leak myself?
Many dishwasher leaks are fixable by a homeowner. Simple issues like a dirty door gasket, improper loading, or too much detergent are easy DIY repairs. Replacing a door gasket or even a spray arm is often straightforward. For more complex internal component failures, like a float switch or water inlet valve, some DIYers can manage, but it might be safer to call a professional technician.
What causes a dishwasher to leak during the wash cycle?
A dishwasher leaking during the wash cycle often points to an issue with water containment or excessive water pressure. Common causes include a damaged or dirty door gasket, oversudsing from too much or incorrect detergent, blocked spray arms directing water towards the door, or improper dish loading deflecting water. Overfilling due to a faulty float switch or water inlet valve can also cause leaks during the cycle.
Conclusion
Finding your KitchenAid dishwasher leaking from the bottom of the door is a common and frustrating household issue. Fortunately, many of these leaks stem from simple, easily fixable problems. We’ve explored the primary culprits, ranging from a compromised door gasket and improper detergent use to issues with spray arms, loading habits, and even the dishwasher’s level. Understanding these potential causes empowers you to take action.
I hope this guide has given you the confidence to diagnose and, in many cases, resolve your KitchenAid dishwasher’s leak. Remember, start with the simplest solutions, such as inspecting and cleaning the door seal or adjusting your loading technique. Progress to checking internal components like the float switch or spray arms. Regular maintenance, including cleaning your dishwasher and inspecting its seals, will go a long way in preventing future leaks. If you’ve tried these steps and the leak persists, or if you encounter a complex issue like a faulty pump or tub crack, consider contacting a certified appliance technician. They possess the expertise and tools to address more challenging repairs safely and efficiently, ensuring your KitchenAid dishwasher returns to its sparkling, leak-free performance.
- KitchenAid dishwasher
- dishwasher leak
- bottom door leak
- appliance repair
- dishwasher troubleshooting
- KitchenAid repair
- water leak
- dishwasher maintenance

Katria Melrose
Cleaning Specialist
With over 12 years of experience in commercial cleaning and a certification in workplace ergonomics, I’ve developed a deep understanding of what makes a workspace truly productive. At HEG, I specialize in helping people transform their home offices into clean, efficient, and comfortable environments. Through smart cleaning routines and strategic organization solutions, I empower readers to create spaces that support focus, comfort, and success—one well-organized desk at a time.