· Todd Martin · Home Improvement · 23 min read
How To Attach A Drawer Front
Achieve Seamless Style: How To Attach A Drawer Front
Have you ever looked at a cabinet or piece of furniture and wondered how the drawer fronts get that perfectly finished look? Attaching a drawer front can seem like a daunting task. However, with the right steps and tools, it is a straightforward process. I find this project very satisfying, as it transforms a basic drawer box into a beautiful, functional part of your home. This article will guide you through everything you need to know about how to attach a drawer front, ensuring a professional and sturdy result every time.
Takeaway
- Gather all necessary tools and materials before you begin.
- Understand the difference between overlay and flush-mount drawer fronts.
- Prepare your drawer box and front properly for best results.
- Use painter’s tape and clamps to hold the front in place for precise positioning.
- Drill pilot holes and use appropriate screws for secure attachment.
- Adjust the drawer front for perfect alignment after initial attachment.
- Troubleshoot common issues like gaps or crooked fronts effectively.
To attach a drawer front, you align the decorative panel to the drawer box, securing it from the inside using screws. You typically use clamps to hold the front in position during this process. Pilot holes prevent wood splitting, and minor adjustments ensure perfect gaps and flushness.
Understanding Drawer Front Types and Styles
When you decide to attach a drawer front, you first need to understand the different types available. Drawer fronts are decorative panels. They cover the functional drawer box. The style you choose impacts the entire look of your furniture or cabinetry. Knowing the style helps you plan your attachment method.
Overlay Drawer Fronts
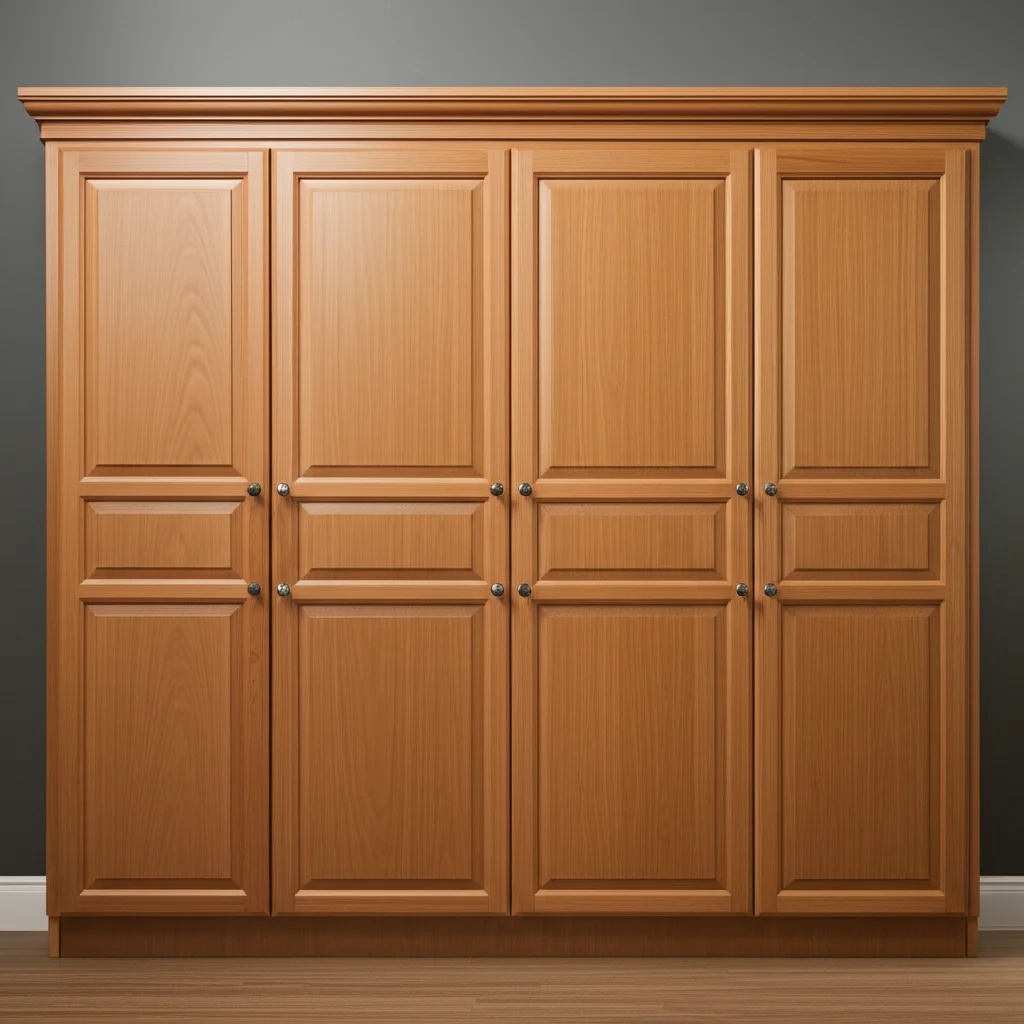
Overlay drawer fronts are common in modern and traditional designs. An overlay front sits on top of the cabinet frame. It overlaps the edges of the cabinet opening. This creates a clean, continuous look. They are generally easier to install. You do not need to worry about the front sitting perfectly inside the opening. This type of drawer front is very forgiving. It hides small imperfections in your drawer box construction. Most kitchens use overlay fronts. They provide a sleek appearance.
- Full Overlay: This type covers almost the entire cabinet face frame. It leaves only small gaps between adjacent doors and drawers. This style is popular for its contemporary feel. It maximizes storage access.
- Partial Overlay (or Standard Overlay): This front covers a portion of the face frame. It leaves more of the frame visible around each drawer. This is a more traditional style. It gives a classic look to your cabinets.
Flush-Mount Drawer Fronts
Flush-mount drawer fronts offer a distinct, built-in appearance. These fronts sit within the cabinet opening. They are flush with the surrounding cabinet frame. This creates a smooth, flat surface. Installing flush-mount fronts requires greater precision. The front must fit perfectly into the opening. Any slight misalignment will be noticeable. They are common in custom furniture. They also appear in high-end cabinet work. If you plan to make a drawer out of wood from scratch, you might consider how it will interact with a flush-mount front. This type of attachment needs very accurate measurements.
Integrated Drawer Fronts
Some drawer systems use integrated fronts. These are often part of a complete drawer slide system. The front attaches directly to special brackets on the drawer slides. This allows for easy removal and adjustment. They are common in modern, pre-manufactured cabinetry. They offer a very streamlined installation process. Sometimes, these systems include specific hardware for precise alignment.
False Drawer Fronts
You might encounter false drawer fronts. These are decorative panels. They mimic the look of a drawer. However, they do not open. They are often found under sinks. They hide plumbing or other elements. Attaching a false drawer front is simpler. You simply screw it directly to the cabinet frame. You do not need to worry about aligning it with a drawer box. They simply enhance the cabinet’s aesthetic appeal.
Choosing the right type helps with the attachment process. Each type has specific requirements. Consider your project’s overall design. Then select the appropriate drawer front. This early decision saves time later on.
Essential Tools and Materials for Attaching Drawer Fronts
Preparing your workspace is the first step for any successful project. To attach a drawer front securely, you need the right tools and materials. Having everything ready beforehand makes the process smoother. It also prevents interruptions during installation. I always lay out all my items before I begin. This helps me visualize the process.
Basic Hand Tools You Will Need:
- Measuring Tape: A reliable measuring tape is crucial. You will use it for accurate measurements. This ensures proper positioning and spacing. Precision is key for a professional finish.
- Pencil: A pencil helps mark pilot hole locations. It also marks alignment lines. Use a light touch to avoid permanent marks.
- Clamps: Woodworking clamps are essential. They hold the drawer front in position. They keep it stable while you drill and screw. I prefer at least two clamps. More clamps provide better stability for larger fronts. Quick-grip clamps work well for this task.
- Drill: A cordless drill speeds up the process. You will use it to drill pilot holes. It also drives the screws. Make sure the battery is charged.
- Drill Bits: You need appropriate drill bits. Use a bit slightly smaller than your screw diameter for pilot holes. A countersink bit is also useful. It allows screw heads to sit flush.
- Screwdriver Bits: Match the bit to your screw head type. Phillips head or Torx bits are common.
- Combination Square or Small Square: This tool helps check squareness. It ensures your drawer front is perfectly straight.
- Level: A small level confirms horizontal and vertical alignment. It helps achieve a perfectly straight installation.
Necessary Hardware and Materials:
- Wood Screws: Select screws appropriate for your material thickness. Typically, 1-inch to 1 1/4-inch screws work well. Ensure they are fine-threaded for hardwoods and coarse-threaded for softwoods or plywood. Using good quality screws prevents stripping.
- Shims or Spacers: These are invaluable for consistent gaps. You can use playing cards, thin pieces of wood, or specific plastic shims. They help maintain uniform spacing around the drawer front. I use these almost every time. They make alignment much easier.
- Painter’s Tape: This tape temporarily holds the drawer front. It keeps it from shifting while you apply clamps. It is gentle on finished surfaces.
- Wood Glue (Optional): For extra strength, you can add a thin bead of wood glue. Apply it along the edges where the front meets the drawer box. This is usually not necessary but provides maximum durability.
- Safety Glasses: Always protect your eyes. Wood dust and flying debris can cause injury. Safety glasses are a non-negotiable item.
Having these tools and materials organized makes the job much simpler. It reduces stress and increases accuracy. A well-prepared workspace contributes significantly to a high-quality finish.
Preparing Your Drawer Box and Front
Proper preparation is critical before you attach a drawer front. This phase ensures a smooth installation. It also helps achieve a professional appearance. Taking time here prevents frustrations later. I always clean my workpieces first. This removes any dust or debris.
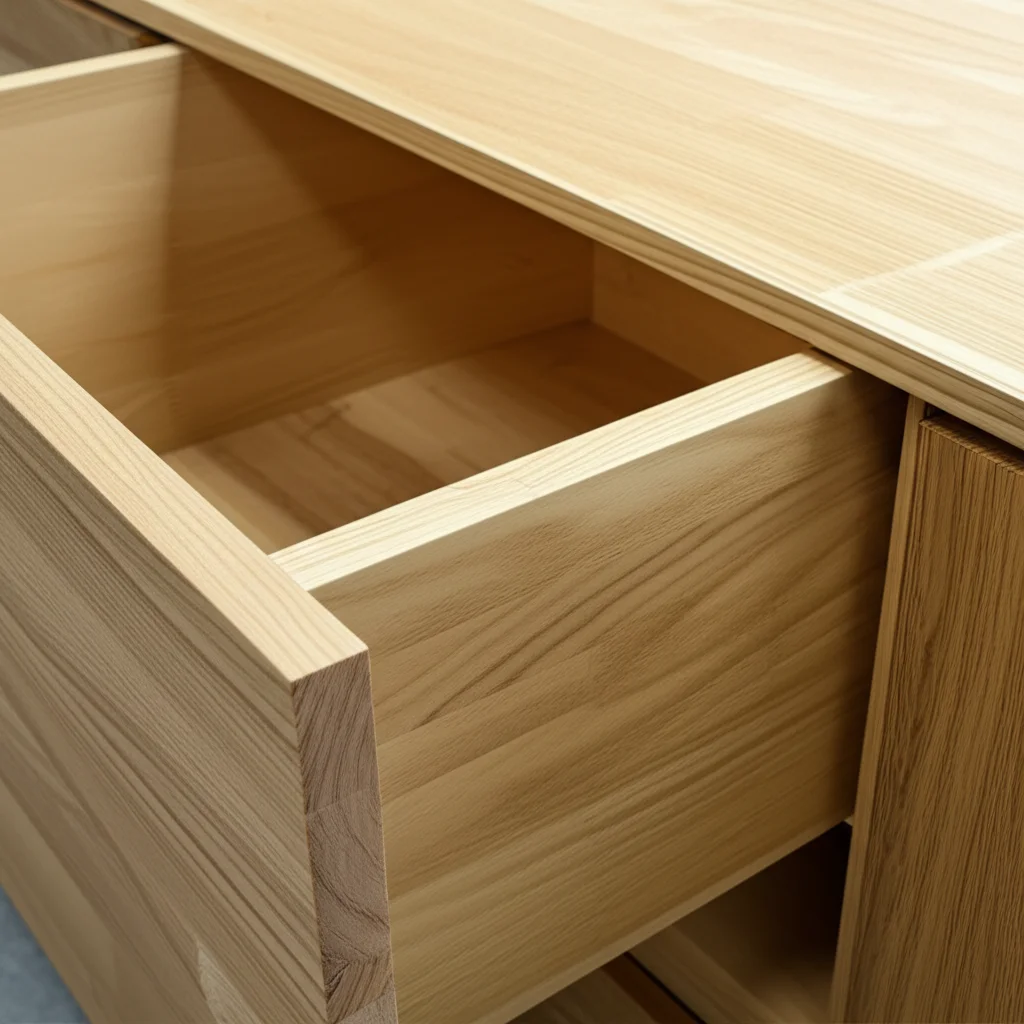
Inspect the Drawer Box: First, examine your drawer box. Ensure it is square and sturdy. The front edge where the panel will attach should be flat. Check for any protruding screws or splintered wood. Sand down any rough spots. A smooth surface helps the drawer front sit flush. If you are building the drawer box yourself, ensure all joints are strong. If you just finished building how to make a drawer out of wood, now is the time to verify its integrity.
Pre-Drill Holes (if necessary): Some drawer boxes, especially those with pre-installed slides, might have designated holes. These holes are for attaching the front. If not, you will drill new holes. You will drill these from the inside of the drawer box. These holes will guide your screws into the drawer front. This prevents splitting the wood.
Prepare the Drawer Front: Inspect the drawer front itself. Ensure it is clean and free of defects. If it is unfinished, apply your desired stain or paint. It is much easier to finish the front before attachment. Once it is attached, finishing can be challenging. Especially around the edges and inside corners. Make sure the finish is completely dry before handling.
Determine Spacing and Overlap (for Overlay Fronts): For overlay drawer fronts, decide on your desired reveals. Reveals are the small, consistent gaps between the drawer front and the cabinet frame. Standard reveals are typically 1/8 inch or 3/32 inch. Consistent reveals make a cabinet look professional. Use shims or spacers to maintain this gap during installation. These small pieces of material are invaluable. They ensure your spacing is even on all sides. You can also use painter’s tape on the cabinet opening to mark your reveal lines. This provides a visual guide.
Mark Center Lines (Optional but Recommended): Mark the center line on the back of your drawer front. Also, mark the center line on the front of your drawer box. Aligning these lines helps with initial positioning. This is particularly useful for wide drawer fronts. It ensures you start with a balanced placement. You can also draw light lines on the back of the drawer front. These lines represent the outer edges of the drawer box. This helps you confirm the exact placement before screwing.
Consider Drawer Pulls/Knobs: If you plan to install drawer pulls or knobs, mark their locations on the drawer front before attachment. Some prefer to drill these holes after the front is attached. This allows you to drill through the drawer box and the front simultaneously. This method ensures perfect alignment for the hardware. However, drilling through two pieces of wood can be tricky. If you drill beforehand, make sure your measurements are exact.
Proper preparation saves time and effort. It contributes significantly to the overall quality of your furniture piece. A well-prepared drawer box and front make the attachment process straightforward.
Step-by-Step Guide: Attaching an Overlay Drawer Front
Attaching an overlay drawer front correctly is all about precision and patience. This method is common for most cabinetry. It creates a sleek look. Follow these steps for a perfect installation. I find that taking my time here always pays off.
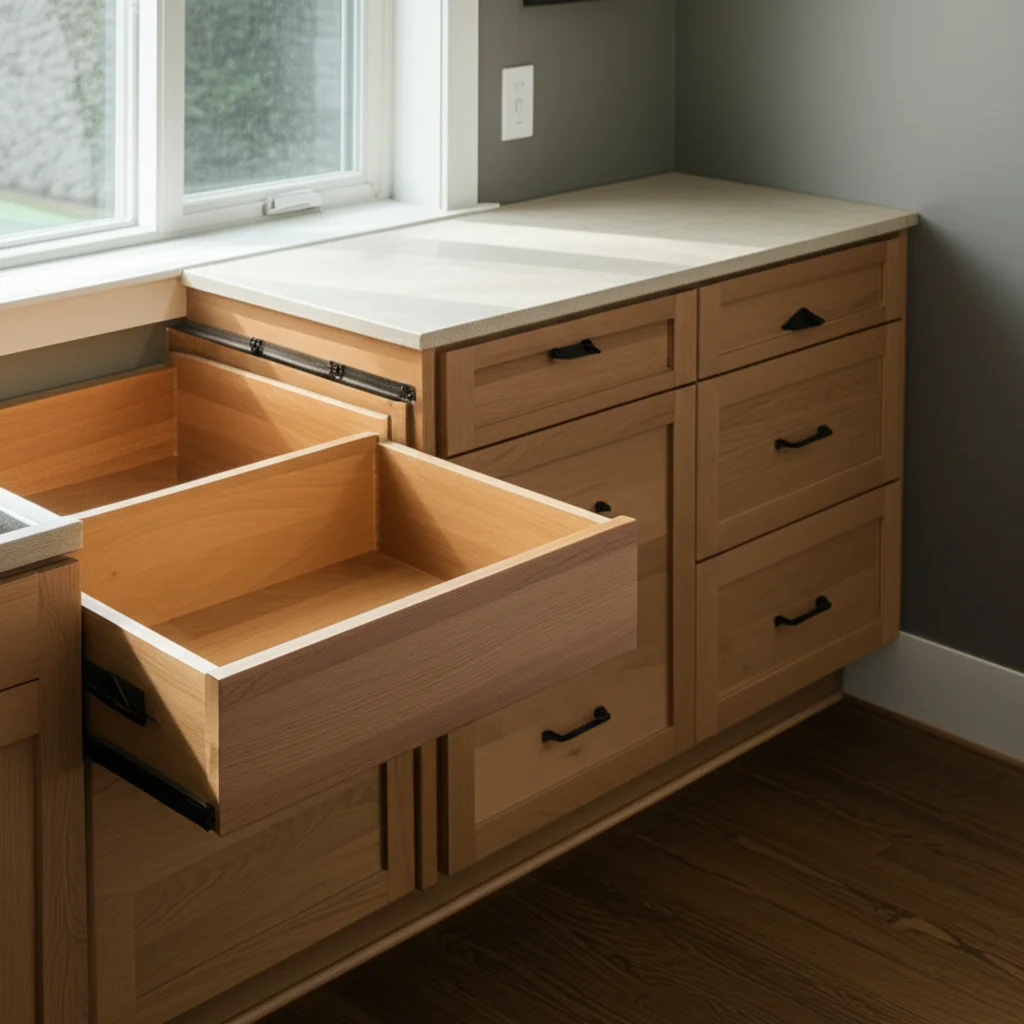
Step 1: Position the Drawer Box in the Cabinet First, ensure your drawer box is fully installed on its slides. Slide the drawer box into the cabinet. Close it completely. The drawer box should sit flush with the cabinet opening. This gives you a stable base for attaching the front. Make sure the slides operate smoothly.
Step 2: Dry Fit the Drawer Front Hold the drawer front in its intended position. Visually check the alignment. Look at the gaps around the edges. Adjust it until the gaps are even. Use shims or spacers to maintain these consistent gaps. Place shims between the drawer front and the cabinet frame. This ensures an even reveal on all sides. This is a critical step for a professional appearance. You want the gaps to be consistent with any existing cabinet doors or drawer fronts.
Step 3: Secure the Drawer Front with Painter’s Tape Once the drawer front is perfectly aligned, secure it temporarily. Apply strong painter’s tape across the top and bottom edges. The tape should span from the drawer front onto the cabinet frame. This holds the front in place while you open the drawer. Make sure the tape is firm. This prevents the front from shifting.
Step 4: Clamp the Drawer Front to the Drawer Box Carefully open the drawer. The painter’s tape should keep the front in its correct position. Now, clamp the drawer front to the drawer box from the inside. Use at least two clamps. Position them to hold the front firmly against the drawer box. This is where most people make a mistake. Do not overtighten the clamps. Just enough pressure to prevent movement. This ensures the front does not slip during drilling.
Step 5: Drill Pilot Holes With the front clamped, drill pilot holes. Drill from the inside of the drawer box. Drill through the drawer box and into the back of the drawer front. Use a drill bit slightly smaller than your screw diameter. Drill at least two pilot holes. Place them near the top and bottom corners. For wider fronts, add more holes, evenly spaced. Make sure your drill bit does not go all the way through the drawer front. You can use a drill stop collar for this. I always double check my drill depth.
Step 6: Attach the Drawer Front with Screws Now, attach the drawer front permanently. Insert your screws into the pilot holes. Drive them carefully. Ensure they pull the drawer front tightly against the drawer box. Avoid overtightening. Overtightening can strip the wood or cause the front to bow. After the screws are in, you can remove the clamps and painter’s tape.
Step 7: Check and Adjust Alignment Close the drawer. Inspect the reveals around the drawer front. Are they even? Does the front sit flush? If minor adjustments are needed, open the drawer. You can sometimes slightly loosen the screws. Then tap the drawer front gently into position. Retighten the screws. Some drawer slide systems have built-in adjustment screws. These allow for fine-tuning after initial attachment. If you need to make more significant adjustments, consider removing the screws, re-clamping, and redrilling. This step is crucial for that polished look.
Attaching an overlay drawer front with these steps ensures a sturdy and visually pleasing result. The consistent reveal around the drawer front will make your cabinet or furniture piece look professionally made.
Mastering Flush-Mount Drawer Front Attachment
Attaching a flush-mount drawer front demands greater precision. This style sits inside the cabinet opening. It creates a smooth, continuous surface. Any error in alignment will be more noticeable. But with careful work, you can achieve a sophisticated finish. I find flush-mount installations very rewarding.
Step 1: Prepare the Drawer Box and Opening Ensure your drawer box fits perfectly within the cabinet opening. The opening must be perfectly square. Check for any unevenness or debris. The drawer box should slide smoothly. It should also stop flush with the cabinet face frame when closed. This might require adjusting your drawer slides. Take your time to get this right. It is the foundation for a good flush-mount.
Step 2: Position the Drawer Front within the Opening This is the most critical step for flush mounting. Hold the drawer front in the opening. It needs to be perfectly flush with the cabinet frame. Use shims or spacers to achieve even gaps. These gaps should be minimal. Typically, 1/16 inch or less on all sides. Place shims carefully between the drawer front and the cabinet frame. This ensures consistent spacing. Use multiple shims if needed. Small pieces of paper or playing cards work well for very tight tolerances.
Step 3: Secure with Double-Sided Tape or Hot Glue (Temporary) Since you cannot use painter’s tape across the cabinet frame like with overlay fronts, you need another method. Apply small pieces of strong double-sided tape to the back of the drawer front. Place them where the front will contact the drawer box. Alternatively, use a few small dots of hot glue. This temporarily adheres the front to the drawer box. It holds the front precisely in place when you open the drawer. This allows you to clamp it securely from the inside.
Step 4: Clamp the Drawer Front to the Drawer Box Gently open the drawer. The temporary adhesive should hold the drawer front in its perfect flush position. Now, secure the drawer front to the drawer box using clamps. Use at least two clamps. Position them carefully to avoid shifting the front. Ensure the clamps apply even pressure. This step is similar to overlay attachment but relies on the initial adhesive to maintain flushness.
Step 5: Drill Pilot Holes from Inside With the front clamped firmly, drill pilot holes. Drill from the inside of the drawer box, through the drawer box, and into the back of the drawer front. Use a drill bit slightly smaller than your screw diameter. Aim for at least two holes per side. This provides good stability. For larger fronts, use four to six pilot holes, evenly distributed. Always check your drill depth. You do not want to drill through the front.
Step 6: Attach with Screws Insert your chosen screws into the pilot holes. Drive them carefully. Ensure they pull the drawer front tightly against the drawer box. Avoid overtightening. Overtightening can distort the wood. It can also strip the screw holes. After the screws are in, remove the clamps and any temporary adhesive. Clean off any hot glue residue.
Step 7: Final Check and Adjustments Close the drawer. Inspect the flushness and gaps. The front should sit perfectly even with the cabinet frame. The gaps should be uniform. If minor adjustments are needed, you might carefully loosen screws and gently tap the drawer front. Some high-quality drawer slides have precision adjustment screws. These screws allow you to fine-tune the front’s position. This final adjustment step is vital for a truly professional flush-mount look. This precision brings your project to life.
Mastering flush-mount attachment takes practice. But the clean, integrated look it provides is worth the effort. It truly elevates the quality of your woodworking projects.
Achieving Perfect Drawer Front Alignment and Adjustments
Even after careful installation, drawer fronts often need fine-tuning. Achieving perfect alignment is what separates a good job from a great one. Consistent gaps and flush surfaces make your furniture or cabinetry look professional. This step is where attention to detail really matters. I spend extra time here to get it right.
Why Alignment Matters: Misaligned drawer fronts are noticeable. They can detract from the overall aesthetic of your piece. Gaps that are too wide or uneven look sloppy. A drawer front that protrudes or is recessed unevenly can also be a visual distraction. Proper alignment ensures smooth operation. It also protects the drawer front from rubbing against the cabinet frame.
Tools for Fine-Tuning:
- Shims or Spacers: These are your best friends for gap adjustment.
- Small Rubber Mallet: Useful for gentle tapping.
- Screwdriver: For loosening and tightening screws.
- Level: To check horizontal and vertical alignment.
- Feeler Gauges (Optional): For extremely precise gap measurement.
Methods for Adjusting Drawer Fronts:
Loosening and Tapping:
- If a drawer front is slightly misaligned, open the drawer.
- Slightly loosen the screws that attach the front to the drawer box. Do not remove them.
- Gently tap the drawer front into the correct position. Use a rubber mallet or a block of wood.
- Once aligned, carefully re-tighten the screws. Ensure the front does not shift during tightening. This method works well for minor shifts.
Using Shims/Spacers for Consistent Gaps:
- Close the drawer. Observe the gaps around the front.
- If a gap is too wide, insert shims (playing cards, thin wood scraps, or specific plastic shims) into the adjacent gaps. This pushes the drawer front over.
- If a gap is too tight, you may need to loosen screws and slightly reposition the front.
- Maintain consistent shims between multiple drawer fronts and cabinet doors. This creates a uniform look across your entire piece.
Adjusting with Drawer Slide Mechanisms:
- Many modern drawer slides have built-in adjustment features. These are typically small screws on the slide itself.
- These screws allow you to move the drawer front up, down, or side to side.
- Consult the instructions for your specific drawer slides. This is often the easiest way to make precise adjustments without disassembling. This is why I prefer modern slides. They simplify final adjustments.
Re-Drilling Pilot Holes (Last Resort):
- If the misalignment is significant, you may need to re-drill.
- Remove the drawer front from the drawer box.
- Plug the old screw holes in the drawer box with wood glue and dowels or toothpicks. Let it dry.
- Re-position the drawer front using the initial clamping and tape method.
- Drill new pilot holes, slightly offset from the old ones.
- Re-attach the drawer front. This method is more involved but fixes major alignment issues.
Checking Your Work:
- Eye Level Inspection: Stand back and look at the drawer fronts at eye level. This helps spot unevenness.
- Run Your Hand Across: Feel the surface. Does the flush-mount front sit perfectly even with the frame?
- Measure Gaps: Use a ruler or feeler gauge to confirm gap consistency.
Perfect alignment takes patience. Do not rush this final step. It significantly enhances the professional look of your work.
Common Challenges and Troubleshooting Tips
Even with careful planning, you might encounter issues when you attach a drawer front. These challenges are normal. Knowing how to troubleshoot them will save you time and frustration. I have faced all of these myself.
Challenge 1: Drawer Front Is Crooked or Uneven This is perhaps the most common issue. The drawer front might be tilted or not sitting straight.
- Solution 1: Loosen and Re-adjust. Open the drawer. Slightly loosen the screws holding the front. Gently push or tap the drawer front until it is straight. Use a level to confirm. Then retighten the screws carefully.
- Solution 2: Adjust Drawer Slides. If your drawer slides have adjustment screws, use them. These often allow for vertical or horizontal movement of the entire drawer box. This can correct a crooked front. Refer to your slide’s manual.
- Solution 3: Shims for Gaps. If the crookedness comes from uneven gaps, use shims. Place thin shims in the wider gaps. This pushes the front to even out the spacing.
Challenge 2: Gaps Are Inconsistent One side of the drawer front has a wider gap than the other. Or the top gap differs from the bottom.
- Solution 1: Shim Correction. This is the primary solution. Place shims of varying thickness in the gaps to achieve consistency. You might put a thicker shim on one side to push the drawer front over. Remember, shims are your best friend here.
- Solution 2: Re-evaluate Mounting. If shims do not fix it, the initial mounting might be off. Remove the screws. Re-position the drawer front. Ensure it is perfectly centered and square before re-clamping and re-drilling pilot holes.
Challenge 3: Drawer Front Sits Proud or Recessed Unevenly (for Flush-Mounts) The drawer front does not sit perfectly flush with the cabinet frame. One corner might stick out, while another is too far in.
- Solution 1: Check for Obstructions. Ensure nothing is behind the drawer front. Check for screw heads that are not countersunk. Also, check for wood splinters or debris on the drawer box edge.
- Solution 2: Adjust Depth. If your drawer slides allow for depth adjustment, use it. This moves the entire drawer box in or out.
- Solution 3: Shim the Drawer Box. If the problem is persistent, you might need to shim the drawer box itself. Add thin shims behind the drawer slide mounting points. This pushes the entire drawer box further out or in. This is a more advanced adjustment.
Challenge 4: Screws Are Stripping or Not Holding This happens if pilot holes are too large or too small. Or if the wood is soft.
- Solution 1: Use Thicker Screws. If the pilot hole is too large, use a slightly thicker screw.
- Solution 2: Wood Filler/Dowel. Fill the stripped hole with wood filler. Let it dry completely. Then drill a new pilot hole. For better hold, insert a wooden dowel (with glue) into the stripped hole. Once dry, drill a new pilot hole into the dowel.
- Solution 3: Pre-drill Correctly. Always use the correct pilot bit size. The bit should be slightly smaller than the screw’s major diameter. This provides good thread engagement.
Challenge 5: Drawer Front Rubs Against the Frame The drawer front scrapes against the cabinet opening when opening or closing.
- Solution 1: Identify Rub Point. Open and close the drawer slowly. Pinpoint exactly where it is rubbing.
- Solution 2: Adjust Alignment. Use the methods described above (loosening screws, shims, slide adjustments) to move the drawer front away from the rubbing point.
- Solution 3: Sanding (Last Resort). If all else fails, and it’s a minor rub, carefully sand a tiny amount of material from the rubbing surface. Do this only as a last resort and with extreme caution.
Troubleshooting requires a systematic approach. Identify the problem, then apply the most appropriate solution. Do not get discouraged. Every project has its quirks.
Frequently Asked Questions
Q1: What is the best way to temporarily hold a drawer front in place? A: You can use strong painter’s tape across the drawer front and cabinet frame. For flush-mount fronts, small pieces of double-sided tape or hot glue dots on the back of the front work well. These methods hold the front securely while you open the drawer to clamp it from the inside.
Q2: How do I prevent drilling through the drawer front? A: Use a drill stop collar on your drill bit. This small ring clamps onto the bit. It prevents the drill from penetrating deeper than desired. Measure the thickness of your drawer front. Set the collar so the drill bit only goes about two-thirds to three-quarters of the way through.
Q3: Can I attach a drawer front with just glue? A: No, I do not recommend attaching a drawer front with just glue. While glue provides strong adhesion, screws provide the mechanical strength needed for a drawer that is constantly opened and closed. Glue can be used in addition to screws for extra durability, but not as the sole fastening method.
Q4: How do I ensure even gaps around multiple drawer fronts? A: Use consistent shims or spacers. For example, use 1/8-inch thick pieces of scrap wood or plastic shims. Place them between the drawer fronts and cabinet frames during installation. This helps maintain uniform spacing across all your drawer fronts and cabinet doors.
Q5: What type of screws should I use for attaching drawer fronts? A: Use wood screws that are about 1 to 1.25 inches long. Choose screws with a head that can be countersunk. Ensure the screw length is appropriate for the combined thickness of your drawer box and drawer front. You want the screw to penetrate the drawer front deeply enough for a strong hold without going all the way through.
Q6: Is it better to attach drawer pulls before or after attaching the drawer front? A: It is generally easier to attach drawer pulls after the drawer front is secured to the drawer box. This allows you to drill through both the drawer box and the front at the same time, ensuring perfect alignment for your hardware. If you drill beforehand, measure very precisely.
Conclusion
Attaching a drawer front is a rewarding DIY project. It brings a finished look to your furniture or cabinetry. I have found that careful preparation and precise execution are key. By understanding drawer front types and gathering the right tools, you set yourself up for success. Remember to use clamps, drill pilot holes, and take your time with adjustments.
Whether you are working on an overlay or a flush-mount style, patience is your best tool. The effort you put into achieving perfect alignment will shine through in the final product. You will have a sturdy, beautiful drawer that enhances your home. With these steps, you can confidently attach a drawer front and add a professional touch to your woodworking projects. Start your next project today and enjoy the satisfaction of a job well done!
- drawer installation
- cabinet fronts
- furniture assembly
- DIY woodworking
- drawer alignment

Todd Martin
Senior Writer
With over 15 years of experience in home renovation and design, I started HEG to share what I’ve learned with homeowners who want to create spaces that are both beautiful and functional. I’ve always believed in a hands-on approach, and over the years, I’ve picked up practical solutions that actually work. Through HEG, I aim to make home improvement more approachable, sharing real tips that help you create a home you truly love.