· Todd Martin · Furniture Painting · 22 min read
How To Blend Paint On Furniture
Achieve Smooth Transitions: How to Blend Paint on Furniture
Are you looking to give an old piece of furniture a fresh, artistic look? Learning how to blend paint on furniture opens up a world of creative possibilities. Blending paint allows you to create seamless color transitions, from soft ombre effects to dramatic gradients. This technique transforms ordinary items into unique statement pieces. It adds depth, visual interest, and a custom touch to any room. We will explore everything you need to know about blending paint on furniture, from choosing the right colors and tools to mastering various blending techniques.
Takeaway
- Prepare your furniture surface properly for the best blending results.
- Select paint types and brushes suitable for smooth color transitions.
- Choose a color palette that complements the blending technique.
- Apply paint in thin layers, blending while wet for seamless gradients.
- Practice different blending methods like wet-on-wet or dry brushing.
- Protect your finished blended piece with a durable topcoat.
How do you blend paint on furniture?
You blend paint on furniture by applying two or more colors next to each other and using a damp brush or sponge to feather the edges where they meet. This creates a soft, gradual transition from one shade to the next. Working quickly while the paint is wet allows for the smoothest, most seamless effect, achieving beautiful ombre or gradient designs.
Understanding Paint Blending Techniques for Furniture
Paint blending on furniture is an artistic skill. It lets you transition colors smoothly across a surface. You might want a soft ombre look, where one color gradually fades into another. Or, you might aim for a more vibrant gradient, with distinct yet connected color changes. This technique adds depth and character to any furniture piece. It moves beyond simple solid colors.
I love seeing how a piece transforms with a good blend. It feels like magic. You take separate colors and make them flow together. This creates a cohesive design that draws the eye. The beauty lies in the seamlessness. There are no harsh lines, only graceful shifts in hue.
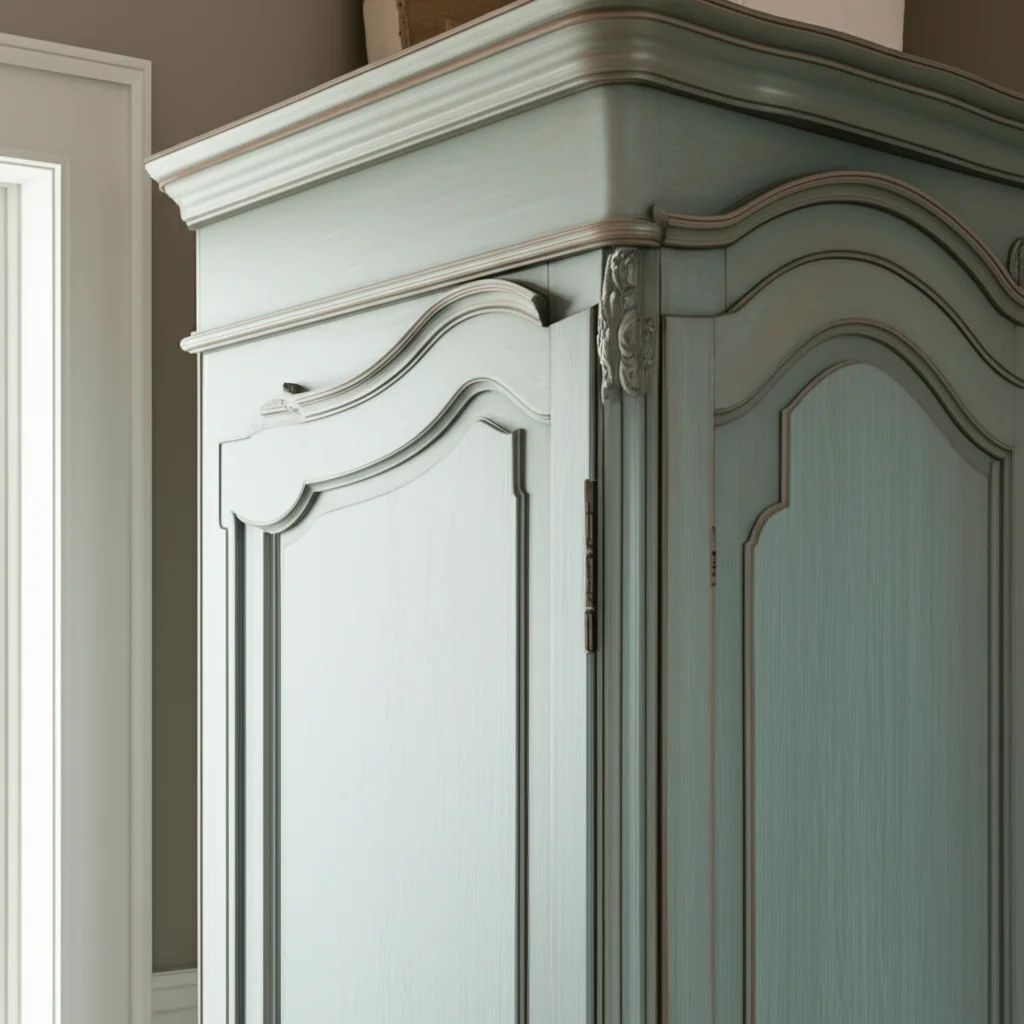
Blended furniture pieces become focal points. They tell a story with their colors. You can use this method to match decor or create a bold contrast. It works well on dressers, tables, and even small accent pieces. Think about how a sunrise transitions from deep reds to soft oranges and then to bright yellows. Blending paint on furniture aims to capture that same natural flow of color. It’s a way to personalize your space truly.
What is Paint Blending?
Paint blending is the process of merging two or more paint colors directly on a surface. This creates a smooth, transitional effect. The goal is to avoid harsh lines between colors. Instead, you want a gradual fade or shift. This makes the colors appear to melt into one another.
Common styles include ombre and gradient. Ombre usually moves from dark to light, or one color to another, along a single axis. Gradient refers to any smooth transition between colors or tones. Both add a sophisticated look to furniture.
This technique is popular in furniture upcycling. It brings new life to old pieces. It allows for unique, custom designs that reflect personal style. Blending can hide imperfections too. It draws attention to the beautiful color flow instead.
Why Blend Paint on Furniture?
Blending paint offers many benefits for furniture. First, it adds visual interest. A solid color can be nice, but a blend adds dynamic appeal. It makes the furniture more engaging to look at. Second, it allows for customization. You can choose specific colors to match your existing decor. This creates a cohesive and professional look in your home.
Third, blending can hide flaws. Small dents or scratches might be less noticeable with a color transition. The eye focuses on the blend, not minor imperfections. Fourth, it is a creative outlet. You get to experiment with colors and techniques. This makes furniture painting a more rewarding hobby.
Finally, blended furniture often looks high-end. You can achieve a designer look without the high cost. It gives your furniture a handcrafted, unique feel. This elevates the entire room’s aesthetic.
Essential Tools and Materials for Blending Success
Having the right tools and materials is critical for successful paint blending. Just like a chef needs the right ingredients, you need specific items for a smooth blend. Using quality tools makes the process easier. It also helps achieve professional-looking results. Do not skip on these essentials.
The type of paint you choose matters greatly. Different paints behave differently when blended. Your brushes are equally important. You will need a variety of sizes and bristle types. A spray bottle with water is another key item. It keeps paint wet for longer blending times.
I always gather everything before I start. This prevents interruptions. It also keeps the paint from drying prematurely. A well-prepared workspace is a happy workspace. Get your supplies ready before you even think about putting brush to wood.
Choosing the Right Paint for Blending
Not all paints are ideal for blending. You need paint with a good open time. Open time refers to how long the paint stays wet and workable. Longer open times give you more time to blend colors seamlessly.
Chalk paint is a fantastic choice for blending. It has a matte finish and a porous nature. This makes it very forgiving for blending. It also dries slower than some other paints. Many artists prefer chalk paint for ombre effects. How to chalk paint furniture without sanding might be helpful if you are new to chalk paint.
Acrylic paints can also work well. Look for craft or artist acrylics with a fluid consistency. Some acrylics dry very fast. You might need to use a blending medium or extender. This slows down the drying process. Latex paints can be tricky due to their fast drying time. If you use latex, you must work very quickly. How to paint furniture with latex paint offers more details on general latex application.
Fusion Mineral Paint also works for blending. It has a built-in topcoat and a nice flow. How to use Fusion Paint on furniture provides insights into this specific type. Oil-based paints are generally not recommended for beginners due to their long drying times and strong fumes. Stick to water-based options for easier cleanup and safer use.
Essential Brushes and Blending Tools
Your brush selection is vital for smooth blending. You will need several types.
- Flat or Angled Brushes: These are great for applying the initial blocks of color. Choose synthetic bristles for water-based paints. A good quality brush will hold more paint and distribute it evenly.
- Blending Brushes: These brushes often have soft, fluffy bristles. They are designed to gently feather colors together. Look for oval or round blending brushes. They help eliminate brush marks. How to paint furniture without brush marks shares techniques to achieve a smooth finish.
- Small Detail Brushes: Use these for tight corners or small areas. They ensure precision where needed.
- Artist Sponge: A damp natural or synthetic sponge can create soft, mottled blending effects. It’s great for adding texture or blending large areas quickly.
- Spray Bottle: Fill this with clean water. A fine mist helps keep paint wet. This extends your working time. It is essential for wet-on-wet blending.
- Paper Towels or Rags: Keep these handy for wiping brushes. They also help control moisture.
Having a range of tools means you are ready for any blending challenge. Clean your brushes often during the process. This prevents colors from muddling. How to clean your paint brushes offers a comprehensive guide for brush care.
Preparing Your Furniture for a Seamless Blend
Proper preparation is the foundation for any successful paint project, especially blending. You cannot achieve a smooth, seamless transition on a dirty or poorly prepped surface. Think of it like a canvas for an artist. A clean, primed canvas makes the artwork shine. The same applies to your furniture.
I learned this lesson the hard way. Once, I rushed the prep phase. The paint did not adhere well, and the blend looked patchy. It was frustrating. Now, I dedicate ample time to preparing the piece. This step ensures the paint adheres properly. It also provides a smooth surface for blending.
Even if you are using a “no-sanding” paint, cleaning is always necessary. This removes grime, oils, and old waxes. These can interfere with paint adhesion. A well-prepped surface will accept the paint evenly. This allows your blending efforts to truly stand out.
Cleaning and Degreasing the Surface
The first step is always thorough cleaning. Furniture often collects dust, dirt, and greasy residues over time. These contaminants can prevent paint from sticking properly. They can also cause an uneven finish.
Start by wiping down the entire piece with a damp cloth. Use a mild all-purpose cleaner or a specialized furniture degreaser. For stubborn grime or wax buildup, a 50/50 mix of denatured alcohol and water works wonders. How to clean furniture before painting offers a detailed guide on this crucial first step.
Make sure to clean all surfaces you plan to paint. Pay attention to crevices and carved details. Rinse the furniture with clean water to remove any cleaner residue. Let the piece dry completely before moving on. Any lingering moisture can affect paint adhesion.
Sanding and Priming for Optimal Adhesion
Sanding provides a slightly abraded surface. This gives the paint something to grip onto. For most furniture projects, a light scuff sand is sufficient. Use 150-220 grit sandpaper. Sand in the direction of the wood grain. The goal is not to remove the existing finish entirely. You simply want to dull the sheen. This creates microscopic scratches for better adhesion.
If your furniture has a very slick surface, like laminate or a high-gloss finish, sanding is even more important. After sanding, wipe away all dust with a tack cloth or a damp rag. Dust is the enemy of a smooth paint finish.
Priming is often a smart extra step. Primer helps the paint adhere better. It also blocks stains from bleeding through. It ensures true color representation, especially when going from dark to light. If you are painting over an existing finish, or changing colors dramatically, primer is highly recommended. Some paints, like chalk paint, can adhere without primer in many cases. However, for a perfect blend and durability, primer offers peace of mind. How to prep furniture for chalk paint provides specific advice if you choose that route.
Choosing Your Colors: The Art of Gradient and Ombre
Selecting the right colors is perhaps the most exciting part of blending. Your color choices will define the mood and impact of your furniture piece. Blending is about creating harmony. This means your colors need to flow together naturally. It is not just about picking pretty colors. It is about understanding how they interact.
I love to spend time with color swatches. I hold them up against the furniture. I look at them in different lights. This helps me visualize the final look. Good color choices make blending easier and more effective. Poor choices can make the blend look muddy or disjointed.
Consider the room where the furniture will live. Think about existing decor and wall colors. Do you want the piece to pop, or to blend in? Your color scheme dictates this. Take your time with this step. It sets the stage for a truly beautiful blended piece.
Understanding Color Theory for Blending
Basic color theory guides your blending choices. It helps you pick colors that will transition well.
- Analogous Colors: These are colors located next to each other on the color wheel. Examples include blue, blue-green, and green. They create smooth, harmonious blends. Think of a sunset – colors like orange, yellow, and red often appear together. Analogous colors are generally the easiest to blend for beginners.
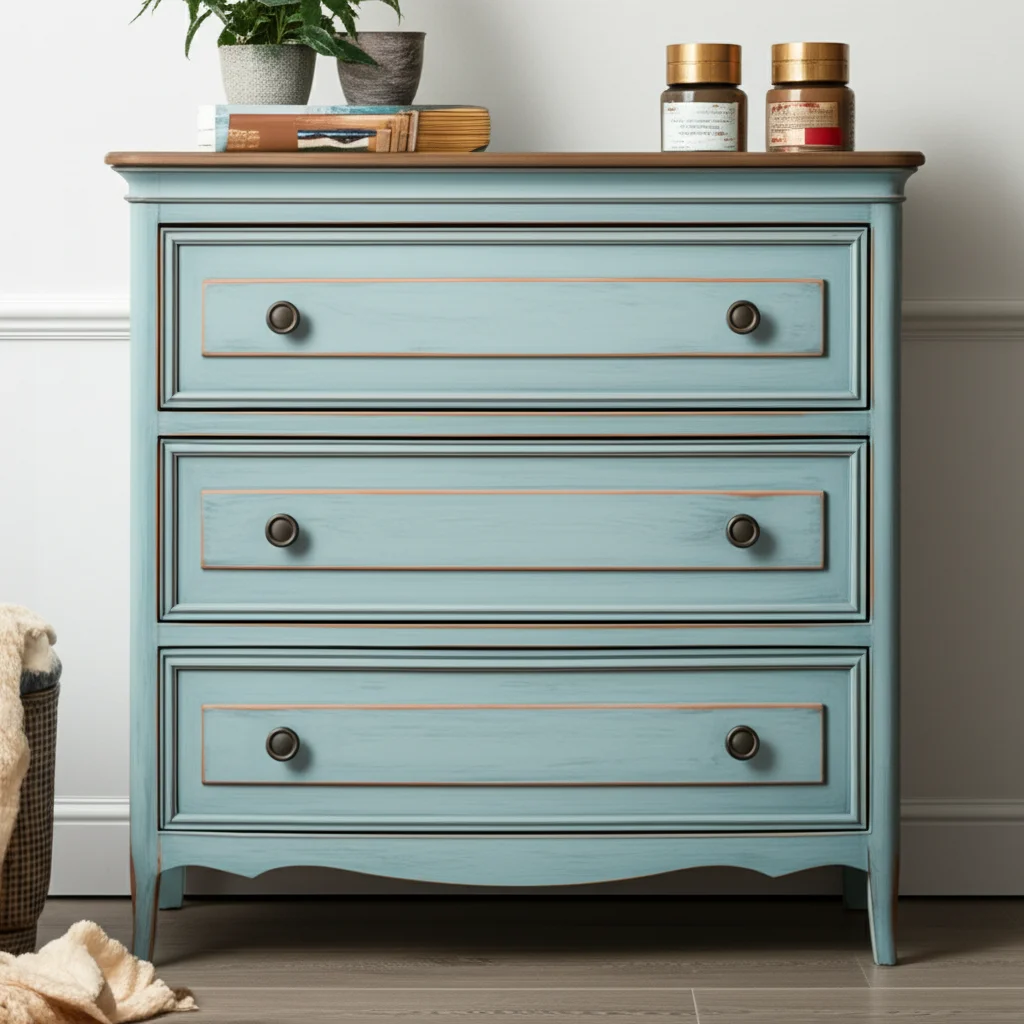
- Monochromatic Colors: These are different shades, tints, and tones of a single color. For example, light blue, medium blue, and dark blue. This creates a very subtle and sophisticated blend. It is perfect for a gentle ombre effect.
- Complementary Colors: These are colors opposite each other on the color wheel (e.g., blue and orange, red and green). Blending these directly can create muddy brown or gray. If you want to use complementary colors, keep them distinct. Blend them with a neutral color in between. Or, blend them very carefully in small areas.
Consider the undertones of your chosen paints. Warm undertones (yellow, red) mix differently than cool undertones (blue, green). Try to pick paints with similar undertones for a cleaner blend. How to decide what color to paint furniture can provide more inspiration for color selection.
Planning Your Ombre or Gradient Effect
Once you have your colors, plan the layout.
- Number of Colors: You can blend two, three, or even more colors. Two colors create a simple, elegant blend. Three or more allow for more complex transitions.
- Direction of Blend: Will your blend go from top to bottom? Side to side? Or from the center outwards? Decide this based on the furniture’s shape and your desired effect. For a dresser, a top-to-bottom blend is popular. Each drawer might represent a distinct shade.
- Color Placement: If using multiple colors, decide which color will be at the top, middle, and bottom. Light colors often go at the top or center. Dark colors typically go at the bottom or edges. This creates a grounding effect.
- Testing: Always test your color combination on a scrap piece of wood or cardboard. This lets you see how the colors blend. It helps you adjust your approach before painting your furniture. Experiment with the amount of each color. See how much overlap you need for a smooth transition.
Planning is crucial. It saves time and avoids mistakes. It ensures your vision translates well onto the furniture.
Mastering Techniques for Blending Paint on Furniture
Now that your furniture is prepped and your colors are chosen, it is time for the fun part: blending. There are several techniques you can use. Each method offers a slightly different look and feel. The key is to practice. Do not expect perfection on your first try. Your technique will improve with each piece.
I always recommend starting on a practice board. This helps you get a feel for the paint and your tools. It also builds confidence. Once you feel comfortable, move to your furniture. Remember, patience is your best friend here. Blending is about gentle, repeated strokes, not harsh ones.
The common goal across all techniques is to keep the paint workable. This means keeping it wet enough to mix. A spray bottle of water will be invaluable. Let’s dive into the most popular methods.
Wet-on-Wet Blending (The Go-To Method)
Wet-on-wet blending is the most common technique for achieving seamless gradients. It involves applying wet paint colors next to each other. Then, you gently merge them while they are still wet. This allows the colors to flow together naturally.
- Apply First Color: Paint a section of your furniture with your first color. Do not let it dry.
- Apply Second Color: Immediately apply your second color right next to the first. Overlap the edges slightly where the two colors meet.
- Blend: Use a clean, damp blending brush (or a regular brush lightly dampened). Gently feather the line where the two colors meet. Use light, back-and-forth strokes or circular motions. Move your brush along the overlapping area. The goal is to soften the transition.
- Repeat for More Colors: If you have a third color, apply it next to the second. Blend its edge into the second color.
- Mist with Water: If the paint starts to dry, mist it lightly with your spray bottle. This re-wets the paint, giving you more time to blend.
- Light Hand: Use a very light touch. Pressing too hard will create harsh lines or pull too much paint. Let the bristles do the work.
This method works best with paints that have a good open time, like chalk paint. It creates a soft, hazy transition. How to layer paint colors on furniture can also provide useful insights on achieving depth and unique effects, which complements blending nicely.
Dry Brushing Blending
Dry brushing creates a more textured, distressed blend. It is less about a seamless gradient and more about layering colors lightly.
- Apply Base Color: Paint your furniture with a base color and let it dry completely.
- Load Brush: Dip your brush into the second color. Wipe almost all the paint off onto a paper towel. Your brush should feel almost dry.
- Light Strokes: Gently skim the brush over the surface, applying a very thin layer of the second color. Start from one area and lightly brush towards where you want the colors to blend. The dry brush will deposit only a small amount of paint.
- Layer and Build: Repeat with more colors, overlapping where you want the blend. You can build up the intensity gradually. This method works well for a rustic or shabby chic look. It is also good for adding subtle highlights or lowlights.
Sponge Blending
Sponge blending offers a unique, mottled, or dappled effect. It is a good choice for abstract or textured blends.
- Apply Colors: Apply your first two colors to the surface, side by side, leaving a slight overlap. Do not let them dry.
- Dampen Sponge: Lightly dampen a natural or synthetic sponge. Squeeze out excess water.
- Dab and Blend: Gently dab the sponge over the overlapping area. Use a light, patting motion. The sponge will pick up and transfer small amounts of paint, blending them together.
- Rotate Sponge: Rotate the sponge frequently to prevent a repeating pattern. This helps create a more organic blend. This method is great for adding depth and unique textures.
Remember to clean your brushes and sponges frequently during the process. This prevents colors from getting muddy.
Step-by-Step Guide to Blending Paint on Furniture (Wet-on-Wet)
The wet-on-wet technique is your best bet for a smooth, professional blend. This method requires a bit of speed but is incredibly rewarding. I always prepare my space and have everything within reach before starting. This ensures I can work continuously while the paint is wet.
It is like a race against the clock, but a calm, artistic race. You want to move with purpose. But you should not feel rushed. Each stroke contributes to the final masterpiece. Remember, practice makes perfect. Your first blended piece might not be flawless, but each attempt refines your skill.
Let’s walk through the process, assuming you have prepped your furniture and chosen your colors. This guide focuses on a two-color blend, moving from top to bottom. You can adapt it for more colors or different directions.
Materials You Will Need:
- Prepped furniture piece
- Two or more paint colors (e.g., chalk paint, acrylic with extender)
- Flat or angled paint brushes for application
- Soft blending brush (oval or round)
- Small spray bottle with clean water
- Paper towels or clean rags
- Painter’s tape (optional, for crisp edges if needed)
The Blending Process:
Divide Your Surface (Mentally or with Tape):
- Decide where each color will start and end. For a two-color blend, you might divide the surface into three sections: top color, middle blending zone, and bottom color.
- You can use painter’s tape to mark off areas if you want very crisp starting/ending points for your solid colors. Remove it before blending. I often just eye it.
Apply Your First Color:
- Start with your top color. Apply it evenly to the top section of your furniture. Paint about one-third to one-half of the way down the surface.
- Work in sections if your piece is large. Keep the edges where the next color will meet wet. Apply a generous but not dripping amount of paint.
Apply Your Second Color:
- Immediately apply your second color to the bottom section of your furniture. Paint upwards, meeting the first color.
- Create an overlap area where the two colors meet. This overlap should be about 2-4 inches wide, depending on the size of your piece. This is your blending zone.
Begin Blending the Overlap:
- Take your clean, slightly damp blending brush.
- Start at the top of the overlap area. Use gentle, light, back-and-forth strokes. Move your brush horizontally or vertically, depending on your blend direction.
- Gradually work your way down through the overlap zone. The goal is to feather the colors together.
- Do not press hard. Let the tips of the bristles gently pull the colors into each other.
- Wipe your brush on a paper towel often. This removes excess paint and prevents muddling.
- If the paint starts to dry, lightly mist the blending area with water from your spray bottle. This re-activates the paint.
Refine the Transition:
- Step back and look at your blend. Do you see any harsh lines? If so, continue to gently feather them.
- You can go back and add a tiny bit more of the top color or bottom color to areas if needed. Apply sparingly to a clean brush and blend immediately.
- The more you work the paint while it’s wet, the smoother the transition will be.
Repeat for Additional Colors (if any):
- If you have a third color, apply it next to your second color. Follow steps 3-5 to blend the new overlap area.
- Remember to work quickly and keep the paint wet.
Let Dry Completely:
- Once you are happy with the blend, let the paint dry thoroughly. This can take several hours, or even overnight. Drying times vary by paint type and humidity.
- Do not touch the painted surface until it is fully dry.
Troubleshooting Common Blending Issues
Even experienced painters encounter challenges when blending. It is part of the learning process. Do not get discouraged if your first attempt is not perfect. Many common issues have simple solutions. Identifying the problem is the first step to fixing it.
I have faced streaky blends and muddy patches many times. Each time, it taught me something valuable. Usually, it comes down to a few key factors: paint consistency, brush technique, or drying time. Addressing these will improve your results dramatically.
Remember, practice truly makes perfect with blending. The more you do it, the more intuitive it becomes. Embrace the learning curve. You are developing a unique artistic skill.
Dealing with Streaks and Brush Marks
Streaks and visible brush marks can ruin a seamless blend. This often happens if the paint is drying too fast. Or, you might be using too much pressure.
- Solution 1: Work Faster: Blending needs speed. If your paint dries quickly, you must blend quickly.
- Solution 2: Use a Misting Bottle: Keep your spray bottle handy. A fine mist of water helps re-wet the paint. This gives you more working time. Mist the area lightly as you blend.
- Solution 3: Proper Brush Technique: Use a very light touch. Let the bristles do the work. Overlapping your strokes slightly also helps. For brush marks in general, How to paint furniture without brush marks offers comprehensive advice that applies here.
- Solution 4: Use a Blending Brush: These brushes have soft, feathery bristles. They are designed to smooth out paint. Their softness helps eliminate those tell-tale lines.
- Solution 5: Thin Your Paint (Slightly): Sometimes, paint is too thick. A tiny bit of water (for water-based paints) can make it more workable. Add just a few drops at a time. Mix well. Test on scrap wood.
Avoiding Muddy or Patchy Blends
A muddy blend happens when colors mix too much. They lose their distinctness. A patchy blend means uneven coverage or poor adhesion.
- Solution 1: Clean Your Brush Often: If your blending brush becomes saturated with mixed paint, it will transfer that muddied color. Wipe your brush on a clean paper towel frequently. You can also have multiple blending brushes. Use one for lighter areas, another for darker.
- Solution 2: Control Water Amount: Too much water can dilute the paint. This makes it too thin and prone to patchiness. Use just enough to keep the paint workable. A fine mist is better than a heavy spray.
- Solution 3: Apply Even Coats: Ensure your initial color applications are even. Patchiness can come from applying paint too thinly in some spots.
- Solution 4: Proper Surface Prep: A dirty or oily surface prevents paint from adhering evenly. Review the cleaning and sanding steps if you notice patchy results. How to paint over painted furniture discusses adhesion over existing finishes.
- Solution 5: Less Overlap: If your colors are becoming muddy, you might be overlapping too much or blending too far into each color. Keep the blending zone focused.
Sealing and Protecting Your Blended Furniture
After all your hard work blending paint, the final step is to protect it. A topcoat is essential for durability. It safeguards your beautiful blended finish from everyday wear and tear. Skipping this step would be a shame. Your masterpiece deserves to last.
I always apply a topcoat. It ensures my furniture can withstand spills, scratches, and cleaning. Without it, your paint job might chip or fade quickly. Different topcoats offer different levels of protection and sheen. Choose one that suits your paint type and desired look.
This final layer seals in your artistry. It creates a durable barrier. It makes the furniture ready for daily use. Do not rush this step. Allow proper drying time for each coat of sealant.
Choosing the Right Topcoat
The type of topcoat you use depends on your paint and desired finish.
- Water-Based Polyurethane/Polycrylic: These are highly durable and popular choices. They come in various sheens (matte, satin, semi-gloss, gloss). Polycrylic is non-yellowing. This makes it ideal for light-colored or white blended pieces. Apply in thin coats. Allow ample drying time between coats.
- Wax (for Chalk Paint): If you used chalk paint, furniture wax is a traditional topcoat. It provides a soft, buttery feel. It enhances the matte finish. Apply wax with a lint-free cloth. Buff it after about 15-20 minutes. Wax is less durable than polyurethane. It may need reapplication over time, especially on high-traffic pieces.
- Clear Coat/Varnish: These can also be used. Ensure they are compatible with your paint type. Read the product labels carefully.
Always choose a topcoat that is non-yellowing, especially for lighter blends. Test the topcoat on a hidden area or a scrap piece first. This confirms it will not alter your blended colors.
- paint blending
- furniture painting
- DIY furniture
- ombre furniture
- gradient paint

Todd Martin
Senior Writer
With over 15 years of experience in home renovation and design, I started HEG to share what I’ve learned with homeowners who want to create spaces that are both beautiful and functional. I’ve always believed in a hands-on approach, and over the years, I’ve picked up practical solutions that actually work. Through HEG, I aim to make home improvement more approachable, sharing real tips that help you create a home you truly love.