· Todd Martin · Furniture Painting · 18 min read
How To Paint Over Varnished Pine Furniture
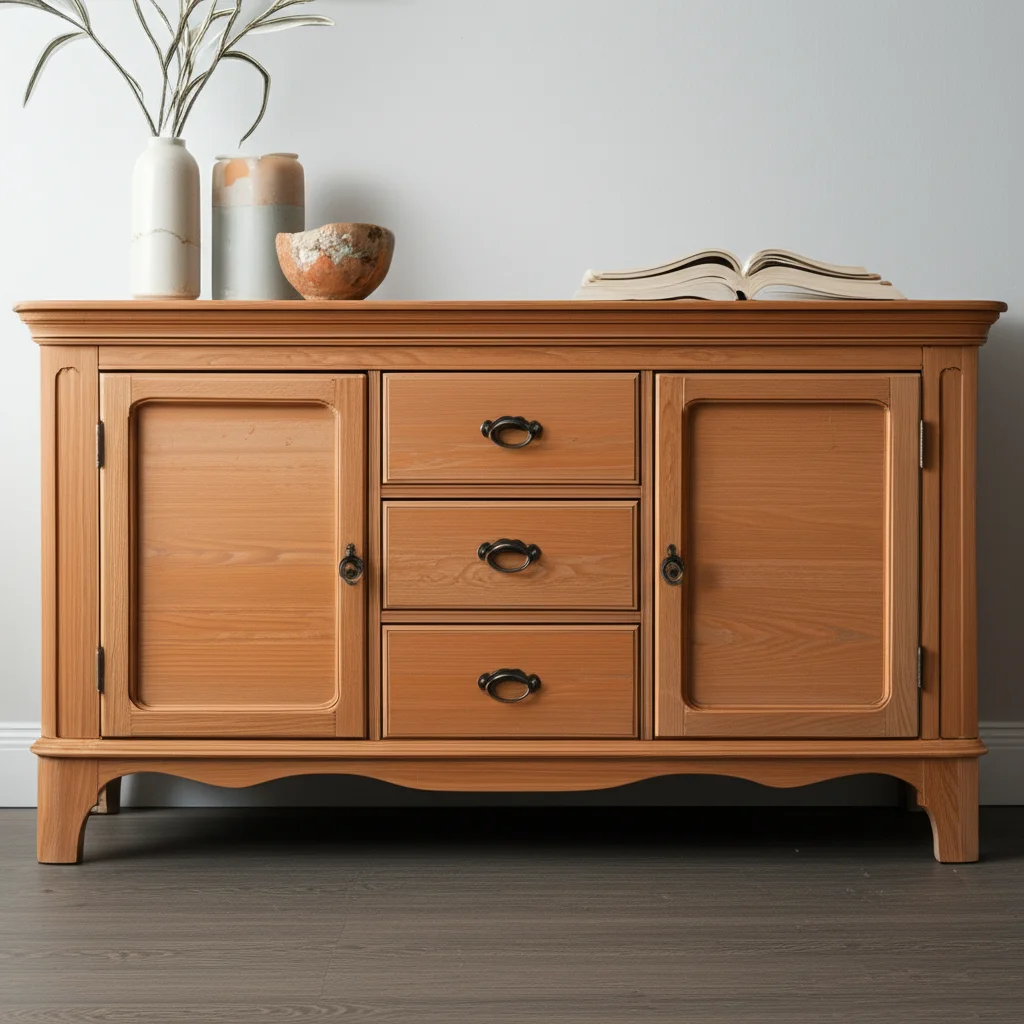
Transform Your Pine: How to Paint Over Varnished Furniture
Have you looked at your old varnished pine furniture and wished it had a fresh, new look? Many homes have sturdy pine pieces. They often feature a warm, honey-toned varnish. Over time, this style can feel dated. You might wonder if you can really paint over varnished pine furniture successfully. The answer is a resounding yes! I have done this many times myself. It is a rewarding project that updates your space. This comprehensive guide will show you exactly how to do it. We cover every step from preparation to the final coat. You will learn the right materials and techniques. This ensures a durable and beautiful finish. Let us turn that old pine into a modern showpiece.
Takeaway:
- Proper surface preparation is crucial for success.
- Use the right primer to ensure paint adhesion on varnish.
- Apply thin, even coats of paint for a smooth finish.
- Protect your newly painted furniture with a durable topcoat.
You can successfully paint over varnished pine furniture. First, clean the surface well. Then, sand it lightly to create a grip. Apply a high-quality adhesion primer. Finish with your chosen paint and a protective topcoat.
Why Refresh Varnished Pine Furniture?
Many of us own pine furniture. It is often sturdy and well-made. However, the varnished finish can become tired. It might not match your current home style. Painting offers a simple solution. It allows you to update pieces without buying new ones. This saves money and resources. Giving old furniture a new life also promotes sustainability. You can create a piece that truly fits your personal taste. I love seeing the drastic change a coat of paint can make.
Varnished pine furniture often has a specific yellow or orange tone. This color can clash with modern decor. The varnish itself might show wear and tear. It could have scratches or faded areas. Painting covers these imperfections. It gives the furniture a smooth, fresh appearance. This process allows for creative expression. You choose the exact color and finish. You can make an old dresser look like a completely new item.
Gathering Your Supplies: Essential Tools and Materials
Before you begin painting, you need the right tools. Having everything ready saves time. It also ensures a smooth process. I always organize my workspace first. This prevents interruptions later on. Gather these items to start your painting project.
Preparing Your Workspace and Furniture
A good workspace makes painting easier. Choose an area with good ventilation. This is important for fumes from primers and paints. Lay down drop cloths or old sheets. This protects your floors from spills. Remove all hardware from the furniture. Take off knobs, pulls, and hinges. Label them if you plan to reuse them. This helps put them back correctly later.
Essential Materials List
- Cleaning Supplies:
- Mild detergent or degreaser (e.g., TSP substitute)
- Clean rags or sponges
- Bucket of warm water
- Sanding Supplies:
- Medium-grit sandpaper (120-150 grit)
- Fine-grit sandpaper (220-grit)
- Sanding block or orbital sander (optional, for large pieces)
- Primer:
- High-quality adhesion primer (oil-based or shellac-based for best results)
- Paint:
- Furniture paint (latex, acrylic, chalk paint, or mineral paint are popular choices)
- Consider paint specific for cabinets and furniture.
- Application Tools:
- High-quality paint brushes (angled for detail, flat for large areas)
- Small foam rollers or microfiber rollers (for smooth finish)
- Paint trays
- Protection:
- Painter’s tape
- Drop cloths
- Disposable gloves
- Safety glasses
- Dust mask
- Topcoat/Sealer (Optional but Recommended):
- Polyurethane (water-based is less yellowing)
- Polycrylic
- Furniture wax (for chalk paint)
Choosing the right primer is key for painting over varnish. An oil-based or shellac-based primer grips the slick surface. It also blocks knots and stains from bleeding through. For the paint itself, consider what finish you want. Latex or acrylic paints are easy to clean. Chalk paint gives a matte, distressed look. Mineral paint offers a durable, smooth finish. Your choice depends on the desired final appearance.
Preparing the Surface: Cleaning and Deglossing Varnished Pine
Surface preparation is the most critical step. Skipping this part leads to peeling paint. The paint needs a surface to grip. Varnish is very smooth and slick. This makes it hard for paint to stick. You must clean and prepare the surface thoroughly. This ensures long-lasting results. I have learned that shortcuts here always cause problems later.
Thorough Cleaning
Start by cleaning the furniture piece. Use a mild detergent or a degreaser like TSP substitute. Mix it with warm water. Wipe down the entire surface. Pay attention to areas with grease or grime. This includes handles and edges. Kitchen or dining furniture often has hidden grease. This step removes dirt, oils, and old polishes. These contaminants stop paint from sticking. Rinse the furniture with clean water. Use a damp cloth. Let the furniture dry completely before moving on. Any moisture can affect adhesion. You can learn more about general furniture cleaning here: how to clean furniture before painting.
Light Sanding for Adhesion
After cleaning, lightly sand the varnished surface. Use 120-150 grit sandpaper. The goal is not to remove all the varnish. You just need to scuff up the surface. This creates a “tooth” for the primer to grab onto. Sand in the direction of the wood grain. This avoids noticeable scratches. For flat areas, a sanding block works well. If you have a large piece, an orbital sander can speed this up. Be careful not to sand through the varnish in spots. Uneven sanding creates uneven absorption of primer.
Once sanded, wipe away all dust. Use a tack cloth or a damp cloth followed by a dry one. Ensure no dust particles remain. Dust can get trapped under the paint. This results in a bumpy finish. This sanding step is vital. It allows the primer to bond properly. Without it, your paint will likely chip. This is particularly true on high-use items. Consider learning more about how to properly clean wood furniture for painting here.
The Importance of Priming: Choosing the Right Primer for Varnish
Priming is not an optional step when painting over varnish. It is essential. Primer creates a bonding layer. It allows your chosen paint to stick. It also seals the wood. Pine, especially, can have knots. These knots contain resins. These resins can bleed through paint over time. This creates yellow or brown stains. A good primer prevents this from happening. I never skip priming, especially on pine.
Types of Primers for Varnished Surfaces
Not all primers are equal. You need a primer designed for adhesion. Here are the best types:
- Oil-Based Primers: These primers offer excellent adhesion. They stick well to slick surfaces like varnish. They also block stains effectively. Oil-based primers dry slowly. They require mineral spirits for clean-up. They have strong fumes, so use them in a well-ventilated area. My personal favorite is Zinsser B-I-N Shellac-Based Primer.
- Shellac-Based Primers: These are top-tier for stain-blocking. They dry very quickly. Shellac primers seal knots in pine incredibly well. They also adhere strongly to varnish. Like oil-based primers, they have strong fumes. They require denatured alcohol for clean-up.
- Water-Based Bonding Primers: Some newer water-based primers offer good adhesion. Look for ones specifically labeled “bonding primer” or “adhesion primer.” These are lower in odor and clean up with water. They may not block stains as well as oil or shellac. Test them on a hidden area first.
Applying the Primer
Stir your chosen primer well. Apply a thin, even coat. Use a good quality brush or a small foam roller. Ensure full coverage. Do not apply too thickly. Thick coats can lead to drips. They can also take longer to dry. Allow the first coat to dry completely. Check the manufacturer’s instructions for drying times. This can range from one hour to overnight.
Once the first coat is dry, lightly sand it with 220-grit sandpaper. This creates a super smooth surface. It helps the topcoat adhere better. Wipe away all dust with a tack cloth. Then, apply a second thin coat of primer. Two thin coats are better than one thick coat. This provides superior stain blocking and adhesion. Make sure the second coat dries fully before painting. Proper priming lays the foundation for a professional-looking finish.
Applying the Paint: Techniques for a Smooth, Durable Finish
With a perfectly primed surface, you are ready to paint. This is where your furniture starts to transform. Applying paint correctly ensures a smooth, durable finish. Take your time with each coat. Patience pays off here. I always look forward to this stage.
Choosing Your Furniture Paint
Several types of paint work well on furniture:
- Latex (Acrylic) Paint: This is a popular choice. It is water-based, low odor, and easy to clean. Look for a paint specifically designed for furniture or cabinets. These paints are more durable. They resist chipping better than wall paint. You might need a paint conditioner to thin it slightly for smooth application. This helps reduce brush marks. Learn how to thin paint properly for a smoother finish: how to thin valspar cabinet and furniture paint.
- Chalk Paint: Known for its matte, velvety finish. It offers a rustic or distressed look. Chalk paint typically requires less prep. You still benefit from proper cleaning and priming for durability. It needs a wax or topcoat for protection.
- Mineral Paint: A relatively new option. It offers a self-leveling, durable finish. Mineral paint often needs no topcoat. It has excellent adhesion.
- Oil-Based Paint: Very durable and smooth. It levels out beautifully. However, it has strong fumes and a longer drying time. It also yellows over time. It cleans up with mineral spirits.
For furniture, a satin or semi-gloss finish is usually best. These are easier to clean and more durable than matte finishes.
Painting Techniques
Stir your paint thoroughly before starting. Do not shake it. Shaking creates air bubbles. These bubbles will show up in your paint finish.
- First Coat: Apply your first thin coat of paint. Use a high-quality synthetic brush for water-based paints. Use a natural bristle brush for oil-based paints. For large, flat surfaces, use a foam roller or a short-nap microfiber roller. Rollers leave fewer brush marks. Apply paint in the direction of the wood grain. Overlap your strokes slightly. Avoid applying paint too thickly. Thin coats dry faster and cure harder.
- Drying Time: Allow the first coat to dry completely. Refer to the paint manufacturer’s recommendations. This usually takes 2-4 hours for water-based paints. Rushing this step can cause problems. It leads to streaks or peeling.
- Light Sanding (Optional but Recommended): After the first coat dries, you can lightly sand it with 220-grit sandpaper. This smooths out any minor imperfections or dust nibs. It creates a beautiful, smooth base for the next coat. Wipe away all dust with a tack cloth.
- Second Coat (and Subsequent Coats): Apply a second thin coat of paint. Follow the same technique as the first coat. Most projects require two coats for full coverage. Darker colors or light colors over dark primer may need a third coat. Always ensure adequate drying time between coats. This builds depth and durability. If you want to achieve a super smooth finish without brush marks, especially on cabinets or large flat surfaces, consider techniques like spraying or using a paint additive to improve flow. More tips on avoiding brush marks can be found here: how to paint kitchen cabinets without brush marks.
Protecting Your Work: Topcoats and Curing
You have finished painting your furniture piece. The color looks fantastic. Now, you need to protect that beautiful finish. A topcoat adds durability. It protects against scratches, spills, and daily wear. This step is especially important for high-use furniture. Think about tabletops or dressers. The curing process is also vital. It allows the paint to reach its maximum hardness.
Choosing and Applying a Topcoat
The type of topcoat depends on your paint and desired finish:
- Polyurethane (Water-Based): This is a very popular choice. It offers excellent durability. Water-based polyurethane is clear and does not yellow over time. It cleans up with water. Apply 2-3 thin coats. Use a high-quality synthetic brush or foam applicator. Sand lightly with 400-grit sandpaper between coats for a super smooth finish. Always allow full dry time between coats.
- Polycrylic: Similar to water-based polyurethane. It is a good option for protecting water-based paints. It offers good durability and is non-yellowing.
- Furniture Wax: This is primarily for chalk paint. Wax provides a soft, matte finish. It protects against light use. It is easy to apply. You rub it on and buff it off. It needs reapplication every few years for continued protection. Wax is not as durable as polyurethane for high-traffic areas.
- Varnish or Lacquer: These offer very hard, durable finishes. However, they can be more challenging to apply. They also often have strong fumes. They may yellow over time.
Apply your chosen topcoat evenly. Use thin coats. Avoid drips or pooling. Too much topcoat can create a cloudy or uneven appearance. Let each coat dry completely. Lightly sand with very fine grit sandpaper (e.g., 400-600 grit) between coats. This helps create a smooth, professional feel. Dust off thoroughly after each sanding. I usually apply two or three coats of polyurethane for maximum protection.
Curing Time
Paint and topcoats need time to fully cure. “Drying” means the paint is dry to the touch. “Curing” means the paint has hardened completely. This process can take weeks. It depends on the paint type and humidity. For latex or acrylic paints, full cure can take 2-4 weeks. Oil-based paints can take even longer.
During the curing period, treat your furniture gently. Avoid placing heavy objects on it. Do not put anything wet or hot on the surface. Use coasters for drinks. Avoid harsh cleaning products. The paint is still hardening during this time. Rushing the curing process can lead to marks, dents, or damage. A fully cured finish is much more durable. It will withstand daily use better.
Troubleshooting Common Issues: What to Do When Things Go Wrong
Even with careful planning, sometimes issues arise. Knowing how to fix common problems saves your project. Do not get discouraged if something does not go perfectly. Most issues have simple solutions. I have encountered all of these myself.
Paint Not Sticking or Peeling
This is the most common problem when painting over varnish. It happens if the surface was not properly prepared. The primer could not bond.
- Solution: You must address the cause. If the paint is peeling or scratching off easily, it indicates poor adhesion. You need to sand the affected area. Sand down to a stable layer (either the primer or the varnish). Clean the area thoroughly. Reapply primer designed for adhesion. Then repaint. Ensure you scuff sand the original varnish well before priming next time.
Bleed-Through from Knots or Stains
You might see yellow or brown spots appear through your paint. This is common with pine knots. The natural resins bleed through.
- Solution: This means your primer did not seal the knots completely. Shellac-based primer is the best choice for blocking knots. If you see bleed-through, apply another coat or two of shellac-based primer over the affected areas. Let it dry fully. Then repaint those sections. You might need to paint the entire piece again if the bleed-through is widespread.
Brush Marks or Roller Texture
Sometimes, the paint dries with visible brush strokes or a stippled texture from a roller. This affects the smoothness of the finish.
- Solution:
- Brush Marks: Use a high-quality brush. Apply paint in thin, even coats. Do not overwork the paint. If using latex paint, add a paint conditioner. This helps the paint self-level. Lightly sand between coats with fine-grit sandpaper (220-400 grit) to smooth out any texture. Then apply the next coat.
- Roller Texture: Use a short-nap roller (like a foam roller or mohair roller). Avoid cheap rollers. They leave a bumpy texture. Roll in one direction. Do not press too hard. Again, light sanding between coats helps smooth this. For more specific advice on paint repair, look here: how to fix chipped paint on wood furniture.
Uneven Coverage or Streaks
Sometimes, the paint looks patchy or thin in certain areas. This is usually due to uneven application or not enough coats.
- Solution: Apply another thin coat of paint. Ensure you are applying enough paint to cover the surface evenly. Work in small sections. Maintain a wet edge. This prevents streaks where wet and dry paint meet. Sometimes, the issue is simply that you needed more coats than you initially thought.
By knowing these common problems and their fixes, you can approach your painting project with confidence. Remember, practice makes perfect. Each project teaches you something new.
Color and Style Considerations: Making Your Furniture Pop
Painting varnished pine furniture is more than just applying color. It is an opportunity for a complete style transformation. The right color choice can make a huge impact. It can change the entire feel of your room. Think about the existing decor in your home. Consider the mood you want to create. I enjoy the creative aspect of choosing colors.
Choosing the Right Color Palette
- Match Your Decor: Look at the existing colors in your room. Do you have warm tones or cool tones? Choose a paint color that complements your walls, curtains, and other furniture. This creates a cohesive look.
- Consider the Mood: Light colors make a room feel open and airy. Dark colors add drama and sophistication. Bright colors bring energy and fun. Neutral colors offer versatility and timelessness.
- Sample Colors: Always test paint colors. Paint small swatches on an inconspicuous area of your furniture or on a piece of scrap wood. View the samples in different lighting conditions throughout the day. Light changes how colors appear.
- Trendy vs. Timeless: Trendy colors can be fun but may go out of style quickly. Timeless neutrals like white, gray, or soft blues offer lasting appeal. A blend of both can be effective. For more guidance on selecting furniture colors, check this resource: how to decide what color to paint furniture.
Style Transformation Ideas
- Modern Minimalist: Choose crisp whites, grays, or even black. Pair with simple, clean hardware. This creates a sleek, contemporary look from an old pine piece.
- Farmhouse Chic: Opt for off-whites, creams, or light blues. Consider distressing the edges slightly for a worn look. Add vintage-style knobs.
- Bohemian: Use bold, rich colors like deep teal, emerald green, or terracotta. Incorporate patterned stencils or painted details.
- Classic Traditional: Darker, muted tones like navy blue, forest green, or deep burgundies work well. Add elegant hardware.
- Vintage or Distressed: For a worn, antique look, apply two contrasting colors. Lightly sand through the top coat to reveal the base color. This creates a charming effect. You can learn more about making furniture look vintage: how to paint a coffee table to look vintage.
Do not forget the hardware. New knobs, pulls, or hinges can completely change the furniture’s character. Shiny brass, matte black, or brushed nickel can all make a statement. Sometimes, simply painting the existing hardware a new color can also work. The overall design should reflect your personal aesthetic. This project allows you to customize a piece fully. It makes it uniquely yours.
Frequently Asked Questions
Do I really need to sand varnished pine furniture before painting?
Yes, light sanding is crucial. Varnish is a very smooth surface. Paint needs something to grip onto. Sanding creates tiny scratches, known as “tooth.” This helps the primer and paint adhere much better. Skipping sanding often leads to peeling paint later on.
Can I use chalk paint directly over varnished pine without sanding or priming?
Chalk paint brands often claim no prep is needed. For best adhesion and durability on varnished pine, I recommend light sanding and at least one coat of adhesion primer. This prevents chipping and ensures the paint lasts. Especially for high-use items, prep is key.
What kind of primer is best for blocking knots in pine?
Shellac-based primers are the absolute best for blocking knots in pine. Knots contain natural resins that can bleed through paint and cause yellow or brown stains. Shellac primer seals these resins effectively. Oil-based primers are also very good at this.
How long does the entire painting process take?
The total time varies by furniture size and coats needed. Generally, plan for at least 2-3 days. This accounts for cleaning, sanding, two coats of primer (with drying time), two or three coats of paint (with drying time between each), and applying a topcoat. Full cure time for the paint takes longer, usually 2-4 weeks.
What if my paint chips after I finish painting?
If your paint chips, it usually points to insufficient surface preparation or primer adhesion. You may need to sand the chipped area down to the stable layer. Then re-prime with an appropriate adhesion primer and repaint. Ensure you follow all prep steps carefully next time.
Can I paint over a very dark varnished pine furniture with a light color?
Yes, you can paint dark varnished pine with a light color. The key is using a high-quality, stain-blocking primer. A good primer will cover the dark color completely. It creates a neutral base for your light paint. You may need two coats of primer for full coverage.
Conclusion
You have learned how to paint over varnished pine furniture. This process transforms old, dated pieces into fresh, modern treasures. It is a rewarding DIY project. Remember, success hinges on careful preparation. Cleaning, proper sanding, and using the right adhesion primer are non-negotiable steps. These foundational steps ensure your paint adheres well. They provide a durable, beautiful finish for years to come.
Choosing the right paint and applying thin, even coats further enhances the result. Do not forget the importance of a protective topcoat. It guards against daily wear. Finally, allowing adequate curing time ensures the paint reaches its maximum hardness. I encourage you to gather your supplies and start your own furniture transformation. Give that old pine furniture a new life. The satisfaction of a completed DIY project is immense. Begin your project today and enjoy your beautifully updated home!
- pine furniture
- painting furniture
- varnish
- DIY furniture
- furniture makeover
- wood refinishing
- primer

Todd Martin
Senior Writer
With over 15 years of experience in home renovation and design, I started HEG to share what I’ve learned with homeowners who want to create spaces that are both beautiful and functional. I’ve always believed in a hands-on approach, and over the years, I’ve picked up practical solutions that actually work. Through HEG, I aim to make home improvement more approachable, sharing real tips that help you create a home you truly love.