· Todd Martin · Home Improvement · 20 min read
How To Make A Pantry Shelf
Build Your Own Pantry Shelf for Better Organization
A disorganized pantry can cause daily frustration. Items get lost, food expires unnoticed, and finding what you need becomes a chore. Imagine opening your pantry door to see everything neatly arranged and easily accessible. Learning how to make a pantry shelf can transform your kitchen and simplify your life.
Building your own pantry shelves offers many benefits. You create storage tailored to your exact needs and space. This DIY project saves money compared to custom-built solutions. It also gives you a deep sense of accomplishment. This article will guide you through planning, gathering materials, and building durable, functional pantry shelves. We will cover finishing touches and smart organization tips.
Takeaway
Building a custom pantry shelf helps you maximize kitchen storage and reduce clutter.
- Plan your shelf layout carefully based on your items and space.
- Choose appropriate wood and hardware for durability and strength.
- Follow simple steps to cut, assemble, and install your shelves.
- Finish your shelves with paint or stain to protect them and match your home.
- Organize your new pantry shelves for easy access and efficient use.
To make a pantry shelf, you first measure your space and plan the layout. Then, gather your chosen wood, tools, and hardware. You will cut the wood, assemble the shelf frame, and attach the shelves securely to your pantry walls or inside a cabinet. Finally, apply a finish for protection and aesthetics.
Planning Your Perfect Pantry Shelf Layout
Creating a well-designed pantry shelf begins with careful planning. This step ensures your new shelves meet your storage needs precisely. It also helps you avoid costly mistakes. Think about what you store in your pantry now and what you plan to store.
You should consider the size and weight of your pantry items. Do you have tall cereal boxes or small spice jars? Will you store heavy cans or light snack bags? Planning helps you decide on shelf spacing and overall design. A good plan makes the building process much smoother.
Assess Your Current Pantry Needs
Start by taking everything out of your current pantry. This helps you see what you own. Group similar items together, like canned goods, baking supplies, or snacks. Identify items you use often versus those you use rarely.
This assessment reveals your true storage needs. You might discover you need more space for tall bottles or deep shelves for appliances. This step also allows you to declutter. Get rid of expired food or items you no longer use.
Measure and Map Your Space
Measure the height, width, and depth of your pantry area. Note any obstructions like door frames or existing pipes. Decide if you want shelves along one wall or multiple walls. Sketch a simple diagram of your pantry.
On your diagram, draw where each shelf will go. Mark the desired height and depth for each shelf. Consider varying shelf heights to fit different items. For instance, tall shelves for cereal, shorter ones for cans. This map acts as your building blueprint.
Choose the Right Shelf Style and Material
Different shelf styles offer unique benefits. Fixed shelves attach permanently to walls. Adjustable shelves let you change height later. Pull-out shelves offer easy access to deep items.
The material you choose impacts durability and look. Plywood and MDF are common, affordable options. Solid wood, like pine or oak, offers greater strength and a more finished look. Wire shelving provides good airflow. Each material has its own benefits for your pantry. Consider what you need for your space.
- Fixed Shelves: Attach directly to wall studs. These are very strong.
- Adjustable Shelves: Use shelf pins and holes for flexible height. This allows future changes.
- Pull-Out Shelves: Often found on glides, they bring items forward. This makes deep storage accessible.
- Plywood: Affordable, easy to work with. Requires sealing to prevent moisture damage.
- Solid Wood: Strong, durable, looks good. Costs more than plywood.
- MDF (Medium-Density Fiberboard): Smooth surface, good for painting. Not as strong as wood.
- Wire Shelving: Easy to install, good for ventilation. Less sturdy for heavy items.
If you are thinking about converting an entire space, consider how to turn a closet into a pantry. For a more enclosed look, you might want to learn how to build a pantry cabinet with doors. These options provide more complete pantry solutions.
Essential Tools and Materials to Build Your Pantry Shelf
Building sturdy pantry shelves requires the right tools and materials. Having everything ready before you start saves time and frustration. It also makes the building process safer and more efficient. I always check my inventory twice before beginning any project.
Choosing good quality materials ensures your shelves last for years. Investing in proper tools helps you achieve professional results. Do not cut corners on these items. A well-stocked toolbox makes any DIY project easier.
Wood Choices for Pantry Shelves
Plywood is a popular choice for pantry shelves due to its stability and cost. Opt for a good grade of plywood, like ¾-inch thick, for strength. This thickness prevents sagging. Pine is another good option; it is affordable and easy to work with.
Hardwoods such as oak or maple are more durable and look better. They cost more, though. MDF works well for painted shelves because it has a smooth surface. However, MDF does not handle moisture as well as wood. Select the material based on your budget and desired look.
Hardware and Fasteners
You will need various hardware pieces to build and install your shelves. Shelf brackets provide support for shelves. L-brackets are common for fixed shelves. Standards and pins work for adjustable systems. Choose strong brackets made from steel.
Screws are essential for assembly and installation. Wood screws or construction screws are ideal. Make sure they are long enough to grip firmly into studs or shelf supports. Use wall anchors if attaching shelves to drywall without studs. You will also need wood glue for stronger joints.
Must-Have Tools for the Job
A measuring tape is crucial for accurate dimensions. A pencil helps you mark cuts. A circular saw or miter saw makes clean, straight cuts in wood. For smaller cuts or details, a handsaw can work.
A drill with various drill bits is necessary for pre-drilling holes and driving screws. A level ensures your shelves are perfectly straight. A stud finder helps you locate wall studs for secure mounting. Safety glasses and gloves are also important for protection.
Here is a list of essential tools and materials:
- Measuring Tools: Tape measure, pencil, speed square, level
- Cutting Tools: Circular saw, miter saw (optional), handsaw
- Drilling/Fastening Tools: Electric drill, drill bits (pilot holes), screwdriver bits, stud finder
- Joining/Support: Wood glue, clamps (optional)
- Hardware: Shelf brackets (L-brackets, standards, pins), wood screws, wall anchors (if needed)
- Wood: ¾-inch plywood, pine boards, or other chosen material
- Safety Gear: Safety glasses, work gloves
For ideas on adding shelves within existing structures, you might find inspiration from how to add extra shelf in cabinet. This can help you utilize smaller, existing spaces.
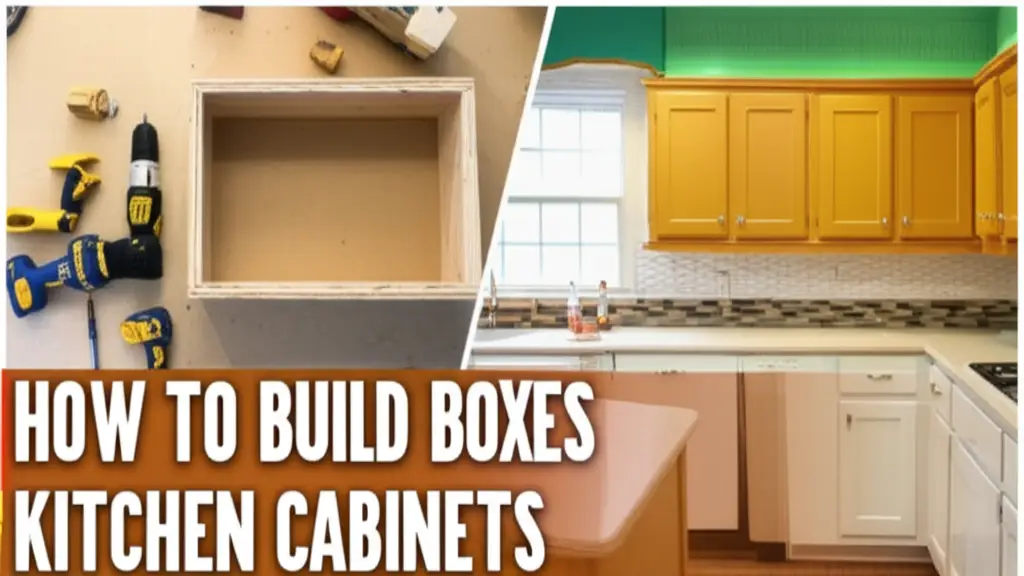
Step-by-Step Guide to Constructing Your Pantry Shelf
Building your own pantry shelf is a rewarding project. With careful steps, you can create a strong and useful storage solution. I enjoy seeing my designs come to life, piece by piece. Follow these instructions to build your shelves with confidence.
Accuracy in each step is key to a stable and good-looking shelf. Take your time, measure twice, and cut once. This approach ensures a successful outcome. Soon, you will have custom storage.
Cutting Your Shelf Components
Begin by marking your wood according to your measurements. Use a tape measure and a pencil. A speed square helps ensure your lines are perfectly straight. If cutting plywood, draw a straight line across the sheet.
Use a circular saw or miter saw to cut your shelf boards to the planned length and depth. For supports, cut smaller pieces of wood that will run along the wall or form the shelf frame. Make sure all cuts are clean and precise. Smooth edges now save sanding time later.
Assembling the Shelf Frame
If you are building a standalone shelf unit or a frame to hold shelves, assemble it first. Use wood glue and screws to join the pieces. For example, if building a simple box shelf, attach the side pieces to the top and bottom. Pre-drill pilot holes to prevent wood splitting.
If your shelves will attach directly to the wall, you will need to install ledger boards first. These are strips of wood that screw into wall studs. They create a strong base for your shelves to rest on. Use a level to ensure ledger boards are perfectly horizontal.
Installing the Shelves Securely
With your frame assembled or ledger boards in place, it is time to install the shelves. For fixed shelves resting on ledger boards, simply place the cut shelf boards on top. Secure them with screws from the top down into the ledger boards. For extra strength, you can add small L-brackets underneath.
If using adjustable shelf pins, install the shelf standards vertically on the wall or inside your cabinet. Make sure they are plumb and evenly spaced. Then, insert the shelf pins at your desired heights. Place your cut shelf boards directly onto these pins. Always check for level after installing each shelf.
Consider these steps for different shelf types:
- For Fixed Shelves:
- Mark stud locations on your wall.
- Cut ledger boards to length.
- Attach ledger boards to studs using long screws, ensuring they are level.
- Place shelf boards on ledger boards.
- Secure shelf boards to ledger boards with screws from above.
- For Adjustable Shelves:
- Measure and mark vertical lines for shelf standards.
- Install shelf standards, ensuring they are plumb. Use a stud finder and wall anchors if needed.
- Insert shelf pins into the standard holes at desired heights.
- Place shelf boards onto the pins.
- Check each shelf with a level.
For a deeper dive into installing shelves in various configurations, explore how to install a shelf between two cabinets. You can also find more general guidance on how to make shelves in cabinets, which applies to pantry spaces too.
Finishing Touches and Enhancements for Your Pantry Shelves
Once your pantry shelves are built, the finishing touches make a big difference. Proper finishing protects the wood and makes your shelves look professional. It also helps with cleanliness and longevity. I find this step very satisfying as the project comes together.
A good finish prevents food stains and makes cleaning easy. It also protects against moisture, which is important in a kitchen environment. Take your time with these steps for the best results. Your efforts will pay off with beautiful, durable shelves.
Sanding and Sealing for Durability
Sanding is crucial for a smooth, splinter-free surface. Start with a medium-grit sandpaper (like 120-grit) to remove any rough spots or pencil marks. Then, move to a finer grit (like 220-grit) for a silky smooth finish. Always sand in the direction of the wood grain.
After sanding, wipe down the shelves thoroughly to remove all dust. Next, apply a wood sealer or primer. This prepares the wood for paint or stain and offers a layer of protection. It also helps prevent moisture from seeping into the wood.
Painting or Staining Your Pantry Shelf
Painting your shelves gives them a clean, modern look. Use a high-quality interior paint that is durable and washable. A semi-gloss or gloss finish is ideal for pantry shelves because it is easy to wipe clean. Apply thin, even coats, allowing proper drying time between each.
Staining highlights the natural beauty of the wood grain. Choose a stain color that matches your kitchen decor. Apply the stain evenly with a brush or rag, then wipe off any excess. Follow with a clear topcoat like polyurethane for added protection. A topcoat protects the stain and the wood from scratches and moisture.
Adding Edge Banding or Trim
Edge banding gives plywood shelves a finished look by covering the exposed layers. It is an iron-on material that mimics solid wood. Simply cut it to size, apply it with an iron, and trim the excess. This small detail elevates the appearance of your shelves.
Adding decorative trim or molding can also enhance the look. Small pieces of trim can be nailed or glued along the front edge of the shelves. This adds a custom, built-in feel. Choose trim that complements your kitchen style. These details add a polished touch to your DIY pantry.
- Sanding Steps:
- Use 120-grit sandpaper to remove major imperfections.
- Switch to 220-grit sandpaper for a smooth finish.
- Wipe away all dust with a tack cloth or damp rag.
- Finishing Options:
- Paint: Apply wood primer first, then 2-3 thin coats of washable interior paint (semi-gloss or gloss).
- Stain: Apply wood conditioner (optional, but recommended for even stain), then stain, wiping off excess. Follow with 2-3 coats of clear polyurethane.
- Enhancements:
- Edge Banding: Iron-on to cover plywood edges for a seamless look.
- Trim/Molding: Add decorative pieces to the front edges of shelves for a custom finish.
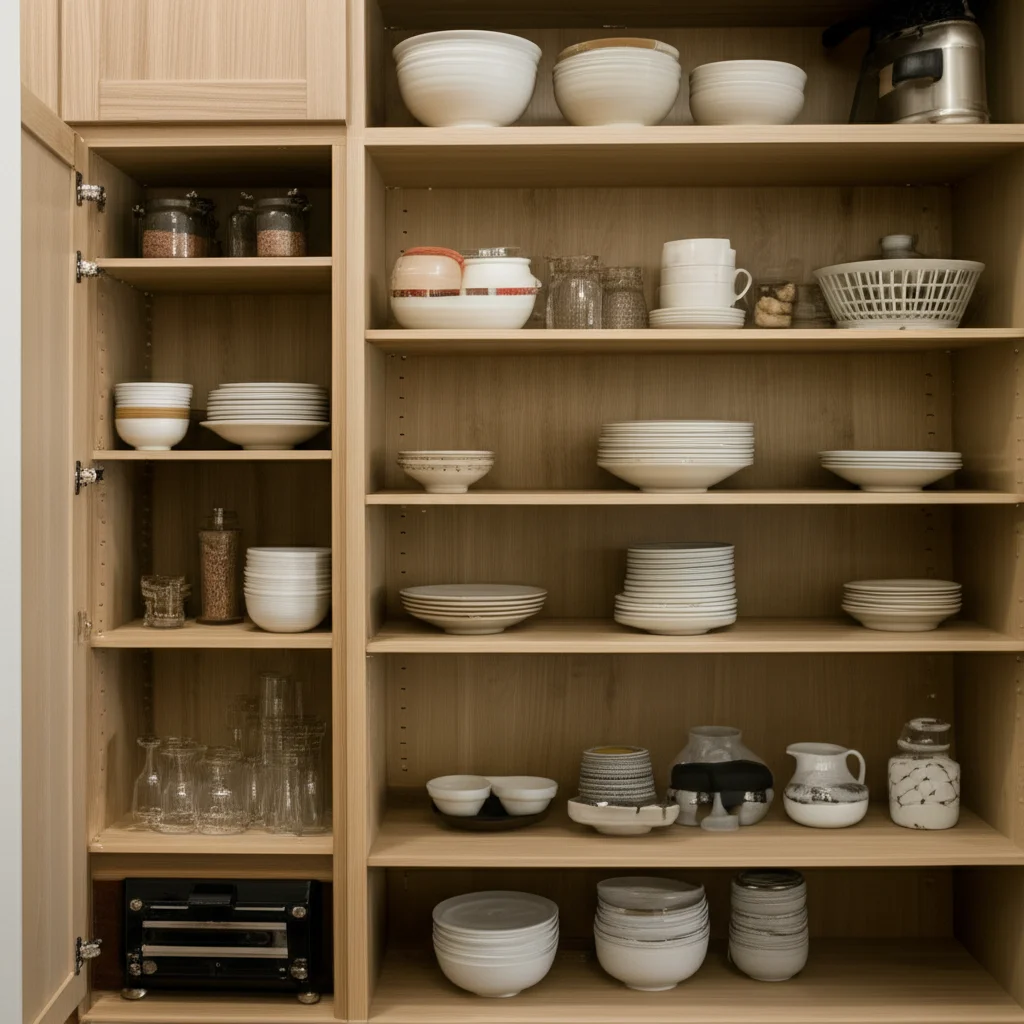
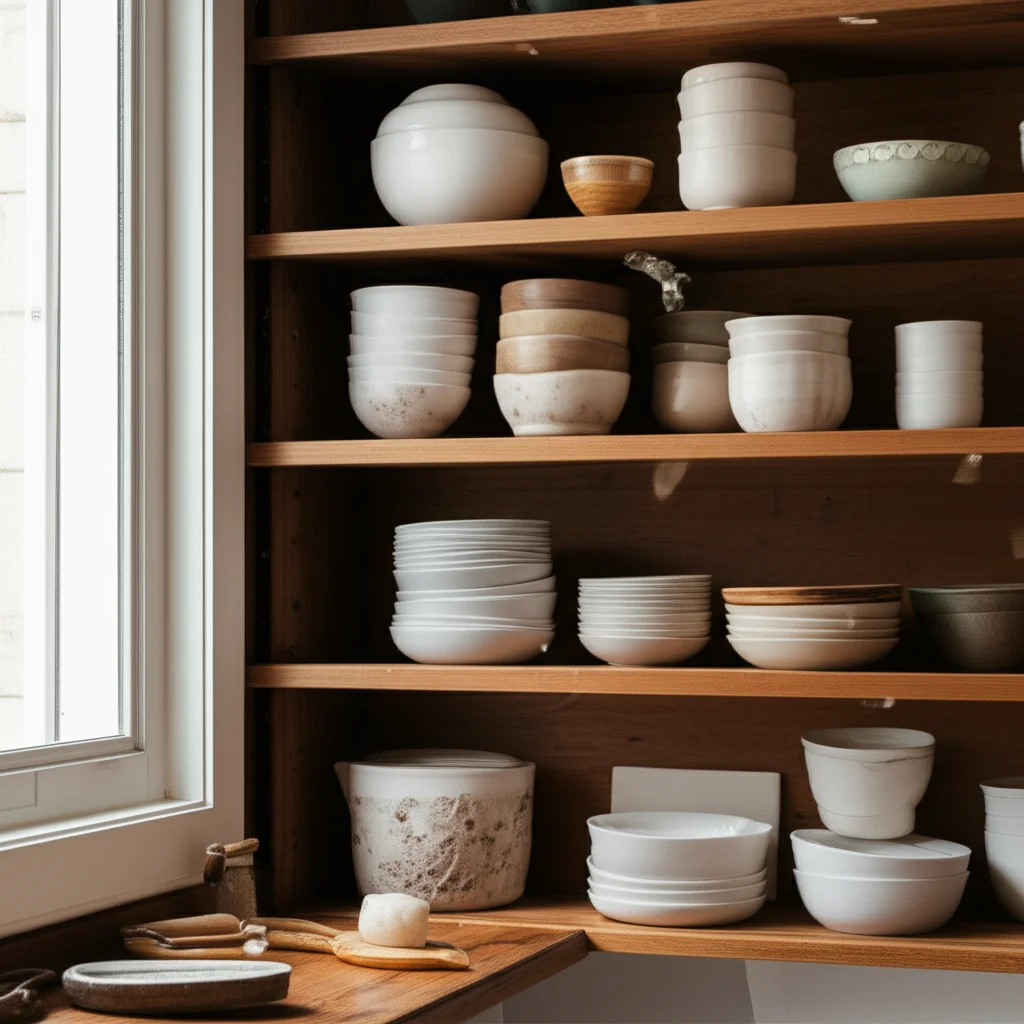
Maximizing Storage with Smart Pantry Shelf Organization
Building new pantry shelves is a great start. But true pantry efficiency comes from smart organization. A well-organized pantry helps you see everything you have, reducing waste and saving time. I love opening my pantry and finding exactly what I need instantly.
Effective organization means using every inch of space wisely. It also means setting up a system that is easy to maintain. Your new shelves provide the perfect canvas for a system that works for you. Let us explore some key strategies.
Utilizing Vertical Space with Shelf Dividers
Shelf dividers are simple tools that make a big impact. They help keep items upright and prevent stacks from toppling. Use them for cutting boards, baking sheets, or even platters. Dividers also create neat sections for different food categories.
You can buy ready-made dividers or create your own from thin plywood or plastic. Placing them strategically on your shelves maximizes vertical space. This stops items from sprawling sideways. It ensures every vertical inch serves a purpose.
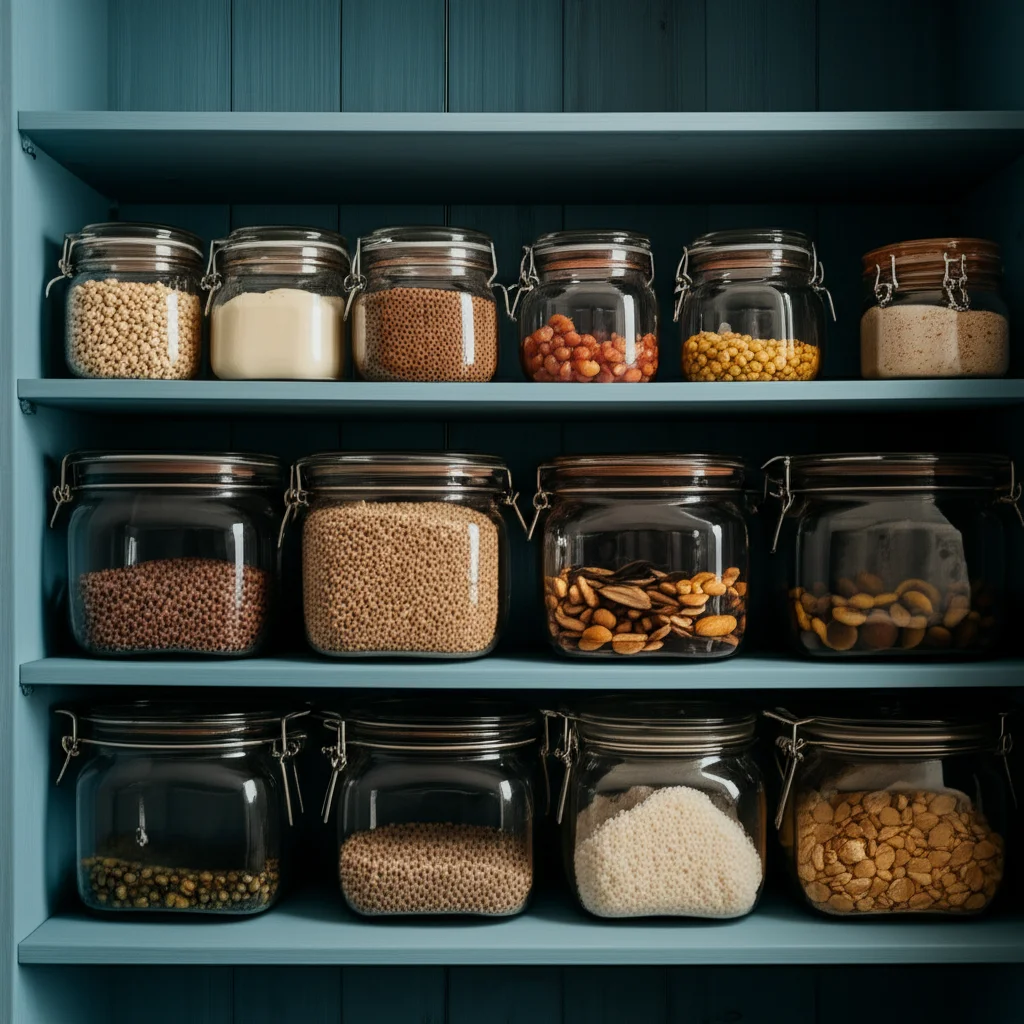
Incorporating Bins and Baskets
Clear bins and baskets are pantry game-changers. They contain smaller items and prevent clutter. Store snacks, pasta, or kid-friendly items in separate bins. Pull-out bins are especially useful for deep shelves, allowing easy access to items at the back.
Choose containers that fit your shelves well. Measure your shelves before buying bins to ensure they slide in and out smoothly. Clear bins let you see contents at a glance. Opaque bins hide visual clutter for a cleaner look. These containers group similar items, making your pantry functional and attractive.
Labeling for Easy Access
Labeling is the final step for a truly organized pantry. Labels tell everyone where things belong. This makes putting groceries away simple. It also helps you find items quickly when cooking.
Use clear, readable labels. You can use a label maker, write on adhesive labels, or even use chalk markers on chalkboard-painted bins. Label the front of each bin or the shelf edge where items sit. Consistent labeling keeps your pantry orderly. It ensures everything returns to its designated spot.
Consider these tips for a highly functional pantry:
- Group Like Items: Keep all baking supplies together, all spices together, etc.
- Zone Your Pantry: Create specific zones for breakfast items, dinner items, snacks, etc.
- First-In, First-Out (FIFO): Place newer items behind older ones to ensure you use older items first.
- Decant Dry Goods: Store rice, pasta, or flour in airtight containers. This saves space and keeps food fresh.
- Utilize Door Space: Add shallow shelves or organizers to the back of your pantry door for small items.
To further improve your pantry organization, consider solutions like how to make vertical shelf dividers. If you have specific shelf types, learn how to organize deep pantry shelves or how to organize wire pantry shelves. These resources offer targeted advice for common pantry challenges.
Common Challenges and Troubleshooting for DIY Pantry Shelves
Building your own pantry shelves is a rewarding project, but challenges can arise. Knowing how to handle common issues saves time and frustration. It ensures your finished shelves are strong and safe. I always prepare for potential problems before I start.
No DIY project is without its hiccups. The key is to approach these challenges with patience and the right solutions. Understanding how to fix minor problems helps you gain confidence. Your pantry shelves will be even better for it.
Dealing with Uneven Walls
Many older homes have walls that are not perfectly flat or plumb. This can make installing straight shelves difficult. Use a long level to identify high and low spots on your wall before marking shelf lines. If the wall is significantly uneven, you have a few options.
You can shim out the ledger boards or shelf supports in the thinner areas. Shims are small, thin pieces of wood that fill gaps behind the board. Use a level constantly as you attach supports. Another option is to use a flexible caulk along the gap between the shelf and the wall after installation. This creates a clean line.
Ensuring Proper Weight Capacity
Pantry shelves often hold heavy items like canned goods. Ensuring they can bear enough weight is critical for safety. The thickness of your shelf material affects its strength. For common pantry items, ¾-inch thick plywood or solid wood is usually sufficient.
The spacing of your supports also matters. Closer supports mean less span for the shelf, which increases its weight capacity. If you plan to store very heavy items, add an extra support in the middle of a long shelf. Reinforce wall connections by screwing into studs whenever possible. Using strong L-brackets also boosts support.
Repairing Minor Mistakes
Small errors can happen during any build. For instance, you might drill a pilot hole in the wrong spot. Fill these holes with wood filler, let it dry, and then sand it smooth. This repair becomes invisible once you paint or stain.
If a cut is slightly off, you might be able to trim it down. For minor gaps in joints, wood glue and clamps can often fix them. Do not rush the repairs; patience leads to a better finish. Learning to fix mistakes is part of becoming a skilled DIYer.
Here are some common issues and their solutions:
- Issue: Shelf sags in the middle.
- Solution: Add an additional support bracket or ledger board in the center of the shelf. Consider using thicker shelf material.
- Issue: Screws strip out of drywall.
- Solution: Use appropriate wall anchors (toggle bolts or self-drilling anchors) designed for heavy loads in drywall. Always try to screw into studs first.
- Issue: Shelf is not level.
- Solution: Adjust ledger boards or shelf brackets. Use shims behind supports to true them up. Use a long level to double-check.
- Issue: Wood splits when drilling.
- Solution: Use a smaller pilot bit for your screws. Drill slowly. Avoid drilling too close to the edge of the wood.
By anticipating these challenges, you can approach your pantry shelf project with more confidence. Solutions are often simple. Proper preparation prevents most issues.
Beyond Basic Shelves: Advanced Pantry Shelf Ideas
Once you master basic pantry shelf construction, you might want to explore more advanced options. These ideas can make your pantry even more functional and user-friendly. They address specific storage challenges in unique ways. I always look for ways to make my spaces work harder for me.
Advanced features can add a custom feel to your kitchen. They make accessing items easier and maximize every available corner. These ideas transform a simple pantry into a highly efficient storage hub. Consider which ones best fit your needs and DIY skill level.
Pull-Out Pantry Shelves
Pull-out shelves, also known as roll-out shelves or pantry drawers, bring the back of your pantry to you. They mount on slides, allowing the entire shelf to extend out. This is perfect for deep pantries where items can get lost at the back. It eliminates the need to dig through piles of food.
Installing pull-out shelves requires precise measurements and good quality drawer slides. The slides attach to the sides of your shelf or cabinet and the shelf itself. They are a game-changer for visibility and access. You can easily see all your canned goods or small appliances.
Corner Pantry Shelf Solutions
Corner pantries often have dead space that is hard to reach. Custom corner shelves can make this area useful. L-shaped shelves or Lazy Susans are popular options. L-shaped shelves use the full depth of the corner. Lazy Susans rotate, bringing items from the back to the front.
Building corner shelves needs careful angle cuts and accurate measurements. Using a template can help ensure a good fit. These solutions turn a challenging corner into valuable storage. It eliminates wasted space in your pantry.
Integrating Cabinets and Shelves
For a truly custom pantry, combine open shelves with enclosed cabinets. Open shelves are great for frequently used items or decorative storage. Cabinets hide less attractive items or provide secure storage. This creates a versatile and tidy pantry.
You can build lower cabinets with doors and install open shelves above. Or, you can add shelves within existing cabinets. This approach offers flexibility. It allows you to tailor your pantry to various storage needs. It also adds a more finished look to your pantry area.
Consider these advanced concepts for your pantry:
- Pantry Pull-Out Drawers:
- Install full-extension drawer slides on the sides of your pantry opening.
- Build simple boxes (drawers) to fit the slides.
- Attach drawer fronts if desired.
- Great for cans, small appliances, or baking supplies.
- Custom Corner Units:
- Design L-shaped shelves to fit snugly into the corner.
- Measure angles precisely.
- Consider a Lazy Susan mechanism for rotating shelves.
- Hybrid Pantry Systems:
- Use base cabinets for heavier items or less attractive storage.
- Install open shelves above for easy access to daily essentials.
- This creates a layered, functional system.
If you are looking to integrate existing kitchen components, learning how to stack wall cabinets to make pantry can be very helpful. Similarly, understanding how to use kitchen cabinets as a pantry offers alternatives for creating more storage without a full build.
FAQ Section
How much weight can a DIY pantry shelf hold?
A well-built pantry shelf made from ¾-inch plywood or solid wood can hold significant weight. This is especially true if you screw supports into wall studs. A typical 24-inch wide shelf can hold 50-75 pounds. Longer shelves need more support. Adding extra brackets increases the weight capacity of your shelves.
What is the best wood for pantry shelves?
Plywood is a top choice for pantry shelves due to its stability, cost, and strength. Opt for cabinet-grade ¾-inch plywood. Solid pine is also good, offering a natural look and easy workability. Hardwoods like oak are very durable but cost more. MDF works for painted shelves, but avoid moisture.
How deep should pantry shelves be?
Most pantry shelves are between 12 and 16 inches deep. A 12-inch depth works well for most cans and jars. A 16-inch depth fits larger items like cereal boxes or small appliances. Deeper shelves can lead to items getting lost in the back. Consider varying depths for different items.
Can I use plywood for pantry shelves?
Yes, plywood is an excellent material for pantry shelves. It is strong, stable, and less prone to warping than solid wood boards. Always choose a good quality ¾-inch thick plywood for durability. You will want to seal or paint the plywood to protect it from moisture.
How do I clean my new pantry shelves?
Once finished, clean your pantry shelves with a damp cloth and mild soap. Avoid harsh chemicals that could damage the finish. For routine cleaning, a quick wipe-down with a dry or slightly damp cloth is enough. Ensure shelves are dry before placing items back on them.
How long does it take to build a pantry shelf?
The time to build a pantry shelf varies. A simple fixed shelf might take a few hours. A complete pantry system with multiple shelves could take a weekend or longer. Planning, cutting, and finishing steps each take time. Allow extra time for paint or stain to dry between coats.
- pantry shelf
- DIY pantry
- kitchen storage
- build shelves
- home organization
- custom shelving
- food storage

Todd Martin
Senior Writer
With over 15 years of experience in home renovation and design, I started HEG to share what I’ve learned with homeowners who want to create spaces that are both beautiful and functional. I’ve always believed in a hands-on approach, and over the years, I’ve picked up practical solutions that actually work. Through HEG, I aim to make home improvement more approachable, sharing real tips that help you create a home you truly love.