· Todd Martin · Home Improvement · 20 min read
How To Make Shelves In Cabinets
Transform Your Cabinets: How To Make Shelves For Smarter Storage
Are your cabinets overflowing and disorganized? Perhaps you have deep cabinets with wasted vertical space. Learning how to make shelves in cabinets is a simple yet powerful solution to these common problems. Adding custom shelves can double or even triple your usable storage space, bringing order and efficiency to any room. Whether it is your kitchen, pantry, linen closet, or garage, well-planned shelving transforms clutter into calm. This article walks you through the entire process, from initial planning to final installation.
Takeaway
- Plan carefully: Measure cabinet dimensions, assess storage needs, and decide on shelf type (fixed or adjustable).
- Choose suitable materials: Select durable wood or engineered wood products for your shelves.
- Gather tools: Ensure you have basic woodworking tools for accurate cuts and secure installation.
- Install with precision: Follow steps for cutting, finishing, and securing shelves, whether with pins or cleats.
- Optimize storage: Maximize new shelf space with smart organization accessories.
Making shelves in cabinets involves careful measurement, selecting appropriate materials like plywood or MDF, and using basic tools to cut and secure them. You can install fixed shelves using cleats or adjustable shelves with shelf pins, greatly enhancing storage capacity and organization within any cabinet space.
Planning Your Cabinet Shelves Project
Before you cut any wood, thoughtful planning is essential. Proper planning ensures your new shelves fit perfectly and meet your storage needs. This first step helps avoid common mistakes and saves time later. I always start by envisioning how I want the cabinet to function.
Assess Your Cabinet and Storage Needs
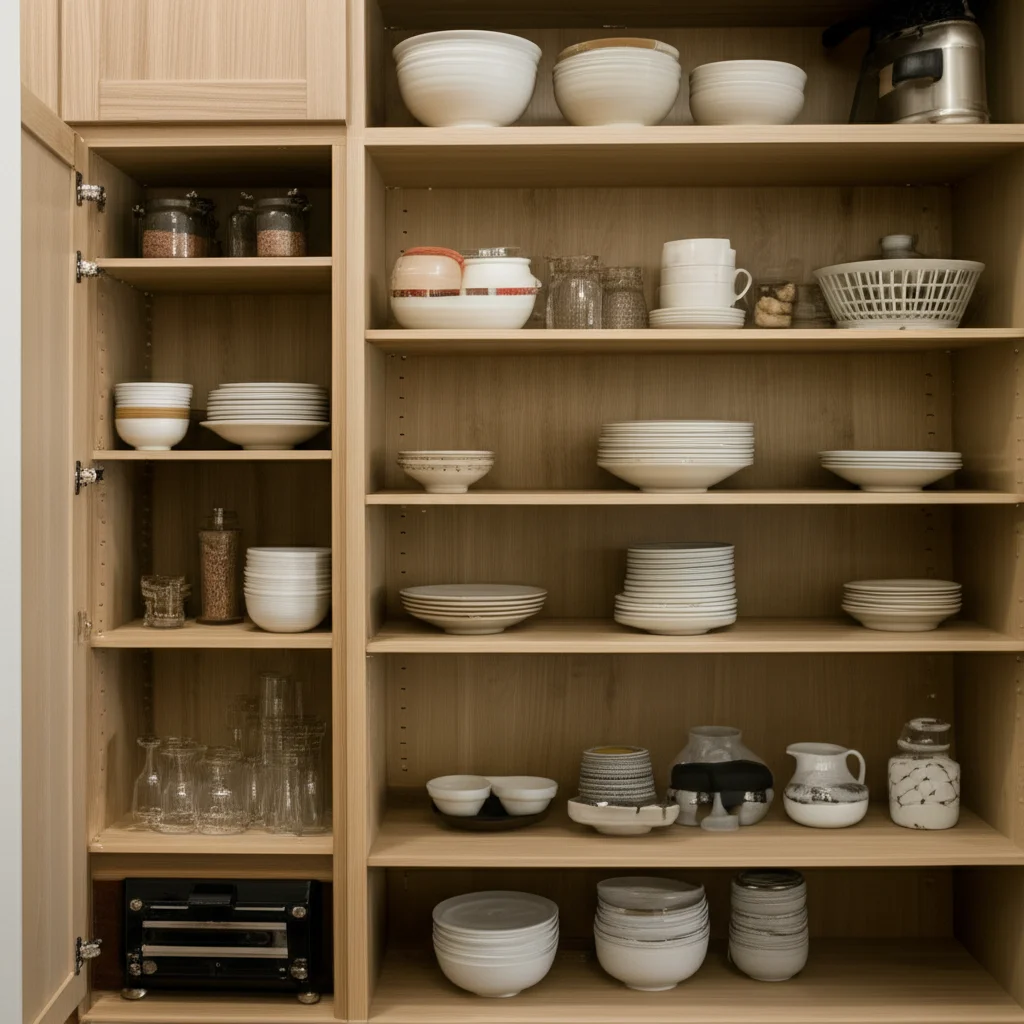
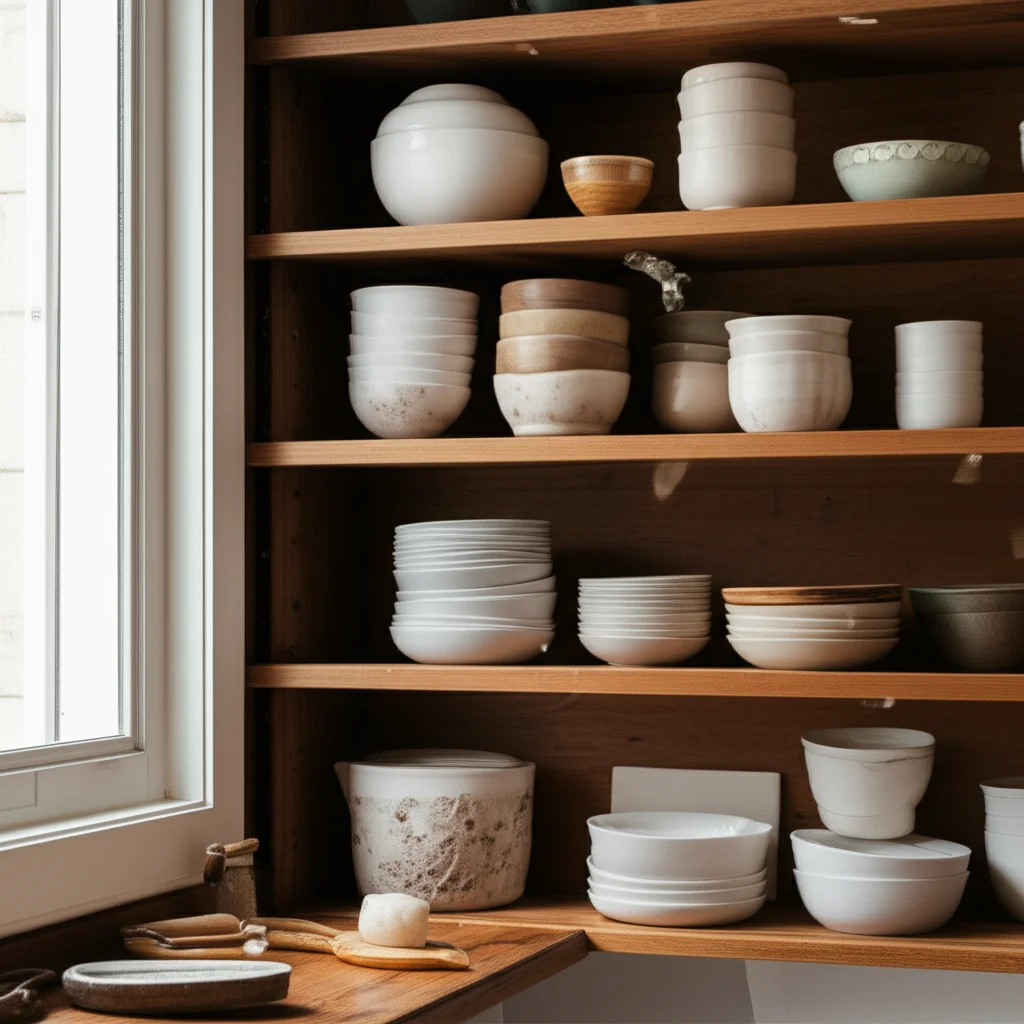
First, look at your existing cabinet. Is it deep? Is it wide? What do you plan to store on the new shelves? Heavy items like dishware require sturdy shelves and support. Lighter items like linens or spices allow for more flexibility in materials. Consider the types of items currently cluttering your space.
Next, identify the specific cabinet. Is it a kitchen base cabinet, a tall pantry, or a small bathroom cupboard? Each type presents unique challenges and opportunities. For example, adding shelves under kitchen cabinets often requires careful consideration of plumbing. Think about how many shelves you need and how far apart they should be.
Measure Your Cabinet Accurately
Accurate measurements are critical for success. Use a reliable tape measure. Measure the inside width of the cabinet at the front, middle, and back. Cabinets can taper, so take the smallest width. Measure the inside depth from front to back. Also, measure the inside height from the cabinet floor to the top.
Subtract a small allowance from your measurements for easy fitting. For instance, subtract 1/8 inch from the width and depth to ensure the shelf slides in without binding. This small gap prevents frustration during installation. Double-check all your measurements.
Decide on Shelf Type: Fixed vs. Adjustable
You have two main options for how to make shelves in cabinets: fixed or adjustable. Fixed shelves are permanently installed. They offer maximum stability for heavy items. They are often supported by wood cleats or dado joints. Fixed shelves are perfect for areas where you know the exact spacing needed.
Adjustable shelves offer flexibility. They rest on shelf pins inserted into pre-drilled holes. This allows you to change shelf height as your storage needs evolve. Adjustable shelves are great for pantries or linen closets where item sizes vary. Consider what level of flexibility you need. Building custom shelves enhances usability.
Choosing the Right Materials for DIY Shelves
Selecting the correct material is crucial for making durable and functional shelves. The material choice impacts shelf strength, appearance, and cost. I always aim for a balance between these factors for my projects. Consider what your shelves will hold and how much moisture the area gets.
Types of Wood and Engineered Wood Products
- Plywood: This is a strong and stable choice. Plywood consists of multiple thin wood veneers glued together. It resists warping better than solid wood. Various grades are available, with cabinet-grade plywood offering a smooth finish. It is excellent for heavy loads.
- MDF (Medium-Density Fiberboard): MDF is an engineered wood product made from wood fibers, resin, and wax. It has a smooth surface that takes paint well. MDF is very stable and less expensive than plywood. However, it is heavier and less resistant to moisture. Use MDF for painted shelves in dry areas.
- Particle Board: This material is made from wood chips bonded with resin. Particle board is the most affordable option. It is also the least strong and most susceptible to moisture damage. I recommend using particle board only for light-duty shelves in low-moisture environments. It needs edge banding to look good.
- Solid Wood: For a natural wood look, solid wood planks are an option. Common choices include pine, oak, or maple. Solid wood is strong and beautiful. It can be more expensive and prone to warping or splitting with changes in humidity. Solid wood is great if you want to match existing wood cabinets.
Shelf Support Hardware and Fasteners
The hardware you choose directly impacts shelf stability.
- Shelf Pins: These small pegs insert into holes drilled along the cabinet sides. They support adjustable shelves. Pins come in various materials, like metal or plastic. Choose sturdy metal pins for heavier items.
- Wood Cleats: These are strips of wood screwed into the cabinet sides. The shelf rests directly on top of the cleats. Cleats provide very strong support for fixed shelves. They are ideal for heavy-duty storage. You can also use cleats for how to add shelves under kitchen cabinets.
- Screws and Nails: Use wood screws for attaching cleats and securing fixed shelves. Screws offer a stronger hold than nails. Choose screws appropriate for the thickness of your material and the cabinet structure. Predrilling pilot holes prevents wood splitting.
Consider the aesthetics as well. If your cabinet interior is visible, choose hardware that matches your style. For example, how to build wood shelves in a closet often uses cleats for strength and simplicity.
Essential Tools for Building Cabinet Shelves
Having the right tools makes the job easier and safer. You do not need a professional workshop to make shelves in cabinets. However, some basic woodworking tools are necessary. I always make sure my tools are sharp and in good working condition before starting.
Measuring and Marking Tools
- Tape Measure: A reliable 25-foot tape measure is indispensable. It allows for accurate measurements of cabinet dimensions and shelf material. Ensure it has clear markings.
- Pencil: A carpenter’s pencil or a regular pencil works well for marking cuts and drill points. Make light marks that you can erase later.
- Speed Square or Combination Square: These tools help you draw straight, accurate lines at 90-degree angles. This is crucial for precise cuts. A combination square also helps with depth measurements for drilling.
- Level: Use a small level to ensure your shelf supports are perfectly horizontal. This prevents items from sliding off the shelves. A level also ensures the finished shelf looks correct.
Cutting and Drilling Tools
- Circular Saw or Table Saw: For cutting sheet goods like plywood or MDF, a circular saw with a straight edge guide or a table saw is ideal. These tools provide straight, accurate cuts. A table saw offers the most precision for repeated cuts.
- Jigsaw: A jigsaw is useful for making curved cuts or cutting out notches, though it is less common for simple rectangular shelves. It offers more maneuverability than a circular saw.
- Drill/Driver: A cordless drill/driver is essential for pre-drilling pilot holes and driving screws. It also powers bits for drilling shelf pin holes. Make sure you have fully charged batteries.
- Drill Bits: You will need bits for pilot holes for screws. If installing adjustable shelves, you will also need a shelf pin jig and a corresponding drill bit. This ensures consistent, straight holes.
Safety Equipment
Safety is paramount when working with tools. Never skip these items.
- Safety Glasses: Always wear safety glasses to protect your eyes from sawdust and flying debris. This is the most important piece of safety gear.
- Hearing Protection: Power tools can be loud. Wear earplugs or earmuffs to protect your hearing.
- Gloves: Work gloves protect your hands from splinters and abrasions. They also improve grip on materials.
- Dust Mask: Cutting wood creates fine dust. A dust mask prevents you from inhaling it. Good ventilation is also important.
Having these tools ready simplifies the process of how to make shelves in cabinets. I always double-check I have everything before I begin cutting.
Step-by-Step Guide to Installing Adjustable Shelves
Adjustable shelves offer incredible versatility. They allow you to reconfigure your cabinet space as your storage needs change. This method is ideal for pantries, linen closets, and general storage. You can even use this method if you need to add shelves to a closet without drilling by using tension rods or similar non-drilling solutions, though for cabinet shelves, drilling is typically required for stability.
Marking and Drilling Shelf Pin Holes
The first step is to accurately mark where your shelf pins will go.
- Determine Shelf Spacing: Decide on the minimum and maximum heights for your shelves. Consider the tallest items you plan to store. Mark these initial positions.
- Use a Shelf Pin Jig: A shelf pin jig is a game-changer for this step. It is a template with pre-drilled holes that ensures consistent spacing and depth. Place the jig inside the cabinet, flush with the front or back edge.
- Mark Holes: Use a pencil to mark through the jig’s holes onto the cabinet sides. If your cabinet is deep, ensure you mark at least two lines of holes per side: one near the front and one near the back. This provides stable support.
- Drill Holes: Attach a drill bit with a depth stop to your drill. The depth stop prevents you from drilling too deep. Carefully drill into each marked spot. Keep the drill straight and level. Repeat this process for all four corners where shelves will sit. Ensure corresponding holes on opposite sides are at the exact same height. This ensures your shelves are level.
Cutting Your Shelf Boards
Once your holes are ready, cut the shelves themselves.
- Measure Again: Even after drilling, measure the actual distance between the opposing shelf pin holes. This accounts for any slight variations. Also measure the depth from the front to the back of the cabinet.
- Transfer Measurements: Carefully transfer these measurements to your chosen shelf material (plywood, MDF, etc.). Use a straight edge and a pencil to draw precise cut lines.
- Make Precise Cuts: Use a circular saw or table saw to cut the shelf boards. For a circular saw, clamp a straight edge to the material as a guide for a perfectly straight cut. Take your time to ensure clean, accurate cuts. Any unevenness will be noticeable.
- Edge Banding (Optional): If using plywood or particle board, consider applying edge banding to cover the raw edges. This gives the shelf a finished look and helps protect it from moisture. Apply with an iron or special adhesive.
Installing the Adjustable Shelves
With the holes drilled and shelves cut, installation is quick.
- Insert Shelf Pins: Push the shelf pins into the desired holes. Make sure they are fully seated and secure. You will need four pins per shelf.
- Place the Shelf: Carefully lower the cut shelf board onto the pins. It should rest securely and level. Check with a small level.
- Adjust as Needed: The beauty of adjustable shelves is the ability to change their height. If your storage needs change, simply move the pins to new holes. This adaptability makes them highly practical for dynamic storage.
This method transforms your cabinet into a highly organized and flexible space. It is a simple yet effective way to how to make shelves in cabinets. You can even learn how to install a shelf between two cabinets for integrated shelving solutions.
Building Fixed Shelves for Maximum Stability
Fixed shelves offer superior strength and rigidity. They are ideal for storing heavy items like books, dishes, or tools. Unlike adjustable shelves, they are permanently attached to the cabinet structure. This method provides robust support that will last for years. I often choose fixed shelves for my pantry for heavy items.
Understanding Support Methods: Cleats vs. Dado Joints
There are two primary ways to support fixed shelves:
- Wood Cleats: This is the most common and easiest method for DIYers. Cleats are strips of wood (typically 1x2 or 1x3 lumber) that are screwed or glued to the cabinet interior sides. The shelf then rests directly on top of these cleats. This method is strong and relatively simple. It is excellent for adding shelves to existing cabinets.
- Dado Joints: A dado joint is a groove cut into the cabinet side walls, into which the shelf slides. This method creates a very strong, integrated joint. It looks cleaner because the support is hidden within the cabinet wall. However, cutting accurate dadoes requires more advanced woodworking skills and specialized tools like a router or table saw with a dado blade. This is typically done during the initial cabinet construction. For adding shelves to an existing cabinet, cleats are usually the preferred method.
Preparing the Cabinet for Fixed Shelves
Before installing cleats or cutting dados, prepare your cabinet.
- Clean the Interior: Ensure the cabinet interior is clean and free of dust or debris. A clean surface ensures better adhesion for glue and makes marking easier.
- Measure and Mark Shelf Locations: Determine the desired height for each fixed shelf. Use a tape measure and a pencil to mark the exact location on both side walls of the cabinet. Use a level to draw a perfectly horizontal line across the cabinet sides at your desired height. This line will guide the placement of your cleats or dados.
- Locate Studs (if applicable): If your cabinet walls are thin or made of particle board, try to align your cleats with any cabinet framing or studs for maximum support. This is more critical for freestanding units than internal cabinet walls. However, screwing into cabinet sides generally provides enough strength.
Installing Cleats and Securing Shelves
This is the most common DIY approach to how to make shelves in cabinets.
- Cut Cleats: Cut your wood cleats to the correct depth of the cabinet. They should run from the front to the back of the cabinet along your marked lines. You will need two cleats per shelf, one for each side.
- Attach Cleats: Apply a strong wood glue along the back of the cleats. Then, align them precisely with your marked lines on the cabinet sides. Use a level to ensure they are perfectly horizontal. Secure the cleats with wood screws, driving them through the cleats into the cabinet sides. Use screws long enough to get a good bite but not so long they penetrate the outside of the cabinet. Space screws every 6-8 inches.
- Cut Shelf Boards: Measure the exact distance between the installed cleats. This is your shelf width. Measure the depth of the cabinet for the shelf depth. Cut your shelf material (plywood, solid wood) to these precise dimensions.
- Install Shelves: Place the cut shelf board directly onto the installed cleats. You can optionally secure the shelf to the cleats from underneath with a few screws. This adds extra stability but makes future removal more difficult. Often, the weight of the items on the shelf is enough to hold it securely.
Fixed shelves are a permanent and strong solution. They are excellent for heavy-duty storage needs. This robust method enhances your cabinet’s storage capacity significantly.
Finishing Touches and Maintenance for Your New Shelves
Once your shelves are installed, the job is not quite done. Finishing them properly protects the wood, improves appearance, and makes cleaning easier. Regular maintenance keeps your shelves looking good and functioning well for years. I always take the time for these final steps to ensure longevity.
Sanding and Sealing/Painting
The type of finish depends on your shelf material and desired look.
- Sanding: Start by sanding all surfaces and edges of your new shelves. Use medium-grit sandpaper (e.g., 120-grit) to smooth out any rough spots or imperfections. Follow up with fine-grit sandpaper (e.g., 220-grit) for a silky smooth finish. Proper sanding prepares the surface for a professional look. Wipe away all dust with a tack cloth before proceeding.
- Sealing or Priming:
- For Staining: If you plan to stain solid wood or plywood, apply a wood conditioner first. This helps the stain absorb evenly and prevents blotchiness.
- For Painting: If you plan to paint, apply a high-quality primer. Primer helps the paint adhere better and provides a uniform base. It also seals the wood and prevents stains from bleeding through. For MDF or particle board, use a shellac-based primer to seal the porous surface.
- Painting or Staining:
- Painting: Apply thin, even coats of paint. Lightly sand between coats for the smoothest finish. Two to three coats are usually sufficient.
- Staining: Apply stain according to product instructions. Wipe off excess stain for an even color.
- Topcoat/Sealer: After staining or painting, apply a protective topcoat. Options include polyurethane, lacquer, or clear acrylic. A topcoat protects the shelf from moisture, scratches, and wear. It also makes cleaning easier. Apply multiple thin coats for best durability.
Regular Cleaning and Care
New shelves need proper care to maintain their condition.
- Routine Dusting: Dust your shelves regularly with a soft cloth or duster. This prevents dust buildup and keeps them looking fresh.
- Spot Cleaning: For spills or sticky residue, clean immediately. Use a damp cloth with a mild soap solution. Avoid harsh chemicals, especially on painted or stained surfaces, as they can damage the finish. For specific cleaning needs, remember how to clean wood cabinets.
- Avoid Excessive Moisture: Wood and engineered wood products are susceptible to water damage. Wipe up spills quickly. Avoid placing wet items directly on shelves. Consider using shelf liners for extra protection, especially in kitchen or bathroom cabinets.
- Check for Wear: Periodically inspect your shelves and their supports. Look for any signs of wear, loosening screws, or damage. Address minor issues promptly to prevent bigger problems. Tighten screws if necessary.
By taking these finishing and maintenance steps, your custom-built shelves will not only look great but also provide functional storage for many years to come. This attention to detail completes your project of how to make shelves in cabinets.
Maximizing Cabinet Storage with Smart Shelving Ideas
Adding shelves is a fantastic first step towards better organization, but the true magic happens when you optimize that new space. Smart shelving ideas help you get the most out of every inch. I love finding creative ways to store things efficiently. Your goal is to make every item easy to find and access.
Organizing Deep and Tall Cabinets
Deep cabinets can become black holes for forgotten items. Tall cabinets often have too much vertical space between standard shelves.
- Pull-Out Trays and Bins: For deep lower cabinets, consider using pull-out trays or bins on your new shelves. These allow you to reach items at the back without rummaging. Label the bins for quick identification. This is especially useful for how to organize deep pantry shelves.
- Vertical Dividers: Install vertical dividers on your shelves to create slots for trays, cutting boards, baking sheets, or platters. This keeps them upright and easily accessible. You can buy these or make simple wooden dividers.
- Tiered Organizers: For tall cabinets or shelves with significant height, use tiered organizers (risers) to create different levels. This allows you to stack cans, spices, or small dishes without wasting vertical space. It effectively doubles the usable area on one shelf.
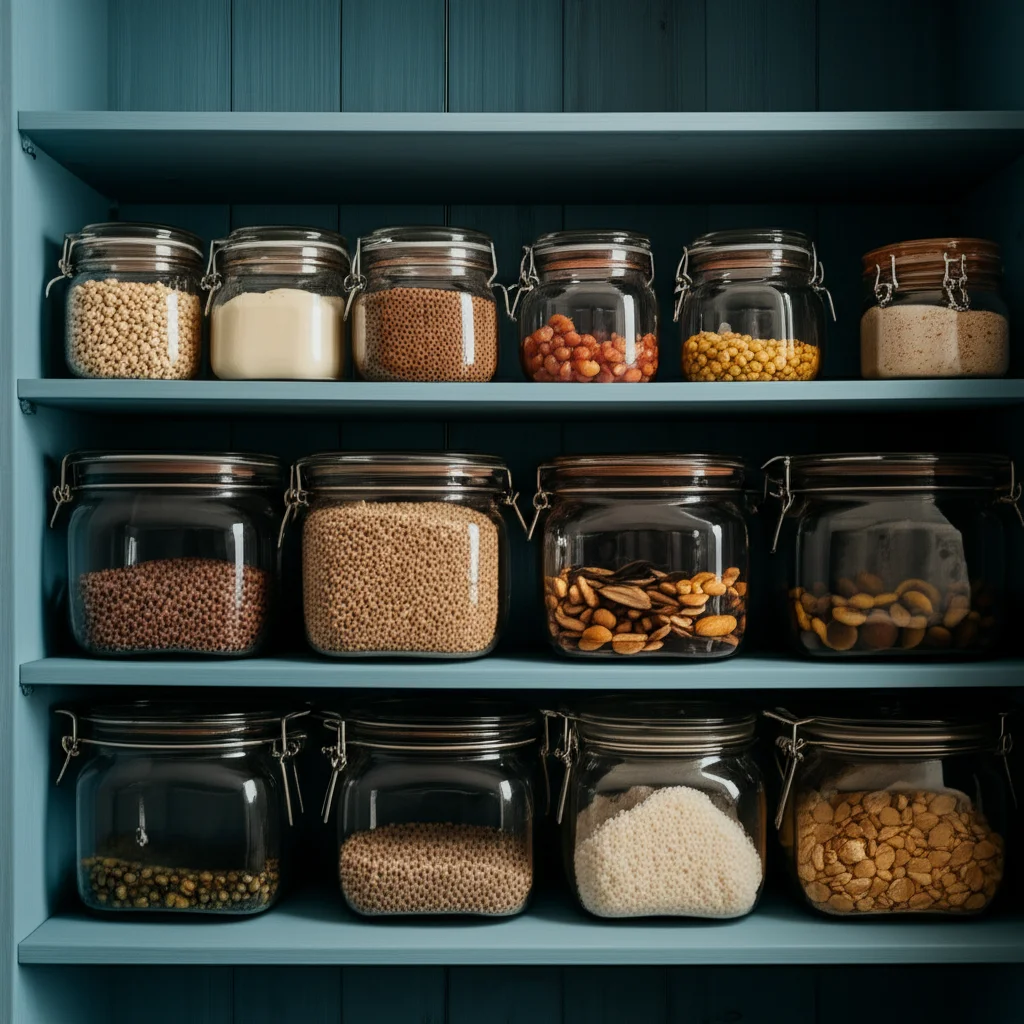
- Clear Containers: Store small items like spices, cleaning supplies, or crafts in clear containers. This makes it easy to see what is inside without pulling everything out. Consistent containers also create a more uniform and tidy look.
Utilizing Cabinet Doors and Sides
Do not forget the often-unused surfaces within your cabinet.
- Door-Mounted Organizers: Attach small wire racks or clear pockets to the inside of cabinet doors. These are perfect for storing spices, small bottles, aluminum foil, or plastic wrap boxes. This frees up valuable shelf space.
- Hooks and Clips: Install adhesive hooks or small screw-in hooks on the inside of cabinet sides or doors. These can hold measuring cups, cleaning cloths, or lightweight tools. Magnetic strips can also hold knives or metal spice tins.
Integrating Specialized Storage Solutions
Consider specific items you store and how shelving can cater to them.
- Wine Rack Inserts: If you have wine bottles, install a dedicated wine rack insert on one of your new shelves. This keeps bottles stable and organized.
- Plate Dividers: For kitchens, plate dividers can hold plates upright, making them easier to grab and preventing chipping.
- Linen Closet Solutions: For linen closets, dedicate specific shelves for sheets, towels, and blankets. Use shelf dividers to keep stacks neat and separate by size or type. Roll towels instead of folding them to save space.
- Shoe Shelves: In a closet cabinet, angle shelves slightly to create shoe racks. This prevents shoes from piling up.
By combining well-built shelves with smart organizational tools, you transform any cabinet into a highly functional storage hub. These strategies maximize the impact of your efforts in how to make shelves in cabinets.
Frequently Asked Questions About Making Cabinet Shelves
Making shelves in cabinets often brings up common questions. Here are answers to some of the most frequent queries to help you with your project.
What is the best material for DIY cabinet shelves?
Plywood is often the best choice for DIY cabinet shelves. It offers a great balance of strength, stability, and workability. It resists warping better than solid wood and is stronger than MDF or particle board. For a budget-friendly option, MDF works well for painted shelves in dry areas.
How much weight can a DIY shelf hold?
The weight a shelf can hold depends on several factors: the material thickness, span between supports, and the type of support. A typical 3/4-inch plywood shelf supported every 24-30 inches by sturdy cleats can hold significant weight (50-100+ lbs). Thicker materials and closer supports increase load capacity.
Can I add adjustable shelves to an old cabinet?
Yes, you can add adjustable shelves to most old cabinets. The key is to carefully measure and then drill new shelf pin holes. Use a shelf pin jig for accuracy. Ensure the cabinet walls are solid enough to hold the pins securely. This is a common and effective cabinet upgrade.
How do I make sure my shelves are level?
To ensure shelves are level, use a good quality level. When marking for fixed shelves, draw a perfectly horizontal line using a level. For adjustable shelves, make sure your shelf pin jig is plumb and level before drilling holes. Double-check the shelf itself with a level after installation.
What is the typical spacing between cabinet shelves?
The typical spacing depends on what you store. For kitchen base cabinets, 8-12 inches is common for dishes and small appliances. Pantry shelves might range from 12-18 inches for various food items. Always measure your tallest items and provide adequate clearance. Adjustable shelves offer the most flexibility here.
Do I need to finish the edges of my shelves?
Finishing the edges is not always structurally necessary, but it greatly improves appearance and durability. Raw edges of plywood or particle board can look unfinished and absorb moisture. Applying edge banding, paint, or stain makes the shelves more professional, protects the material, and simplifies cleaning.
Conclusion
Learning how to make shelves in cabinets is a highly rewarding home improvement project. You gain valuable storage, improve organization, and customize your living space. We have covered everything from initial planning and precise measuring to selecting the right materials and tools. We also walked through detailed installation steps for both adjustable and fixed shelves. Remember the importance of finishing touches and ongoing maintenance to ensure your new shelves last for years.
By following these steps, you can confidently transform any cabinet into an efficient, organized storage area. No more wasted space or cluttered countertops. Start your cabinet shelving project today and enjoy the benefits of a more functional home. Your organized cabinets await!
- cabinet shelves
- DIY shelving
- custom cabinets
- storage solutions
- woodworking
- home organization
- kitchen storage
- pantry shelves

Todd Martin
Senior Writer
With over 15 years of experience in home renovation and design, I started HEG to share what I’ve learned with homeowners who want to create spaces that are both beautiful and functional. I’ve always believed in a hands-on approach, and over the years, I’ve picked up practical solutions that actually work. Through HEG, I aim to make home improvement more approachable, sharing real tips that help you create a home you truly love.