· Todd Martin · Kitchen Maintenance · 20 min read
How To Clean A Gas Stove Top Grates

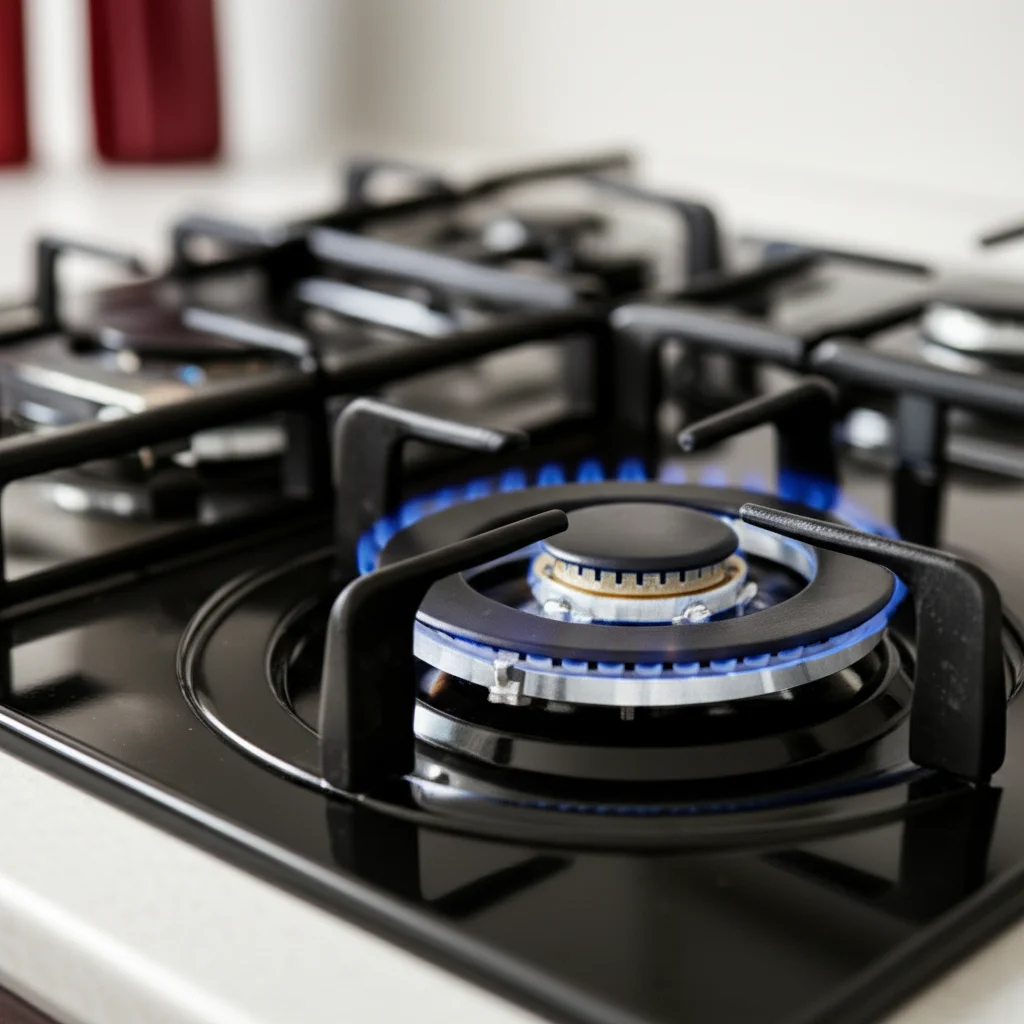
A Spotless Kitchen: How To Clean Your Gas Stove Grates
Stepping into your kitchen, a clean stove makes a big difference. However, constant cooking can leave gas stove top grates coated in grease and food spills. Neglecting these grates not only makes your kitchen look untidy but also affects how your stove performs. A build-up of grime can block burner ports and reduce heating efficiency. I know how frustrating it is to deal with stubborn, baked-on messes, but cleaning them is simpler than you might think. This guide will walk you through everything you need to know to clean a gas stove top grates, ensuring they look new and function perfectly. We will cover necessary tools, various cleaning methods, specific care for different grate materials, and tips for ongoing maintenance.
Takeaway
Keeping your gas stove grates clean ensures kitchen hygiene and extends appliance life.
- Regular maintenance prevents tough grime buildup.
- Use appropriate methods for different grate materials like cast iron or porcelain.
- Effective cleaning improves stove performance and appearance.
- Always dry grates completely to prevent rust and damage.
How do you clean gas stove top grates?
To clean gas stove top grates, first remove them from the stove. Submerge the grates in a sink filled with hot water and dish soap to loosen initial grime. For tougher residue, create a paste with baking soda and water, apply it, and let it sit before scrubbing. Rinse thoroughly and dry completely to avoid rust before placing them back.
Why Cleaning Your Gas Stove Grates Matters
Maintaining a clean kitchen is important, and your gas stove grates are a key part of this. They bear the brunt of spills, splatters, and burnt-on food every time you cook. I have seen how quickly grates can accumulate grime, which not only looks bad but also creates problems. Keeping them clean is not just about aesthetics; it is about hygiene, safety, and the long-term performance of your appliance. A neglected stove can harbor bacteria and odors, making your cooking space less inviting.
Think about the food particles and grease that settle on these grates daily. Over time, these residues bake onto the surface, becoming incredibly difficult to remove. This buildup can make your grates feel sticky or rough. Beyond that, a dirty grate can actually hinder your cooking. When burner ports are obstructed by grease, flames may not distribute heat evenly, leading to inefficient cooking. This means your meals might take longer to prepare or cook unevenly. A well-maintained stove top allows heat to flow freely, ensuring optimal performance for every dish. Cleaning your grates regularly contributes to the overall cleanliness of your kitchen. If you want to keep your entire cooking area spotless, learn how to clean your stove thoroughly.
Health and Hygiene Benefits
Grease and food particles on grates create a breeding ground for bacteria. When these residues are heated, they can produce smoke and odors. This impacts your indoor air quality and overall kitchen hygiene. Regularly cleaning your gas stove top grates prevents the growth of mold and bacteria. It makes your cooking environment safer and healthier for your family. A clean grate also reduces the risk of attracting pests. You will feel better preparing meals in a truly clean space.
Improving Cooking Efficiency
Clean grates mean better heat distribution. When grates are covered in burnt-on food, they can block the flow of heat from the burners to your cookware. This forces your stove to work harder, using more gas to achieve the same results. A clean surface allows heat to transfer directly and evenly to your pots and pans. This leads to more efficient cooking and better-tasting food. It can also save you money on energy bills over time. Keep your stove top clear of obstructions for optimal performance by learning how to clean your stove top.
Extending Grate Lifespan
Just like any other appliance part, proper care extends the life of your stove grates. Neglecting them can lead to corrosion, rust, and permanent damage, especially for cast iron grates. Baked-on residue can also make grates more brittle and prone to chipping. Regular cleaning protects the material, whether it’s cast iron or porcelain-coated. This saves you the expense and hassle of replacing them prematurely. Investing a little time in cleaning helps maintain your stove’s overall value and appearance. Knowing how to clean the stove top is vital for your appliance’s longevity.
Gathering Your Cleaning Arsenal: Essential Tools and Solutions
Before you start to clean a gas stove top grates, gathering the right supplies makes the job much easier. You do not need fancy equipment. Most of what you require can be found around your house or at any grocery store. Having everything ready before you begin saves time and effort. I always make sure I have all my tools laid out, so I can move efficiently from one step to the next. The proper tools ensure effective cleaning without damaging your grates.
Your choice of cleaning solution often depends on the level of grime and the material of your grates. For everyday messes, simple dish soap and water work wonders. For tougher, baked-on residue, you might need something stronger. Understanding the properties of different cleaners helps you choose the best option. This careful selection prevents unnecessary scrubbing and potential damage. Always aim for the least abrasive method first.
Basic Cleaning Tools
You will need a few simple items for effective grate cleaning. A sturdy scrub brush with stiff bristles is important for removing stuck-on food. Avoid wire brushes unless you are cleaning very specific, durable materials like cast iron without a coating. A non-abrasive sponge or microfiber cloth is useful for wiping down and rinsing. For protection, rubber gloves are a must to shield your hands from grease and cleaning agents. A large sink or basin is ideal for soaking the grates. Alternatively, a large plastic bag can work for the ammonia method. Lastly, old towels or newspaper can protect your countertop from spills.
Natural Cleaning Solutions
Many common household items make excellent, safe grate cleaners. Dish soap, especially one designed to cut grease, is perfect for initial soaking. Baking soda is a powerful abrasive that can tackle tough stains without scratching surfaces. Mix it with a little water to form a thick paste. White vinegar can help dissolve grease and acts as a mild disinfectant. A spray bottle filled with equal parts water and vinegar is useful for rinsing or pre-treating. These natural options are often gentler on your hands and the environment. They are also less likely to damage grate finishes.
Commercial Cleaning Products
For exceptionally stubborn grime, you might need commercial products. Heavy-duty degreasers are formulated to break down baked-on grease quickly. Look for products specifically designed for kitchen or oven cleaning. Oven cleaner spray can also be very effective on severely soiled grates. However, these chemicals are potent and require careful handling. Always read the product label and follow safety instructions, including wearing gloves and ensuring good ventilation. Be aware that some harsh chemicals can damage certain grate finishes, especially porcelain. For cleaning your entire cooktop, you might explore how to clean cooktop grates for more options. If you want to clean range grates, the same principles apply. Knowing how to clean range grates can help you broaden your cleaning skills.
Step-by-Step Guide: Deep Cleaning Your Gas Stove Grates
A deep clean of your gas stove grates can transform your entire stovetop. This process is more thorough than a quick wipe-down and targets stubborn, baked-on grime. I find that setting aside dedicated time for this task yields the best results. It makes the subsequent regular cleaning much easier. Following a structured approach ensures you do not miss any spots and achieve a truly spotless finish.
Remember, patience is key, especially for heavily soiled grates. Allowing the cleaning solutions time to work their magic drastically reduces your scrubbing effort. This deep cleaning method is generally suitable for most gas stove grates, including many porcelain-coated ones. However, always check your stove’s manual for any specific care instructions regarding materials or methods to avoid. Always prioritize safety, especially when dealing with chemical cleaners.
Initial Preparation
First, ensure your stove is completely cool. Remove all the grates from the stove top. Take off any burner caps and burner heads as well; you can clean these separately. Scrape off any large, loose food particles or debris from the grates using a plastic scraper or old credit card. This pre-scraping step prevents clogging your sink and makes the soaking process more effective. You want to remove anything that can be easily dislodged before introducing liquids.
Lay down old towels or newspapers on your countertop to protect the surface. Place the removed grates on this protected area. This provides a clean, contained workspace. It also catches any drips or mess during the preparation stage.
Soaking for Success
Soaking is the most crucial step for loosening baked-on grime. Fill a large sink, utility tub, or even a bathtub (if your grates are very large) with hot water. Add a generous amount of grease-cutting dish soap. I usually add about half a cup for a sink full of water. Submerge the grates completely in the soapy water. For best results, let them soak for at least 30 minutes, or up to several hours. For extremely stubborn residue, I recommend an overnight soak. The hot water and soap work together to penetrate and soften the burnt-on food and grease, making it much easier to scrub away later. You might be surprised how much gunk floats away just from this step.
If your grates are safe for the dishwasher (check your manual), soaking them first can make the dishwasher cycle even more effective. For more specific advice on this, you can refer to how to clean gas stove grates in dishwasher.
Scrubbing Away Grime
After soaking, drain the dirty water. Use your scrub brush or a heavy-duty non-abrasive sponge to scrub each grate. Focus on areas with remaining stubborn spots. For really tough, baked-on residue, make a paste of baking soda and a little water. Apply this paste directly to the problem areas. Let the paste sit for 15-30 minutes, then scrub vigorously with your brush. The baking soda provides a gentle abrasive action that helps lift the grime without scratching. If you are dealing with a thick layer of grease, a commercial degreaser might be helpful. Spray it on, let it dwell for the recommended time, then scrub. Remember to wear gloves when using strong cleaners.
Rinsing and Drying
Thorough rinsing is essential to remove all cleaning residue and loosened grime. Rinse each grate under warm running water. Ensure all suds and paste are completely gone. You want your grates to be free of any slippery film. After rinsing, the drying process is critically important, especially for cast iron grates, to prevent rust. You can air dry them completely on a drying rack. Alternatively, use a clean towel to dry each grate thoroughly. For cast iron, I sometimes place them in a low-temperature oven (around 200°F or 93°C) for 15-20 minutes to ensure every bit of moisture evaporates. This step is crucial for preventing rust on your gas stove grates. Once completely dry, carefully place them back on your stove top. If you are looking for tips on other grate types, exploring how to clean stove grills can provide more general guidance.
Specific Care for Different Grate Materials
Gas stove grates come in various materials, and each requires specific care to maintain its integrity and appearance. The two most common types are cast iron and porcelain-coated steel. While the general cleaning principles remain similar, there are important distinctions in how you approach cleaning each. Using the wrong method or cleaner can damage the finish, leading to rust, chipping, or dullness. I have learned through experience that understanding your grate material is the first step toward effective and safe cleaning.
Treating your grates according to their material ensures their longevity. It also preserves their aesthetic appeal. Whether you have rugged cast iron or sleek porcelain, a tailored cleaning approach will yield the best results. Always refer to your stove’s user manual if you are unsure about your grate material or specific care instructions. This information helps avoid any accidental damage that could occur from using an incompatible cleaning agent or tool.
Cleaning Cast Iron Gas Stove Grates
Cast iron grates are known for their durability and heat retention. However, they are also prone to rust if not cared for properly. I usually follow a few key steps for them.
- Soaking: Cast iron grates benefit greatly from soaking. Submerge them in very hot, soapy water (using a good grease-cutting dish soap) for at least 30 minutes. For heavily soiled grates, an overnight soak is ideal. This helps loosen baked-on food and grease.
- Scrubbing: Use a stiff-bristled nylon brush or a non-abrasive scrubber. For stubborn spots, a baking soda paste (baking soda mixed with a little water) works wonders. Apply the paste, let it sit for 15-30 minutes, then scrub. Avoid abrasive scouring pads or steel wool, as they can strip the seasoning.
- Avoid Harsh Chemicals: Do not use oven cleaners or strong chemical degreasers on bare cast iron. These can strip the seasoning that protects the iron and makes it non-stick. If your grates are porcelain-coated cast iron, some oven cleaners might be acceptable, but always test in an inconspicuous area first.
- Drying and Seasoning: This is the most crucial step for cast iron. After rinsing thoroughly under warm water, dry the grates IMMEDIATELY and completely. Use a clean towel. To prevent rust, I often place them in a low-temperature oven (around 200-250°F or 93-121°C) for 15-20 minutes. This ensures all moisture evaporates. Once dry and slightly warm, apply a very thin layer of vegetable oil (like canola or flaxseed oil) with a paper towel. This “re-seasoning” helps protect the surface and maintain its non-stick properties. You can find more details on how to clean cast iron stove grates for deeper insights. For a broader perspective on similar materials, consider how to clean stove grates cast iron and how to clean cast iron stove top grates.
Cleaning Porcelain-Coated Gas Stove Grates
Porcelain-coated grates are easier to clean but can scratch. I handle these with a gentler approach.
- Soaking: Like cast iron, soaking in hot, soapy water helps immensely. A 30-minute to an hour soak is usually enough for most messes.
- Gentle Scrubbing: Use a soft sponge, cloth, or a nylon brush. Avoid anything abrasive like steel wool or harsh scrubbers, as they can chip or scratch the porcelain finish. A baking soda paste is safe and effective for stubborn spots.
- Careful with Cleaners: Most dish soaps and natural cleaners like baking soda and vinegar are safe for porcelain. Some commercial degreasers are also safe, but always check the product label for “porcelain safe” instructions. Avoid strong acidic or alkaline cleaners that could dull the finish over time.
- Rinsing and Drying: Rinse thoroughly to remove all soap residue. Porcelain is less prone to rust than bare cast iron, but drying completely with a soft cloth is still a good practice to prevent water spots and buildup. Air drying is fine, but I sometimes wipe them down quickly. For more specific tips on materials, how to clean porcelain grill grates offers similar considerations.
Tackling Tough Stains: Burnt-On Food and Grease
Sometimes, your gas stove grates face more than just routine splatters. Baked-on food and layers of old grease can seem impossible to remove. I have encountered many such challenges in my own kitchen. These stubborn stains require a more intensive approach than just dish soap and water. The key is to break down the bond between the grime and the grate material without causing damage.
While it takes a bit more effort, successfully removing these tough stains is incredibly satisfying. It restores your grates to a near-new condition. Remember to always work in a well-ventilated area, especially when using stronger cleaning agents. Also, wear protective gloves to shield your hands from both the grime and the chemicals. With the right technique and a little patience, you can conquer even the most formidable messes. Knowing how to deal with greasy stove surfaces is a valuable skill.
The Power of Baking Soda Paste
Baking soda is a miracle worker for tough, burnt-on food. Its mild abrasive quality combined with its natural degreasing properties makes it highly effective.
- Remove and Wet: Take the grates off the stove. Lightly wet them with warm water.
- Apply Paste: In a bowl, mix baking soda with just enough water to form a thick, spreadable paste. I use about a 3:1 ratio of baking soda to water.
- Coat Thoroughly: Apply this paste generously to all areas with burnt-on food and grease. Make sure the grime is completely covered.
- Let it Sit: This is crucial. Let the paste sit on the grates for at least 30 minutes, or for several hours if the stains are very old and thick. For extremely tough cases, leaving it overnight can work wonders. The baking soda will work to break down the bonds of the cooked-on food.
- Scrub and Rinse: After dwelling, use a stiff scrub brush or a non-abrasive scouring pad to scrub away the softened grime. You will find that most of it comes off much more easily than before. Rinse thoroughly under warm water until all paste and residue are gone. Dry completely. This method is effective for issues like burnt milk from stove or other sticky spills.
Ammonia Bag Method
This method is highly effective for extremely stubborn, baked-on grease, but it requires caution due to ammonia fumes. Always use in a well-ventilated area, preferably outdoors or with open windows.
- Prepare: Find a large, heavy-duty sealable plastic bag (like a garbage bag) big enough to hold the grates.
- Add Ammonia: Place one or two grates inside the bag. Pour about 1/4 to 1/2 cup of household ammonia into the bag, but do not let it directly touch the grates if possible (you can put it in a small dish inside the bag). The fumes do the work.
- Seal and Wait: Seal the bag tightly, ensuring no ammonia fumes can escape. Let the grates sit in the sealed bag for several hours, or preferably overnight (8-12 hours). The ammonia fumes will break down the toughest grease and carbon deposits.
- Ventilate and Clean: After the waiting period, take the bag outside or open it in a very well-ventilated area. Carefully remove the grates. The grime will be softened and should wipe away easily with a sponge or brush.
- Rinse and Dry: Rinse the grates thoroughly with hot, soapy water to remove all ammonia residue. Dry completely before returning them to the stove. Remember, never mix ammonia with bleach, as it creates toxic fumes. This method is fantastic for significant burn marks off stove.
Commercial Degreasers for Stubborn Buildup
When natural solutions are not enough, a commercial heavy-duty degreaser can be a powerful ally.
- Choose Wisely: Select a degreaser designed for kitchen or oven use. Read the label to ensure it is safe for your grate material (especially if porcelain-coated).
- Apply: Follow the product instructions carefully. Typically, you spray the degreaser onto the grates, ensuring good coverage over the stubborn areas.
- Dwell Time: Allow the degreaser to sit for the recommended dwell time, which can range from 5 minutes to half an hour. This gives the chemicals time to penetrate and break down the grease.
- Scrub and Rinse: With gloves on, use a scrub brush or a non-abrasive pad to scrub the grates. The grime should come off more easily now. Rinse thoroughly under running water until all chemical residue is gone.
- Dry: Dry the grates completely with a towel or by air drying. Always ensure good ventilation when using chemical degreasers.
Beyond the Grates: Cleaning Associated Stove Components
While cleaning the grates is a major step in stove maintenance, your gas stove has other components that also get dirty. These parts, including the burners, burner caps, and igniters, are essential for your stove’s proper functioning. Neglecting them can lead to uneven flames, slow heating, or even ignition issues. I have found that cleaning these components simultaneously with the grates makes the entire process more efficient. It ensures every part of your stove top is clean and in good working order.
Addressing these associated parts prevents a cycle of dirt transferring back to your newly cleaned grates. It also maintains the overall efficiency and safety of your appliance. A quick clean of these components can prevent bigger problems down the line. It ensures your stove always lights properly and cooks evenly.
Cleaning Gas Stove Burners
Gas stove burners, or burner heads, often accumulate food spills and grease. This can block the small holes where the gas comes out, leading to uneven or weak flames.
- Remove: Ensure the stove is completely cool. Carefully remove the burner grates, then lift off the burner caps and burner heads (the metal parts the caps sit on). Note their position for reassembly.
- Soak: For basic grime, soak burner caps and heads in warm, soapy water for 15-30 minutes. For stubborn clogs, a mixture of equal parts white vinegar and water can be very effective. I sometimes let them soak in vinegar overnight for a deep clean.
- Scrub: Use a soft brush or an old toothbrush to gently scrub away any food debris or grease. For clogged burner holes, use a paper clip or a needle to clear them. Never use a toothpick, as it can break off inside.
- Rinse and Dry: Rinse all components thoroughly under running water. Ensure all soap or vinegar residue is gone. Dry them completely before putting them back. Moisture can interfere with ignition or cause rust. For more details, explore how to clean burners on gas stove or general tips for how to clean stove burners gas.
Drip Pans and Burner Rings
Many gas stoves have drip pans or burner rings underneath the grates and around the burners. These catch spills and food particles.
- Remove: Lift off the grates and burner components to access the drip pans or burner rings.
- Soak: Place these in a sink with hot, soapy water. Let them soak for at least 20 minutes to loosen any baked-on gunk.
- Scrub: Use a scrub brush or sponge to clean away the softened food and grease. For tough spots, a baking soda paste can be applied and allowed to sit before scrubbing.
- Rinse and Dry: Rinse thoroughly and dry completely before placing them back. Stainless steel or enamel drip pans are usually dishwasher safe. You can find more targeted advice on how to clean stove drip pans or general approaches for how to clean drip pans on stove.
Maintaining the Igniter
The igniter is the small, typically white or gray component that sparks to light your gas burner. If it gets dirty, it might not spark reliably.
- Inspect: After removing grates and burner components, locate the igniter near each burner. It might look like a small ceramic rod.
- Clean: If you notice grease or food debris on the igniter, gently wipe it with a dry paper towel or a soft cloth. For tougher, baked-on grime, lightly moisten a cotton swab with rubbing alcohol and carefully wipe the igniter.
- Avoid Water: Never submerge the igniter in water or use excessive liquid. This can damage the electrical components. Ensure it is completely dry before reassembling the stove. If your igniter is failing to spark, learn how to clean igniter on gas stove for specific troubleshooting.
Maintaining Grate Cleanliness: Prevention and Regular Care
Cleaning your gas stove grates deeply is satisfying, but consistent maintenance keeps them looking their best. It also prevents the build-up of tough, baked-on grime in the first place. I have found that small, regular efforts save a lot of time and scrubbing in the long run. Establishing a routine helps make grate cleaning a less daunting task. It integrates seamlessly into your kitchen care habits.
Prevention is truly better than cure when it comes to stove grates. By adopting simple daily and weekly habits, you can significantly reduce the need for intensive deep cleaning.
- gas stove cleaning
- stove grates
- kitchen cleaning tips
- home maintenance
- cast iron grates
- porcelain grates
- stove care

Todd Martin
Senior Writer
With over 15 years of experience in home renovation and design, I started HEG to share what I’ve learned with homeowners who want to create spaces that are both beautiful and functional. I’ve always believed in a hands-on approach, and over the years, I’ve picked up practical solutions that actually work. Through HEG, I aim to make home improvement more approachable, sharing real tips that help you create a home you truly love.