· Todd Martin · Kitchen Maintenance · 16 min read
How To Clean Stove Burners Gas
Sparkling Clean: How To Clean Gas Stove Burners Effectively
A gas stove is a central part of many kitchens. Its burners often face spills, grease, and food debris. Over time, this buildup affects performance and appearance. Learning how to clean stove burners gas ensures your cooking appliance stays efficient and hygienic. This guide provides simple steps for deep cleaning and daily maintenance. We will cover necessary tools, cleaning agents, and safety tips.
Cleaning your gas stove burners keeps them working well. It also makes your kitchen look better. Dirty burners can cause uneven flames. They might even stop working properly. I will show you how to tackle tough grime. We will explore different cleaning methods. You can bring your stove back to its best condition.
Takeaway
- Gather Tools: Collect essential items like gloves, brushes, and cleaning solutions before you start.
- Disassemble Carefully: Remove burner grates, caps, and heads gently.
- Soak and Scrub: Use warm, soapy water or a baking soda paste for soaking. Scrub away grime with a non-abrasive brush.
- Address Clogs: Clear burner holes with a thin wire or paper clip.
- Rinse and Dry Thoroughly: Ensure all parts are completely dry before reassembling.
- Maintain Regularly: Wipe up spills quickly and perform routine surface cleans.
To clean stove burners gas, you must first remove all detachable parts. Soak them in warm, soapy water or a vinegar-baking soda solution. Scrub away grease and food residue with a non-abrasive brush. Dry each component completely before reassembling to prevent rust and ensure proper function.
Why Cleaning Your Gas Stove Burners Matters
Keeping your gas stove burners clean is more than just about looks. It significantly impacts your stove’s performance and your kitchen’s safety. Dirty burners can lead to many problems. They are less efficient and can even pose health risks. I always prioritize cleaning these parts.
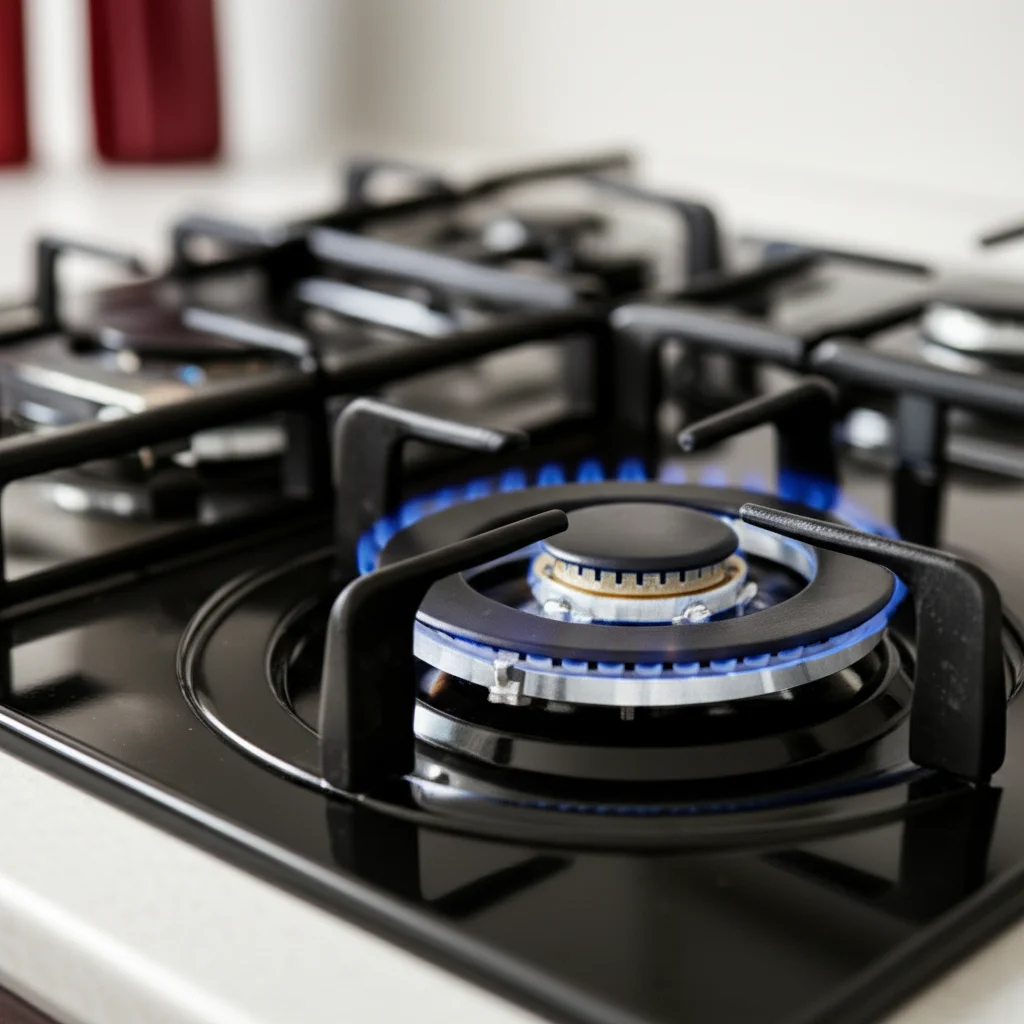
Clean burners ensure that gas flows freely. This gives you an even, blue flame. A dirty burner often produces a weak or orange flame. This means your food cooks slower. It also wastes gas. Regular cleaning helps save energy and money. It makes your cooking more effective.
Dirt and grease on burners can create hot spots. These can lead to uneven cooking. This makes it harder to achieve perfect results for your meals. A clean burner distributes heat evenly. Your food cooks properly. It creates a better cooking experience for you.
Beyond performance, hygiene is a big concern. Food spills and grease attract bacteria and pests. A dirty stove is not a sanitary cooking area. Keeping the burners clean prevents germ buildup. It makes your kitchen a healthier place. This protects your family from potential illness.
Finally, clean burners extend the life of your gas stove. Buildup can corrode metal parts over time. This leads to costly repairs or even replacement. Regular cleaning prevents this damage. It keeps your stove working well for years. Think of it as an investment in your home. Maintaining your stove also contributes to the overall cleanliness of your cooking space. You can learn more about general stove cleaning by visiting our guide on how to clean your stove.
Essential Tools and Cleaning Agents
Before you begin cleaning your gas stove burners, gather all necessary tools. Having everything ready simplifies the process. It makes your cleaning session efficient. You probably have most of these items in your home already. I always collect my supplies first.
You will need rubber gloves. These protect your hands from harsh cleaners and grime. A sturdy scrubbing brush is essential. Choose one with stiff bristles that are safe for your stove’s surfaces. Old toothbrushes also work well for small areas. They can reach tight spots.
Several common household items make excellent cleaning agents. Dish soap is a must for cutting through grease. White vinegar is a natural degreaser and disinfectant. Baking soda is abrasive enough to scrub without scratching. It also helps neutralize odors. For very stubborn grime, you might consider ammonia. Use it in a well-ventilated area, and never mix it with bleach.
You also need a few microfiber cloths or old rags. These are good for wiping and drying. A non-abrasive sponge is helpful for surfaces that scratch easily. A small, thin wire or a paper clip comes in handy. It can clear clogged burner holes. A large basin or sink is needed for soaking parts.
For tough, baked-on messes, a plastic scraper can help. Avoid metal scrapers, as they can scratch. I find that having a dedicated bucket for soaking makes the process easier. It keeps the dirty parts contained. Remember to check your stove’s manual for any specific cleaning recommendations. This prevents damage to your appliance. Having the right tools makes cleaning your gas burners much simpler. It helps you get great results.
Step-by-Step Guide to Deep Cleaning Gas Burners
Deep cleaning your gas stove burners restores their shine and function. This process requires a bit of time but yields impressive results. I follow these steps for a thorough clean. It makes a big difference.
First, ensure your stove is off and completely cool. Safety comes first. Turn off the gas supply if you feel uncomfortable. Remove the burner grates. These are usually heavy cast-iron pieces. Then, take off the burner caps. These are the flat covers over the burner heads. Finally, lift out the burner heads themselves. These are the parts with the gas holes. Set all these pieces aside.
Next, fill a sink or large basin with very hot, soapy water. Add a few drops of dish soap. Place the grates, caps, and burner heads into the water. Let them soak for at least 30 minutes. For heavily soiled parts, an hour or more is better. This soaking action loosens baked-on food and grease. It makes scrubbing much easier. This step is crucial for effective cleaning.
While parts soak, clean the stove top surface around the burners. Wipe away loose debris. Use a damp cloth with some dish soap or an all-purpose kitchen cleaner. This prevents grime from getting back onto clean parts later. For specific guidance on cleaning different types of stovetops, you can read our article on how to clean your stove top.
After soaking, remove each part from the water. Scrub them thoroughly. Use a sturdy scrubbing brush for the grates. An old toothbrush works wonders for the small holes in the burner heads. Pay close attention to any clogged ports. A paper clip or thin wire can help clear these. Be gentle. You do not want to damage the delicate parts. Our guide on how to clean gas burners offers more specific methods for these components.
Once scrubbed, rinse all parts under clean, running water. Make sure no soap residue remains. Allow them to air dry completely. This is very important. Reassembling wet parts can cause rust. It can also affect the flame quality. You can place them on a towel or drying rack. Once everything is bone dry, carefully reassemble the burners. Place the burner heads first, then the caps, and finally the grates. Make sure all parts fit securely. Your gas stove burners should now look and perform much better.
Tackling Stubborn Stains and Blockages
Sometimes, regular cleaning is not enough for really tough grime. Baked-on food, rust, and clogged burner holes need special attention. I often use specific methods for these stubborn issues. They help bring burners back to life.
For baked-on grease and food, a paste of baking soda and water works wonders. Mix equal parts baking soda and a little water to form a thick paste. Apply this paste generously over the stubborn areas. Let it sit for at least 20-30 minutes, or even a few hours for really tough stains. The baking soda helps lift the grime. After soaking, scrub with a stiff brush. You will see the difference.
Rust spots can appear on burner grates or caps, especially cast iron ones. For light rust, the baking soda paste can also help. For more severe rust, a solution of white vinegar can work. Soak the rusty parts in undiluted white vinegar for a few hours. Then, scrub with a steel wool pad or a stiff brush. Always re-season cast iron grates after cleaning to prevent future rust. Our guide on how to clean gas stove grates cast iron provides detailed steps for this process.
Clogged burner ports or igniters are common problems. Food debris or grease can block the tiny holes where gas comes out. This causes an uneven flame or prevents the burner from lighting. Use a thin wire, a sewing needle, or an unfolded paper clip to clear these holes. Gently poke through each hole. Do not use a toothpick, as wood can break off inside. Be very careful not to enlarge the holes.
If the igniter is not sparking, it might be dirty. Food and grease can cover the ceramic igniter. This stops it from creating a spark. Turn off the gas and power to the stove. Use a dry toothbrush or a cotton swab dipped in rubbing alcohol to gently clean the ceramic igniter tip. Let it dry completely before trying to light the burner again. For a more detailed look at this specific issue, you can check out our article on how to clean igniter on gas stove. Tackling these stubborn issues directly helps maintain your stove’s performance. It keeps your cooking smooth and trouble-free.
Cleaning Gas Stove Grates and Burner Caps
Gas stove grates and burner caps collect a lot of grime. They sit directly over the flames and spills. Cleaning them properly is key to a truly clean stove. I use different methods depending on the material.
Most gas stove grates are made of cast iron or porcelain-coated steel. Cast iron grates are durable but can rust. Porcelain grates are easier to clean but can chip. Both benefit from soaking. Fill a large sink or tub with hot water and dish soap. Submerge the grates and caps. Let them soak for at least 30 minutes, or longer for heavy buildup. This loosens the grease and baked-on food.
For cast iron grates, after soaking, scrub them with a stiff brush. A non-abrasive scrubber works well. Avoid harsh detergents or steel wool, as these can strip the seasoning. If rust is present, a baking soda paste can help. Apply the paste, let it sit, then scrub. After cleaning, it is important to dry cast iron grates immediately and thoroughly. You can place them in a low-heat oven (around 200°F or 90°C) for 10-15 minutes to ensure they are completely dry. Then, lightly rub them with cooking oil. This re-seasons the cast iron and prevents future rust. We have a dedicated guide on how to clean stove grates cast iron for more in-depth advice.
Porcelain-coated grates are generally easier. After soaking, scrub them with a sponge or soft brush. You can use a general kitchen degreaser. For tough spots, a paste of baking soda and water works well. Rinse thoroughly. These can often be air-dried or wiped dry. Some porcelain grates are even dishwasher safe. Always check your stove’s manual first. You can find more information about this in our article about how to clean gas stove grates in dishwasher.
Burner caps are usually made of enamel or cast iron. They also benefit from soaking in hot, soapy water. Use a soft brush or sponge to clean them. Pay attention to the underside where carbon buildup can occur. For tough spots, the baking soda paste is effective. Rinse them well and dry completely before placing them back on the burner heads. Clean grates and caps not only look good but also ensure proper heat distribution for your cooking. Maintaining these parts is an important part of overall stove maintenance.
Everyday Maintenance Tips for Sparkling Burners
Deep cleaning your gas stove burners is important, but daily habits make a big difference. Regular maintenance prevents grime from building up. This means fewer deep cleaning sessions. I incorporate these simple steps into my routine.
First, wipe up spills immediately. Food and liquid spills are much easier to clean when fresh. If they dry and bake onto the surface, they become stubborn stains. Keep a damp cloth handy while cooking. A quick wipe can save you a lot of effort later. This simple act keeps your stove top looking clean. It also prevents stains from setting.
Perform a quick surface clean after each cooking session. Once the stove has cooled, wipe down the burner grates and the stove top. Use a damp cloth with a little dish soap or an all-purpose cleaner. This removes light grease and food splatter. This prevents daily cooking residue from becoming tough grime. It helps maintain the overall cleanliness of your cooking area. For daily care of the entire surface, you can refer to our tips on how to clean the stove top.
Every week, take off the burner grates and burner caps. Give them a quick wash in hot, soapy water. This removes any minor buildup before it becomes major. Pay attention to the areas around the burner holes. A quick scrub with an old toothbrush can prevent clogs. This weekly check keeps everything running smoothly.
Consider using a stove protector or burner liners. These are thin sheets that fit under the grates. They catch spills and splatters. You can easily remove and wash them. Some are even disposable. These liners simplify cleanup greatly. They protect your stove top from direct contact with spills.
Finally, inspect your burners regularly. Check the flame quality. A clean, blue flame indicates a healthy burner. If you see orange or yellow flames, or uneven heating, it might be time for a more thorough clean or a check for clogs. Early detection of issues can prevent bigger problems. Regular maintenance keeps your gas stove burners sparkling. It ensures they perform at their best every time you cook.
Safety Precautions Before You Start
Cleaning your gas stove burners involves working with a gas appliance. Taking safety precautions is extremely important. Never rush the process. Your safety is the highest priority. I always follow these rules before I begin.
First and most important, ensure the gas supply to your stove is off. This prevents any accidental gas leaks during cleaning. You can typically find a shut-off valve behind or near your stove. If you cannot find it, turn off the main gas supply to your home. This step eliminates the risk of gas ignition.
Make sure your stove is completely cool before you touch any parts. Attempting to clean hot burners can cause severe burns. Allow ample time after cooking for the stove to cool down. This usually takes at least 30 minutes to an hour. Touch a burner with your hand to confirm it is cool.
Always work in a well-ventilated area, especially if using strong cleaning agents like ammonia. Open windows and doors. Turn on your kitchen exhaust fan. Good ventilation disperses fumes. It reduces your exposure to harsh chemical odors. Ammonia, in particular, needs good airflow.
Wear protective gloves. Rubber or latex gloves protect your hands from cleaning solutions. They also protect your hands from grime and sharp edges. Some cleaning agents can irritate skin. Gloves prevent this.
Never use abrasive cleaners or steel wool on delicate parts. These can scratch surfaces. Scratches can also damage protective coatings. This makes parts more prone to future rust or grime buildup. Always opt for non-abrasive brushes and soft cloths.
Do not use too much water directly on electrical components. Gas stoves have igniters and other electrical parts. Getting these wet can cause a short circuit. It can also prevent the burner from lighting. Be careful when cleaning around these areas. Avoid spraying water directly onto the igniter.
Lastly, make sure all burner components are completely dry before reassembling and turning the gas back on. Moisture can cause corrosion. It can also interfere with gas flow. This can lead to uneven flames or ignition problems. A damp burner might not light properly. Following these safety tips ensures a safe and effective cleaning process. You can then enjoy your clean stove without worry.
FAQ Section
How often should I clean my gas stove burners?
You should wipe up small spills immediately. Perform a quick weekly cleaning of the grates and caps. A deep cleaning of the burner heads themselves is recommended every 1-3 months. This depends on how often you cook. Frequent cooking means more frequent deep cleaning.
Can I put gas stove burner grates in the dishwasher?
Some gas stove grates are dishwasher safe, especially those with porcelain enamel coatings. Always check your stove’s user manual first. Cast iron grates should not go in the dishwasher. Dishwashers can remove their seasoning, leading to rust. They require hand washing and re-seasoning.
What if my gas burner is not lighting after cleaning?
First, ensure all parts are completely dry before reassembling. Moisture can prevent ignition. Check that the burner cap and head are seated correctly. If the igniter still does not spark, gently clean the ceramic tip with a dry brush or cotton swab. Make sure the gas supply is on.
What household items can I use to clean stove burners?
You can effectively clean stove burners with common household items. Dish soap mixed with hot water is excellent for grease. Baking soda paste works well for stubborn stains and light rust. White vinegar can also act as a degreaser and disinfectant. These are safe and effective.
Should I use harsh chemical cleaners on my burners?
Avoid harsh chemical cleaners like oven cleaner directly on burner parts. These can damage the finish, especially on cast iron or enamel. They can also leave harmful residues. Stick to milder solutions like dish soap, baking soda, and vinegar for safety and to preserve your stove.
How do I prevent future buildup on my gas stove burners?
The best way to prevent future buildup is through consistent, light cleaning. Wipe up spills as they happen. Do a quick wipe-down of the grates and stove top after each use. Consider using stove burner liners. These protective sheets catch spills, making daily cleanup much easier.
Conclusion
Keeping your gas stove burners clean is a simple task that offers significant rewards. It ensures your stove operates at its peak efficiency. It also keeps your cooking area hygienic. A clean stove looks great in your kitchen too. You now have the knowledge and steps to tackle even the toughest grime.
From gathering essential tools to applying powerful yet safe cleaning agents, you are ready. You can effectively remove stubborn stains. You can also clear those pesky clogs. Remember the importance of safety. Always turn off the gas and let your stove cool before you begin. You can keep your gas stove burners performing their best.
Regular maintenance is key. Small, consistent efforts prevent major buildup. This saves you time and effort in the long run. By following these guidelines, your gas stove will continue to serve you well for years to come. Make cleaning stove burners gas a part of your routine. You will enjoy a more efficient, safer, and cleaner kitchen. Start today and see the difference a sparkling clean stove makes!
- gas stove cleaning
- burner cleaning
- kitchen hacks
- home maintenance
- grease removal
- stove care
- burner repair

Todd Martin
Senior Writer
With over 15 years of experience in home renovation and design, I started HEG to share what I’ve learned with homeowners who want to create spaces that are both beautiful and functional. I’ve always believed in a hands-on approach, and over the years, I’ve picked up practical solutions that actually work. Through HEG, I aim to make home improvement more approachable, sharing real tips that help you create a home you truly love.