· Todd Martin · Kitchen Maintenance · 22 min read
How To Clean Air Fryer

Unlock a Spotless Fryer: How to Clean Your Air Fryer Effectively
My air fryer has become one of my favorite kitchen tools. It makes crispy fries, tender chicken, and perfectly roasted vegetables. However, like any cooking appliance, it gets dirty. Food particles, grease splatters, and stubborn residue build up over time. Knowing how to clean air fryer correctly is essential. It keeps your appliance running efficiently and ensures your food tastes great.
A dirty air fryer not only affects performance but also poses hygiene concerns. Unwanted odors can transfer to your food. Grease buildup can become a fire hazard. I want to guide you through a comprehensive cleaning process. This article covers everything. We will discuss daily cleaning, deep cleaning methods, and common mistakes to avoid. I will also share natural cleaning solutions. You will learn how to maintain your air fryer. This ensures it stays in top condition for years to come.
Takeaway:
- Clean your air fryer basket and pan after every use.
- Perform a deep clean on your air fryer every few weeks.
- Use mild soap, warm water, and soft sponges to prevent damage.
- Always ensure the appliance is unplugged and cool before cleaning.
- Address stubborn grease and food residue with targeted methods.
- Regular maintenance extends your air fryer’s lifespan and performance.
You clean an air fryer by first unplugging it and allowing it to cool. Then, remove and wash the basket and pan with warm, soapy water. Use a damp cloth to wipe down the interior and exterior. For deep cleaning, target stubborn grease and the heating element with baking soda or vinegar solutions.
Why Regular Air Fryer Cleaning Matters for Your Kitchen
Regular cleaning of your air fryer is more than just a chore. It is a critical step for kitchen hygiene and appliance longevity. When you cook, grease and food particles inevitably accumulate. This buildup can affect your air fryer’s performance. It can also impact the quality of your meals. I have seen firsthand how much difference a clean appliance makes.
Leaving food residue in your air fryer creates a breeding ground for bacteria. This is a basic health and hygiene concern. Old food can also burn, producing unpleasant smells. These odors then transfer to your next meal. Nobody wants chicken that smells like yesterday’s fish. Consistent cleaning prevents these issues. It ensures your meals are always fresh and delicious.
Moreover, grease and grime can block airflow within the air fryer. This reduces its cooking efficiency. Your food may not cook evenly or get as crispy. A well-maintained air fryer performs better. It cooks food faster and more consistently. This helps you get the most out of your appliance. Let us look closer at these benefits.
Health and Hygiene Benefits
A clean air fryer prevents bacterial growth. Food particles and grease can harbor germs. These germs can contaminate new food you cook. Regular washing removes these risks. It keeps your kitchen environment safer. This protects your family’s health.
I always make sure my cooking surfaces are spotless. The air fryer is no exception. A clean appliance reduces the chance of foodborne illness. It gives me peace of mind every time I cook. This is a fundamental aspect of kitchen hygiene.
Preserving Food Quality
Imagine your crispy fries tasting like stale oil. This happens if you do not clean your air fryer. Old grease becomes rancid. It imparts off-flavors to your fresh food. This ruins the taste and aroma of your meals.
Cleaning removes these unwanted flavors. Your food will taste as intended. It will be fresh and delicious every time. This preserves the quality of your cooking. It makes your air-fried dishes truly enjoyable.
Extending Appliance Lifespan
Grease and food buildup can damage the air fryer’s components. They can corrode non-stick coatings. They can clog the heating element. This reduces the appliance’s lifespan. Repairs can be costly. Replacing the air fryer is even more so.
Regular cleaning prevents this wear and tear. It keeps all parts working smoothly. This extends the life of your air fryer. It saves you money in the long run. I consider it an investment in my kitchen tools.
Daily Air Fryer Cleaning: A Quick and Easy Routine
I believe daily maintenance is key to keeping any appliance in top shape. This applies especially to your air fryer. A quick clean after each use prevents residue buildup. This makes deep cleaning much easier later on. It only takes a few minutes. I can walk you through my simple routine.
Always unplug your air fryer first. This is a safety rule you should never skip. Then, let the appliance cool down completely. Handling hot parts can cause burns. Most air fryer baskets are non-stick. This makes daily cleaning straightforward. I typically use warm, soapy water and a soft sponge. Avoid abrasive scrubbers at all costs. They can damage the non-stick coating.
After washing, rinse the parts thoroughly. Dry them completely before reassembling. Trapped moisture can lead to mold or mildew growth. It can also damage electrical components. A dry towel works well. You can also let them air dry on a rack. This routine keeps your air fryer ready for its next use.
Cooling Down and Disassembly
Safety always comes first. As soon as you finish cooking, unplug your air fryer. Allow it to cool down for at least 30 minutes. Some air fryers have a cool-down indicator. Do not rush this step. Once cool, remove the basket and the pan. Most models have a release button for the basket. This makes separation simple.
I sometimes place the basket and pan on a cooling rack. This helps them cool faster. It also keeps them off my countertop. This step is crucial before handling any parts. It ensures you do not burn yourself.
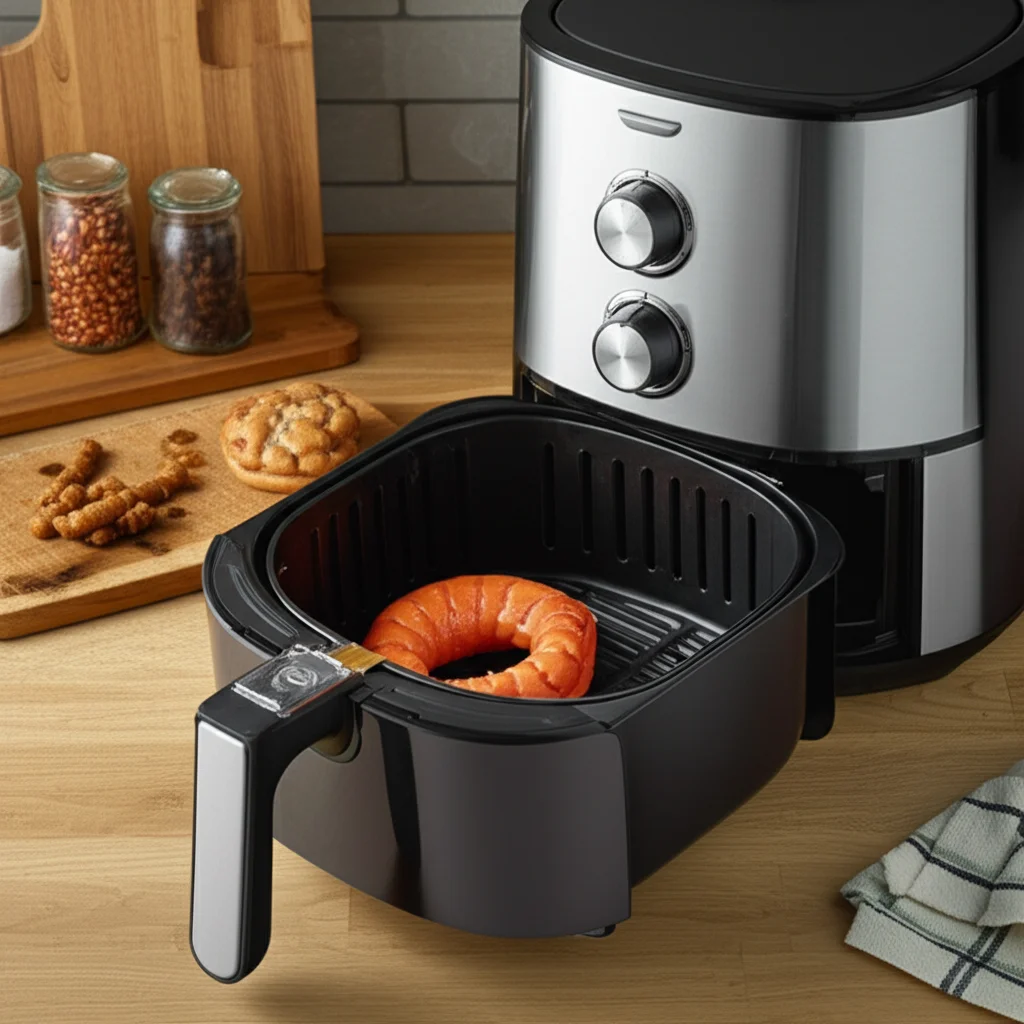
Washing the Basket and Pan
This is where the magic happens for daily cleaning. I fill my sink with warm water. Then I add a few drops of dish soap. Submerge the air fryer basket and pan in the soapy water. Let them soak for 5-10 minutes. This helps loosen any food bits.
For detailed cleaning of these components, you might find our guide on how to clean fryer basket especially helpful. Use a soft sponge or a non-abrasive brush. Gently scrub away any grease or food residue. Pay attention to the corners and crevices. These areas often collect stubborn bits. Rinse thoroughly under running water. Ensure all soap is gone.
Wiping Down the Exterior
While the basket and pan are drying, I tackle the exterior. I dampen a microfiber cloth with warm water. I add a tiny drop of dish soap to the cloth if needed. Gently wipe down the outer shell of the air fryer. Pay attention to the control panel. Be careful not to get water into any vents or openings.
This step removes fingerprints and splashes. It keeps your appliance looking new. It also prevents grease from accumulating on the outside. A quick wipe goes a long way. Always ensure the exterior is dry before plugging it back in.
Deep Cleaning Your Air Fryer: Step-by-Step for Stubborn Grime
While daily cleaning keeps your air fryer tidy, a deep clean is necessary every few weeks. This tackles stubborn grease and hard-to-reach areas. It ensures your air fryer performs at its peak. I typically schedule this type of cleaning after about 5-7 uses, depending on what I have been cooking. This process takes a bit more time. It is definitely worth the effort for a truly clean appliance.
Deep cleaning involves more than just the basket and pan. You will focus on the heating element and the interior cavity. These areas collect grease and burnt-on food particles. Neglecting them can lead to smoke and unpleasant odors during cooking. I recommend having baking soda, white vinegar, and a soft brush on hand. These are my go-to tools for tough jobs. Remember, patience is key here. Let the cleaning solutions do their work.
Preparing for Deep Clean
Just like with daily cleaning, safety first. Unplug your air fryer and let it cool completely. Remove the basket, pan, and any accessories like racks. For some models, you might have air fryer racks that need specific cleaning attention. Our article on how to clean air fryer racks provides comprehensive guidance for this. Set these aside to soak or wash separately. Lay down some old newspapers or a towel. This protects your countertop from spills. Gather your cleaning supplies. This includes dish soap, baking soda, white vinegar, a soft sponge, a non-abrasive brush, and a microfiber cloth. Having everything ready saves time and effort.
Tackling Stubborn Grease and Food Residue
This is often the most challenging part. For burnt-on grease in the basket or pan, I create a paste. Mix baking soda with a little water until it forms a thick paste. Apply this paste to the affected areas. Let it sit for 15-30 minutes. The baking soda helps break down the grease. After soaking, gently scrub with a non-abrasive brush or sponge. You will see the grime lift away. For particularly stubborn areas, you might need to repeat the process. Our guide on how to clean grease from air fryer offers more in-depth strategies for this.
Cleaning the Heating Element
The heating element is located at the top of the air fryer’s interior. This part gathers a lot of grease and crumbs. Cleaning it requires caution. Never use water directly on the heating element. It is an electrical component. Instead, use a damp cloth. Dip a soft cloth in warm, soapy water. Wring it out very well. The cloth should be barely damp. Gently wipe the heating element. You can also use an old toothbrush or a small, soft brush. This helps dislodge stuck-on bits. If there is stubborn residue, a mixture of baking soda and water can be applied with a brush. Wipe it off immediately after scrubbing. Be careful not to drip water.
Cleaning the Interior Cavity
After addressing the heating element, focus on the rest of the air fryer’s interior. This includes the walls and the bottom. I often spray a mixture of white vinegar and water (1:1 ratio) inside. Let it sit for about 10-15 minutes. The vinegar helps to dissolve grease and deodorize. Then, wipe thoroughly with a damp cloth. For tougher spots, use the baking soda paste method again. Apply it with a sponge or brush. Scrub gently. Always wipe down with a clean, damp cloth afterwards. Ensure all cleaning solutions are removed. You want no residue left behind.
Reassembly and Storage
Once all components are clean, rinse them thoroughly. Make sure no soap or cleaning solution remains. Dry everything completely. I mean completely. Any moisture can cause issues. You can air dry them overnight. Or use a clean towel. Reassemble the air fryer parts. Ensure they click into place correctly. Store your air fryer in a cool, dry place. A clean air fryer is ready for its next cooking adventure. This thorough cleaning ensures optimal performance.
Natural Cleaning Solutions for Your Air Fryer
I prefer using natural cleaning solutions whenever possible. They are effective, safe for your family, and gentle on appliances. For an air fryer, harsh chemicals can damage non-stick coatings. They can also leave behind toxic fumes. Natural alternatives like baking soda, vinegar, and lemon are powerful. They tackle grease and odors without the risks. I have tried these methods extensively. They consistently deliver excellent results.
These ingredients are likely already in your pantry. This makes natural cleaning convenient and cost-effective. Baking soda is a gentle abrasive and deodorizer. Vinegar cuts through grease and disinfects. Lemon provides a fresh scent and helps with light stains. Combining them can create even more potent cleaners. Always test a small, inconspicuous area first. This ensures no discoloration or damage occurs. Let me share my favorite natural approaches.
Baking Soda Paste Method
Baking soda is a miracle worker for tough grease. I often use it as a paste. Mix about three parts baking soda with one part water. You want a thick, spreadable consistency. Apply this paste directly to greasy or burnt-on areas. This works well on the basket, pan, and even the interior walls.
Let the paste sit for 15-30 minutes. For really stubborn spots, you can leave it longer. The baking soda works to lift and loosen the grime. Then, scrub gently with a non-abrasive sponge or brush. You will be amazed at how easily the residue comes off. Rinse thoroughly with warm water. This method is safe and very effective.
Vinegar and Water Soak
White vinegar is excellent for cutting grease and deodorizing. I use it for soaking parts or spraying the interior. For the basket and pan, I fill a sink with warm water. Then I add about half a cup of white vinegar. Submerge the parts and let them soak for 30 minutes to an hour. This helps dissolve greasy film.
For the interior cavity, I mix equal parts white vinegar and water in a spray bottle. Spray the inside of the air fryer, avoiding the heating element directly. Let it sit for 10-15 minutes. Then, wipe down with a clean, damp cloth. The vinegar smell dissipates quickly as it dries. For more general cleaning with vinegar, our guide on how to clean shower with vinegar offers valuable insights into its versatility. This leaves your air fryer fresh and clean.
Lemon for Freshness and Light Stains
Lemon is fantastic for a fresh scent and light grease. It is also mildly acidic, which helps break down grime. I cut a lemon in half. I use one half to rub directly on minor stains or sticky spots. The natural oils and acid in the lemon lift the residue.
You can also add lemon slices to a bowl of water. Place the bowl in the air fryer. Run the air fryer for 5-10 minutes at a low temperature. This creates steam. The steam helps loosen stubborn bits. It also leaves a pleasant citrus scent. Wipe down the interior afterwards with a damp cloth. This method is great for quick refreshers.
Special Considerations for Different Air Fryer Types
Not all air fryers are built the same. The cleaning process can vary slightly depending on your model. You might have a traditional basket-style air fryer. Or perhaps a larger air fryer toaster oven combo. Understanding these differences helps you clean more effectively. I have experience with several types. I can share some specific tips for each.
The basic principles remain constant. Always unplug. Always cool. Always use mild cleaners. However, access to components differs. This impacts how you approach scrubbing and wiping. For instance, air fryer toaster ovens have more internal surface area. They also have racks and crumb trays. Basket-style models focus more on the removable drawer. Let us break down the nuances.
Basket-Style Air Fryers
These are the most common air fryers. They typically consist of an outer pan and an inner basket. Both parts are usually removable. This makes cleaning relatively straightforward. After each use, I remove the basket and pan. I wash them with warm, soapy water. Sometimes I let them soak to loosen baked-on bits.
The main challenge with basket-style fryers is the compact interior. The heating element is often directly above the basket. This area can be hard to reach. I use a long-handled brush or a damp cloth wrapped around a stick. This helps me wipe down the heating coil. Always ensure the appliance is completely cool before attempting this. The non-stick coating on baskets makes cleaning easier. Be gentle to preserve it.
Air Fryer Toaster Ovens
Air fryer toaster ovens offer more cooking versatility. They combine air frying with baking, toasting, and roasting functions. They often have multiple racks, a crumb tray, and a larger interior cavity. Our comprehensive guide on how to clean air fryer toaster oven provides detailed instructions specific to these versatile appliances. These features mean more surfaces to clean. I tackle these a bit differently.
First, remove all racks and the crumb tray. Wash them separately in warm, soapy water. For stubborn stains, a baking soda paste works wonders on racks. The interior walls can get very greasy. I use a spray bottle with a vinegar and water solution. Spray the interior. Let it sit for 10-15 minutes. Then wipe it down with a damp cloth. The glass door also needs attention. Use a glass cleaner or vinegar solution for a streak-free shine. The heating elements in these models are usually rods. Wipe them carefully with a damp cloth.
Digital vs. Analog Models
The cleaning process for the main cooking parts is similar. However, the control panels differ. Digital models have touch screens. Analog models have dials and buttons. For digital touch screens, I use a slightly damp microfiber cloth. Too much moisture can damage the electronics. Wipe gently to remove fingerprints and grease.
For analog dials and buttons, I use a damp cloth. I pay attention to the crevices around the dials. Food particles and grease can accumulate there. A cotton swab slightly dampened with rubbing alcohol can help. This cleans the tight spaces. Always be careful not to let liquids seep into the control panel. This could cause electrical issues.
Common Air Fryer Cleaning Mistakes to Avoid
I have learned a lot about cleaning appliances over the years. This includes what not to do. Making mistakes during air fryer cleaning can damage your appliance. It can also make it less effective. Some errors are common. Others can be dangerous. I want to share these pitfalls with you. This way, you can avoid them.
The goal is to clean thoroughly without causing harm. Using the wrong tools or chemicals is a major problem. Neglecting certain parts is another. Rushing the process can also lead to issues. I always take my time. I ensure I use the correct methods. This protects my air fryer. It keeps it working well for years.
Overlooking the Heating Coil
Many people forget to clean the heating element. It is often hidden at the top of the air fryer’s interior. Yet, it collects grease and burnt food more than any other part. This buildup can cause smoke and a burning smell. It can even be a fire hazard.
Never pour water directly onto the coil. It is an electrical component. Instead, use a damp cloth or a soft brush. Gently wipe away any residue. For stubborn bits, a baking soda paste applied with a toothbrush works. Wipe it off immediately. Regular cleaning of this area is crucial for safety and performance.
Using Abrasive Materials
Non-stick coatings are common in air fryer baskets and pans. These coatings make cleaning easy. However, they are delicate. Using abrasive scrubbers, steel wool, or harsh chemicals will scratch them. This damages the non-stick surface. Food will then stick more easily. The coating may also flake off into your food.
Always use soft sponges, microfiber cloths, or non-abrasive brushes. Opt for mild dish soap or natural cleaners. Be gentle when scrubbing. This preserves the non-stick finish. It keeps your air fryer easy to clean and safe to use.
Submerging Electronic Parts
Air fryers are electrical appliances. Submerging the main unit in water is a major mistake. It will cause severe damage. It also creates a shock hazard. This includes the base of the air fryer. It contains the heating element and fan motor.
Only the removable parts, like the basket and pan, can be washed in water. Wipe down the exterior and interior cavity with a damp cloth only. Ensure the cloth is not dripping wet. Always keep water away from electrical components and vents. This prevents short circuits and other malfunctions.
Neglecting Regular Maintenance
Waiting until your air fryer is heavily soiled is a common mistake. Burnt-on grease is much harder to remove. It takes more time and effort. It also means your air fryer performs poorly in between cleans. Regular, quick cleaning prevents heavy buildup.
Make it a habit to clean the basket and pan after every use. Perform a deep clean every few weeks. This proactive approach keeps your air fryer consistently clean. It ensures efficiency. It extends its lifespan significantly. Consistency is key for long-term air fryer health.
Maintaining Your Air Fryer for Lasting Performance
Cleaning is only one part of maintaining your air fryer. Good habits can extend its life and performance even further. Think of it as a holistic approach to appliance care. These tips are simple. They do not require much effort. But their impact is significant. I always incorporate these practices into my routine.
Proper maintenance prevents future problems. It ensures your air fryer continues to cook your favorite dishes perfectly. It also helps avoid common issues like smoke or foul odors. From what you cook to how you store it, every detail counts. Let us explore these key maintenance strategies.
Using Air Fryer Liners
Air fryer liners are a game-changer for reducing cleaning effort. These are usually parchment paper or silicone mats. They fit inside the basket. Liners catch drips, crumbs, and grease. This prevents them from sticking to the basket and pan. It makes post-cooking cleanup much faster.
I use parchment paper liners for most of my air frying. They are disposable. This means less scrubbing for me. Silicone liners are reusable. They require washing, but they still protect the basket. Just ensure the liner is weighted down by food. Otherwise, it can fly up and hit the heating element.
Proper Storage
How you store your air fryer also impacts its condition. After cleaning, ensure it is completely dry. Store it in a cool, dry place. Avoid humid environments. Humidity can promote rust or mold growth. Keeping it covered can also prevent dust buildup.
I keep my air fryer on my countertop. It is ready for daily use. If you store it in a cupboard, ensure it is easily accessible. This encourages regular use and cleaning. Proper storage protects your appliance from external damage.
Addressing Odors Promptly
Sometimes, even after cleaning, lingering odors can develop. This might be from strong-smelling foods. Or it could be a sign of residual grease. Addressing these odors quickly is important. It prevents them from seeping into your next meal.
My go-to solution is a lemon and water steam bath. Place a bowl with water and lemon slices in the air fryer. Run it at a low temperature for about 10 minutes. The steam helps deodorize. Another option is a bowl of baking soda placed inside overnight. It absorbs smells. Regular cleaning prevents most odors.
Regular Inspections
I make it a habit to visually inspect my air fryer periodically. Look for signs of wear and tear. Check the non-stick coating for scratches. Ensure the power cord is not frayed. Look for any loose parts. Catching small issues early prevents them from becoming major problems.
If you notice excessive smoke, a strange smell, or reduced performance, investigate. These could indicate an issue with the heating element or fan. Sometimes, it is just a buildup you missed. Regular inspections help you stay on top of your air fryer’s health. They ensure it continues to serve you well.
FAQ Section
How often should I clean my air fryer?
You should clean the air fryer basket and pan after every use. This prevents food and grease buildup. Perform a deep clean of the entire appliance every few weeks. The frequency depends on how often you use it and what types of food you cook. More frequent use or greasy foods mean more frequent deep cleans.
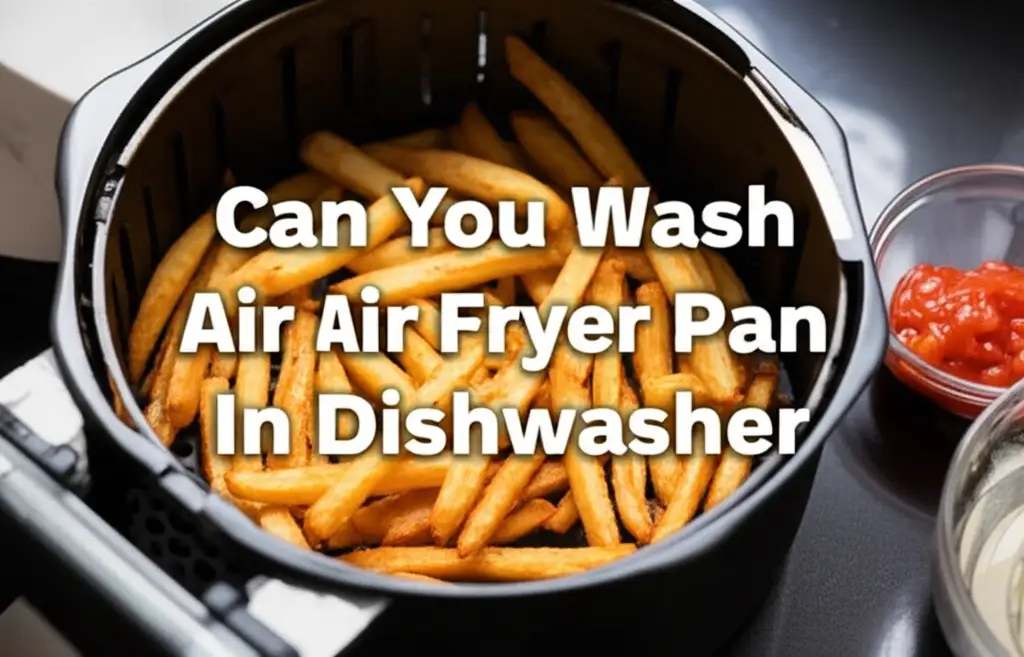
Can I put air fryer parts in the dishwasher?
Many air fryer baskets and pans are dishwasher safe. Always check your specific model’s manual before placing parts in the dishwasher. Dishwasher detergents can sometimes be harsher. Hand washing with mild soap and warm water is often gentler. This can help preserve the non-stick coating for longer.
What if my air fryer smells bad after cleaning?
Lingering odors often mean some grease or food residue was missed. Try a vinegar and water spray in the interior. Let it sit for 10-15 minutes, then wipe. Alternatively, place a bowl of water with lemon slices in the air fryer. Run it at a low temperature for 5-10 minutes to create steam. This helps neutralize smells.
How do I clean the heating element without water?
Never apply water directly to the heating element. It is an electrical component. Instead, use a damp cloth. Wring it out thoroughly so it is barely moist. Gently wipe the coil to remove grease. For stubborn bits, use a soft brush or an old toothbrush. You can also use a baking soda paste on the brush. Wipe it off immediately.
Is it safe to use oven cleaner on an air fryer?
No, do not use oven cleaner on your air fryer. Oven cleaners are very harsh. They contain strong chemicals that can damage the non-stick coating. They can also leave behind toxic residues. This is dangerous when cooking food. Stick to mild dish soap, baking soda, vinegar, or specialized air fryer cleaners.
How do I remove burnt-on food?
For burnt-on food, make a paste with baking soda and a little water. Apply the paste directly to the affected area. Let it sit for 15-30 minutes. This helps soften the burnt residue. Then, gently scrub with a non-abrasive sponge or brush. You may need to repeat the process for very stubborn spots.
Conclusion
Keeping your air fryer clean is not just about aesthetics. It is about maintaining performance, ensuring food quality, and prolonging the life of your appliance. I have shared my best tips for how to clean air fryer. From a quick daily wipe-down to a thorough deep clean, these steps make a real difference. Embracing a consistent cleaning routine helps you enjoy perfectly cooked meals every time.
Remember to prioritize safety. Always unplug your air fryer and allow it to cool completely before cleaning. Use gentle, non-abrasive tools and mild cleaning solutions. Avoiding common mistakes, like using harsh chemicals or neglecting the heating element, will protect your appliance. By following these guidelines, your air fryer will remain a reliable and efficient kitchen companion. Make cleaning a regular part of your cooking habit. Your air fryer will thank you with years of delicious, healthy meals.
- air fryer cleaning
- clean air fryer
- air fryer maintenance
- deep clean air fryer
- air fryer basket clean
- air fryer interior clean

Todd Martin
Senior Writer
With over 15 years of experience in home renovation and design, I started HEG to share what I’ve learned with homeowners who want to create spaces that are both beautiful and functional. I’ve always believed in a hands-on approach, and over the years, I’ve picked up practical solutions that actually work. Through HEG, I aim to make home improvement more approachable, sharing real tips that help you create a home you truly love.