· Todd Martin · Engine Maintenance · 19 min read
How To Clean Carb Without Removing
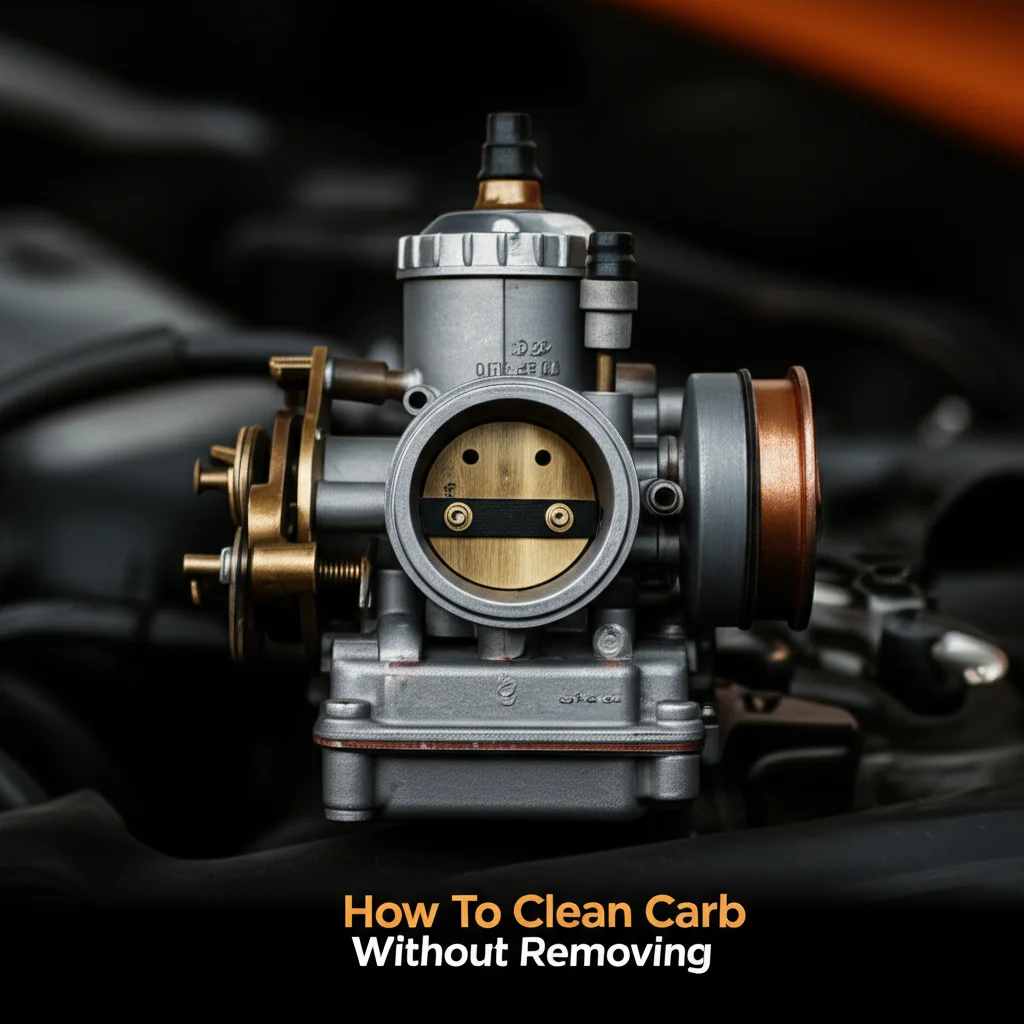
How to Clean Your Carb Without Removing It
I know the thought of dismantling a carburetor can feel daunting. You might worry about complex parts or losing tiny screws. The good news is, you often don’t have to remove it to get it clean. Many common issues from a dirty carburetor can be fixed with it still attached. This guide will show you how to clean carb without removing it, saving you time and hassle. We will explore various techniques, the right tools, and tips to keep your engine running smoothly.
Takeaway:
- Restore engine performance without complex disassembly.
- Utilize fuel additives for internal cleaning.
- Employ carburetor cleaner sprays for external and internal passages.
- Perform routine maintenance to prevent future clogs.
You can clean a carburetor without removing it by using specialized fuel additives that dissolve deposits internally, or by spraying carburetor cleaner directly into accessible passages while the engine is running. This approach often resolves minor clogging and restores proper fuel flow.
Understanding Your Carburetor: Why it Gets Dirty
Carburetors are simple but precise devices. They mix air and fuel in the right ratio for engine combustion. Over time, these precise parts can get dirty. Deposits from fuel build up inside the carburetor’s small passages. This buildup makes the carburetor work poorly.
Fuel Quality Matters
The quality of fuel plays a big role in carburetor cleanliness. Low-quality fuel may contain more impurities. These impurities can leave residues as the fuel evaporates. Even good fuel can cause issues if it sits for too long.
Ethanol in gasoline is a common culprit. Ethanol attracts moisture, leading to water in your fuel system. This water can separate from the gasoline, causing corrosion and gunk. This sticky residue then clogs tiny jets and passages within the carburetor.
The Effects of Infrequent Use
Engines that sit idle for long periods are more prone to carburetor issues. Fuel breaks down over time, especially when exposed to air. This breakdown creates varnish and gum deposits. These deposits stick to carburetor components, hardening over weeks or months.
This process is why your lawn mower or motorcycle might struggle to start after winter. The old, stale fuel has left sticky residues. These residues block fuel flow and prevent proper operation. Regular use helps keep fuel fresh and moving.
Signs Your Carburetor Needs Cleaning
Your engine will tell you when its carburetor needs attention. It might not run as smoothly as it used to. Performance drops and starting becomes difficult. Recognizing these signs early can save you bigger repair headaches.
Engine Performance Issues
A dirty carburetor often leads to poor engine performance. You might notice the engine sputtering or running rough. It could hesitate when you accelerate. The engine may also lack its usual power.
It might idle unevenly or die frequently. This indicates that the fuel-air mixture is incorrect. Clogged jets prevent the right amount of fuel from entering the engine. This makes the engine struggle to maintain a steady speed.
Starting Difficulties
One of the most common signs is trouble starting the engine. If your engine cranks but won’t catch, or requires many pulls, the carburetor might be dirty. The starting circuit, which provides a rich fuel mixture for cold starts, is often the first to clog. This prevents enough fuel from getting to the engine to ignite. Even if it starts, it might die quickly without constant throttle.
Fuel Economy Decline
A dirty carburetor can also cause your engine to use more fuel. Clogged passages can lead to an inefficient fuel-air mixture. The engine tries to compensate, perhaps running richer than it should. This results in wasted fuel and lower miles per gallon or shorter run times. You might notice you are filling up the tank more often. Keeping the carburetor clean helps maintain optimal fuel consumption.
Benefits of Cleaning a Carburetor In-Situ
Cleaning a carburetor without removing it offers several advantages. This method saves you valuable time. It also reduces the risk of damaging delicate components. This approach is often the easiest and most cost-effective first step for minor issues.
Time and Effort Savings
Removing a carburetor involves many steps. You must disconnect fuel lines, throttle cables, and vacuum hoses. Then you must carefully unbolt the unit. Cleaning it while it is on the engine avoids all this disassembly work. This can cut your repair time significantly.
Think about it: no complex reassembly is needed. You don’t have to worry about misplacing parts. This makes the cleaning process much quicker. It is a great option for basic maintenance and minor clogs.
Avoiding Potential Damage
Carburetors contain many small, delicate parts. Gaskets can tear easily during removal or reinstallation. Tiny O-rings can get lost or damaged. Misplacing a small spring or jet can lead to bigger problems.
By cleaning it in place, you reduce these risks. You avoid stressing old fuel lines or cracking plastic components. This method helps preserve the integrity of your engine’s fuel system. It is a gentler approach that minimizes wear and tear.
Cost-Effectiveness
Professional carburetor cleaning or replacement can be expensive. Buying new gaskets and repair kits adds to the cost. Cleaning your carburetor without removing it usually only requires a can of cleaner or a bottle of additive. These supplies are much cheaper than replacement parts or labor fees.
This method also helps you avoid unexpected problems. Sometimes, during a full removal, you discover other worn parts that need replacement. Cleaning in place helps you manage your budget better. It is a practical solution for preventative maintenance.
Essential Tools and Materials for Non-Removal Cleaning
Before you start cleaning your carburetor, gather your supplies. Having everything ready makes the job easier and safer. You will need specific cleaners and some basic hand tools. Safety gear is also very important.
Recommended Carburetor Cleaners
You have two main choices for cleaners: fuel additives and aerosol sprays. Fuel additives pour directly into your gas tank. They circulate with the fuel, dissolving deposits from the inside. They are good for maintenance and minor clogs.
Aerosol carburetor cleaner sprays work faster. You spray them directly into the carburetor’s openings. This direct application helps dissolve stubborn varnish and gum. Look for cleaners safe for oxygen sensors and catalytic converters. Brands like Berryman B-12 Chemtool, Gumout, or Sea Foam are popular.
Safety Gear is Key
Always prioritize safety when working with fuel and chemicals. Wear safety glasses to protect your eyes from splashes. Gloves are also essential to protect your skin from harsh cleaners. These chemicals can cause irritation.
Work in a well-ventilated area, preferably outdoors. Carburetor cleaners produce strong fumes. Breathing these fumes can be harmful. Keep a fire extinguisher nearby as a precaution, given the presence of flammable liquids.
Basic Hand Tools You’ll Need
While you won’t remove the carburetor, you may need a few tools. A screwdriver (flat-head and Philips) helps with air filter housing removal. You might need pliers to adjust clamps or hoses. A small wrench can be useful for throttle linkage adjustments.
A shop rag or towel is good for wiping away excess cleaner. A small brush can help with external scrubbing. Having these simple tools ready ensures a smooth cleaning process.
Method 1: Cleaning Your Carburetor with Fuel Additives
Using fuel additives is the simplest way to clean a carburetor without removing it. This method works by letting the cleaner mix with your fuel. It then slowly dissolves deposits as the engine runs. This approach is best for preventative maintenance or mild clogging.
Choosing the Right Additive
Many fuel additives claim to clean carburetors. Look for products specifically designed for “fuel system cleaning” or “carburetor cleaning.” Popular choices include Sea Foam, Techron, or Gumout Multi-System Tune-Up. These products contain detergents that break down carbon and varnish. Read the label carefully to ensure it is compatible with your engine type.
Step-by-Step Application
Using a fuel additive is straightforward. First, ensure your fuel tank is at least half full, or as the additive instructions suggest. Then, pour the recommended amount of additive directly into the fuel tank. The amount needed depends on the size of your tank and the specific product. After adding it, run your engine as usual.
Allow the engine to run for at least 30 minutes, or longer if possible. This lets the additive circulate through the fuel system. It gives the cleaner time to work on the deposits. You might need to run several tanks of treated fuel for best results.
When Additives Are Most Effective
Fuel additives are most effective as a preventative measure. They can stop small clogs from becoming bigger problems. They also work well for engines that are just starting to show signs of a dirty carburetor. If your engine starts rough but runs okay once warm, an additive might help.
However, additives may not clear heavy, stubborn clogs. For significant issues, a more direct cleaning method might be needed. Think of additives as a maintenance tool rather than a quick fix for severe problems.
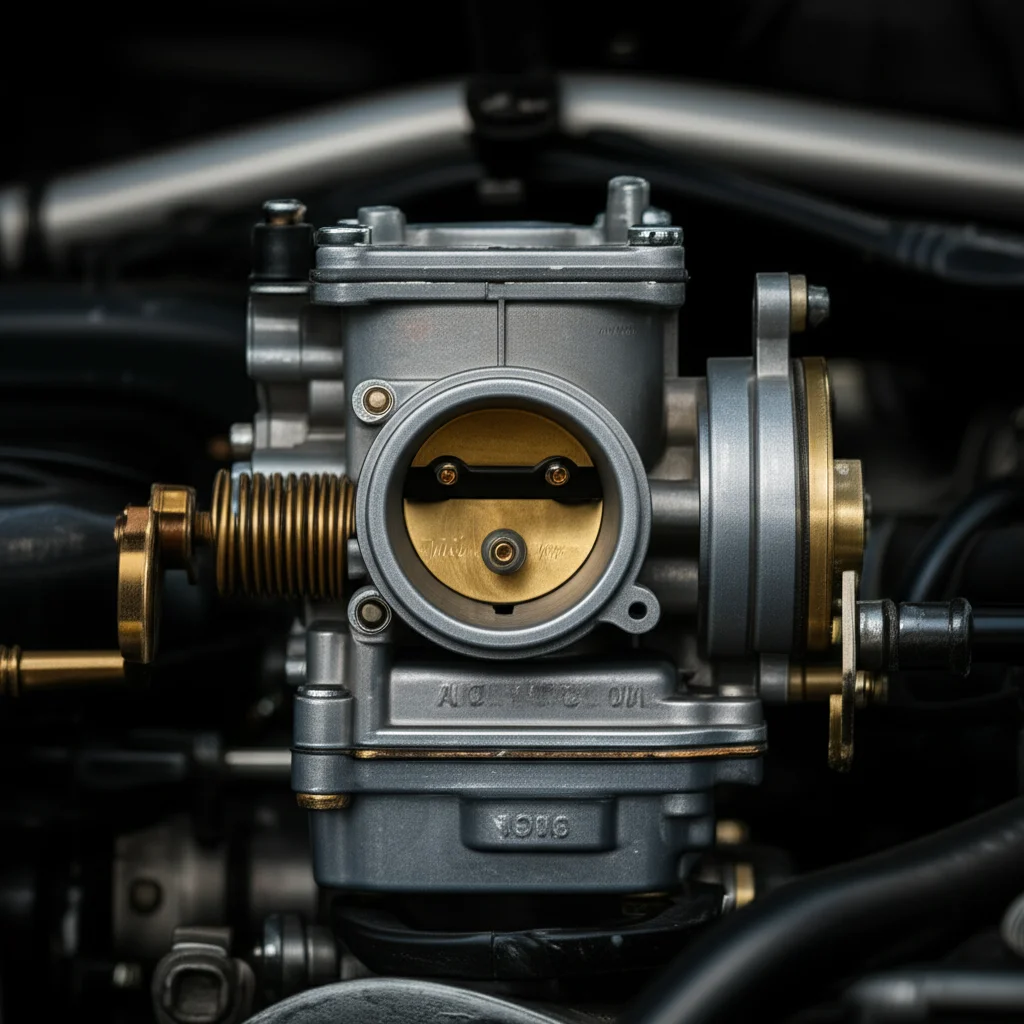
Method 2: Targeted Spray Cleaning for External Components
Aerosol carburetor cleaner allows for more direct cleaning. You can spray it on the outside of the carburetor and into some accessible openings. This method targets visible grime and sticky linkages. It is a good first step before attempting internal spray cleaning.
Preparing Your Engine for Spray Cleaning
Safety is first. Make sure your engine is off and cool. Disconnect the spark plug wire to prevent accidental starting. This makes the area safe to work in. Next, remove the air filter housing. This exposes the carburetor’s air intake.
Use a rag or towel to cover any painted surfaces around the carburetor. Carburetor cleaner can damage paint. Also, place a drip pan underneath to catch any runoff. This helps keep your workspace clean.
Focusing on Linkages and Throttle Plate
Now, you can start spraying. Look for any visible grime on the outside of the carburetor. Pay attention to the throttle linkage and choke mechanism. These parts can get sticky from fuel residue and dust. Spray the cleaner liberally on these areas. Use a small brush or old toothbrush to scrub away stubborn deposits. Work the throttle and choke linkages by hand to help the cleaner penetrate.
Next, open the throttle plate (the butterfly valve inside the air intake). Spray the cleaner directly onto the throttle plate and the surrounding bore. Carbon deposits often build up here. These deposits restrict airflow and cause idle problems. Continue spraying until the area looks clean.
Air Filter Box Considerations
While cleaning, inspect your air filter. A dirty air filter restricts airflow and can contribute to a rich fuel mixture. This puts more stress on the carburetor. If your air filter is heavily soiled, consider replacing it. A new filter helps ensure the carburetor works efficiently after cleaning.
Also, check the air filter box itself for debris. Clean out any leaves, dust, or insect nests. A clean air intake system helps your engine breathe better. This simple step complements your carburetor cleaning efforts.
Method 3: Internal Spray Cleaning Through Air Intake
This method uses aerosol carburetor cleaner to clean the carburetor’s internal passages. You do this while the engine is running. It is more aggressive than fuel additives and can clear more significant clogs. This technique allows the cleaner to be drawn through the fuel system just like gasoline.
The Process: Running the Engine
Start the engine and let it warm up to normal operating temperature. This helps the engine run smoothly during cleaning. It also helps the cleaner vaporize and travel through the passages effectively. Keep the engine running at a steady idle speed. If possible, have someone help you by holding the throttle slightly open.
With the engine running, remove the air filter assembly. Now, the carburetor intake is open. You will spray the cleaner directly into this opening. Be ready for the engine’s reaction.
Careful Application and Engine Response
Spray the carburetor cleaner in short bursts into the air intake. Do not empty the whole can at once. Each burst will cause the engine RPMs to drop. The engine might even stall if you spray too much. If the engine stalls, restart it and continue. This shows the cleaner is hitting the internal passages.
As you spray, the cleaner dissolves varnish and carbon. You might see some smoke or black residue coming from the exhaust. This is normal. It means the cleaner is doing its job and burning off deposits. Continue until the engine runs smoother. You should notice an improvement in idle quality.
For targeted cleaning, briefly hold the throttle open and spray into the venturi. This helps clean the main jet and fuel passages. Repeat this process a few times until the engine runs cleanly. For specific engines, like a lawn mower, you can find more detailed instructions at how to clean lawn mower carburetor without removing.
Post-Cleaning Idle Adjustment
After cleaning, the engine’s idle speed might change. The cleaning process can clear clogs that were making the engine run richer or leaner. You might need to adjust the idle screw. Consult your engine’s manual for the correct idle speed. Turn the idle screw slightly, usually a quarter turn at a time, until the engine idles smoothly.
If your engine has a mixture screw, you might also need to fine-tune it. This screw controls the air-fuel ratio at idle. Turn it slowly in small increments, listening for the highest, smoothest idle. Then, turn it out slightly until the RPMs just begin to drop. This sets the best idle mixture. A properly adjusted carburetor will run more efficiently.
Specific Applications: Cleaning Carbs on Different Engines
The basic principles of cleaning a carburetor without removing it apply across various engines. However, each type of engine might have slight differences in accessibility or common issues. Let’s look at how these methods apply to some common small engines.
Cleaning a Lawn Mower Carburetor Without Removing
Lawn mower carburetors are often exposed and easy to access. Most lawn mowers use simple carburetors. You typically remove the air filter housing to expose the intake. Then, you can spray carburetor cleaner directly into the throat while the engine is running. Pay attention to the throttle and choke linkages. These can get gummed up easily on a mower that sits for months.
Using a fuel additive at the end of the mowing season or before storage is also very effective. This prevents fuel from breaking down and clogging the carb. For detailed steps on mowers, you can check out how to clean lawn mower carburetor without removing.
Cleaning a Motorcycle Carburetor Without Removing
Motorcycle carburetors can be a bit trickier due to their location. They are often tucked away under the fuel tank. You may need to remove the tank or side covers for better access. Once exposed, remove the air box or air filter. Then, follow the same internal spray cleaning method. Spray short bursts while the engine is running.
Motorcycles often have multiple carburetors, one for each cylinder. You must clean each one. Fuel additives are also a good option for bikes used infrequently. Regular use and proper fuel stabilization are key for motorcycle carbs. Learn more specific tips at how to clean motorcycle carb without removing.
Cleaning an Outboard Carburetor Without Removing
Outboard marine engines face unique challenges due to water exposure. Their carburetors can get corroded. The cleaning process is similar: remove the air silencer or cover to expose the carburetor. Then, use an aerosol cleaner while the engine runs. Pay attention to the choke and throttle linkage, as salt and moisture can corrode them.
Using marine-specific fuel stabilizers and cleaners is highly recommended for outboard engines. These products help prevent ethanol-related damage and water contamination. They are formulated to combat the harsh marine environment. Find more details for these engines at how to clean outboard carburetor without removing.
Cleaning a Chainsaw Carburetor Without Removing
Chainsaw carburetors are small and precise. They are often tucked away under covers. You will need to remove the air filter cover and air filter to gain access. Chainsaws typically use two-stroke engines. The cleaning process involves spraying carburetor cleaner into the intake while the engine is running. Be careful with the throttle control.
Due to their small size, chainsaw carbs are very sensitive to clogs. Using a quality two-stroke oil and fresh fuel is crucial. Regular use of fuel stabilizer can prevent future issues. For specific steps on chainsaw carbs, consult how to clean carb on chainsaw.
Troubleshooting Common Issues After Cleaning
Sometimes, even after cleaning, your engine might not run perfectly. Don’t worry; this is common. A few simple checks can help you figure out what went wrong. Understanding common issues helps you resolve them quickly.
Engine Still Runs Poorly
If your engine still sputters or runs rough, the clog might be more severe. The in-situ cleaning might not have reached all the hidden passages. The main jet or pilot jet could be heavily blocked. Consider repeating the internal spray cleaning method. Sometimes, a second pass makes a big difference.
Also, check for other related problems. A dirty spark plug can cause misfires. A clogged fuel filter restricts fuel flow. Ensure your fuel filter is clean; learn more about it here: how to clean fuel filter without removing it. Check your spark plugs too. These issues mimic carburetor problems.
White Smoke or Strong Odor
Seeing white smoke or smelling a strong chemical odor is common during cleaning. This means the cleaner is burning off deposits. It should clear up after a few minutes of running. If it persists, you might have used too much cleaner. Continue running the engine until the smoke stops. Ensure you are in a well-ventilated area.
A persistent chemical smell indicates lingering cleaner. Running the engine longer helps burn off any remaining residue. If the smoke is thick and oily, it might indicate an engine issue beyond the carburetor, such as burning oil.
Engine Won’t Start
If the engine won’t start after cleaning, you might have flooded it. Excessive spraying of cleaner can temporarily rich-en the mixture too much. Wait 10-15 minutes for the cleaner to evaporate. Then, try starting it again. You might need to hold the throttle wide open while cranking to help clear the excess fuel.
Another reason could be that the cleaning dislodged a bigger piece of debris. This debris might now fully block a critical passage. In this case, in-situ cleaning might not be sufficient. You might need to consider a full carburetor removal for a deeper clean.
Preventing Future Carburetor Clogs and Performance Issues
The best way to deal with a dirty carburetor is to prevent it from getting dirty in the first place. Simple maintenance steps can save you a lot of hassle. These practices ensure your engine runs reliably for a long time. They focus on fuel quality and proper storage.
Using Fuel Stabilizer Regularly
Fuel stabilizer is your best friend for engines that sit idle. It prevents gasoline from breaking down and forming varnish. Add it to your fuel tank before storing any engine for more than a few weeks. Follow the product instructions for the correct dosage. Run the engine for a few minutes after adding the stabilizer. This ensures the treated fuel reaches the carburetor.
Using stabilizer year-round, even in frequently used engines, is a good idea. It helps maintain fuel quality. This simple step greatly reduces the chance of carburetor clogs. I personally use it in all my small engines.
Proper Storage Practices
When storing an engine, especially for the off-season, prepare it properly. Run the engine dry of fuel, or treat the fuel with stabilizer. Draining the fuel from the carburetor float bowl is ideal if possible. This prevents stale fuel from sitting in the carburetor’s delicate parts. Always store your fuel in a cool, dry place in a sealed container. Avoid leaving fuel in open cans.
Regular Fuel Filter Checks
A dirty fuel filter can restrict fuel flow to the carburetor. This causes similar symptoms to a dirty carburetor. A clogged filter also puts more strain on your fuel pump, if your engine has one. Regularly check and replace your fuel filter as part of routine maintenance. Most small engines have an inline fuel filter that is easy to spot.
A clean fuel filter ensures only clean fuel reaches the carburetor. This extends the life of your carburetor and prevents clogs. It’s a quick and inexpensive check that can save you future headaches.
When In-Situ Cleaning Isn’t Enough: Considering Removal
While cleaning a carburetor without removing it is very effective for many issues, it’s not a magic bullet. There are times when a deeper, more thorough cleaning is necessary. Knowing when to escalate your efforts can save you time and frustration.
Persistent Symptoms
If you have tried multiple in-situ cleaning attempts and your engine still runs poorly, the problem might be too severe. Symptoms like constant stalling, extreme difficulty starting, or significant power loss despite cleaning indicate a deeper issue. Heavy varnish or corrosion can completely block passages that topical sprays cannot reach. This means the internal channels might be too clogged for a simple flush.
At this point, the carburetor likely needs to be disassembled. This allows for manual cleaning of each jet and passage. You can inspect for worn parts like needles, seats, or gaskets. If this sounds like your situation, a full removal and rebuild might be the next step.
Visible Heavy Damage
Sometimes, the problem isn’t just dirt; it’s damage. Inspect the carburetor for visible cracks, leaks, or signs of heavy corrosion. Pitting on internal surfaces or a stuck float needle assembly suggests mechanical failure. These issues cannot be resolved with spray cleaner or fuel additives alone. For example, if the float is stuck, it will cause fuel to overflow or starve the engine, requiring physical intervention.
If you see physical damage, cleaning will not fix the problem. The carburetor might need new components or a complete replacement. This is especially true if the carburetor has been exposed to water or extremely old, untreated fuel.
Seeking Professional Help
If you are uncomfortable with carburetor removal, or if multiple attempts at in-situ cleaning fail, it’s wise to consult a professional. Small engine mechanics have specialized tools and expertise. They can diagnose the issue accurately and perform a proper carburetor rebuild or replacement. While it costs more, it often saves time and ensures the job is done right.
Sometimes, the issue isn’t even the carburetor. A professional can rule out other problems like ignition issues, valve problems, or poor compression. They can give you a clear answer and a lasting solution.
FAQ Section
Q1: How often should I clean my carburetor without removing it?
A1: I recommend cleaning your carburetor without removing it at least once a year. This is especially true for seasonal equipment like lawn mowers or snow blowers. If you notice early signs of performance issues, clean it immediately. Regular use of fuel stabilizer can extend the time between cleanings.
Q2: Can I use brake cleaner instead of carburetor cleaner?
A2: I do not recommend using brake cleaner. While it may seem similar, brake cleaner is often harsher and can damage rubber and plastic components inside the carburetor. Carburetor cleaner is specifically formulated to be safe for these parts while dissolving fuel deposits. Always use products designed for carburetors.
- carburetor cleaning
- small engine repair
- fuel system maintenance

Todd Martin
Senior Writer
With over 15 years of experience in home renovation and design, I started HEG to share what I’ve learned with homeowners who want to create spaces that are both beautiful and functional. I’ve always believed in a hands-on approach, and over the years, I’ve picked up practical solutions that actually work. Through HEG, I aim to make home improvement more approachable, sharing real tips that help you create a home you truly love.