· Todd Martin · Home Essentials · 12 min read
How To Clean Cricut Blade
How to Clean Your Cricut Blade for Flawless Cuts
Do you ever wonder why your Cricut machine is not cutting as smoothly as it once did? A dull or dirty blade is often the culprit. I know how frustrating it is when your precise crafting projects turn out ragged. Learning how to clean Cricut blade effectively can significantly improve your machine’s performance.
This comprehensive guide will walk you through everything. We will cover why cleaning matters and what tools you need. You will find step-by-step instructions for basic and deep cleaning. I will also share tips for maintaining blade sharpness and when to replace your Cricut blade.
Takeaway
Keeping your Cricut blade clean ensures crisp cuts and extends its life.
- Regularly remove debris from the blade tip.
- Use a foil ball to “sharpen” the blade.
- Deep clean the blade housing to remove stubborn material.
- Store blades properly to prevent damage.
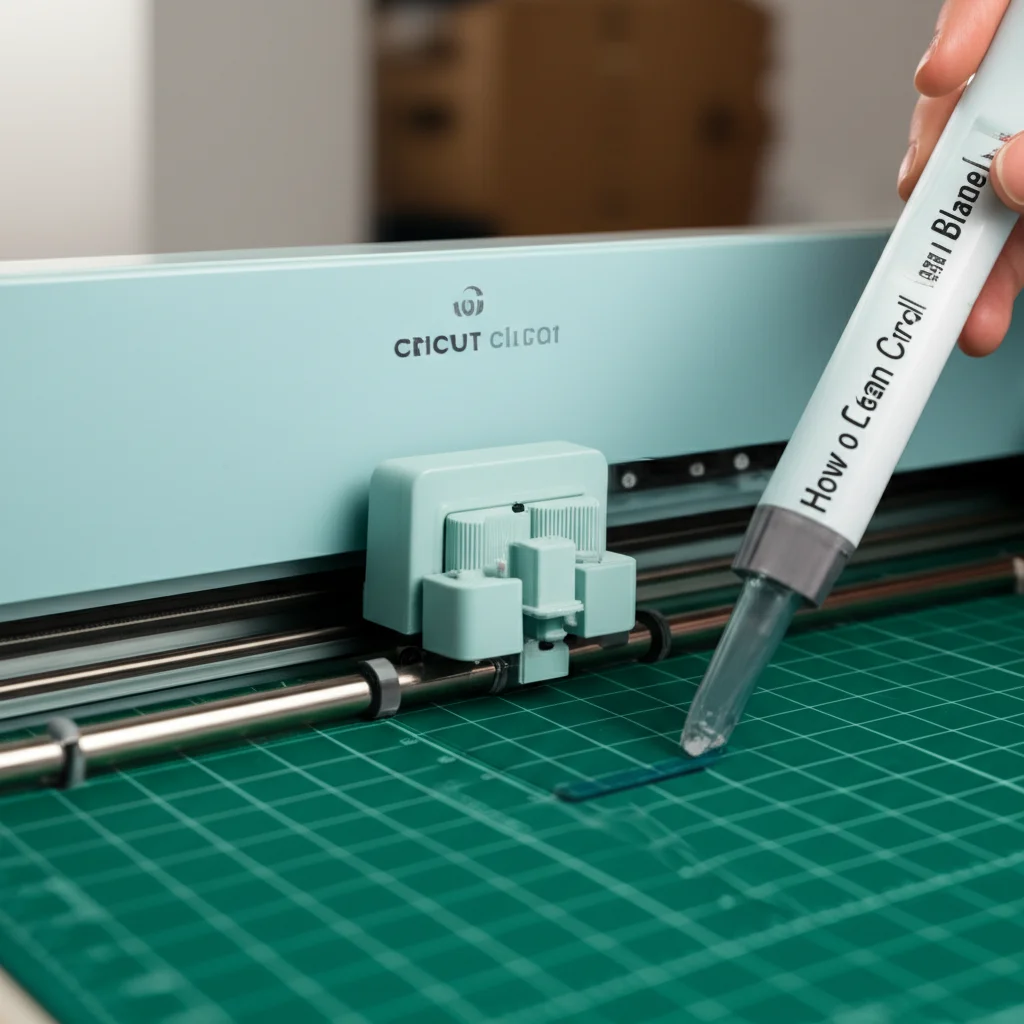
To clean a Cricut blade, gently remove it from the housing. Carefully pick off any visible debris using tweezers or a brush. For stickier residue, poke the blade into a foil ball several times. This action helps clear tiny bits from the blade’s edge. You can also wipe the blade with a soft cloth and rubbing alcohol for a deeper clean.
Why Cleaning Your Cricut Blade Matters
A clean Cricut blade is crucial for achieving high-quality cuts. Over time, tiny fibers and adhesive residue build up on the blade. This buildup causes the blade to drag through materials instead of cutting cleanly. It can lead to torn edges, incomplete cuts, and wasted crafting supplies.
Think of your Cricut blade as a precision tool. Just like any other sharp tool, it needs regular care. Dirt and grime reduce its sharpness and accuracy. This impacts everything from intricate cardstock designs to thicker vinyl projects.
Signs that your blade needs cleaning are easy to spot. Your machine might make a tearing sound during cuts. You may notice fuzzy edges on your materials. Sometimes, the blade fails to cut all the way through, requiring multiple passes. All these issues point to a blade that is not performing at its best. Taking a few minutes to clean it can save you hours of frustration.
Essential Tools for Cleaning Your Cricut Blade
Cleaning your Cricut blade does not require many special tools. You likely have most of these items around your home already. Gathering everything before you start makes the process smooth. I always lay out my tools on a clean surface.
First, you will need a small piece of aluminum foil. A crumpled ball of foil works wonders for basic cleaning. Next, have a pair of tweezers or a small, stiff brush ready. These are perfect for removing visible debris. A soft, lint-free cloth is also helpful.
For a deeper clean, rubbing alcohol is essential. Isopropyl alcohol works great for dissolving sticky residues. I use a cotton swab or a corner of my soft cloth with the alcohol. Remember to have a safe place to put the blade down. A small, non-slip mat or a secure holder prevents accidents. Safety is always important when handling sharp objects.
- Aluminum Foil: A small piece, crumpled into a ball.
- Tweezers: For picking off larger debris.
- Small, Stiff Brush: An old toothbrush or a dedicated cleaning brush.
- Lint-Free Cloth: For wiping the blade and housing.
- Rubbing Alcohol (Isopropyl Alcohol): For dissolving sticky residue.
- Cotton Swabs: For precise application of alcohol.
- Safe Surface: A non-slip mat or a small dish for the blade.
These simple items will help you keep your Cricut blade in top condition. Having them ready makes regular maintenance a quick and easy task.
Step-by-Step Guide to Cleaning Your Cricut Blade
Cleaning your Cricut blade is a simple process. Regular cleaning prevents performance issues. I recommend doing this after every few projects. It keeps your cuts crisp.
First, remove the blade housing from your Cricut machine. Open the clamp that holds it. Pull the housing straight up and out. Be gentle with this step.
Next, press down the plunger at the top of the blade housing. The blade will pop out from the bottom. Hold it carefully by the dull end. Avoid touching the sharp tip directly.
Now, take your crumpled aluminum foil ball. Carefully poke the blade tip into the foil multiple times. Rotate the blade as you poke it. This action helps to dislodge tiny bits of material stuck to the edge. It can also “realign” microscopic parts of the blade edge. Many crafters find this method very effective for a quick clean.
Finally, inspect the blade. If you see any remaining fibers or residue, use tweezers or a small brush to remove them. You can also wipe the blade with a lint-free cloth. Reinsert the blade into the housing. Make sure it clicks into place. Then, put the housing back into your Cricut machine. Your blade is now ready for more crafting!
Deep Cleaning Your Cricut Blade and Housing
Sometimes, a simple foil poke is not enough. Sticky materials like vinyl or felt can leave stubborn residue. When this happens, a deep clean of both the blade and its housing is necessary. This ensures optimal performance. I do this every few weeks, or when I notice persistent cutting problems.
Begin by removing the blade housing from your Cricut machine, just as before. Take out the blade by pressing the plunger. Set the blade aside safely. Now you have the empty blade housing.
Use a cotton swab dipped in rubbing alcohol. Wipe down the inside and outside of the blade housing. Pay close attention to the area where the blade sits. Residue can build up here, preventing the blade from rotating freely. This trapped debris causes poor cuts. You might be surprised by how much grime comes off. This method is similar to how you might clean other small precision parts or even how to clean a saw blade to remove stubborn gunk.
For the blade itself, if the foil method did not clear everything, you can also use rubbing alcohol. Dampen a lint-free cloth or a cotton swab with alcohol. Gently wipe the blade from the dull end towards the tip. Be extremely careful not to cut yourself. The alcohol helps dissolve sticky adhesives and stubborn material fibers. Let both the blade and housing air dry completely before reassembling. Reinsert the blade into the housing. Ensure it slides in smoothly. This deep cleaning helps your Cricut machine perform at its best.
Maintaining Blade Sharpness: Debunking Myths and Best Practices
Maintaining blade sharpness is key to long-lasting Cricut performance. Many crafters wonder if they can truly “sharpen” their blades. The truth is, Cricut blades are tiny and delicate. Traditional sharpening methods do not work. However, there are best practices to keep them performing well.
The popular aluminum foil ball method does not sharpen the blade in a conventional sense. Instead, it helps to clean off microscopic debris. It also realigns any tiny burrs or imperfections on the blade edge. Think of it as realigning the blade’s very fine edge. This process helps the blade feel sharper because it removes obstructions. It also straightens out any slight bends from heavy use.
Proper storage of your blades is also vital. Store them in a blade organizer or the plastic cap they came in. This protects the delicate tip from damage. Exposure to dust or banging around in a drawer can dull the blade quickly. Always keep blades in a safe, designated spot.
When loading materials, ensure they are flat and free of wrinkles. Uneven surfaces can cause the blade to drag or snag. This puts unnecessary stress on the blade. Also, ensure your Cricut mat is clean and sticky. A secure mat prevents material from shifting, reducing blade strain. If your Cricut mat isn’t sticky enough, it can cause materials to lift, damaging the blade. Using the correct pressure settings for your material also helps. Too much pressure can dull a blade faster. By following these practices, you can maximize your blade’s life and cutting efficiency.
When to Replace Your Cricut Blade
Even with regular cleaning and proper maintenance, Cricut blades do not last forever. Knowing when to replace your blade saves you frustration and wasted material. Recognizing the signs of a worn-out blade is important for smooth crafting. I always keep a spare blade on hand.
The most obvious sign is consistent poor cut quality. If your projects have ragged edges, incomplete cuts, or skipped lines, your blade might be dull. This happens even after cleaning. Trying to cut with a dull blade damages your materials and can even strain your machine. It also extends cutting time.
Another indicator is the sound your machine makes. A new, sharp blade cuts with a smooth sound. A dull blade often makes a tearing or scratching noise as it tries to force its way through material. Listen for these changes during your projects. The specific material you cut also affects blade lifespan. Thicker materials like chipboard or balsa wood wear blades faster than paper or vinyl. Glitter cardstock is notoriously tough on blades.
Consider the type of blade you are using. Standard fine-point blades are designed for everyday materials. Specialty blades, like deep-point or knife blades, handle thicker items. Each has a different expected lifespan. Keeping a log of when you replace blades can help you predict future needs. Ultimately, if your cuts are consistently poor despite cleaning and adjusting settings, it is time for a new blade. Replacing it will bring back the joy of crisp, precise cuts.
Troubleshooting Common Cricut Blade Issues
Cricut blade issues can be frustrating, especially when you are in the middle of a project. Many problems relate to the blade’s condition or its interaction with the material. Knowing how to troubleshoot these common issues can save your project. I have experienced many of these problems myself.
Skipping Cuts: If your Cricut blade skips parts of your design, first check for debris. A small piece of vinyl or paper stuck to the blade tip often causes this. Clean the blade using the foil method or rubbing alcohol. Also, ensure your material is firmly adhered to the mat. If your Cricut LightGrip mat isn’t sticky enough, the material can lift and cause skips.
Ragged or Fuzzy Edges: This is a classic sign of a dull or dirty blade. The blade is tearing the material instead of cutting it cleanly. Perform a thorough cleaning of your blade and housing. If the problem persists, your blade might be worn out. Consider replacing it. Sometimes, using too much pressure for a material can also cause this. Adjust your pressure settings down slightly.
Incomplete Cuts: When your Cricut machine does not cut all the way through, even after multiple passes, it often means the blade is losing its edge. Again, clean the blade. If that does not work, increase the pressure setting slightly. If you still have problems, it is time for a new blade. For thicker materials, make sure you are using the correct blade type. A fine-point blade cannot cut very thick materials effectively.
Blade Dragging or Snagging: This issue suggests material is stuck in the blade housing. Or, the blade itself is not rotating freely. Remove the blade and housing. Deep clean the housing with rubbing alcohol. Ensure the blade spins easily within the housing when you reinsert it. Sometimes, cutting highly fibrous materials like felt can leave excessive residue. A quick clean usually solves this.
By systematically addressing these common issues, you can often quickly restore your Cricut’s cutting performance. Most often, a good clean is the first and most effective step.
FAQ Section
How often should I clean my Cricut blade? I recommend a quick clean after every 2-3 projects, especially if cutting sticky materials like vinyl or glitter cardstock. A deeper clean of the blade and housing is good every few weeks or when you notice performance issues. Consistent cleaning extends blade life and ensures precise cuts. This routine prevents stubborn buildup.
Can I sharpen my Cricut blade with the foil method? The foil method does not truly sharpen a dull blade like a knife sharpener. It primarily cleans off tiny bits of debris and helps realign microscopic imperfections on the blade’s edge. This process makes the blade feel sharper because it cuts more efficiently. It is an excellent maintenance trick, not a sharpening solution.
What causes my Cricut blade to get dull quickly? Cutting highly abrasive materials like glitter cardstock, felt, or chipboard dulls blades faster. Using excessive pressure settings also speeds up wear. Not cleaning off sticky residue regularly can make the blade feel dull sooner. Always use the recommended settings for your materials and keep your blade clean.
Can I use water to clean my Cricut blade? I do not recommend using water to clean your Cricut blade. Water can cause corrosion or rust, especially on the delicate metal parts. Water does not effectively dissolve sticky adhesive residues. Rubbing alcohol is the best choice because it evaporates quickly and dissolves most crafting material residues without harming the blade.
How do I know if my blade needs cleaning or replacing? Start by cleaning your blade. If cleaning resolves issues like ragged edges, incomplete cuts, or skipping, then it just needed a clean. If the problems persist after a thorough clean and adjusting pressure settings, your blade is likely worn out and needs replacement. A truly dull blade will not improve with cleaning.
Does cleaning a Cricut blade extend its life? Yes, absolutely! Regular cleaning significantly extends the life of your Cricut blade. By removing debris and sticky residue, you prevent the blade from dragging and getting damaged. A clean blade performs efficiently, reducing stress on its delicate tip. This means fewer replacements and more consistent, high-quality cuts for your projects.
Conclusion
Mastering how to clean Cricut blade is a simple yet powerful skill. It transforms your crafting experience. A clean blade delivers crisp, professional-looking cuts every time. This saves you frustration and precious materials. Remember, regular maintenance is key to longevity.
By following the steps outlined in this guide, you can keep your blades in top condition. Perform quick cleans often. Deep clean when sticky residue builds up. You will notice an immediate improvement in your machine’s performance. Do not let a dirty blade hold back your creativity. Take a few moments after your projects to care for your Cricut blade. Your crafting projects will thank you. Get ready for flawless designs and enjoyable crafting sessions!
- Cricut cleaning
- blade maintenance
- crafting tips

Todd Martin
Senior Writer
With over 15 years of experience in home renovation and design, I started HEG to share what I’ve learned with homeowners who want to create spaces that are both beautiful and functional. I’ve always believed in a hands-on approach, and over the years, I’ve picked up practical solutions that actually work. Through HEG, I aim to make home improvement more approachable, sharing real tips that help you create a home you truly love.