· Todd Martin · Automotive Maintenance · 23 min read
How To Clean Cylinder Walls
Optimize Your Engine: How To Clean Cylinder Walls
Every engine enthusiast knows the secret to a long-lasting, powerful engine often lies in proper maintenance. I find that many people overlook one crucial step: keeping cylinder walls clean. These surfaces inside your engine are where pistons travel. Carbon buildup, rust, and glaze can severely hinder performance. When I first learned how important this was, it changed my approach to engine work completely.
This guide helps you understand why cleaning these walls matters. We will cover the right tools and materials for the job. Then, I will walk you through the cleaning process. We will talk about honing and final inspection steps. This article aims to give you the knowledge to clean cylinder walls effectively. You can improve your engine’s health and performance.
Takeaway
- Understand Why: Clean cylinder walls prevent power loss and reduce wear.
- Gather Tools: You need specific brushes, degreasers, and possibly a honing tool.
- Prepare Carefully: Disassemble the engine safely and protect other parts.
- Clean Effectively: Use proper techniques to remove carbon, rust, and glaze.
- Consider Honing: Honing creates a cross-hatch pattern vital for piston ring seating.
- Inspect Thoroughly: Ensure walls are clean and free of damage before reassembly.
To clean cylinder walls, you must first remove the engine components covering them. Then, use specialized bore brushes and degreasing solutions to scrub away carbon deposits and oil residue. For glazed or lightly rusted walls, a cylinder hone or abrasive pads can restore the surface texture. Finally, wipe down the walls completely to remove all contaminants.
Why Cleaning Cylinder Walls Is Essential for Engine Health
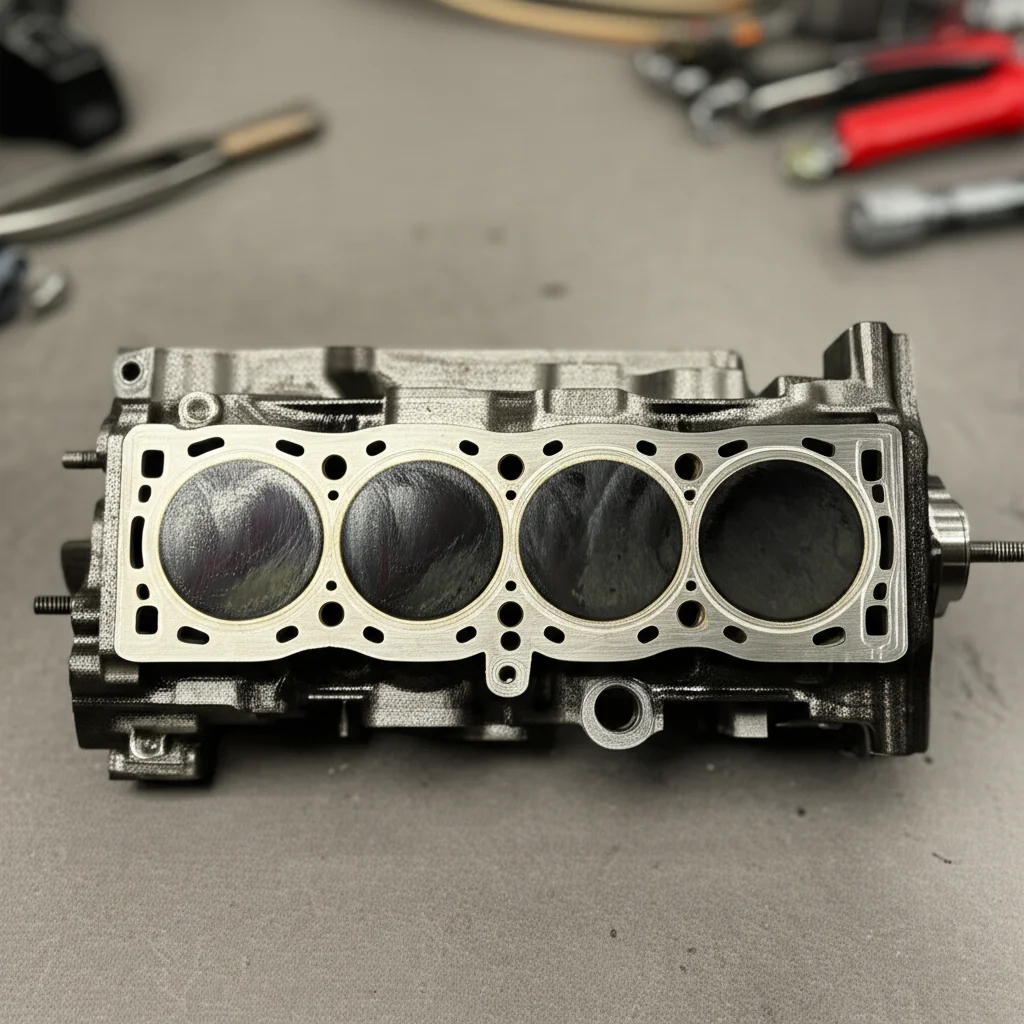
Clean cylinder walls are vital for an engine’s optimal function. These walls are the stage for piston movement. They face extreme temperatures and pressures. Over time, various substances build up on these surfaces. This buildup leads to many problems. I learned early on that ignoring this step can lead to significant engine issues down the line. It is a critical part of any engine rebuild or major service.
Carbon deposits are common culprits. They form from burnt oil and fuel. These deposits create a rough surface. This roughness increases friction between the piston rings and the wall. Increased friction means more wear on the piston rings and the cylinder itself. Your engine loses efficiency. It may consume more oil. I have seen engines suffer from poor compression due to excessive carbon. This directly impacts power output.
Oil glaze is another issue. This smooth, hard layer forms on the cylinder wall. It happens when piston rings do not seat properly. Or it occurs when an engine runs at low RPMs for too long. Glaze makes it hard for new piston rings to seal. This leads to what mechanics call “blow-by.” Combustion gases escape past the rings. Oil can also get past the rings and burn. This causes increased oil consumption and smoke. A glazed cylinder will not allow the new piston rings to break in properly. This prevents them from sealing.
Rust and corrosion are less common inside a running engine. They can happen if an engine sits for a long time. Water or moisture gets into the cylinders. Rust on cylinder walls is very damaging. It creates pits and rough spots. These damage piston rings quickly. I have seen engines where rust required extensive machining. Sometimes, it even meant replacing the entire engine block. Preventing rust is always better than fixing it. Always store an engine properly if it will be idle for a while.
Cleaning the cylinder walls solves these problems. It restores the surface integrity. This allows piston rings to seal correctly. Proper sealing means maximum compression. It means efficient combustion. Your engine will make more power. It will use less fuel and oil. Cleaning also extends the life of new piston rings and pistons. This saves you money in the long run. I always make sure to clean these surfaces thoroughly. It helps ensure the engine performs as intended. It also provides peace of mind that the engine will last.
Necessary Tools and Materials for Cylinder Wall Cleaning
To clean cylinder walls properly, you need the right set of tools and materials. Using improper items can damage the delicate surfaces. This damage can cost you significant time and money. I always gather everything before starting. This prevents delays and ensures a smooth process. You cannot rush this important step in engine maintenance.
First, you need cleaning solutions. A strong degreaser or automotive solvent is essential. These products break down oil, grease, and carbon. Examples include specific engine degreasers or carburetor cleaner. Avoid harsh acids or highly corrosive chemicals. They can harm the metal. Some people use brake cleaner, but it evaporates fast. I prefer dedicated engine cleaning solutions. They typically work better on heavy carbon.
Next, you need abrasive tools. For light carbon or glaze, a non-abrasive bore brush works well. These brushes have plastic or nylon bristles. They scrub without scratching the surface. For tougher carbon or light rust, a more aggressive bore brush might be necessary. Some people use brass or stainless steel brushes. Be very careful with metal brushes. They can scratch the cylinder wall finish if used improperly. I always start with the least abrasive option first.
If the walls are glazed, you will need a cylinder hone. There are different types of hones. A flex-hone, often called a “dingleberry” hone, has abrasive balls on flexible arms. This is good for light glaze removal. It also helps restore the cross-hatch pattern. A rigid hone uses stones and requires more skill. It removes more material. Always use the hone with the correct grit. Fine grits are typically for cast iron, coarser for harder materials. I recommend consulting your engine’s service manual for specific grit recommendations.
You also need plenty of clean rags or lint-free towels. These are crucial for wiping away debris. They also absorb cleaning solutions. Microfiber towels are excellent. Avoid cloths that shed lint. Lint left inside the cylinder can cause problems when the engine runs. I keep a large stack of these available. You will use more than you think.
Safety gear is paramount. Wear safety glasses or goggles. Cleaning solutions can splash and irritate your eyes. Nitrile gloves protect your hands from chemicals. A respirator mask is also smart. Cleaning chemicals can produce strong fumes. Breathing these fumes is not good for your lungs. I always prioritize safety. It makes the job easier and safer.
Finally, consider having a shop vacuum or compressed air. These help remove loose debris after cleaning. Be careful with compressed air. It can blow debris into other engine parts. Always vacuum first if possible. I use compressed air only when all other sensitive components are covered or removed. Having the right tools makes the process effective and safe.
Essential Preparation Before Cleaning Cylinder Walls
Proper preparation is half the battle when cleaning cylinder walls. Skipping steps can lead to more work or damage. You must make sure the engine is ready for this deep clean. I always follow a clear checklist before touching any cleaning solutions. This methodical approach ensures safety and effectiveness.
First, remove engine components. You cannot clean cylinder walls with pistons still inside. This means disassembling the engine. You will remove the cylinder head. You will also take out the pistons and connecting rods. Keep all parts organized. Label them if needed. Knowing where each bolt and part goes saves time during reassembly. For example, if you are working on the cylinder head, understanding how to clean cylinder head properly can be a related task. If you’re wondering how to clean cylinder head without removing valves, that’s another specific method for that component. My focus here is the walls themselves.
Next, protect other engine parts. The engine block is full of oil passages and crankshaft bearings. You do not want cleaning solutions or debris getting into these areas. Mask off the crankshaft journals and bearings with tape or plastic. You can use old rags to plug oil holes. I often put plastic bags over the crankshaft itself. This creates a barrier. It prevents contamination. Any debris left inside the engine can cause severe damage during operation. Be thorough with this step.
Drain all fluids. Ensure the engine block is free of oil and coolant. Even if you are just cleaning the cylinders, old fluids can get in the way. They can also mix with cleaning solutions. This creates a mess. A dry engine block is easier to work on. It also helps you see the condition of the cylinder walls clearly. I always double-check for any residual fluids.
Assess the cylinder wall condition. Before cleaning, look closely at each cylinder. Are there deep scratches? Is there significant rust pitting? Is the glaze very thick? This assessment helps you choose the right cleaning approach. Minor issues might only need a light clean. Severe problems might require professional machining or boring. I use a flashlight to get a good view of the entire surface. This initial inspection guides my next steps.
Ventilate your workspace. Engine cleaning chemicals produce fumes. Work in a well-ventilated area. Open garage doors. Use fans. Good airflow prevents you from breathing in harmful vapors. I always make sure the air is moving. Your health is more important than getting the job done fast.
By taking these preparation steps, you set yourself up for a successful cleaning. This foundation ensures the cleaning process is safe and effective. It protects your engine from further damage. This makes the entire engine rebuild process much smoother.
Step-by-Step Guide to Cleaning Cylinder Walls
Cleaning cylinder walls requires careful steps to remove various types of buildup. This process needs patience and the right technique. I always approach this with a methodical mind. Each step builds on the last to ensure a thorough clean. Let’s break down how to tackle different contaminants.
1. Initial Degreasing and Carbon Removal: Start with a strong automotive degreaser or engine cleaner. Spray it generously onto the cylinder walls. Allow it to soak for a few minutes. This gives the chemicals time to break down heavy oil and loose carbon. Do not let the solution dry on the surface. For stubborn areas, apply more.
Once soaked, use a stiff bristle brush (nylon or brass, depending on carbon thickness) to scrub the walls. Pay close attention to the top of the cylinder, near where the piston rings stop. Carbon tends to build up most here. Scrub in an up-and-down motion. Then wipe away the loosened gunk with a lint-free rag. Repeat this process until most of the loose carbon is gone. I often go through several rags during this phase.
2. Addressing Glaze and Light Rust: If you have oil glaze, you need more than just degreaser. Glaze is a smooth, hard layer. It prevents new piston rings from seating. For light glaze, a non-abrasive flex-hone can be used. Dip the hone in some light oil (like WD-40 or a honing oil) to lubricate it. Insert the hone into the cylinder. Attach it to a drill. Run the drill at a moderate speed (around 300-600 RPM). Move the hone up and down the cylinder at a steady pace. Aim for about 50-60 strokes per minute. This motion creates a cross-hatch pattern. This pattern is essential for oil retention and piston ring seating. I always make sure the hone goes slightly past the bottom of the bore. It also needs to reach just shy of the top. This ensures even honing.
For light surface rust, the honing process will often remove it. If the rust is deeper, you might need a more aggressive honing stone. Or you might use fine-grit abrasive pads designed for cylinder walls. Always lubricate the abrasive tool well. The lubrication carries away debris and prevents scratching. Be careful not to remove too much material. The goal is to clean, not enlarge the cylinder bore.
3. Final Cleaning After Honing: After honing, fine abrasive particles will be everywhere. These particles are very damaging if left in the engine. They act like sandpaper. You must remove every trace. I start by wiping the cylinder walls with clean, lint-free rags. Use plenty of brake cleaner or a dedicated engine cleaning solvent. Wipe repeatedly until the rag comes away absolutely clean. No gray or black residue should be visible. This might take many passes.
Then, use warm, soapy water. Use dish soap. Scrub the walls with a soft brush. This helps lift embedded abrasive particles. Rinse thoroughly with clean water. Immediately dry the walls completely with compressed air. Or use a heat gun on a low setting. Any water left behind can cause rust. Once dry, apply a thin layer of clean engine oil. This prevents flash rusting. It also lubricates the surface for piston installation. I make sure the oil coating is even.
This step-by-step approach ensures your cylinder walls are truly clean. It prepares them for new piston rings and a long service life. It is crucial for engine reliability.
Honing Cylinder Walls: When and How
Honing cylinder walls is a critical step, but it is not always needed. Knowing when and how to hone ensures you prepare the cylinder surface correctly. This process restores the essential cross-hatch pattern. This pattern is vital for piston ring seating and oil retention. I have learned that improper honing can do more harm than good.
When to Hone Cylinder Walls
You typically hone cylinder walls when:
- Replacing Piston Rings: New piston rings need a fresh cross-hatch pattern to seat properly. If the walls are too smooth (glazed), the rings will not seal. This leads to poor compression and oil consumption.
- Removing Light Glaze: Engines that have idled a lot or run at low RPMs can develop an oil glaze. This smooth surface needs breaking up.
- Removing Minor Surface Imperfections: Light rust, minor scratches, or carbon deposits that cleaning solutions cannot remove may need honing.
- After Engine Disassembly for Inspection: If you have the engine apart, it is a good time to refresh the cylinder walls. Even if not completely glazed, a light hone improves the surface.
You should not hone if:
- The Cylinders Are Worn Beyond Specification: If the bore is too large or out of round, honing will not fix it. It needs professional machining (boring and new pistons).
- The Walls Have Deep Scratches or Pitting: Honing cannot remove deep damage. It will only follow the existing flaws.
- You Are Not Replacing Piston Rings: Honing removes material and requires new rings to re-establish a seal. If you are not replacing rings, you should not hone.
How to Hone Cylinder Walls
Before you start, ensure the cylinder walls are as clean as possible from carbon and oil. Lubricate the hone with a specific honing oil or light engine oil. This lubricant carries away metal particles and keeps the abrasive cool.
1. Choose the Right Hone:
- Flex-Hone (Ball Hone): This is the most common for DIY use. It is flexible and self-centering. It is excellent for restoring the cross-hatch pattern and deglazing. Choose the correct diameter for your bore. Also, pick the right grit (e.g., 240-320 grit for most automotive applications).
- Rigid Hone (Stone Hone): This type uses abrasive stones. It removes more material and can correct minor taper or out-of-round conditions. It requires more skill and a solid fixture. I usually recommend this for experienced professionals.
2. Attach to a Drill: Secure the hone into a powerful drill. Ensure the hone is centered in the cylinder before starting the drill.
3. Apply Lubricant: Pour or spray generous amounts of honing oil or light engine oil into the cylinder. Keep the walls well-lubricated throughout the process.
4. Honing Technique:
- Start the drill at a moderate speed (around 300-600 RPM for a flex-hone).
- Move the hone up and down the cylinder bore smoothly and consistently. The goal is to create a 45-degree cross-hatch pattern. This means moving the drill at a speed that allows the hone to travel from the bottom to the top and back while the drill rotates.
- Practice on an old cylinder or piece of pipe if you are unsure.
- Do not stop the hone’s movement inside the cylinder. Keep it moving until you pull it out.
- Ensure the hone extends slightly beyond the bottom of the bore on each stroke. It should also come within an inch or so of the top. This ensures even honing.
- Work each cylinder for a consistent amount of time. About 30-60 seconds for light deglazing is common. Use your eyes to check the cross-hatch pattern.
5. Check the Cross-Hatch Pattern: After a few strokes, pull the hone out and wipe the cylinder wall. Look for a uniform cross-hatch pattern. The lines should intersect cleanly. They should be at about a 45-degree angle to the top of the cylinder. If the angle is too steep, you are moving the drill too fast. If it is too flat, you are moving it too slow. Adjust your speed and stroke rate accordingly.
6. Thorough Cleaning After Honing: This is critical. Honing creates abrasive particles. These must be completely removed. Refer to the “Final Cleaning and Inspection” section for detailed steps. Missing this can ruin your engine quickly. I cannot stress enough how important this post-honing clean-up is.
Proper honing sets the stage for new piston rings to seal effectively. This ensures good compression and engine performance. It is a precise skill. But it is achievable with the right tools and patience.
Final Cleaning and Inspection After Honing
The work is not done once you finish honing. The most critical step follows: removing all abrasive particles. If you leave even a speck of honing residue, it can destroy your engine. These particles act like sandpaper. They will abrade bearings and cylinder walls during operation. I consider this phase even more vital than the honing itself.
1. Initial Wipe Down: Immediately after honing, use clean, lint-free rags to wipe the cylinder walls. Use plenty of a good cleaning solvent, such as brake cleaner or specialized engine cleaning solvent. Wipe repeatedly. The first few rags will come away dark gray. This is the honing grit and metal particles. Keep wiping until your rag comes away perfectly white. This might take many rags and many passes. Do not be stingy with rags or solvent. I typically use a dozen or more rags per cylinder.
2. Soap and Water Wash: Many engine builders then recommend a warm, soapy water wash. Dish soap is good for this. It helps lift and suspend any remaining abrasive particles that wiping alone might miss. Use a soft brush or a clean rag saturated with soapy water. Scrub the cylinder walls. The soap helps emulsify oils and lift microscopic debris. Some people worry about water and rust. But prompt drying prevents this.
3. Thorough Rinse and Dry: After the soapy wash, rinse the cylinder walls thoroughly with clean water. A spray bottle can work for this, or carefully pour water. The goal is to remove all soap residue and suspended particles. Immediately after rinsing, dry the cylinder walls completely. Use compressed air to blow out all water from crevices and bolt holes. You can also use a heat gun on a low setting. Any moisture left will cause flash rust. I always ensure the walls are bone dry before moving on.
4. Oiling for Protection: Once dry, apply a thin, even coat of clean engine oil to the cylinder walls. You can use a clean, lint-free rag for this. This oil layer prevents flash rusting. It also provides initial lubrication for when you install the pistons. This step is a quick measure to protect the newly honed surface.
Inspection Before Assembly
Before you start reassembling your engine, inspect the cylinder walls thoroughly. This final check ensures your cleaning and honing were successful.
- Cross-Hatch Pattern Check: Use a bright flashlight. Look for a consistent cross-hatch pattern. The lines should intersect at approximately a 45-degree angle. This pattern holds oil and aids piston ring seating. If the pattern looks uneven or too deep/shallow, re-evaluate.
- Visual Inspection for Debris: Look for any remaining particles, lint, or foreign material. Run your clean finger along the walls. It should feel smooth but with a slight texture from the cross-hatch. There should be no grit.
- Check for Scratches or Pitting: Ensure no new scratches or pits appeared during cleaning. If deep damage exists, honing will not fix it. It may require professional boring.
- Measure Cylinder Bore: If you have a bore gauge or inside micrometer, measure the cylinder diameter at various points. This ensures the bore is within specifications. It also checks for taper or out-of-round conditions. This is especially important if you used a rigid hone. Even if you are just cleaning cylinder walls, checking tolerances is good practice.
This rigorous final cleaning and inspection prevents issues down the road. It ensures your newly installed piston rings have the best possible surface to seal against. This translates to better compression, lower oil consumption, and a longer-lasting engine. I always take my time here. It is a small investment for peace of mind.
Common Mistakes to Avoid When Cleaning Cylinder Walls
Cleaning cylinder walls seems straightforward, but several common mistakes can ruin your engine or undo your hard work. I have seen these errors firsthand. Knowing what to avoid is as important as knowing what to do. Being aware of these pitfalls saves you time and potential engine damage.
1. Not Protecting Other Engine Components: This is a major oversight. Cleaning solutions and abrasive grit can easily get into crankshaft bearings, oil passages, and bolt holes. If this happens, those components will suffer. Bearing damage can lead to catastrophic engine failure. Always mask off sensitive areas. Use tape, plastic sheeting, and old rags to block off openings. I make sure everything else is completely covered before I start scrubbing.
2. Using the Wrong Cleaning Agents: Harsh acids or overly aggressive solvents can corrode or etch the cylinder walls. Bleach is a definite no-go. Conversely, using a weak cleaner will not remove stubborn carbon or glaze. Stick to automotive-specific degreasers, engine cleaning solvents, or brake cleaner. Always test a small, inconspicuous area first if you are unsure about a product. I rely on products specifically designed for engine internals.
3. Improper Honing Technique:
- Too Much Material Removal: Over-honing can enlarge the cylinder bore past its limits. This means new standard-sized pistons and rings will not fit. It then requires expensive re-boring.
- Incorrect Cross-Hatch Angle: The 45-degree cross-hatch is vital. Honing too fast or too slow creates the wrong angle. This prevents piston rings from seating properly. It leads to blow-by and oil consumption.
- Not Lubricating the Hone: Honing dry or with insufficient lubrication generates excessive heat. This damages the hone and the cylinder wall. Always use plenty of honing oil or light engine oil.
- Stopping the Hone Inside the Bore: If you stop the hone while it is in the cylinder, it can create a ‘ring’ or uneven wear. Keep the hone moving until it is completely removed.
4. Not Cleaning Thoroughly After Honing: This is the most critical mistake. Abrasive particles from honing are microscopic but incredibly destructive. If left behind, they will circulate with the oil. They will damage bearings, cylinder walls, and piston rings. It is like running sandpaper through your engine. Wipe, wash with soap and water, rinse, and then wipe again until rags are perfectly clean. I go over the area many times. This step must be meticulous.
5. Ignoring the Cross-Hatch Pattern: The cross-hatch pattern is not just for looks. It holds oil, which lubricates the piston rings. It also provides microscopic peaks and valleys for the rings to “bed into” and seal. If you clean and the walls are still mirror-smooth (glazed), new rings will not seal. Always check for that proper cross-hatch pattern after honing.
6. Not Oiling After Cleaning: Bare metal rusts quickly, especially after a water wash. Flash rust can appear within minutes. Always apply a thin coat of clean engine oil immediately after drying the cylinder walls. This protects the newly prepared surface until assembly.
Avoiding these common mistakes ensures your effort leads to a well-performing and durable engine. Precision and patience are your best allies in this process. I always remind myself that shortcuts often lead to bigger problems later.
Cylinder Wall Restoration: Beyond Basic Cleaning
Sometimes, cleaning cylinder walls means more than just scrubbing. When you encounter significant issues like deep scoring, extreme wear, or severe rust pitting, basic cleaning and honing might not be enough. At this point, you are looking at cylinder wall restoration. This goes beyond simple maintenance. It requires specialized knowledge and equipment.
Addressing Severe Scoring or Scratches
Scoring happens when something hard gets trapped between the piston and the cylinder wall. It creates deep lines. These lines allow combustion gases to blow past the piston rings. They also allow oil to burn. Honing cannot remove deep scores. It only follows the existing path.
When walls are severely scored, the solution is boring. This is a machining process. A machine shop uses a specialized boring bar to precisely enlarge the cylinder diameter. This removes the damaged material. After boring, the cylinder is larger. This means you need oversized pistons and piston rings. The new pistons match the new, larger bore. I always send blocks with deep scoring to a reputable machine shop. They have the precision tools needed.
Correcting Out-of-Round or Tapered Cylinders
Over time, cylinder walls can wear unevenly. This leads to an “out-of-round” shape. Or they can become “tapered,” meaning the diameter is wider at one end than the other. This usually happens from piston thrust. Piston rings cannot seal properly against these irregular shapes. Even new rings will not perform well.
Like severe scoring, these conditions require boring and honing. Boring removes the irregular shape. It makes the cylinder perfectly round again. Then, honing creates the necessary cross-hatch pattern for the new, oversized piston rings. You cannot correct these issues with just a home hone. It takes professional equipment and measurements.
Repairing Rust Pitting
If an engine has sat for a long time, especially in humid conditions, rust can develop inside the cylinders. This rust can create small pits in the cylinder wall surface. Minor surface rust might be removed by aggressive honing. However, deep pitting is problematic. The pits can cause localized hot spots. They also damage piston rings quickly.
If pitting is deep, boring is the common solution. It removes enough material to get below the deepest pit. If the pits are too deep, the cylinder might be unrepairable. Or it might require a cylinder sleeve. A cylinder sleeve is a new metal cylinder inserted into the original bore. This is a complex machining operation. It is typically done when a bore cannot be enlarged further. Or when damage is too severe for boring alone.
Importance of Professional Assessment
For any of these severe conditions, a professional machinist’s assessment is crucial. They have bore gauges, micrometers, and other measuring tools. They can accurately determine the cylinder’s wear and damage. They will advise if boring, sleeving, or a simple hone is appropriate. I always get a professional opinion for anything beyond simple carbon or glaze removal. They ensure the engine block is structurally sound and within repairable limits.
Understanding when to seek professional help saves you time, money, and frustration. Basic cleaning and honing are DIY tasks. But true cylinder wall restoration for significant damage is a job for experts. It ensures your engine rebuild results in a durable, high-performing power plant.
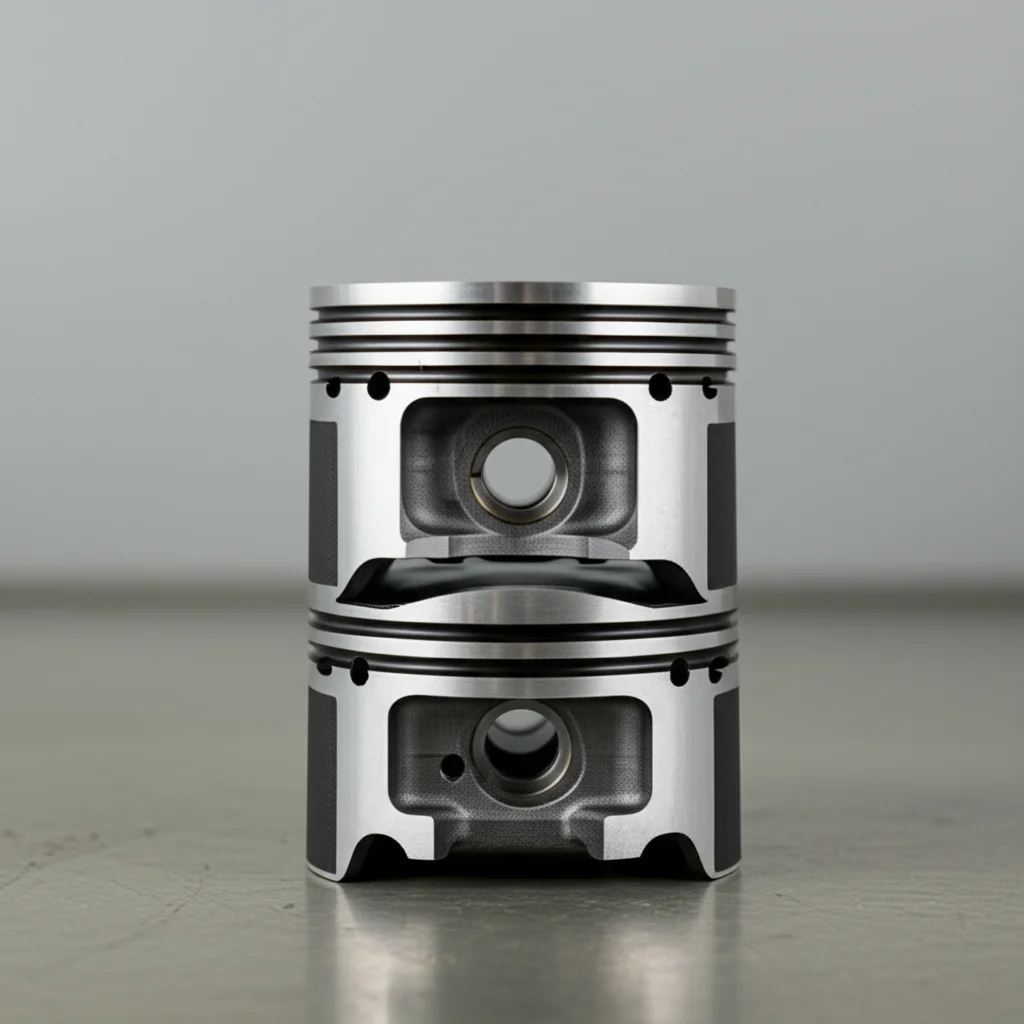
The Role of Piston Rings and Oil in Cylinder Wall Performance
Understanding how piston rings and oil interact with cylinder walls is crucial. This knowledge helps reinforce why cleaning and proper surface finish are so important. These components work together to ensure your engine runs efficiently. If any part of this system fails, engine performance suffers greatly. I find this relationship fascinating and central to engine health.
Piston Rings: The Seal
Piston
- Engine Cleaning
- Cylinder Bore
- Carbon Removal
- Engine Rebuild
- DIY Auto Repair

Todd Martin
Senior Writer
With over 15 years of experience in home renovation and design, I started HEG to share what I’ve learned with homeowners who want to create spaces that are both beautiful and functional. I’ve always believed in a hands-on approach, and over the years, I’ve picked up practical solutions that actually work. Through HEG, I aim to make home improvement more approachable, sharing real tips that help you create a home you truly love.