· Todd Martin · Automotive Maintenance · 20 min read
How To Clean Engine Block
Cleaning Your Engine Block: A Complete Guide
Have you ever looked at a car engine and wondered about the hidden heart within? The engine block is that core component, and keeping it clean is crucial for your vehicle’s health. A dirty engine block can hide problems, reduce efficiency, and even shorten your engine’s life. This guide will show you exactly how to clean engine block components, from preparation to post-cleaning care. We will cover essential tools, detailed cleaning steps, and vital safety tips. By the end, you will understand the best ways to restore your engine block’s cleanliness and function.
Takeaway:
- Gather all tools and safety gear: Have degreasers, brushes, pressure washer (if applicable), and PPE ready.
- Prepare the block carefully: Disassemble as needed and protect sensitive areas.
- Use appropriate cleaning methods: Manual scrubbing, pressure washing, or professional chemical treatment.
- Focus on all contaminants: Tackle oil, carbon, sludge, and rust effectively.
- Perform post-cleaning steps: Inspect, preserve, and prepare for assembly.
To effectively clean an engine block, remove it from the vehicle and fully disassemble it. Use strong degreasers, specialized brushes, and pressure washing to remove external grime. Address internal passages with dedicated brushes and solvents for oil, carbon, and sludge, ensuring all contaminants are gone before reassembly.
Why a Clean Engine Block is Essential for Vehicle Health
A clean engine block does more than just look good. It is vital for your vehicle’s overall health and performance. Over time, engine blocks collect dirt, grease, oil, and carbon. This buildup can hide serious issues like leaks or cracks. It also affects how your engine cools itself. Heat transfer becomes less efficient with a layer of grime.
A dirty block makes it hard to spot new oil leaks or coolant leaks. If you cannot see the surface clearly, you might miss a small problem. A small leak can become a major repair quickly. Cleaning the block allows you to find these issues early. This saves you money and prevents larger damage.
The engine block plays a big role in dissipating heat. It is designed to transfer heat away from the combustion chambers. A layer of caked-on dirt acts like an insulator. This insulation traps heat inside the engine. Excessive heat causes components to wear out faster. It can lead to warped cylinder heads or damaged piston rings.
For anyone planning an engine rebuild, cleaning the block is a mandatory first step. You cannot properly inspect or machine a dirty block. Machinists need a spotless surface to check for flaws. Cleaning removes all contaminants that could interfere with precise measurements. It ensures proper fit and function of new parts during assembly. I always make sure the block is pristine before any rebuild.
A clean block also looks professional. If you work on cars, a clean engine shows your attention to detail. It reflects pride in your work. More importantly, it directly contributes to the engine’s longevity and efficient operation. You extend the life of your engine by keeping its core clean. This simple step protects your investment.
Gathering the Right Tools and Cleaning Agents
Before you start cleaning your engine block, you need to gather all the necessary tools and cleaning agents. Having everything ready saves time and ensures a thorough job. Proper preparation is key for a successful cleaning process. I always organize my workspace first.
First, let’s talk about safety. You will be dealing with harsh chemicals and sharp metal parts. Always wear safety glasses or goggles to protect your eyes. Chemical-resistant gloves are essential for protecting your hands. A respirator or face mask is also important, especially if you are working with strong fumes or dust. Good ventilation is a must; work in an open area or a well-ventilated garage.
Next, you need cleaning solutions. An automotive-grade degreaser is critical. These products are formulated to break down heavy grease and oil. There are water-based degreasers and solvent-based ones. Water-based options are often more environmentally friendly. Solvent-based ones are usually more aggressive. You might also need a specialized carbon remover for tough carbon deposits. For rust, consider a rust converter or a phosphoric acid solution. Sometimes, a simple bucket of warm, soapy water is useful for initial rinses.
You will need a variety of brushes. A stiff wire brush is excellent for scraping off heavy, caked-on grime. Nylon brushes are good for less abrasive cleaning on sensitive areas. Small detail brushes or bottle brushes are perfect for reaching into oil passages and bolt holes. A bore brush, like those used for cleaning firearms, can be helpful for internal passages. A paint scraper or putty knife can help remove large chunks of solidified grease.
For rinsing, a garden hose with a strong nozzle works well for most external cleaning. If you have a pressure washer, it can speed up the process significantly for exterior surfaces. However, use it carefully around delicate areas and never direct high pressure into small openings that should stay dry. Make sure you understand how to use a pressure washer safely to avoid damaging components.
Finally, gather rags, old towels, and a shop vac or compressed air. These are vital for drying the block thoroughly after cleaning. Proper drying prevents rust, especially on cast iron blocks. Compressed air is fantastic for blowing out water from bolt holes and internal passages. Having a collection bucket for used liquids is also a good idea for proper disposal. I always make sure to have plenty of rags on hand.
Pre-Cleaning Preparations: Disassembly and Protection
Before you begin the actual cleaning of your engine block, proper preparation is essential. This stage involves carefully disassembling the engine and protecting sensitive areas. Rushing this step can lead to damage or an incomplete cleaning. I take my time with these preparations.
The level of disassembly depends on how thoroughly you want to clean the block. For a deep, comprehensive cleaning, you must remove the engine block from the vehicle. Then, you must completely disassemble it. This means removing the crankshaft, pistons, camshaft, cylinder heads, and all other attached components. A bare block allows for the best cleaning access. It also lets you clean all internal passages thoroughly.
If you are only doing a lighter external cleaning on an engine still in the car, you will need to cover sensitive components. Wrap electrical connectors, the alternator, distributor, and any exposed sensors with plastic bags or foil. Make sure to seal them tightly. This prevents water and cleaning solutions from entering and causing damage. For a full block cleaning, you do not need to worry about these external components, as they are already removed.
When disassembling the block, keep track of all parts. Use labeled containers or a system to organize bolts, nuts, and smaller components. This makes reassembly much easier later. Take photos as you go along. This visual record can be incredibly helpful for remembering how things connect. For example, if you are cleaning carbon buildup in engine passages, you need to remove all associated parts first.
Drain all fluids from the engine before disassembling. This includes engine oil and coolant. You do not want these fluids mixing with your cleaning solutions. Proper disposal of these fluids is also very important for environmental reasons. Never pour them down drains or on the ground. Take them to an automotive fluid recycling center.
Once the block is bare, or sufficiently protected, you need to plug any open passages. Use rubber stoppers or tape to cover openings like oil galleries, coolant passages, and bolt holes. This prevents dirt and cleaning solutions from entering areas you do not want to clean yet. It also stops debris from getting lodged inside. For instance, you would not want grit entering the finely machined cylinder bores. This protective step is crucial.
Finally, prepare your work area. Lay down old tarps or cardboard to catch drips and debris. Ensure good lighting so you can see all areas of the block. A sturdy workbench or engine stand makes the job much easier. Proper setup makes the cleaning process safer and more efficient.
Deep Cleaning Techniques for the Engine Block Surface
Once your engine block is prepared, you can begin the deep cleaning process. There are several effective techniques for cleaning the external surfaces. The best method depends on the level of grime and the tools you have available. I often combine a few methods for the best results.
Manual Scrubbing for External Grime
Manual scrubbing is a fundamental part of engine block cleaning. It is excellent for breaking down tough, caked-on grease and dirt. Start by applying a strong automotive degreaser to the entire block surface. Let it soak for 10-15 minutes, allowing the chemicals to penetrate the grime. Use a stiff wire brush for heavily soiled areas, especially where oil has solidified. For less stubborn dirt and smoother surfaces, a nylon brush works well. Get into all the nooks and crannies. Pay attention to the areas around bolt holes and casting marks. Repeat the degreaser application and scrubbing as needed. This initial pass removes the bulk of the surface contaminants.
High-Pressure Washing: When and How
A pressure washer can be a powerful tool for cleaning an engine block, but it must be used with caution. It is most effective for rinsing away loosened grime after manual scrubbing or for removing lighter dirt. Use a wide-angle nozzle (like a 25-degree or 40-degree tip) to avoid concentrating too much pressure on one spot. Keep the spray wand a safe distance from the block, typically 12-18 inches away. Avoid directing high-pressure spray directly into sensitive openings or passages. The force can push water and contaminants into areas that should remain dry. After pressure washing, ensure you thoroughly dry the block to prevent flash rust. Compressed air is excellent for blowing water out of threaded holes and hidden crevices.
Advanced Blasting Techniques
For the ultimate deep clean, especially for internal passages or for preparing the block for painting, advanced blasting techniques are superior. These methods remove all contaminants, including rust, carbon, and old paint, without using water.
- Vapor Blasting: This method uses a mixture of abrasive media and water, propelled by compressed air. It creates a smooth, satin finish on the metal. Vapor blasting is gentle enough to clean delicate surfaces without damage. It leaves a very clean and corrosion-resistant surface. The water acts as a lubricant and cushions the abrasive, reducing material removal.
- Dry Ice Blasting: Dry ice blasting uses frozen carbon dioxide pellets propelled at high speed. The pellets vaporize on impact, lifting dirt and contaminants without leaving any secondary waste. This method is non-abrasive and leaves no residue. It is perfect for intricate areas and when you want a completely dry cleaning process. This method can also clean things like engine air filters or other delicate engine components without water.
- Media Blasting: This involves using various abrasive media like glass beads, sand, or plastic beads, propelled by compressed air. Media blasting is very effective for removing rust, paint, and heavy carbon. The choice of media depends on the desired finish and the material of the block. Glass beads give a smoother finish, while sand is more aggressive. Always ensure all media is completely removed from the block after blasting, especially from internal passages. Remaining media can cause severe engine damage during operation.
Choosing the right method depends on the block’s condition and your goals. Combining manual scrubbing with a pressure wash is common for exterior grime. For a full rebuild, consider professional blasting services for a truly pristine block. These methods are excellent for getting into all the little spaces where oil sludge builds up.
Addressing Internal Passages and Stubborn Contaminants
Cleaning the exterior of the engine block is only half the battle. The internal passages often harbor the most stubborn and damaging contaminants. These passages include oil galleries, coolant channels, and cylinder bores. Neglecting these areas can lead to engine failure, even after an exterior clean. I always pay close attention to these hidden areas.
Clearing Oil and Coolant Passages
Oil galleries carry oil to all moving parts of the engine. Coolant passages circulate coolant to regulate temperature. Over time, these passages can become clogged with sludge, carbon, and rust. Clogged oil galleries starve engine components of lubrication, leading to premature wear. Blocked coolant passages cause the engine to overheat.
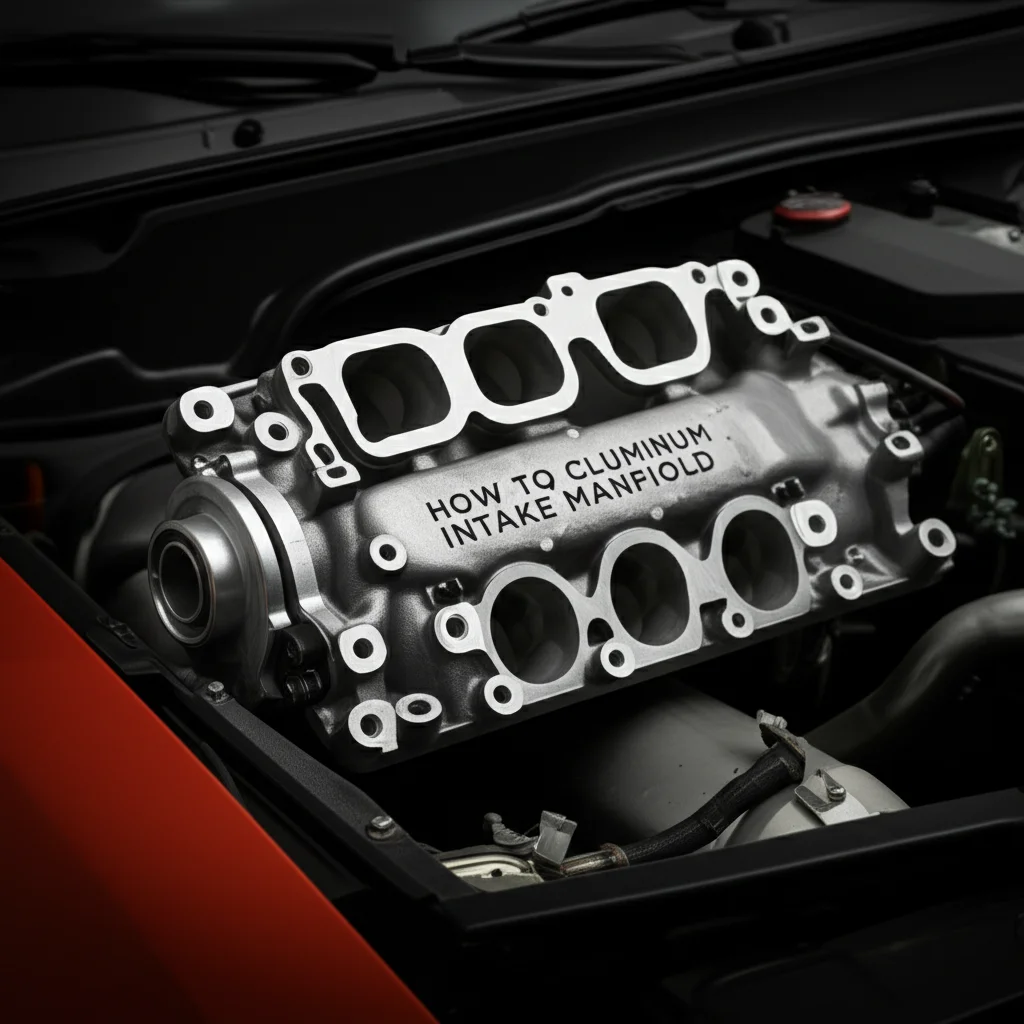
To clean oil passages, use a strong solvent or degreaser designed to dissolve oil sludge. Pour the cleaner into the passages and let it soak. Use specialized long, thin brushes, like rifle bore brushes, to scrub the inside of these channels. Push the brushes through every accessible opening. Compressed air is excellent for blowing out loosened debris and remaining solvent. For very stubborn blockages, a professional machine shop might use a hot tank or chemical vat. This process involves submerging the block in a heated, caustic solution that dissolves all contaminants. This method is highly effective for cleaning aluminum engine parts, for example.
For coolant passages, rust and scale are common problems. Flush these passages with a dedicated cooling system cleaner. Follow the product instructions carefully. Use bottle brushes to scrub the inside of the larger coolant passages. A pressure washer can help flush out loosened debris from these larger channels, but again, be careful with pressure. Ensure you remove all rust and scale; otherwise, it can break loose later and clog your radiator.
Eradicating Carbon Deposits
Carbon buildup occurs in combustion chambers and exhaust ports. If the block still has cylinder heads or internal components with carbon, you need to address it. Carbon deposits reduce engine efficiency and can cause hot spots.
For light carbon, a stiff nylon brush and a carbon-specific cleaner can work. For heavier deposits, a wire brush or even a rotary tool with a small wire brush attachment might be necessary. Be careful not to scratch critical surfaces, like cylinder walls. Chemical carbon removers are effective; apply them and let them sit to soften the deposits. For heavily caked-on carbon, media blasting or walnut blasting is often the best solution. Walnut blasting uses crushed walnut shells as an abrasive, which is effective yet gentle on metal surfaces. This method is common when you need to clean carbon buildup in engine components.
Battling Internal Rust and Sludge
Rust inside the block, particularly in coolant passages, is a common issue. It often indicates a lack of proper coolant maintenance. For surface rust, a rust-dissolving solution (like phosphoric acid or rust converter) can be applied. Allow it to work, then scrub with brushes. For heavy rust, media blasting is the most effective. After rust removal, it is crucial to protect the exposed metal.
Engine sludge is a thick, tar-like substance formed from degraded oil and contaminants. It clogs oil passages and coats internal surfaces. Cleaning sludge from the engine requires aggressive degreasers and mechanical action. Apply a liberal amount of engine sludge remover or heavy-duty degreaser. Use various brushes to physically break up and remove the sludge. For deeper internal sludge, a hot tank or chemical vat treatment is often necessary. This process truly dissolves the sludge and leaves the metal clean. Remember, removing this sludge is crucial for proper oil flow. Check out how to clean engine oil sludge for more details on this specific issue.
Thoroughly flush all passages with clean water after using any chemical cleaners. Then, dry the block immediately and completely using compressed air. Any lingering moisture can lead to new rust formation. This detailed approach ensures every part of the engine block is pristine.
Post-Cleaning Steps: Inspection, Preservation, and Assembly Prep
After the rigorous cleaning process, the work is not quite finished. Several crucial steps remain to ensure your engine block is ready for its next stage. These steps involve careful inspection, proper preservation, and preparation for assembly. Skipping these steps can undo all your hard work. I never neglect these final touches.
First, perform a thorough inspection of the entire engine block. Look for any new cracks or damage that might have been hidden by dirt. Pay close attention to the cylinder walls. They should be smooth and free of scratches or scoring. Check all threaded holes for stripped threads or remaining debris. Use a tap to chase all threaded holes. This cleans out any residual gunk or old thread locker. It ensures new bolts will thread in smoothly and securely. This inspection is critical for the long-term reliability of your engine.
If you are rebuilding the engine, this is the time for machining. The block might need to be decked (to ensure a perfectly flat surface for the cylinder heads). The cylinder bores might need honing or boring (to achieve the correct diameter and surface finish for new pistons). Main bearing bores might need line boring. These precise machining operations require a perfectly clean block. They ensure all surfaces are true and ready for new components.
Once the block is clean and any necessary machining is done, you must protect it from corrosion. Cast iron blocks are particularly susceptible to flash rust after cleaning. Apply a thin coat of rust preventative oil to all machined surfaces, including cylinder bores, deck surfaces, and main bearing saddles. This oil creates a barrier against moisture. For unmachined external surfaces, you can use a spray-on rust inhibitor. This step is vital if the block will be stored for any length of time before assembly.
Many enthusiasts choose to paint their engine blocks. Painting not only improves the appearance but also adds another layer of corrosion protection. Use a high-temperature engine paint designed to withstand the heat cycles of an engine. Clean the surface thoroughly with a wax and grease remover before painting. Apply thin, even coats, allowing proper drying time between each coat. Make sure to mask off all machined surfaces and openings you do not want painted. This includes cylinder bores, deck surfaces, and internal passages.
If you are not immediately assembling the engine, proper storage is paramount. Wrap the entire engine block in heavy-duty plastic sheeting or a specialized engine storage bag. This protects it from dust, moisture, and accidental damage. Store the block in a dry, temperature-controlled environment. Avoid storing it directly on concrete floors, as concrete can wick moisture. Use wood blocks or a sturdy engine stand to elevate it.
Finally, when you are ready for reassembly, give the block one last quick wipe-down. Remove any dust or lint that might have accumulated during storage. Ensure all oil passages are clear and ready for lubrication. Following these post-cleaning steps ensures your engine block is perfectly prepared. It will be ready for a long and healthy life.
Safety Measures and Environmental Considerations
Working with engine parts and strong chemicals requires strict adherence to safety protocols. Protecting yourself and the environment should be your top priorities throughout the cleaning process. Accidents are preventable with proper planning. I always emphasize safety.
Personal protective equipment (PPE) is non-negotiable. Always wear safety glasses or goggles to protect your eyes from splashes, debris, and fumes. Chemical-resistant gloves, such as nitrile or neoprene, are essential for protecting your skin from harsh degreasers and solvents. Long sleeves and pants can offer additional skin protection. If you are working in an enclosed space or using strong, fuming chemicals, a respirator or face mask with appropriate filters is crucial. This protects your lungs from inhaling harmful vapors or dust, especially when using blasting techniques or strong solvents.
Ventilation is another critical safety aspect. Work in a well-ventilated area, preferably outdoors. If you are in a garage, open all doors and windows. Use fans to circulate air and draw fumes away from your workspace. Poor ventilation can lead to dizziness, nausea, or more severe health problems from chemical exposure. Never work in a confined space without proper air exchange.
Be mindful of the chemicals you are using. Read the product data sheets (SDS or MSDS) for every cleaner. These sheets provide detailed information on proper handling, storage, and first aid measures. Some chemicals are flammable; keep them away from open flames, sparks, and heat sources. Store all chemicals in their original, labeled containers and out of reach of children and pets. If a chemical splashes on your skin or eyes, follow the first aid instructions on the product label immediately. Have a eyewash station or plenty of running water readily available.
Environmental considerations are just as important as personal safety. Engine cleaning often generates hazardous waste. Engine oil, coolant, and used degreasing solutions should never be poured down drains, onto the ground, or into storm sewers. These fluids can contaminate soil and water supplies. Collect all used liquids in appropriate, sealed containers. Take them to a certified automotive waste recycling center or a hazardous waste collection facility. Many auto parts stores also accept used oil and antifreeze.
Dispose of rags and cleaning materials contaminated with oil or chemicals responsibly. Some facilities may accept them as hazardous waste. Check with your local waste management services for specific guidelines in your area. For dry blasting media, ensure proper collection and disposal as well. Some media can be reused, but contaminated media must be disposed of correctly. Being environmentally conscious protects both nature and your community.
Always keep a fire extinguisher nearby when working with flammable materials. Have a first aid kit accessible for minor cuts or abrasions. By prioritizing safety and environmental responsibility, you can clean your engine block effectively and without incident.
Frequently Asked Questions
How often should I clean my engine block?
You do not typically clean an engine block regularly while it is in the vehicle. A full deep clean is usually done during an engine rebuild or significant repair. External spot cleaning of the engine bay might happen annually. For the bare block itself, it is a one-time intensive cleaning as part of a major overhaul.
Can I clean an engine block without removing it?
Cleaning an engine block without removing it is very limited. You can clean the external surfaces of the block still in the vehicle. This involves degreasers and brushes. You cannot access or thoroughly clean the internal oil galleries or coolant passages without full disassembly. A complete internal clean requires the block to be bare.
What cleaners are safe for engine blocks?
Automotive-grade degreasers are generally safe for engine blocks. For cast iron blocks, most strong alkaline or acidic cleaners are fine. For aluminum blocks, avoid highly caustic cleaners that can corrode aluminum. Always test a small, inconspicuous area first. Products specifically for engine cleaning are the safest choice.
Is professional engine block cleaning worth it?
Yes, professional engine block cleaning is often worth it, especially for rebuilds. Machine shops have specialized equipment like hot tanks, chemical vats, and blasting cabinets. These methods provide a far more thorough clean than what is possible at home. Professionals ensure all internal passages are spotless, which is crucial for engine longevity.
How do I prevent future buildup on my engine block?
To prevent future buildup on the engine block, maintain your vehicle properly. Regularly change your engine oil with the correct type and viscosity. Use high-quality coolant and flush your cooling system as recommended. Address any oil or fluid leaks promptly. A well-maintained engine produces less grime and sludge.
Conclusion
Cleaning an engine block is a demanding but rewarding task. It is a vital step for restoring your engine’s performance and extending its life. We have covered everything from gathering the right tools to understanding various cleaning techniques. We also discussed crucial post-cleaning steps and essential safety measures. Taking the time to properly clean engine block components ensures your engine runs efficiently and reliably.
A clean engine block dissipates heat better and makes it easier to spot potential problems. Whether you are tackling a full engine rebuild or simply preparing parts for inspection, thorough cleaning is non-negotiable. Remember to always prioritize your safety and proper waste disposal. By following these guidelines, you will achieve professional results. Give your engine the clean foundation it deserves; it will thank you with many more miles on the road.
- engine cleaning
- engine block
- car maintenance
- degreaser
- automotive repair

Todd Martin
Senior Writer
With over 15 years of experience in home renovation and design, I started HEG to share what I’ve learned with homeowners who want to create spaces that are both beautiful and functional. I’ve always believed in a hands-on approach, and over the years, I’ve picked up practical solutions that actually work. Through HEG, I aim to make home improvement more approachable, sharing real tips that help you create a home you truly love.