· Todd Martin · Home Cleaning & Maintenance · 22 min read
How To Clean Epoxy Grout
Restore Your Shine: How To Clean Epoxy Grout Effectively
Epoxy grout is a fantastic choice for many homes. It offers excellent durability and resistance to stains and moisture. However, even the toughest materials require proper care to maintain their appearance. Over time, dirt and grime can build up, making your once pristine surfaces look dull.
Learning how to clean epoxy grout correctly is important. Incorrect methods can damage the grout or surrounding tiles. This guide will show you simple, effective ways to clean and restore your epoxy grout. We will cover daily maintenance, deep cleaning techniques, and how to tackle stubborn stains. You will discover the right tools and products to use for the best results. Get ready to make your grout shine like new again!
Takeaway
- Use mild, pH-neutral cleaners for regular epoxy grout cleaning.
- Address spills and dirt quickly to prevent buildup and staining.
- Employ specialized epoxy grout cleaners or gentle abrasive tools for tougher grime.
- Always test cleaning products in an inconspicuous area first.
- Establish a consistent cleaning routine to maintain your grout’s appearance and longevity.
To clean epoxy grout, use warm water and a soft-bristled brush or microfiber cloth for routine maintenance. For tougher stains, apply a pH-neutral cleaner specifically designed for tile and grout, allowing it to penetrate before gently scrubbing and rinsing thoroughly. Avoid harsh chemicals or abrasive tools, which can damage the durable surface.
Understanding Epoxy Grout’s Unique Properties
Epoxy grout is different from traditional cement-based grout. It consists of epoxy resins and a hardener. When these two parts mix, they create a very durable and waterproof material. This makes epoxy grout highly resistant to stains, chemicals, and moisture.
This toughness is a big advantage, especially in wet areas like bathrooms and kitchens. Traditional grout is porous, meaning it can absorb water and stains. Epoxy grout is non-porous, so liquids and dirt sit on the surface instead of soaking in. This property makes it easier to clean if you act quickly. However, it also means that some cleaning methods suitable for cement grout may not work well, or might even harm, epoxy grout. Understanding this difference is key to proper maintenance.
Why Epoxy Grout Requires Specific Cleaning Methods
The non-porous nature of epoxy grout means it does not absorb cleaners. This is a benefit for daily cleaning, but it means very strong, acidic, or abrasive cleaners can sit on the surface and potentially dull the finish or cause discoloration over time. You must avoid harsh chemicals like bleach, ammonia, or highly acidic cleaners. These can degrade the epoxy resin, leading to a cloudy appearance or a sticky residue. Abrasive scrubbing pads can scratch the smooth surface of the grout, reducing its stain resistance and shine.
Therefore, gentle, pH-neutral cleaners are usually the best choice for epoxy grout. These cleaners effectively lift dirt without damaging the material. The goal is to clean the surface gently without compromising the grout’s integrity. Always remember that prevention is easier than cure. Regular, gentle cleaning will prevent stubborn buildup and keep your epoxy grout looking its best for years.
Essential Tools and Gentle Cleaners for Epoxy Grout
Cleaning epoxy grout does not require a large arsenal of specialized tools. In fact, simpler, gentler options are often the most effective. Using the right tools protects your grout from damage while ensuring a thorough clean. I always recommend starting with the least aggressive method possible.
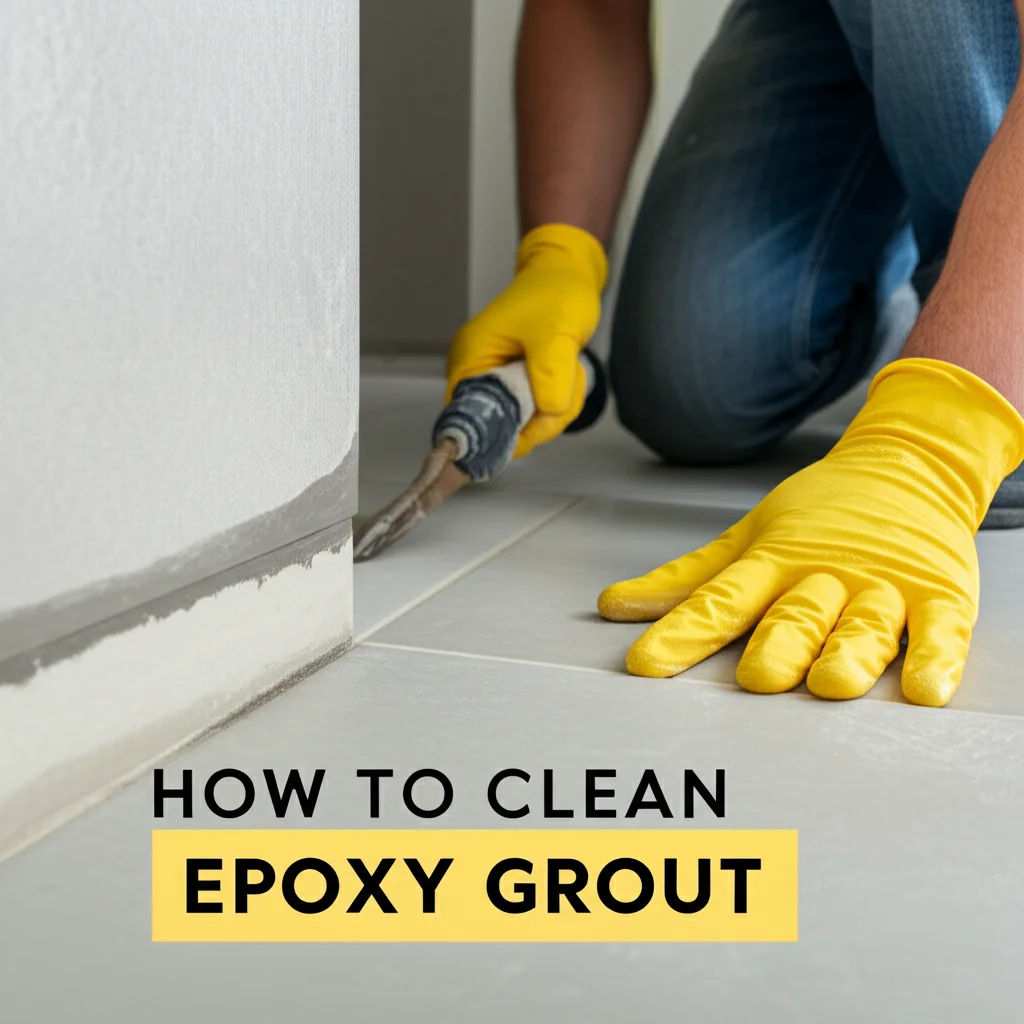
For everyday cleaning, you will need a few basic items. A soft-bristled brush is essential for gently agitating dirt. Microfiber cloths are excellent for wiping down surfaces and drying. A spray bottle can help you apply cleaning solutions evenly. These simple tools form the foundation of your epoxy grout cleaning kit.
Recommended Gentle Cleaning Solutions
When it comes to cleaners, mild is key for epoxy grout. Aggressive chemicals can dull the finish or even break down the epoxy. Stick to pH-neutral solutions that are effective yet safe.
Here are some excellent options:
- Warm Water: For light dirt and routine cleaning, plain warm water is often enough. It helps loosen surface grime without any risk of damage. You can simply wipe down the grout lines with a damp cloth.
- Dish Soap and Water: A few drops of mild dish soap mixed with warm water creates a gentle degreaser. This solution is perfect for cutting through light grease and food spills that accumulate in kitchen areas. Ensure you rinse well to avoid soap residue.
- Commercial pH-Neutral Tile & Grout Cleaners: Many manufacturers offer cleaners specifically labeled as pH-neutral. These are formulated to be safe for epoxy grout while still being effective against common household dirt. Always read the product label to confirm it is safe for epoxy surfaces.
- Baking Soda Paste (for light stains): For slightly tougher, yet still minor, stains, a paste made from baking soda and water can be effective. Apply the paste, let it sit for a few minutes, then gently scrub with a soft brush and rinse. Baking soda is mildly abrasive and alkaline, making it useful without being too harsh.
Tools to Avoid
Just as important as knowing what to use is knowing what to avoid. Harsh tools and chemicals can irreversibly damage your epoxy grout.
- Abrasive Scrubber Pads: Steel wool, scouring pads, or stiff wire brushes can scratch the smooth surface of epoxy grout. This not only makes the grout look dull but also creates microscopic scratches where dirt can settle more easily.
- Acidic or Alkaline Cleaners: Bleach, ammonia, vinegar, and strong bathroom cleaners fall into this category. While great for some surfaces, they can erode the epoxy resin over time, leading to discoloration, stickiness, or a dull finish. I learned this the hard way years ago with a different type of grout. If you need to clean mold from grout, especially cement-based, you might explore specific solutions, but for epoxy, caution is paramount. You can find more information on cleaning grout with hydrogen peroxide for general grout scenarios, but always double-check for epoxy safety first.
- Steam Cleaners (High Pressure): While steam can be effective on some surfaces, high-pressure steam can potentially lift or damage epoxy grout, especially if it’s older or was not installed perfectly. Low-pressure steam might be acceptable, but always test it first.
By sticking to gentle methods and appropriate tools, you can ensure your epoxy grout remains durable and attractive for many years.
Daily Maintenance: Keeping Your Epoxy Grout Pristine
Regular cleaning is the most effective way to keep your epoxy grout looking new. Daily maintenance prevents dirt, grime, and spills from building up and becoming stubborn stains. This simple routine saves you from needing intense deep-cleaning sessions later on. Think of it as a small investment of time that pays off significantly in the long run.
I personally find that a quick wipe-down after use makes a huge difference. This proactive approach is much easier than trying to remove dried-on messes. Consistency is the real secret here.
Simple Steps for Everyday Care
- Wipe Up Spills Immediately: Epoxy grout is stain-resistant, but fresh spills are always easier to clean. Use a damp cloth to blot and wipe away any liquid or food spills as soon as they happen. This prevents them from drying and leaving a residue.
- Sweep or Vacuum Regularly: On floors, loose dirt, dust, and debris can accumulate in grout lines. Regularly sweeping or vacuuming your tiled surfaces helps remove these particles before they become embedded. This simple step prevents abrasive grit from scratching the grout as people walk over it. You can explore how to clean tile grout on floors for more general floor grout cleaning tips, which often apply to epoxy as well.
- Damp Mop or Wipe Down: For general cleaning of floor or wall grout, use a damp mop or cloth with plain warm water. If there’s light grime, add a few drops of mild dish soap. This gentle cleaning removes everyday dirt without harming the epoxy. Always rinse the area with clean water afterward to remove any soap residue.
- Dry Thoroughly: After wet cleaning, especially in showers or bathrooms, ensure the grout dries completely. Using a clean, dry microfiber cloth or allowing good air circulation helps prevent water spots and the growth of mold or mildew in the surrounding areas. While epoxy grout itself resists mold, water standing on its surface can lead to grime accumulation. If you encounter mold issues on other grout types, check out how to clean mold from grout.
These simple daily habits extend the life and beauty of your epoxy grout. They make deep cleaning much less frequent and significantly easier.
Deep Cleaning Your Epoxy Grout: Tackling Tough Grime
Even with regular maintenance, epoxy grout can accumulate stubborn grime over time. High-traffic areas, shower floors, and kitchen backsplashes are particularly prone to this buildup. When daily cleaning isn’t enough, it’s time for a more thorough deep cleaning. This process requires a bit more effort but will restore your grout’s original luster.
Before you begin, ensure the area is well-ventilated. Gather your gentle cleaning solutions and appropriate tools. Remember, patience and persistence are your best allies in deep cleaning.
Step-by-Step Deep Cleaning Process
- Prepare the Area:
- Remove any loose debris by sweeping or vacuuming the tiled surface.
- If cleaning shower grout, ensure the shower is dry.
- For how to clean grout in shower, make sure you are working with a clear space.
- Apply Your Cleaning Solution:
- Mix your chosen pH-neutral cleaner (e.g., commercial epoxy grout cleaner, or a solution of mild dish soap and warm water) according to package directions.
- For a baking soda paste, mix baking soda with just enough water to form a thick consistency.
- Apply the solution generously to the grout lines you plan to clean. You can use a spray bottle for liquid solutions or a small spatula for paste.
- Allow Dwell Time:
- Let the cleaning solution sit on the grout for 5-15 minutes. This “dwell time” allows the cleaner to penetrate and loosen the dirt and grime. Do not let it dry completely.
- For tougher stains, you might extend the dwell time slightly, but never let the solution dry on the surface.
- Gentle Scrubbing:
- Using a soft-bristled brush (a dedicated grout brush works well, but ensure it’s not too stiff), gently scrub the grout lines. Focus on working the bristles into the grout lines to dislodge embedded dirt.
- Avoid scrubbing too aggressively, as this can still cause microscopic scratches, even on epoxy. Let the cleaner do most of the work.
- For areas that need extra attention, like how to clean shower tiles and grout, pay special attention to corners and edges.
- Rinse Thoroughly:
- After scrubbing, rinse the entire area thoroughly with clean, warm water. You can use a clean mop, a sponge, or a spray bottle filled with plain water, followed by wiping.
- It is crucial to remove all cleaning solution residue. Leftover residue can attract more dirt or leave a dull film.
- Dry the Surface:
- Use a clean, dry microfiber cloth to wipe down the grout and tiles.
- Allow the area to air dry completely. Proper drying helps prevent water spots and keeps the grout looking polished.
- For floors, ensure they are completely dry before allowing foot traffic.
Repeat this process for all areas requiring deep cleaning. You might need to repeat steps 3-5 for very stubborn spots. Consistency in technique will yield the best results.
Tackling Stubborn Stains and Mold on Epoxy Grout
While epoxy grout is highly resistant to stains and mold, it’s not entirely immune. Over time, especially in high-moisture environments or areas with heavy spills, some stubborn marks can appear. These might include discoloration from hard water, soap scum buildup, or even surface mold if conditions are right. Addressing these specific issues requires targeted, yet still gentle, approaches.
It’s important to differentiate between actual grout staining and surface discoloration. Often, what appears to be a stain is merely a layer of grime sitting on top of the non-porous epoxy.
Methods for Removing Stubborn Stains
- Baking Soda and Peroxide Paste: For general discoloration or mild stains, a paste of baking soda mixed with hydrogen peroxide can be very effective. Hydrogen peroxide is a mild bleaching agent that breaks down organic matter without being as harsh as chlorine bleach.
- How to use: Mix baking soda with enough 3% hydrogen peroxide to form a thick paste. Apply the paste to the stained areas and let it sit for 10-15 minutes. Gently scrub with a soft-bristled brush, then rinse thoroughly with clean water and dry. If you are interested in how to clean grout with hydrogen peroxide in general, this method applies well.
- Oxygen Bleach (OxiClean): For tougher organic stains (like food spills or mildew), a diluted solution of oxygen bleach (like OxiClean) can work wonders. This product uses oxygen to lift stains and is generally safe for epoxy grout, but always test in an inconspicuous spot first.
- How to use: Mix oxygen bleach powder with warm water according to the product’s instructions to create a paste or solution. Apply it to the stained grout, let it sit for 15-30 minutes, then scrub gently and rinse. For more details on using this specific cleaner, check out how to clean grout with oxiclean.
- Poultice Method for Oil/Grease Stains: For oil-based stains (rare on epoxy, but possible if a spill dries), a poultice can draw out the stain.
- How to use: Mix an absorbent material (like fuller’s earth or talc) with a solvent (like mineral spirits or acetone, used sparingly and cautiously) to form a thick paste. Apply it to the stain, cover with plastic wrap, and tape down the edges. Let it sit for several hours or overnight. Once dry, scrape off the poultice and clean the area with mild soap and water. Test solvents in an hidden spot first.
Dealing with Mold and Mildew
While epoxy grout itself resists mold growth due to its non-porous nature, mold or mildew can sometimes form on the surface if there’s soap scum, dirt, or moisture accumulation. This is typically superficial and easier to remove than mold embedded in porous grout.
- Soap Scum and Mildew Remover (Non-Abrasive): Use a commercial cleaner specifically designed to remove soap scum and mildew, ensuring it is labeled safe for sealed surfaces or epoxy.
- How to use: Spray or apply the cleaner, let it sit for a few minutes (check product instructions), then scrub with a soft brush and rinse thoroughly. Good ventilation is important.
- Diluted Bleach (Last Resort, Extreme Caution): If surface mold is severe and other methods fail, a very diluted bleach solution (1 part bleach to 10 parts water) can be used as a last resort and with extreme caution. Apply only to the affected grout area, let it sit for a very brief time (1-2 minutes), then rinse thoroughly and immediately. Bleach can dull epoxy over time, so use this method sparingly and ensure excellent ventilation. I personally avoid bleach on epoxy grout whenever possible. If you are dealing with grout that has turned black, this severe discoloration usually indicates mold or heavy grime, which might require more robust yet safe cleaning agents.
Always remember to test any cleaning solution in an inconspicuous area first to ensure it does not discolor or damage your epoxy grout. Wear gloves and ensure good ventilation when using any stronger cleaning agents.
Maintaining Epoxy Grout for Long-Term Durability
Cleaning epoxy grout effectively is only half the battle. Long-term maintenance is crucial for preserving its appearance and ensuring its impressive durability. By adopting smart habits and performing periodic checks, you can extend the life of your epoxy grout and keep it looking pristine for many years. Prevention is truly the best form of maintenance when it comes to keeping surfaces clean.
My own experience has taught me that a little proactive care goes a long way. It avoids the need for drastic cleaning measures later.
Tips for Longevity
- Regular Cleaning Schedule: Establish a consistent cleaning routine based on the area’s traffic and exposure to moisture. For showers, a quick wipe-down after each use and a weekly deep clean is ideal. For floors, daily sweeping and weekly damp mopping suffice. This prevents the buildup of soap scum, dirt, and mildew.
- Proper Ventilation: In bathrooms and other high-moisture areas, ensure good ventilation. Use exhaust fans during and after showers or baths. This helps reduce humidity, which can otherwise lead to mold or mildew forming on surfaces, even non-porous ones like epoxy grout. Proper airflow prevents stagnant moisture from accumulating.
- Avoid Harsh Cleaners and Tools: Reiterate the importance of sticking to pH-neutral cleaners and soft-bristled brushes. Harsh chemicals can degrade the epoxy over time, leading to dullness or stickiness. Abrasive tools can scratch the surface, making it more susceptible to dirt adhesion. This is critical for preserving the grout’s original finish and stain resistance.
- Address Spills Promptly: Always wipe up spills on tiled surfaces with epoxy grout as soon as they occur. While epoxy is highly stain-resistant, prolonged exposure to certain substances (like dyes, oils, or highly pigmented liquids) can still leave a residue or superficial mark. Quick action minimizes this risk.
- Inspect and Repair: Periodically inspect your grout lines for any signs of damage, cracking, or deterioration. Although epoxy grout is very durable, extreme impact or improper installation can sometimes lead to issues. If you notice any damage, address it promptly to prevent water infiltration or further degradation. Small repairs can prevent larger problems down the line.
- Consider Matting: In high-traffic entryways or areas prone to water splashes (like in front of sinks or tubs), consider placing mats or rugs. These can help trap dirt and absorb moisture, protecting the grout from excessive wear and tear or water accumulation.
- No Sealing Needed: Unlike traditional cementitious grout which often requires sealing, epoxy grout does not. Its non-porous nature means it is inherently waterproof and stain-resistant from the start. Attempting to apply a sealer can leave a sticky residue on top of the epoxy, attracting dirt. This simplifies maintenance, as you don’t need to worry about re-sealing.
By following these simple maintenance tips, you can ensure your epoxy grout remains a durable, beautiful, and low-maintenance feature of your home for many years to come.
Common Mistakes to Avoid When Cleaning Epoxy Grout
When cleaning any surface, making mistakes can be costly. For epoxy grout, incorrect cleaning methods can lead to a dull finish, surface damage, or even a sticky residue. Many people mistakenly treat epoxy grout like traditional grout, which is a common error. Understanding what not to do is just as important as knowing what to do.
I have seen many instances where good intentions led to damaged grout. Avoiding these common pitfalls will save you time, effort, and potential repair costs.
Pitfalls to Steer Clear Of
- Using Abrasive Cleaners or Tools: This is perhaps the most common mistake. Steel wool, abrasive scrubbing pads, or very stiff wire brushes can scratch the smooth, non-porous surface of epoxy grout. These scratches make the grout look dull and can create tiny crevices where dirt and grime can accumulate more easily. Always opt for soft-bristled brushes or microfiber cloths.
- Applying Acidic or Alkaline Cleaners: Products containing bleach, ammonia, vinegar, or harsh acidic toilet bowl cleaners are detrimental to epoxy grout. While effective on some surfaces, they can chemically react with the epoxy resin, leading to dullness, discoloration, or even breaking down the material over time, leaving a sticky or cloudy residue. Stick to pH-neutral cleaners specifically formulated for tile and grout. You might use vinegar to clean shower with vinegar for tiles, but not for epoxy grout.
- Not Rinsing Thoroughly: Leaving cleaning solution residue on the grout is another frequent error. Any leftover soap or cleaner can dry to form a film that attracts dirt and appears dull. After scrubbing, always rinse the area thoroughly with clean water until all traces of the cleaner are gone.
- Allowing Cleaners to Dry on the Grout: If a cleaning solution dries on the surface before being rinsed, it can leave behind a difficult-to-remove residue or streaks. This is particularly true for stronger cleaners (even pH-neutral ones if highly concentrated). Always work in small sections and rinse promptly.
- Using High-Pressure Steam Cleaners: While some professional-grade steam cleaners can be adjusted to a very low pressure and used cautiously, consumer-grade high-pressure steam cleaners can potentially damage epoxy grout. The high heat and pressure can sometimes loosen the bond or dull the finish. When in doubt, avoid it.
- Ignoring Spillages: Although epoxy grout is very stain-resistant, allowing spills (especially those with strong dyes, oils, or harsh chemicals) to sit for extended periods can still lead to superficial marks or residues that require more effort to remove. Immediate cleanup is always the best defense.
- Not Testing in an Inconspicuous Area: Before applying any new cleaning product or method to a large area, always test it first in a small, hidden spot (e.g., behind a toilet or under a rug). This precaution ensures the cleaner won’t cause discoloration or damage to your specific epoxy grout.
By being mindful of these common mistakes, you can protect your epoxy grout and ensure your cleaning efforts yield fantastic results without any unwanted surprises.
When to Call a Professional for Grout Cleaning
While most epoxy grout cleaning tasks are manageable for homeowners, there are situations where professional help becomes necessary. Knowing when to call in experts can save you time, prevent damage, and ensure your grout looks its best. Sometimes, a problem is beyond simple home remedies.
I always advise homeowners to consider professional help if they feel overwhelmed or notice signs of severe damage. Professionals have specialized tools and knowledge that can address issues safely and effectively.
Signs You Might Need Professional Help
- Deep-Seated Stains or Discoloration You Can’t Remove: If you’ve tried various gentle cleaning methods for stubborn stains (such as deep black marks or color changes from chemical exposure) and they persist, it might indicate a more complex issue. Professionals have access to stronger, yet still safe, commercial-grade cleaners and equipment that can tackle these challenging stains without damaging the epoxy.
- Widespread Haze or Dullness: If your epoxy grout has developed a widespread hazy or cloudy appearance that won’t disappear with regular cleaning, it could be due to chemical residue buildup from improper cleaning products or etching of the epoxy surface. This often requires specialized knowledge to identify the cause and restore the grout’s original luster. Trying to fix it yourself with more harsh chemicals can worsen the problem.
- Mold or Mildew That Recurs Rapidly: While epoxy grout resists mold, persistent or recurring mold growth on the surface, especially if it appears soon after cleaning, might indicate an underlying moisture problem or a need for a more thorough disinfection. Professionals can identify and address the root cause of the mold, ensuring it doesn’t return quickly. For more on persistent mold, consider resources like how to clean mold from grout generally.
- Grout Damage or Deterioration: Although epoxy grout is highly durable, it can be damaged by extreme impact, improper installation, or very harsh chemicals. If you notice cracking, crumbling, pitting, or lifting of the grout, it’s time to call a professional. They can assess the damage and advise on repair or regrouting options. Attempting to repair complex grout damage yourself can lead to further problems.
- Large Areas Requiring Cleaning: For very large tiled areas with extensive epoxy grout (e.g., entire commercial spaces or very big residential floors), professional cleaning services can be more efficient and thorough. They have the equipment to clean large areas quickly and effectively, ensuring consistent results.
- Uncertainty About Cleaning Products: If you’re unsure which cleaning products are safe for your specific type of epoxy grout or if you’re dealing with an unusual stain, a professional can provide expert advice. They can perform a test cleaning and recommend the best course of action.
Calling a professional is an investment in the longevity and appearance of your epoxy grout. They can often achieve results that are difficult or impossible for the average homeowner, providing peace of mind and protecting your valuable surfaces.
Final Thoughts on Maintaining Sparkling Epoxy Grout
Cleaning epoxy grout does not have to be a daunting task. By understanding its unique properties and adopting a consistent, gentle approach, you can maintain its beautiful appearance for many years. Remember, epoxy grout is designed for durability and stain resistance, but it still thrives on proper care. My goal is always to make cleaning simpler and more effective for everyone.
The key takeaways are simple: use mild, pH-neutral cleaners, choose soft tools, and wipe up spills promptly. Regular maintenance is your best defense against stubborn grime and discoloration. Avoid harsh chemicals and abrasive scrubbing, as these can easily damage the non-porous surface you worked so hard to install or preserve. If you are ever unsure about a cleaning method or face a challenging stain, do not hesitate to seek professional advice. Your epoxy grout is a valuable part of your home, and with the right care, it will continue to shine brightly.
FAQ Section
Q1: Can I use vinegar to clean epoxy grout?
A1: No, you should avoid using vinegar on epoxy grout. Vinegar is acidic and can dull the finish of epoxy resin over time. It can also leave a cloudy or sticky residue. Stick to pH-neutral cleaners or mild dish soap solutions for safe and effective cleaning.
Q2: Is sealing necessary for epoxy grout?
A2: No, sealing is not necessary for epoxy grout. Unlike traditional cementitious grout, epoxy grout is inherently non-porous and waterproof. It does not absorb liquids or stains, so applying a sealer would be redundant and could even leave an undesirable film on the surface.
Q3: How often should I clean my epoxy grout?
A3: The frequency of cleaning depends on the area’s use. For high-traffic areas or showers, a quick wipe-down daily and a thorough cleaning weekly or bi-weekly is recommended. For less used areas, monthly deep cleaning might suffice. Regular sweeping or vacuuming is always a good daily practice.
Q4: What if my epoxy grout looks cloudy or hazy?
A4: A cloudy or hazy appearance often results from using improper cleaning chemicals or leaving cleaning residue behind. Try re-cleaning the area thoroughly with warm water and a clean microfiber cloth, rinsing multiple times. If the haze persists, a professional cleaner might be needed to remove built-up residue.
Q5: Can steam cleaning damage epoxy grout?
A5: High-pressure steam cleaning can potentially damage epoxy grout by loosening its bond or dulling its finish. While some low-pressure steam options might be safe, it’s generally best to avoid steam cleaners for epoxy grout to prevent accidental damage. Stick to gentle scrubbing with appropriate cleaning solutions.
- epoxy grout cleaning
- grout care
- tile cleaning
- stain removal
- shower grout maintenance

Todd Martin
Senior Writer
With over 15 years of experience in home renovation and design, I started HEG to share what I’ve learned with homeowners who want to create spaces that are both beautiful and functional. I’ve always believed in a hands-on approach, and over the years, I’ve picked up practical solutions that actually work. Through HEG, I aim to make home improvement more approachable, sharing real tips that help you create a home you truly love.