· Davia Murnell · DIY & Home Improvement · 15 min read
How To Clean Furniture Before Painting
How To Clean Furniture Before Painting: A Step-by-Step Guide
Transforming old furniture with a fresh coat of paint brings new life to any room. However, the secret to a smooth, lasting paint job is not just in the paint itself. It begins with proper preparation. This includes thoroughly cleaning furniture before painting. Skipping this vital step often leads to frustrating results, like peeling paint or an uneven finish.
Cleaning furniture removes hidden grime, dust, and oils that prevent paint from adhering well. Paint needs a clean surface to bond correctly. A good cleaning also reveals any damage or imperfections that you need to address before painting. I will guide you through the essential steps and materials needed. You will learn to properly clean different types of furniture surfaces. This guide ensures your painting project ends with a professional-looking result.
Takeaway:
- Clean furniture thoroughly to ensure paint adhesion.
- Remove all dust, grease, and old finishes.
- Use appropriate cleaners for different furniture materials.
- Rinse and dry surfaces completely before painting.
To clean furniture before painting, first, remove loose dirt with a vacuum or brush. Then, wipe the surface with a degreaser or mild soap and water to eliminate grime and oils. Rinse the furniture thoroughly with clean water, ensuring no residue remains. Finally, allow it to dry completely before applying primer or paint.
Why Cleaning is Crucial for Furniture Painting Success
Starting a furniture painting project brings excitement. We often want to jump straight to the fun part: applying color. However, before you even pick up a brush, you must clean furniture thoroughly. This step is more than just a suggestion; it is the foundation for a successful and durable finish. Imagine painting over a greasy stovetop. The paint would bubble, peel, or simply slide off. Furniture surfaces collect similar invisible contaminants.
Paint needs a clean, stable surface to stick properly. Dust, dirt, grease, old wax, and even invisible hand oils can create a barrier between your furniture and the new paint. If these contaminants remain, your paint will not adhere well. It will likely chip, peel, or scratch off much sooner than it should. A clean surface means the paint forms a strong bond, giving you a finish that looks good and lasts.
Furthermore, cleaning helps reveal the true condition of your furniture. You might discover hidden cracks, dings, or old stains once the surface is clean. Addressing these issues before painting saves you time later. It prevents flaws from showing through your fresh paint coat. A clean base also ensures a smooth, even finish. It avoids texture inconsistencies caused by trapped debris. Investing time in cleaning upfront prevents rework and ensures a beautiful outcome.
Gathering Your Cleaning Tools and Materials
Before you start to clean furniture before painting, you need to collect the right tools and materials. Having everything ready saves time and ensures a smooth process. Proper preparation includes gathering safety gear first. You protect yourself from chemicals and dust with appropriate items. This makes the cleaning process safer and more efficient.
Your basic safety gear should include gloves. These protect your hands from harsh cleaners and dirt. Eye protection, such as safety glasses, is also vital. Cleaning solutions or dust particles can irritate or harm your eyes. Next, gather your cleaning implements. A vacuum cleaner with a brush attachment is excellent for removing loose dust and debris. Stiff brushes are useful for scrubbing stubborn dirt from intricate carvings or textured surfaces. You will also need plenty of clean rags or microfiber cloths for wiping and rinsing.
Regarding cleaning solutions, the type depends on your furniture’s condition. For light dirt, mild dish soap mixed with warm water works well. For greasier surfaces or heavily soiled items, a dedicated degreaser is necessary. Trisodium Phosphate (TSP) is a strong cleaner for extremely dirty or waxy surfaces. Mineral spirits can also remove old wax or oil-based residues. Always read the labels on cleaning products and follow their instructions. Prepare buckets for clean water and cleaning solution. This ensures you do not cross-contaminate. Having all these items ready makes your furniture cleaning task much simpler and more effective.
Initial Assessment and Dry Cleaning Techniques
Before you apply any liquid, you must start with a thorough dry cleaning. This initial assessment and dry cleaning stage removes the bulk of loose dirt. It prepares the surface for deeper wet cleaning. Rushing this step means you are just spreading around surface contaminants later. I always begin by moving the furniture to a well-ventilated area, like a garage or outdoors. This keeps dust out of my home.
First, take a moment to look closely at your furniture. Identify any obvious dirt, cobwebs, or sticky spots. Check for areas where dust has accumulated, especially in corners, crevices, and underneath. A comprehensive visual inspection helps you plan your cleaning approach. Next, grab your vacuum cleaner. Use a brush attachment to gently vacuum every part of the furniture. Pay special attention to cracks, carved details, and the underside. This step removes loose dust, pet hair, and small debris that can scratch the surface during wet cleaning.
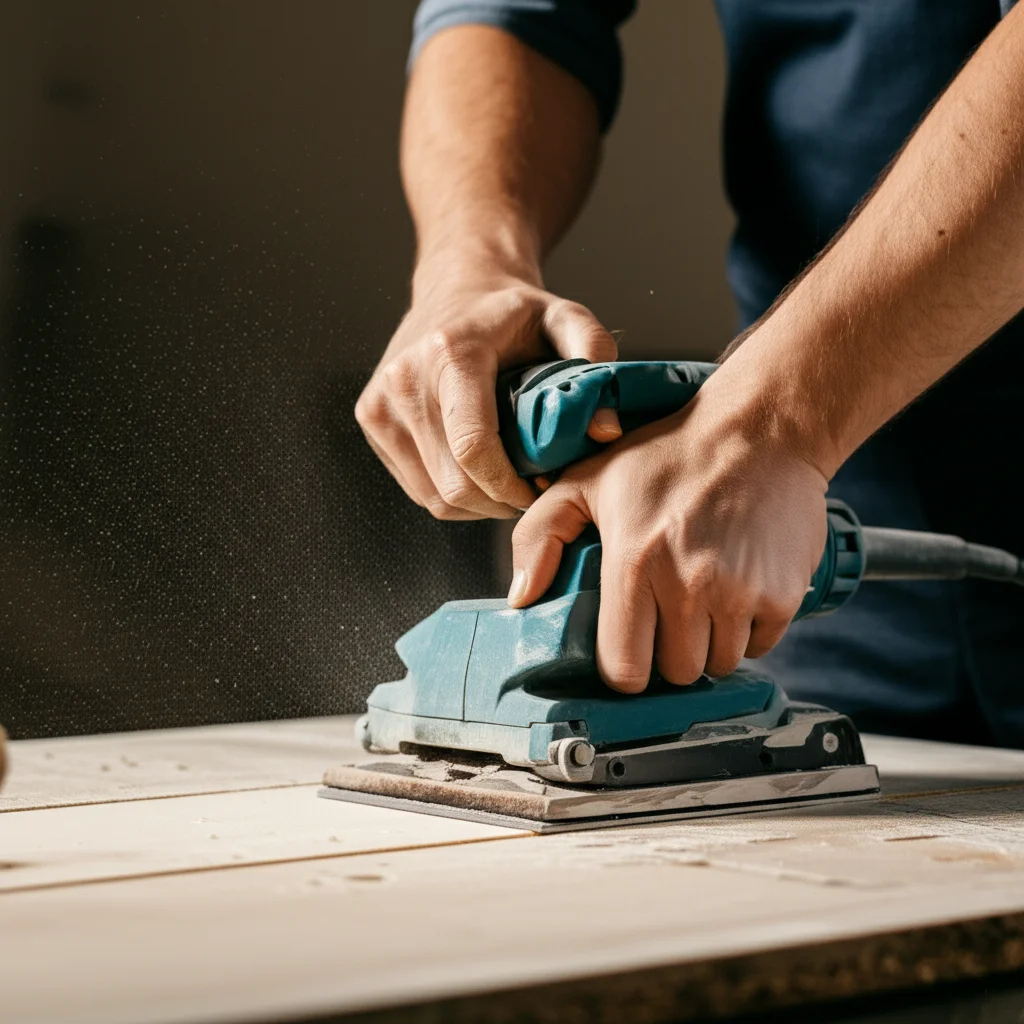
After vacuuming, use a stiff brush or a dry cloth to brush off any remaining loose particles. For a truly clean surface, a light sanding often follows this dry cleaning. Even if you do not plan to heavily sand, a quick scuff with fine-grit sandpaper (180-220 grit) helps. It creates a better “tooth” for the paint to grip. This scuffing also removes minor imperfections and smooths the surface. After sanding, dust removal is critical. Use a tack cloth to pick up all fine dust particles. A tack cloth is sticky and ensures no dust remains on the surface. For detailed guidance, you can learn more about how to clean wood after sanding before painting. This two-step dry cleaning process creates a perfectly prepared canvas for your subsequent wet cleaning.
Deep Cleaning Different Furniture Types and Contaminants
Once you remove loose debris, it is time for deep cleaning. The best approach depends on the type of furniture and the nature of the grime. Different materials react differently to cleaners. Always test your cleaning solution on an inconspicuous area first. This prevents accidental damage to your furniture.
Cleaning Wood Furniture
Wood furniture is common for painting projects. It often collects dust, grease, and old polish. For general dirt and grime, a simple solution of mild dish soap and warm water works well. Dip a soft cloth into the soapy water, wring it out thoroughly, and wipe down the wood. Avoid saturating the wood, as excess moisture can cause damage. For stubborn grease or a waxy buildup, a vinegar solution offers a natural alternative. Mix equal parts white vinegar and water. Wipe the furniture with this solution. For detailed instructions on this method, see how to clean wood furniture with vinegar.
Sometimes, wood furniture has mildew or mold. This requires special attention before painting. Mold indicates moisture issues and must be completely removed to prevent it from growing under your new paint. Use a solution of bleach and water (1 part bleach to 10 parts water) or a specialized mold cleaner. Ensure good ventilation and wear gloves and a mask. For comprehensive instructions, learn about how to clean mold off of wood furniture. For general stains on wood, targeted cleaning may be necessary to ensure an even surface for painting. Explore options for how to clean stains on wood if your piece has stubborn spots.
Cleaning Metal Furniture
Metal furniture, especially outdoor pieces, can accumulate rust, dirt, and oily residues. For typical grime, a degreasing cleaner is often best. Apply it with a sponge or brush, working it into the surface. Rinse thoroughly afterward. If rust is present, you must address it before painting. Light rust can be removed with a wire brush or steel wool. For more severe rust, a rust converter or specialized rust remover may be necessary. Always follow product instructions for these strong chemicals. You can find more specific advice on how to clean metal before painting to ensure proper adhesion.
Cleaning Laminate/MDF Furniture
Laminate and MDF surfaces are less porous than wood. They require a gentler approach. Use a mild all-purpose cleaner or a solution of mild soap and water. Apply it with a damp cloth, making sure not to oversaturate the surface. These materials can swell if they absorb too much water. Wipe clean with a fresh, damp cloth, and dry immediately. Avoid abrasive cleaners or scrubbers that could scratch the surface.
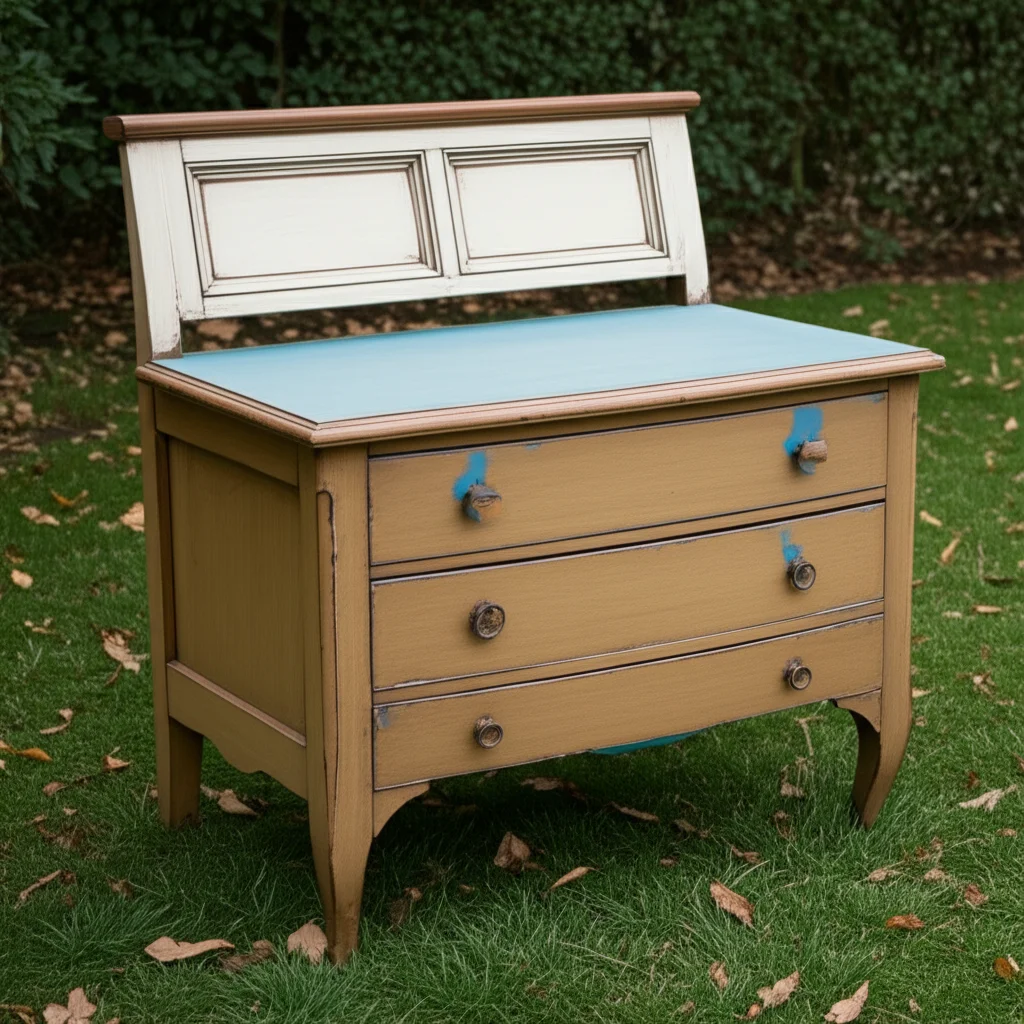
Special Situations: Outdoor and Used Furniture
Outdoor furniture faces unique challenges, like pollen, sap, and heavier dirt accumulation. For outdoor wood, a power washer on a low setting can quickly remove surface grime, but use caution to avoid damaging the wood. For specific types of outdoor furniture, specialized cleaning methods exist. For example, explore how to clean outdoor wood furniture for detailed guidelines on prepping your patio pieces. When working with used furniture, especially antique or thrift store finds, consider potential hidden issues. Some used pieces might carry pests like bed bugs. While cleaning for painting, it is also wise to take precautions for cleanliness beyond just paint adhesion. If you are cleaning a piece from an unknown source, consider steps on how to clean used furniture to prevent bed bugs as part of your overall preparation. This extra step ensures your home remains pest-free.
The Power of TSP and Degreasers for Tough Jobs
Some furniture pieces require more aggressive cleaning than mild soap and water. This is especially true for kitchen cabinets, greasy workshop benches, or heavily soiled vintage finds. In these situations, Trisodium Phosphate (TSP) or a strong degreaser becomes your best friend. These cleaners are powerful and dissolve years of grease, grime, and smoke residue that ordinary cleaners cannot touch. I often turn to these products when I know the surface has a heavy build-up.
TSP is a highly effective, heavy-duty cleaner. It breaks down grease, oil, and various other contaminants. It also dulls glossy surfaces slightly, which helps with paint adhesion. You typically mix TSP powder with warm water according to package directions. Always wear proper safety gear, including gloves and eye protection, when working with TSP. It is an alkaline product and can irritate skin and eyes. Ensure good ventilation in your work area. Apply the TSP solution with a sponge or brush, scrubbing the surface thoroughly. For cleaning items like kitchen cabinets before painting, TSP is often the recommended choice due to its strength in cutting through cooking grease and grime. You can find similar heavy-duty cleaning methods for preparing surfaces in guides like how to clean cabinets before painting.
If you prefer a less harsh chemical, commercial degreasers are also very effective. Many come in spray bottles, making application easy. These products are specifically formulated to break down fats and oils. They are great for furniture that has been in a kitchen or dining area. Spray the degreaser directly onto the surface, let it sit for the recommended time (usually a few minutes), then scrub with a brush or sponge. Just like with TSP, thorough rinsing is critical after using any strong degreaser. Any cleaner residue left on the surface will interfere with paint adhesion. Always follow the product manufacturer’s instructions for mixing, application, and safety precautions. Proper use ensures a truly clean surface ready for painting.
Rinsing and Drying: Don’t Skip These Steps!
You have scrubbed, degreased, and meticulously cleaned your furniture. Now comes two of the most critical, yet often overlooked, steps: rinsing and drying. Skipping or rushing these stages will undermine all your hard work. Any residue from your cleaning solutions can cause significant problems with your paint job. Paint needs a perfectly clean surface to adhere correctly.
After scrubbing with your chosen cleaner, you must rinse the furniture thoroughly. Use a clean cloth or sponge dampened with fresh, clean water. Wipe down every inch of the surface, changing your rinse water frequently. You want to remove all traces of soap, TSP, or degreaser. These chemicals, if left behind, can prevent paint from sticking, cause discoloration, or create a tacky finish. I often rinse a surface two or three times, using a fresh cloth and clean water each time, just to be sure. It is better to over-rinse than to leave residue.
Once rinsed, the furniture must be completely dry before you even think about priming or painting. Moisture is the enemy of paint adhesion. If you paint over a damp surface, the trapped moisture can cause bubbles, peeling, or a weak bond. The paint will not cure properly. The drying time varies based on humidity, temperature, and the amount of water used during cleaning. For most pieces, I recommend allowing at least 24 hours of drying time. Even if the surface feels dry to the touch, moisture can still be lurking within the pores of the wood or other material. Placing the furniture in a well-ventilated area helps speed up the drying process. You can use fans to increase air circulation. Resist the urge to rush this step. A patiently dried piece of furniture ensures your paint job will be durable and beautiful.
Final Inspection and Prep Before Painting
You have cleaned and dried your furniture. The hard part is mostly over. However, one final inspection and a few last preparatory steps are essential. These actions guarantee that your surface is truly ready for paint. It ensures all your previous efforts lead to a flawless finish. I always take a careful look at my project at this stage.
First, conduct a meticulous final inspection of the entire surface. Run your hand over every part of the furniture. Feel for any missed spots, rough areas, or lingering dust. Look closely for any streaks or residue from your cleaning solution that might have dried invisibly. If you find any, repeat the rinsing and wiping steps for those specific areas. Even a tiny piece of debris can show up prominently under a fresh coat of paint.
Next, consider a final light sanding. Even if you sanded before cleaning, a very light scuff with a fine-grit sanding sponge or 220-grit sandpaper can improve adhesion further. This is especially true if the cleaning process raised the grain of the wood. This step also helps to smooth out any minor imperfections or fuzziness that emerged during drying. After this final sanding, it is crucial to remove all the resulting dust. Use a vacuum with a brush attachment, then follow up with a tack cloth. A tack cloth is sticky and will pick up even the finest dust particles that normal cloths miss. This ensures a perfectly dust-free surface.
Finally, ensure your work area is clean and dust-free as well. Dust in the air can settle on your freshly prepped furniture. If you plan to use a primer, apply it now according to the manufacturer’s instructions. Primer provides an ideal base for your paint, enhancing adhesion and covering any remaining minor imperfections. Taking these last few moments for a final inspection and dust removal will significantly impact the quality and durability of your painted finish. You are now ready to paint!
FAQ Section
Do I really need to clean furniture before painting?
Yes, absolutely. Cleaning furniture before painting is critical. It removes dirt, grease, dust, and old finishes that prevent paint from sticking properly. Skipping this step leads to peeling, chipping, or an uneven finish. A clean surface ensures strong paint adhesion and a durable, professional-looking result.
What is the best cleaner for wood furniture before painting?
The best cleaner depends on the level of grime. For light dirt, mild dish soap and warm water work well. For greasy or waxy buildup, a 50/50 white vinegar and water solution is effective. For heavily soiled or smoke-damaged pieces, Trisodium Phosphate (TSP) or a strong degreaser is recommended. Always rinse thoroughly.
Can I use dish soap to clean furniture before painting?
Yes, you can use mild dish soap and warm water for lightly soiled furniture. Dish soap is good for removing general dirt and some oils. Make sure to use only a small amount of soap. It is crucial to rinse the furniture very thoroughly with clean water afterward to remove all soap residue. Any leftover soap can hinder paint adhesion.
How long should furniture dry after cleaning before painting?
Furniture should dry completely after cleaning, which typically takes at least 24 hours. The exact time depends on humidity levels, temperature, and how much water you used. Even if the surface feels dry to the touch, moisture can be trapped inside the material. Adequate drying prevents paint bubbling or peeling.
What if there’s mold on the furniture?
If your furniture has mold, you must remove it completely before painting. Mold indicates moisture, and painting over it will trap the mold, allowing it to grow. Use a solution of 1 part bleach to 10 parts water or a specialized mold cleaner. Ensure good ventilation, wear gloves and eye protection, and allow the furniture to dry fully after treatment.
Do I need to sand after cleaning?
Often, a light sanding after cleaning is recommended. Even after thorough cleaning, a quick scuff with fine-grit sandpaper (like 220-grit) helps create a “tooth” for the paint to grip. This improves adhesion and can smooth any raised wood grain caused by wet cleaning. Always remove all sanding dust with a tack cloth before painting.
Conclusion
Preparing your furniture for painting is an art and a science. It relies heavily on proper cleaning. We have explored why this step is non-negotiable. We also covered the tools you need and how to tackle different types of dirt and furniture materials. From initial dry cleaning to the critical rinsing and drying stages, each step contributes to a flawless finish. Taking the time to properly clean furniture before painting truly pays off.
Remember, a successful paint job is not just about the color. It is about the foundation beneath it. By diligently cleaning your furniture, you ensure excellent paint adhesion. You prevent future chipping and achieve a smooth, durable surface. This investment in preparation saves you time and effort in the long run. Now, armed with this knowledge, you are ready to transform your furniture with confidence. Go ahead, start your project, and enjoy the beauty of a well-prepared and perfectly painted piece!
- furniture cleaning
- furniture painting prep
- DIY furniture
- surface preparation
- wood cleaning

Davia Murnell
Room Cleaning Expert
Before joining HEG, I spent over a decade running my own window cleaning business, where I perfected streak-free techniques and learned the ins and outs of specialty glass care. Now, I bring that expertise to a broader mission—helping homeowners maintain sparkling windows and beautiful outdoor spaces. From skylights and sliding doors to patio glass and outdoor furniture, I believe every surface deserves attention and care. I share practical tips and proven methods that make even the toughest cleaning jobs feel manageable. Whether you're battling pollen on the porch or smudges on high windows, I’m here to help you see your home in a whole new light—literally.