· Todd Martin · DIY & Home Improvement · 22 min read
How To Sand A Table With An Electric Sander
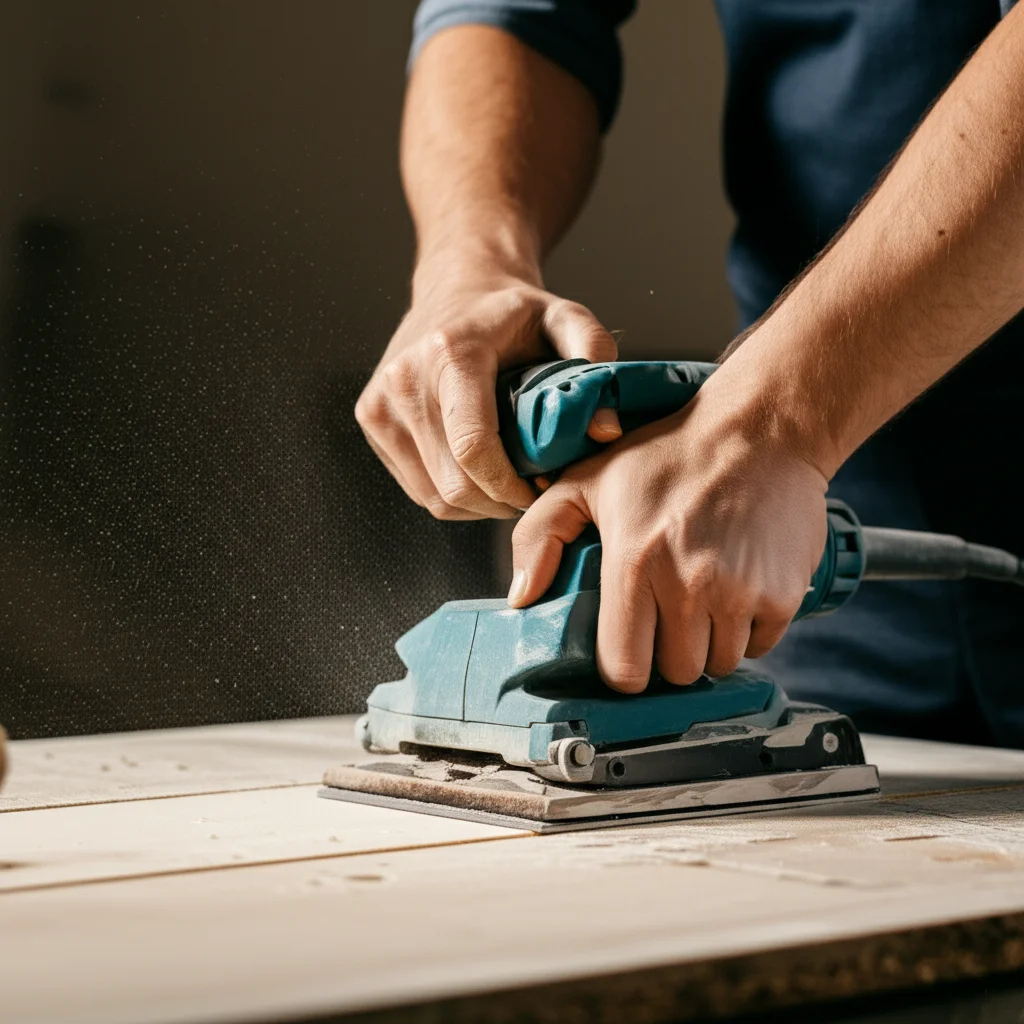
Smooth Tabletop Finish: Sanding with an Electric Sander
Have you ever looked at an old, scratched, or dull table and wished you could bring it back to life? You are not alone. Giving a table a fresh look can transform a whole room. Learning how to sand a table with an electric sander is a key skill for any DIY enthusiast.
Sanding prepares the wood for new finishes, like stain or paint. It removes imperfections and opens up the wood grain. An electric sander makes this job much easier and faster than hand sanding. In this article, I will guide you through every step. We will cover choosing the right sander, preparing your workspace, and achieving a beautiful, smooth surface. Get ready to revitalize your furniture!
Takeaway
Sanding a table with an electric sander gives a smooth, professional finish.
- Choose the right sander and sandpaper grits for your project.
- Prepare the table by cleaning and making minor repairs.
- Sand systematically, starting with coarse grit and moving to fine.
- Clean the table thoroughly after sanding to remove all dust.
To sand a table with an electric sander, you first clean the table and choose the correct sander type and sandpaper grits. Start with a coarse grit to remove old finishes and imperfections, then progressively move to finer grits for a smooth surface. Always work with the wood grain, apply even pressure, and clean dust between grit changes.
Choosing the Best Electric Sander for Your Table Project
Picking the right electric sander is the first important step. Different sanders work best for different tasks. Knowing which one to use makes your sanding job much easier and gives better results. I want you to feel confident in your choice.
Random Orbital Sander: Your Go-To Tool
For sanding a table, a random orbital sander is usually your best friend. This tool moves its pad in small circles while also spinning it. This random action helps prevent swirl marks on your wood. Swirl marks can be very visible after applying a finish, so avoiding them is key.
Random orbital sanders are versatile and easy to control. They use round sandpaper discs that attach with hook-and-loop fasteners. This makes changing grits quick and simple. They also often have a dust collection bag or port, which helps keep your workspace cleaner. This feature is very useful when working indoors.
Other Useful Sanders
While the random orbital sander is primary, other types might be helpful. A belt sander removes a lot of material quickly. It is good for very rough tables or for leveling uneven surfaces. However, belt sanders can be aggressive. They can remove too much wood if you are not careful. I mostly use them for initial heavy stripping or leveling work. You can learn more about using one effectively by reading How To Use A Belt Sander On A Table Top.
A detail sander (or mouse sander) is small and has a triangular pad. It is perfect for reaching tight corners and intricate areas. If your table has detailed legs or carvings, a detail sander will be very useful. It cannot cover large areas quickly, but it shines in precision work.
A sheet sander (or orbital finishing sander) uses quarter sheets of standard sandpaper. It vibrates in small orbital patterns. These are good for fine finishing work. They are also useful for sanding flush against edges, which a random orbital sander might struggle with. Consider your table’s design when deciding if you need more than one sander type.
Essential Tools and Materials for Effective Sanding
Before you start any sanding project, you need to gather your tools and materials. Having everything ready saves time and ensures a smooth process. You do not want to stop in the middle of a project because you forgot something important. I always make a checklist before I begin.
Safety First: Personal Protective Equipment (PPE)
Your safety is the most important thing. Sanding creates a lot of dust, which is harmful to breathe. It also creates noise and fine particles that can irritate your eyes.
- Dust Mask or Respirator: Always wear a good quality dust mask or respirator. This protects your lungs from fine wood dust and old finish particles. A N95 mask is a good minimum.
- Safety Glasses: Wear safety glasses or goggles to shield your eyes. Flying dust or debris can cause serious eye injuries.
- Hearing Protection: Electric sanders can be loud, especially when used for long periods. Earplugs or earmuffs protect your hearing.
- Gloves (Optional but Recommended): While not always necessary, thin work gloves can help protect your hands from splinters and vibration.
Sandpaper Grits: The Key to a Smooth Finish
Sandpaper comes in different grits, which refers to the size of the abrasive particles. Lower numbers mean coarser grit, and higher numbers mean finer grit. You will need a range of grits to achieve a smooth finish.
- Coarse Grits (60-80 grit): Use these for removing old paint, varnish, deep scratches, or significant imperfections. They aggressively strip away material.
- Medium Grits (100-120 grit): After the coarse grit, move to medium. This removes the scratches left by the coarser paper and starts to smooth the surface.
- Fine Grits (150-180 grit): These grits are for refining the surface. They prepare the wood for staining or painting. They leave the wood very smooth to the touch.
- Very Fine Grits (220 grit and up): If you want a super smooth surface, especially for a clear coat finish, use 220 grit. For very specific, specialized finishes, you might even go higher, but 220 is often sufficient for most tables.
Other Important Supplies
- Cleaning Supplies: You will need a clean cloth, a shop vac, and tack cloths. Tack cloths are sticky cloths that pick up very fine dust. For initial cleaning, especially if your table is very dirty, you may also need a general wood cleaner. Learn how to clean a wood table properly before sanding for better results.
- Pencil: A pencil helps you track your progress. You will use it to mark the table surface between sanding steps.
- Wood Filler (if needed): For small holes or cracks, wood filler can be applied before sanding.
- Sanding Blocks (for hand sanding details): Sometimes, an electric sander cannot reach every spot. A simple sanding block wrapped with sandpaper will help you get into corners or around intricate carvings.
Having these items ready will make your sanding project efficient and safe.
Preparing Your Table for Electric Sanding
Proper preparation is crucial for a successful sanding job. You cannot just grab your sander and start. A little effort at this stage saves a lot of headaches later. I always take my time with preparation steps. This makes the entire project smoother.
Clean the Table Thoroughly
First, clean your table very well. Any dirt, grease, or grime on the surface can clog your sandpaper. It can also scratch the wood if trapped under the sander. Use a mild detergent solution and a damp cloth to wipe down the entire table. For stubborn grime or sticky spots, a specialized wood cleaner might be needed. Make sure the table is completely dry before you start sanding. This is a critical step. A clean surface helps your sandpaper last longer and gives a more even result. You can find useful tips on how to clean your dining table thoroughly before starting the sanding process.
Make Necessary Repairs
Now is the time to address any damage. Look for dents, gouges, or deep scratches.
- Minor Dents: For small dents, you can often “steam” them out. Place a damp cloth over the dent and apply a hot iron briefly. The steam causes the wood fibers to swell, lifting the dent. Be careful not to burn the wood.
- Holes and Cracks: Use wood filler for larger holes or cracks. Choose a wood filler that matches the wood’s color if you plan to stain it. If you are painting, color matters less. Apply the filler according to the product directions, usually with a putty knife. Let it dry completely.
Do not try to sand over large imperfections. Sanding will only highlight them or make them worse. Address them before you even turn on the sander. If you have any super glue spills on your wood table, make sure to remove them before sanding. Here’s a guide on how to get super glue off of a wood table.
Protect Your Workspace
Sanding creates a lot of dust, even with a sander that has dust collection. This dust will get everywhere if you do not prepare your area.
- Move Furniture: Clear the room of any other furniture or items you do not want covered in dust. If you cannot move them, cover them with plastic sheeting.
- Ventilation: Work in a well-ventilated area. Open windows and doors. If possible, set up a fan to blow air away from your face and out an exit. This helps clear the dust from the air.
- Drop Cloths: Lay down drop cloths or old sheets on the floor and over any nearby surfaces. This will catch the bulk of the dust. It makes cleanup much easier. I always find a designated “sanding zone” in my garage or outside to contain the mess.
Taking these steps ensures a safer, cleaner, and more effective sanding experience.
Step-by-Step Electric Sanding Process for a Smooth Finish
Now that your table is prepped and your tools are ready, it is time to start sanding. Remember to work systematically. Rushing through the steps can lead to an uneven finish. I find breaking it down into smaller parts makes the job less daunting.
Starting with Coarse Grit: Removing Old Finishes
Begin with your coarse sandpaper, typically 60 or 80 grit. This is the stage for removing old paint, varnish, deep scratches, or any significant surface imperfections.
- Attach the Sandpaper: Securely attach the coarse grit sandpaper to your electric sander. Make sure it is flat and centered.
- Turn On the Sander: Hold the sander firmly, just above the table surface. Turn it on before making contact with the wood.
- Start Sanding: Gently lower the running sander onto the table. Apply light, even pressure. Do not press down hard; let the sander do the work.
- Work in Sections: Move the sander in slow, overlapping passes. For a random orbital sander, move it randomly, but ensure you cover the entire surface evenly. For a belt sander, move it with the wood grain.
- Check Your Progress: After covering an area, lift the sander (while it is still running) and check the surface. You want to see the old finish gone and a uniform dullness.
- Pencil Test: Draw light pencil lines across the entire surface of the table. These lines will act as a guide. When you sand, continue until all the pencil marks are gone. This tells you that you have sanded that area evenly.
- Dust Removal: After using the coarse grit, use a shop vacuum to remove all the sanding dust from the table and your workspace. Then, wipe the table with a tack cloth. This step is crucial before moving to the next grit. Any leftover coarse dust can create new scratches when you use finer sandpaper.
Progressing to Finer Grits: Achieving Smoothness
Once you have removed all old finishes and imperfections with coarse grit, move to the next finer grit. This is typically 100 or 120 grit. The goal here is to remove the scratches left by the previous, coarser paper.
- Change Sandpaper: Replace the coarse grit paper with the medium grit (100 or 120).
- Repeat Sanding Process: Follow the same sanding technique: light, even pressure, overlapping passes, and cover the entire surface.
- Pencil Test Again: Apply new pencil lines across the table. Sand until all these new lines disappear. This confirms you have removed the previous grit’s scratch pattern.
- Clean Dust: Vacuum and wipe with a tack cloth thoroughly.
- Continue to Finer Grits: Repeat this process for each subsequent grit (150, then 180, and finally 220, if desired). Each time, use new pencil lines and ensure they are completely gone before moving to the next finer grit. Always clean the table well between each grit change. This method builds a progressively smoother surface, ensuring no visible scratches remain from the coarser papers.
This systematic approach is how you get a truly professional and smooth finish on your table.
Sanding Tricky Areas and Table Details
Not all tables are perfectly flat and simple. Many tables have legs, curves, edges, or decorative carvings. These areas require a different approach than the flat tabletop. You cannot always use your main electric sander for these parts. I often find myself switching tools for these details.
Corners and Edges: Precision Sanding
Corners can be a challenge for random orbital sanders due to their round pads.
- Detail Sander (Mouse Sander): For sharp, tight corners, a detail sander is ideal. Its triangular pad can fit into spaces that a random orbital sander cannot reach. Use it carefully, following the shape of the corner.
- Hand Sanding with a Block: For extremely tight corners or edges, hand sanding is often the best option. Wrap a piece of your current grit sandpaper around a small sanding block or a piece of wood. Use consistent, even strokes. This gives you precise control. Always sand with the grain of the wood to prevent cross-grain scratches.
- Table Edges: For the table edges, you can use your random orbital sander or sheet sander. Be careful to keep the sander flat against the edge to avoid rounding it over too much unless that is your desired effect. You can also use a sanding block for controlled edge sanding.
Legs and Carvings: Manual Finesse
Table legs, especially those with intricate turnings or carvings, cannot be sanded effectively with a large electric sander. This is where patience and hand sanding come into play.
- Sanding Strips: Cut sandpaper into narrow strips. You can wrap these strips around a dowel or use them to “shoe shine” around curved areas. This technique is effective for cylindrical legs or curved elements.
- Foam Sanding Pads: These flexible pads conform to irregular shapes. They are great for gently sanding curved or molded profiles without flattening them. They come in various grits, similar to sandpaper.
- Sanding Sponges: Similar to foam pads, sanding sponges are versatile for curved surfaces. They are durable and can be washed and reused.
- Fine Files or Rasps (for very rough areas): In some cases, if old finish is deeply caked into carvings, you might need a fine file or rasp to carefully remove the bulk before sanding. Use these with extreme caution to avoid damaging the wood.
When sanding these detailed areas, always work gently. Take your time to ensure even removal of material without altering the original shape or design. Consistent pressure and working with the grain remain important principles. Cleaning dust from these intricate areas is also vital to prevent cross-contamination of grits.
Post-Sanding Cleanup and Preparing for Finish
You have put in all the hard work sanding your table. Now, the final steps before applying a new finish are crucial. Proper cleanup ensures a pristine surface, ready to absorb stain or paint evenly. Skipping these steps can ruin all your efforts. I always make sure these last steps are done perfectly.
Thorough Dust Removal
Even with a sander that has dust collection, fine dust particles will remain on your table surface and in the surrounding air. These particles must be removed completely.
- Vacuum First: Use a shop vacuum with a brush attachment to vacuum the entire table surface. Make sure to get into any crevices, corners, and the underside of the table. Dust can hide everywhere.
- Wipe Down with Damp Cloth (Optional, but good for paint): For some finishes, especially paint, a very lightly damp cloth can be used. Wipe the table down to pick up any remaining dust. Ensure the cloth is barely damp and the table dries quickly. Do not use this method if you plan to stain immediately, as water can raise the grain.
- Tack Cloth: The most important tool for final dust removal is a tack cloth. These are sticky cloths that pick up microscopic dust particles that the vacuum might miss. Gently wipe the entire surface of the table with a tack cloth, folding it to expose a fresh surface as it picks up dust. Do not press hard, as this can transfer residue from the tack cloth to the wood.
- Compressed Air: For very intricate carvings or hard-to-reach spots, a can of compressed air or an air compressor can blow out dust from tight areas. Make sure to do this in a well-ventilated area, as it will kick up dust.
Ensure the table is completely dust-free before moving on. Run your hand over the surface; it should feel perfectly smooth and clean.
Inspect the Surface
After cleaning, carefully inspect the entire table surface. Look for:
- Missed Spots: Are there any areas you accidentally skipped?
- Remaining Scratches: Do you see any scratches from coarser grits that were not fully removed? Hold the table up to a light source at an angle to see scratches more clearly.
- Old Finish Residue: Is there any old finish clinging to the grain or in corners?
If you find any imperfections, go back and re-sand those specific areas with the appropriate grit. It is better to fix them now than to see them highlighted by a fresh coat of finish.
Conditioning the Wood (Optional, for Staining)
If you plan to stain your table, wood conditioner is often a good idea, especially for soft or porous woods like pine, maple, or birch. Wood conditioner helps the wood absorb stain more evenly, preventing blotchiness.
- Apply Conditioner: Follow the product instructions. Usually, you apply a generous coat with a brush or cloth.
- Allow Penetration: Let it soak into the wood for the recommended time (often 5-15 minutes).
- Wipe Excess: Wipe off any excess conditioner before it dries.
Once these final cleanup and preparation steps are complete, your table is perfectly ready for its new stain, paint, or clear protective finish. You have transformed it into a blank canvas.
Troubleshooting Common Sanding Issues
Even with careful preparation, you might run into a few issues when sanding a table. Do not worry; most common problems have simple solutions. Knowing what to look for and how to fix it will save you frustration and lead to a better finish. I have learned to recognize these issues over time.
Swirl Marks: The Orbital Sander’s Signature Problem
Swirl marks are circular scratches left behind by random orbital sanders. They are usually faint but become very visible once you apply a stain or clear coat.
- Cause: Swirl marks often happen when you:
- Do not remove all dust between grit changes. Coarse dust particles can get caught under finer sandpaper.
- Apply too much pressure to the sander.
- Do not let the sander reach its full speed before touching the wood.
- Stop the sander on the wood surface instead of lifting it while it is running.
- Solution:
- Thorough Cleaning: Always vacuum and use a tack cloth diligently between each grit change. This is critical.
- Light Pressure: Let the sander’s weight and action do the work. Do not push down.
- Start/Stop Off Wood: Always turn the sander on or off while it is lifted slightly off the surface.
- Re-sand: If you see swirl marks, go back to the previous grit (the one that should have removed them, or even one grit coarser if they are deep) and re-sand the affected area carefully. Then, proceed through the finer grits again, cleaning thoroughly each time.
Uneven Sanding or Missed Spots
Sometimes, you might find areas that are less smooth, or where the old finish still lingers.
- Cause: This usually happens from inconsistent pressure or not overlapping your sanding passes enough. It can also happen when you rush.
- Solution:
- Systematic Approach: Ensure you are making slow, deliberate, overlapping passes. Do not skip areas.
- Pencil Test: Always use the pencil test. If you can still see pencil marks, you have not sanded that area evenly enough with that grit.
- Re-sand: Go back to the appropriate grit for the imperfection. If it is an area with old finish, use a coarser grit. If it is just unevenness in smoothness, use the last grit you were on and work it until it blends.
Sandpaper Clogging or Wearing Out Too Quickly
If your sandpaper stops cutting or looks covered in gunk, it is clogging.
- Cause: Old finishes (especially paint or varnish) or excessive dust can clog the abrasive particles on the sandpaper. Applying too much pressure can also cause heat build-up and clog.
- Solution:
- Change Paper Often: Sandpaper is relatively inexpensive. Change it frequently, especially when removing old finishes. A fresh piece of paper cuts much better.
- Proper Pressure: Light pressure prevents excessive heat and clogging.
- Dust Collection: Ensure your sander’s dust collection system is working properly. Empty the bag or canister regularly.
By understanding these common issues and how to fix them, you can achieve a truly beautiful, smooth finish on your table. Patience and attention to detail are your best allies in sanding.
Maximizing Your Table’s Longevity After Sanding
Sanding is only the first step in giving your table a new lease on life. To truly make it shine and protect your hard work, you need to apply a suitable finish. This final layer protects the wood and enhances its beauty. Choosing the right finish is just as important as the sanding itself. I always consider how the table will be used when selecting a topcoat.
Applying a Protective Finish
There are many types of finishes, each offering different levels of protection and aesthetic qualities.
- Stain: If you want to change the color of the wood while still showing the grain, use a wood stain. Apply stain evenly with a brush or cloth, let it penetrate for the recommended time, and then wipe off the excess. Always test stain on an inconspicuous area first.
- Varnish/Polyurethane: These are clear protective coatings that offer excellent durability. They create a hard, protective layer on the wood surface. Polyurethane is very popular for tables due to its resistance to water, scratches, and heat. Apply thin, even coats with a brush, roller, or spray gun. Always allow sufficient drying time between coats and light-sand with a very fine grit (like 320 or 400) between coats for better adhesion and a smoother final feel.
- Oil Finish: Oil finishes, like Danish oil or tung oil, penetrate into the wood rather than sitting on top. They enhance the natural beauty of the wood and provide a more natural, tactile feel. They offer less protection against spills and scratches than polyurethane but are easier to repair. Apply multiple thin coats, wiping off excess after each application.
- Paint: If you want a solid color, paint is your best option. After sanding, prime the table (especially if it is bare wood or had a dark stain). Then apply thin, even coats of paint. Lightly sand between coats with 220-grit sandpaper for a smooth finish.
Always follow the manufacturer’s instructions for any finish you choose. Proper application ensures the best results and maximum protection.
Regular Maintenance for Lasting Beauty
Once your table is finished, ongoing care will keep it looking great for years.
- Routine Cleaning: Regularly wipe your table with a soft, damp cloth to remove dust and light spills. For deeper cleaning, use a wood-safe cleaner. Avoid harsh chemicals or abrasive scrubbers. Learning how to clean wooden table surfaces is a key part of maintenance.
- Protect from Heat and Moisture: Use coasters for drinks and hot pads for dishes. This prevents water rings, heat damage, and stains.
- Avoid Scratches: Use placemats or table cloths for added protection, especially during meals or activities that might scratch the surface.
- Re-application of Finish: Over time, finishes can wear down. Depending on the type of finish and how much the table is used, you might need to re-apply a protective coat every few years. Oil finishes might need more frequent re-oiling, while polyurethane can last many years.
By finishing your table properly and maintaining it regularly, you extend its life and keep it looking beautiful. You will enjoy your revitalized table for a very long time.
FAQ Section
What type of electric sander is best for sanding a table?
A random orbital sander is generally best for sanding tables. Its random action helps prevent swirl marks and leaves a smooth finish. For very rough tables or for leveling, a belt sander can be used initially. A detail sander is good for corners and intricate areas.
What grit sandpaper should I start with for a table?
Start with 60 or 80 grit sandpaper if you are removing old paint, varnish, or deep scratches. If the table is already bare wood and mostly smooth, you can start with a medium grit like 100 or 120. Always progress through finer grits (150, 180, 220) for a smooth finish.
How do I avoid swirl marks when sanding with an electric sander?
To avoid swirl marks, always clean the table thoroughly between grit changes to remove dust. Apply light, even pressure, letting the sander do the work. Turn the sander on and off while it is lifted off the wood surface, and avoid stopping the sander on the wood.
Do I need to sand new, bare wood before applying a finish?
Yes, it is important to sand new, bare wood. Even new wood can have minor imperfections or mill marks. Sanding opens the wood grain, which helps stains and finishes absorb evenly. Start with 120 or 150 grit and progress to 220 grit for a smooth surface.
Can I sand a table with a veneer top?
You can sand a table with a veneer top, but extreme caution is necessary. Veneer is a very thin layer of wood. Use only fine grits (180 or 220) and apply very light pressure. Over-sanding can quickly sand through the veneer, exposing the underlying core material.
How do I know when the table is sanded enough?
The table is sanded enough when it feels uniformly smooth to the touch, and all visible scratches from previous grits are gone. The “pencil test” is helpful: draw light pencil lines across the surface; if all lines are gone after sanding, you have covered that area evenly with that grit.
Conclusion
Sanding a table with an electric sander is a rewarding project that can transform old, worn furniture into beautiful, functional pieces. By following the steps I have outlined, you can achieve a professional, smooth finish. We covered everything from selecting the right electric sander and necessary supplies to meticulous preparation, the step-by-step sanding process, handling tricky areas, and vital post-sanding cleanup.
Remember, patience and attention to detail are your greatest assets. Take your time with each grit, clean thoroughly between steps, and you will be amazed at the results. A freshly sanded table is a blank canvas, ready for your chosen finish to truly bring out its character. Now you have the knowledge and confidence to tackle your next furniture restoration project. Go ahead, give that table a new life!
- electric sander
- table sanding
- wood refinishing
- DIY furniture
- furniture restoration
- sanding tips

Todd Martin
Senior Writer
With over 15 years of experience in home renovation and design, I started HEG to share what I’ve learned with homeowners who want to create spaces that are both beautiful and functional. I’ve always believed in a hands-on approach, and over the years, I’ve picked up practical solutions that actually work. Through HEG, I aim to make home improvement more approachable, sharing real tips that help you create a home you truly love.