· Todd Martin · Grill Care · 22 min read
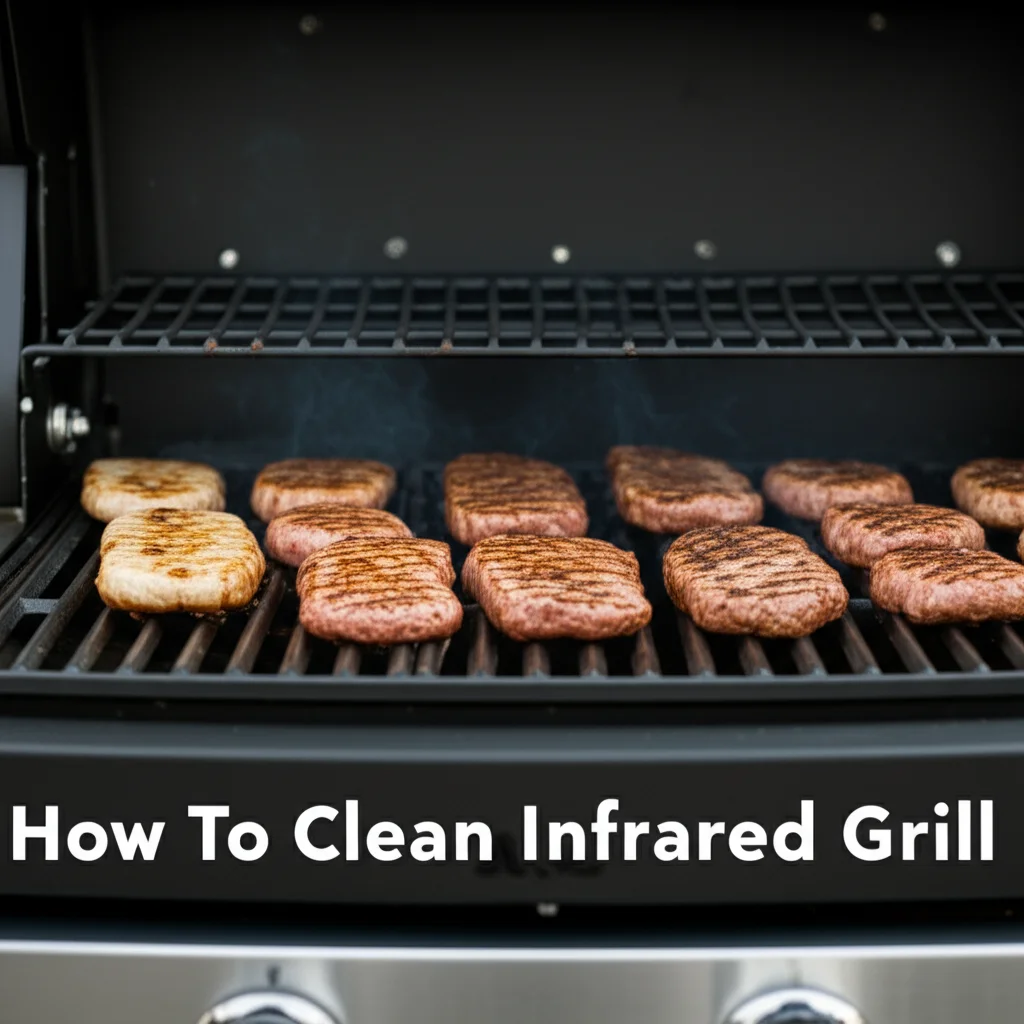
How To Clean Grill Rescue

How To Clean Grill Rescue: Your Ultimate Guide
Cleaning your grill can feel like a chore, especially when stubborn food sticks to the grates. Many grill owners turn to innovative tools like Grill Rescue to make the job easier and safer. This unique cleaning tool uses steam to remove grime without wire bristles. But once you have used it, you might wonder: How do you clean the Grill Rescue itself? Keeping your Grill Rescue clean is important for its effectiveness and lifespan.
This guide will tell you how to properly care for your Grill Rescue. We will cover why cleaning this tool matters and give you simple, step-by-step instructions. You will also learn about common mistakes to avoid and how to keep your Grill Rescue ready for its next use. Let us get your grilling gear spotless.
Takeaway
- Clean Immediately After Use: The most effective time to clean your Grill Rescue is right after you finish grilling, while the grill is still hot.
- Utilize Heat for Steam: The core of cleaning Grill Rescue involves using the grill’s heat to create steam, which activates the cleaning pad.
- Remove and Wash Pads: Regularly detach the cleaning pads and wash them thoroughly, either by hand or in a washing machine.
- Air Dry Completely: Always allow the Grill Rescue pads to air dry fully before storage to prevent mold or mildew growth.
- Inspect for Wear: Periodically check the pads for signs of wear and replace them when they are no longer effective.
How do you clean a Grill Rescue?
You clean Grill Rescue by first using its own steam action on hot grill grates. Then, you remove the cleaning head’s pad. You can wash this pad by hand with soap and water or toss it into a washing machine for a deeper clean. Proper drying ensures it lasts longer.
Understanding Your Grill Rescue Tool
The Grill Rescue tool changed how many people clean their grills. It is different from traditional wire brushes. Instead, it uses a unique cleaning head and steam power. This design helps protect your grill grates. It also prevents wire bristles from breaking off.
Knowing how your Grill Rescue works helps you clean it better. The tool has a handle and a replaceable cleaning head. This head has a special heat-resistant fiber pad. When you dip this pad in water and place it on a hot grill, it creates steam. This steam lifts off burnt food and grease. You move the pad across the grates, and the steam loosens debris. The fibers then wipe the grates clean. This method is effective for various grill grate materials, including cast iron and stainless steel. Proper care of this tool means focusing on its core components.
What Makes Grill Rescue Different?
Grill Rescue stands out because it does not use metal bristles. This is a big safety advantage. Wire bristles can break off and get into your food. Grill Rescue prevents this risk entirely. It uses a high-temperature resistant foam and fiber pad instead.
This pad is designed to get wet and then interact with the hot grill. The steam generated cleans the grates thoroughly. It works on many types of grates, like how to clean stainless steel grill grates or even delicate how to clean porcelain grill grates. The tool offers a safer and often more effective cleaning experience. This innovation makes grilling more enjoyable.
Components of Your Grill Rescue
Your Grill Rescue tool has a few main parts. Understanding these parts helps you maintain it. First, there is the handle. This handle is usually made from durable plastic or metal. It provides a comfortable grip while you clean.
Next is the cleaning head. This part connects to the handle. It holds the replaceable cleaning pads. These pads are the most important part of the tool. They are made from a special material that withstands high heat. The pads are absorbent and create the steam needed for cleaning. They are also designed to scrub off debris. Knowing these parts helps you when it is time to clean or replace them.
The Importance of Cleaning Your Grill Rescue
You clean your grill after every use, but what about the tool that cleans it? Cleaning your Grill Rescue is just as important. A clean cleaning tool works better. It also lasts longer. Neglecting to clean your Grill Rescue can lead to issues.
Dirt and grease from your grill can build up on the cleaning pad. This buildup makes the pad less effective. It also becomes less hygienic. You do not want to spread old food particles onto your freshly cooked meals. Proper cleaning keeps your Grill Rescue performing at its best. It ensures a safe and clean cooking surface every time you grill.
Maintaining Optimal Cleaning Performance
A clean Grill Rescue pad means better cleaning performance. Over time, grease and charred food particles accumulate on the pad. This residue reduces its ability to absorb water and create steam. A dirty pad also cannot effectively scrub your grill grates.
Regular cleaning helps the pad maintain its texture and absorbency. This ensures it creates strong steam for lifting grime. It also means the fibers can properly wipe the grates clean. Think of it like a sponge; a dirty sponge cleans less effectively. Keeping your Grill Rescue pad clean maintains its power. This helps you keep your grill sparkling.
Preventing Buildup and Contamination
Cleaning your Grill Rescue is important for hygiene. Each time you use it, the pad picks up food bits, grease, and carbon. If you do not clean it, these contaminants stay on the pad. This can lead to bacteria growth. You might also transfer old grime back to your grill.
This is especially important if you are grilling different types of food. For example, if you grill chicken, you want to ensure the grill is clean before grilling vegetables. A dirty Grill Rescue can make this harder. Cleaning prevents the spread of old food particles. It ensures a hygienic surface for all your meals. This simple step keeps your grilling safe and clean.
Extending the Lifespan of Your Tool
Proper cleaning also helps your Grill Rescue last longer. The cleaning pads are designed for many uses, but abuse shortens their life. Leftover grease and food can harden on the pad. This makes the fibers stiff and less effective. It can also cause the material to break down faster.
Regular washing keeps the fibers soft and pliable. It prevents excessive wear and tear. You get more uses out of each replacement pad. This saves you money in the long run. Taking good care of your tool ensures it remains a valuable part of your grilling kit for years.
Step-by-Step Guide: How to Clean Grill Rescue Pads
Cleaning your Grill Rescue pads is a straightforward process. You have a few options, depending on how deep a clean you need. The key is to act quickly after grilling. This prevents grime from hardening. I have found that a warm pad is easier to clean.
Here are the best ways to clean your Grill Rescue pads. We will start with the immediate post-grilling cleaning. Then we will move to more thorough methods. Following these steps helps keep your Grill Rescue in top shape.
Immediate Post-Grilling Cleaning
The best time to clean your Grill Rescue pad is right after you finish grilling. The grill is still hot. This heat helps activate the steam power of the Grill Rescue. You can use this to clean the pad itself.
- Dip in Water: Dunk the Grill Rescue pad into a bucket of water. Ensure it is fully saturated. I like to use a small bucket of warm water next to my grill.
- Scrub Hot Grates: Bring the wet pad back to the hot grill. Use it to scrub the grates one last time. This motion helps dislodge loose food particles from the pad. It also creates a final burst of steam, which self-cleans the pad somewhat.
- Wipe Down: Give the pad a few good wipes on a clean, dry section of the grill or a designated rag. This removes excess moisture and loose debris. This immediate step prevents most food from sticking.
This initial clean is quick and effective for everyday use. It keeps the pad from getting excessively dirty between washes.
Hand Washing Your Grill Rescue Pads
For a deeper clean, especially after a heavy grilling session, hand washing is a great option. This method allows you to focus on stubborn spots. I often hand wash my pads when I see significant grease buildup.
- Detach the Pad: Carefully remove the cleaning pad from the Grill Rescue head. It usually slides off or unclips easily. Make sure the pad is cool to the touch before handling.
- Rinse Under Warm Water: Hold the pad under warm running water. Squeeze it repeatedly to flush out loose debris. You will see black water running off; this is normal.
- Apply Dish Soap: Put a small amount of dish soap directly onto the wet pad. Dish soap is excellent at cutting through grease.
- Work into a Lather: Rub the pad against itself or use your hands to work the soap into a good lather. Focus on areas with noticeable grease or char. You can also use a soft brush if needed, but usually, your hands are enough.
- Rinse Thoroughly: Rinse the pad under warm water again. Continue squeezing and rinsing until all soap residue is gone and the water runs clear.
- Squeeze Out Excess Water: Firmly squeeze the pad to remove as much water as possible. This speeds up drying time.
Hand washing is effective for regular maintenance. It keeps the fibers clean and prevents odors.
Machine Washing Your Grill Rescue Pads
For the easiest and most thorough clean, you can machine wash your Grill Rescue pads. This is my preferred method for convenience. I usually throw them in with a load of dark towels or rags.
- Detach the Pad: Just like with hand washing, remove the pad from the Grill Rescue head.
- Pre-Rinse (Optional): If the pad is very dirty, give it a quick rinse under warm water first. This removes large chunks of food.
- Place in Washing Machine: Put the cleaning pad into your washing machine. You can wash it with other dark laundry. Do not use bleach, as this can damage the fibers.
- Use Mild Detergent: Add your regular laundry detergent. Avoid harsh chemicals or fabric softeners. Fabric softeners can reduce the pad’s absorbency.
- Select Cycle: Choose a warm or hot water cycle. A regular or heavy-duty cycle works well. I often use a “towels” setting if my machine has one.
- Run Wash Cycle: Start the washing machine and let it complete the cycle.
- Remove and Prepare for Drying: Once the cycle finishes, remove the clean pad from the washing machine.
Machine washing is great for a deep clean. It gets rid of tough grease and odors effectively.
Proper Drying Techniques
Drying your Grill Rescue pads correctly is just as important as washing them. Improper drying can lead to mildew, odors, or damage. Air drying is the best method.
- Air Dry Completely: After washing, always allow the pads to air dry fully. Do not put them in a dryer. The high heat from a clothes dryer can damage the special fibers and foam within the pad. It can cause them to shrink or deform.
- Hang or Lay Flat: You can hang the pad from a line or lay it flat on a clean, dry surface. Ensure good air circulation around the pad. A clothesline or a drying rack works perfectly.
- Check for Dryness: Make sure the pad is completely dry before storing it. A damp pad can develop mildew or an unpleasant smell. I usually let mine dry overnight or for at least 24 hours.
Proper drying keeps your pads fresh and ready for the next grilling adventure. It also prevents any unpleasant surprises when you go to use them next.
Advanced Grill Rescue Cleaning Tips
Sometimes your Grill Rescue pad needs a little extra attention. Stubborn stains or lingering odors can happen. These advanced tips can help you tackle those tougher cleaning challenges. They ensure your pad stays fresh and effective. I have tried these methods when my pads seemed extra dirty after a long grilling season.
Tackling Stubborn Grease and Char
Even with regular cleaning, some grease and char might cling to the pad. For these tough spots, you need a stronger approach.
- Soaking Method: Fill a basin with hot water and add a generous amount of dish soap. Submerge the Grill Rescue pad in the soapy water. Let it soak for at least 30 minutes, or even a few hours for very stubborn residue. The hot water and soap will help loosen the hardened grease.
- Degreasing Agent: For really tough grease, a dedicated degreasing spray or a solution of how to clean grease from oven cleaner (diluted according to instructions) can work wonders. Spray it on the affected areas of the pad, let it sit for a few minutes, then scrub and rinse thoroughly. Always test a small, inconspicuous area first.
- Vinegar Soak: White vinegar is a natural degreaser and deodorizer. Mix equal parts white vinegar and warm water in a bowl. Soak the pad in this solution for an hour. Then, rinse it very well. This helps break down grease and neutralize odors. This can also be helpful if you are thinking about how to clean mold with vinegar.
Always ensure you rinse the pad completely after using any strong cleaning agents. You want no residue left behind.
Deodorizing Your Grill Rescue Pads
After many uses, your Grill Rescue pad might start to smell a bit. This is common due to absorbed grease and food particles. Deodorizing is simple.
- Baking Soda Paste: Make a thick paste with baking soda and a small amount of water. Spread this paste over the damp pad. Let it sit for 30 minutes to an hour. Baking soda is excellent at absorbing odors. Rinse the pad thoroughly afterward.
- Vinegar Rinse: After washing, give the pad a final rinse in a solution of one part white vinegar to four parts water. The vinegar helps to kill odor-causing bacteria. Do not worry; the vinegar smell will dissipate as the pad dries.
- Sunlight Exposure: After washing, place the damp pad in direct sunlight for a few hours. Sunlight has natural antibacterial properties and can help to air out the pad, removing any lingering smells. Make sure to flip it so both sides get sun.
These methods will leave your Grill Rescue pad smelling fresh and clean.
When to Replace Your Grill Rescue Pad
Even with the best cleaning practices, Grill Rescue pads do not last forever. Knowing when to replace them is important. This ensures optimal cleaning power and safety.
- Visible Wear and Tear: Look for signs of significant fraying, tearing, or thinning of the pad material. If the foam core is exposed or falling apart, it is time for a new one.
- Reduced Effectiveness: If the pad no longer cleans your grill grates as effectively as it used to, even after a thorough wash, its cleaning power might be depleted. It might not be generating enough steam or scrubbing properly.
- Hardening or Stiffness: If the pad feels consistently hard or stiff even after wetting, its material might be degraded. A good pad should remain relatively soft and pliable when wet.
- Persistent Odors: If strong, unpleasant odors persist even after deep cleaning and deodorizing, it is a sign that bacteria or deeply embedded residues are present, and a new pad is needed.
Grill Rescue replacement pads are readily available. Replacing them ensures you always have the best cleaning performance. I usually keep a spare set on hand, especially during grilling season.
Best Practices for Grill Rescue Maintenance
Beyond cleaning the pads, proper maintenance of the entire Grill Rescue tool is key. This includes storage and general care. Following these best practices will extend the life of your tool. It will ensure it is always ready for use. I always make sure my grill tools are in good shape before I put them away.
Proper Storage After Cleaning
Storing your Grill Rescue correctly is crucial. This prevents damage and keeps it hygienic.
- Ensure Dryness: The most important rule is to ensure the cleaning pad is completely dry before storage. Storing a damp pad will lead to mildew and a foul smell. This can also damage the pad material.
- Ventilated Area: Store the Grill Rescue in a well-ventilated area. Avoid damp, enclosed spaces like sheds or grill cabinets if they lack airflow. A garage or pantry shelf often works well.
- Protect from Elements: If storing outdoors near your grill, ensure it is protected from rain and direct sunlight. A grill cover can offer some protection. Direct sun can degrade the materials over time.
- Hang or Place Neatly: Many Grill Rescue tools have a loop for hanging. Hanging it allows for better air circulation and keeps it off dirty surfaces. If you cannot hang it, place it neatly on a clean shelf. This prevents it from getting crushed or damaged.
Proper storage prevents damage and keeps your tool hygienic.
Regular Inspection and Care
Periodically inspect your entire Grill Rescue tool. This helps catch small issues before they become big problems.
- Check the Handle: Look at the handle for cracks, loose parts, or signs of wear. Ensure it feels sturdy in your hand. A damaged handle can make cleaning difficult and unsafe.
- Inspect the Head Connection: Check where the cleaning head connects to the handle. Make sure it is secure and not wobbly. If it is designed to be detachable, ensure the locking mechanism works properly.
- Examine the Pad Attachment: Look at how the pad attaches to the cleaning head. Is it still secure? Does it slide on and off easily, or is it getting stuck? This ensures the pad stays put during vigorous scrubbing.
- Clean the Handle: Wipe down the handle and the rigid parts of the cleaning head with a damp cloth. This removes any grease or grime that might accumulate. A mild soap solution can be used for extra cleaning.
- Lubricate (If Applicable): Some moving parts on certain tools might benefit from a very light application of food-grade lubricant. This is rare for Grill Rescue but worth considering for any tool with moving parts.
Regular inspection helps you identify when parts need attention or replacement. This prolongs the life of your entire tool.
Preventing Common Cleaning Mistakes
Avoiding common mistakes will help you get the most out of your Grill Rescue. I have made some of these mistakes myself, and learned from them.
- Not Cleaning Soon Enough: The biggest mistake is letting the pad sit dirty for too long. Dried-on grease is much harder to remove. Clean the pad immediately after use while the grill is still hot.
- Using Harsh Chemicals: Avoid using bleach, abrasive cleaners, or strong solvents on your Grill Rescue pad. These can damage the special fibers and reduce the pad’s effectiveness. Stick to dish soap or mild detergents.
- Machine Drying: Never put your Grill Rescue pads in a clothes dryer. The high heat can melt or deform the material. Always air dry them completely.
- Not Fully Drying: Storing a damp pad is a recipe for mold and mildew. Always ensure the pad is bone dry before putting it away. This takes time, but it is worth it.
- Scrubbing Too Hard: While Grill Rescue is durable, excessive scrubbing with the pad itself, especially on rough surfaces, can cause premature wear. Let the steam do the work.
- Ignoring Wear and Tear: Do not try to make a pad last too long. If it is showing significant signs of wear, replace it. A worn-out pad is ineffective and can leave residues.
By avoiding these mistakes, you ensure your Grill Rescue stays effective and durable. This makes grill cleaning less of a hassle.
Beyond the Grill Rescue: Keeping Your Grill Clean
Cleaning your Grill Rescue is part of a larger grill maintenance routine. A clean grill tool works best on a grill that receives regular care. Keeping your entire grill clean means better tasting food and a longer lasting appliance. I always make sure my whole grill is clean, not just the grates.
Maintaining Your Grill Grates
Grill grates are where the magic happens, so keep them clean. Different grate materials need specific care.
- After Every Use: Clean your grates while they are still hot, just like with Grill Rescue. The heat helps to carbonize food residue, making it easier to scrape off. Your Grill Rescue tool excels at this.
- Material Specifics:
- Cast Iron Grates: After cleaning, season them with cooking oil to prevent rust. How to clean cast iron grill grates often involves hot water and a light oil coating.
- Stainless Steel Grates: These are durable. You can clean them with soap and water or a specialized grill cleaner. How to clean stainless steel grill typically involves mild abrasives if needed.
- Porcelain or Ceramic Grates: Be gentle. These coatings can chip. Avoid abrasive brushes. Your Grill Rescue is ideal for these. Learn more about how to clean ceramic grill grates for specific tips.
- Deep Cleaning: Periodically, remove the grates for a deeper clean. Soak them in hot, soapy water. Scrub with a non-abrasive brush or pad.
- Preventing Rust: Keep grates dry when not in use. Use a grill cover to protect them from moisture. For rusty grates, check out how to clean rusty grill grates.
Clean grates mean better heat distribution and less food sticking.
Cleaning Other Grill Components
The grates are not the only part of your grill that gets dirty. Other components need attention too.
- Flavorizer Bars/Heat Deflectors: These sit below the grates. They catch drippings and vaporize them to add flavor. Scrape off any carbonized buildup. Check for rust and replace if heavily corroded.
- Burner Tubes: For gas grills, inspect the burner tubes for clogged holes. Use a stiff wire or a dedicated burner brush to clear them. This ensures even flame distribution. Learn more about how to clean burners on gas grill.
- Grease Tray/Drip Pan: This collects excess grease. Clean it regularly to prevent grease fires and odors. Line it with foil for easier cleanup.
- Lid and Exterior: Wipe down the grill lid and exterior regularly. Use a mild degreaser for stubborn stains. For black grills, check out how to clean outside of black grill.
- Inside of the Lid: The inside of the lid often collects black flakes. This is carbonized grease, not paint. Scrape it off with a plastic scraper or a stiff brush.
A full grill clean ensures efficiency and safety.
Dealing with Mold on Your Grill
Sometimes, especially after periods of non-use, mold can grow on grill grates. This is more common in humid climates. Do not panic; it is usually easy to clean.
- Heat It Up: The easiest way to kill mold is to heat your grill to a high temperature. Turn on all burners and close the lid. Let it run for 15-20 minutes. The high heat will burn off any mold.
- Scrub Thoroughly: After heating, use your Grill Rescue or another effective brush to scrub the grates thoroughly. Remove all the burnt mold residue. You can also use a solution of vinegar and water for scrubbing if the mold is very pervasive.
- Deep Clean: For a very moldy grill, consider removing the grates and soaking them in hot, soapy water with a bit of bleach (if safe for your grate material) or vinegar. Then scrub them clean. Learn more about how to clean mold off grill.
- Prevention: To prevent mold, ensure your grill is completely dry before covering it or storing it. Keep it in a well-ventilated area.
Mold on a grill is unsightly but usually not harmful once removed. Proper cleaning kills it and makes your grill safe again.
Frequently Asked Questions
How often should I clean my Grill Rescue pad?
You should clean your Grill Rescue pad after every use, at least with a quick immediate clean. For a deeper wash, aim for every 2-3 uses or whenever you see significant grease buildup. Machine washing every few weeks, or after heavy grilling sessions, is ideal to keep it fresh and effective.
Can I put my Grill Rescue pad in the dishwasher?
No, it is not recommended to put your Grill Rescue pad in the dishwasher. The high heat and harsh detergents in dishwashers can damage the special fibers and foam of the pad. It can cause the material to break down or warp. Stick to hand washing or machine washing for best results.
What should I do if my Grill Rescue pad smells bad after cleaning?
If your Grill Rescue pad still smells bad after cleaning, it means odors are deeply embedded. Try soaking it in a solution of equal parts white vinegar and warm water for an hour. You can also make a baking soda paste, spread it on the damp pad, and let it sit before rinsing thoroughly. Ensure it fully air-dries.
How do I know when it’s time to replace the Grill Rescue pad?
Replace your Grill Rescue pad when you see visible wear like fraying, tearing, or significant thinning. If the pad no longer cleans effectively, feels stiff, or retains persistent odors even after deep cleaning, its lifespan is over. Keeping a new pad handy ensures continuous high performance.
Can I use my Grill Rescue on a cold grill?
Grill Rescue is designed to work on a hot grill. The heat from the grill activates the water in the pad, creating steam, which is the key to its cleaning power. Using it on a cold grill will not generate steam and will not clean effectively. Always use it on a grill that has been heated.
Are Grill Rescue pads safe for all grill grates?
Yes, Grill Rescue pads are designed to be safe for all types of grill grates. This includes cast iron, stainless steel, porcelain, and ceramic. The soft, non-abrasive fibers prevent scratching or damage to the grate’s surface, unlike traditional wire brushes. It offers a gentle yet effective clean.
Conclusion
Cleaning your Grill Rescue tool is a simple yet essential step in maintaining your grilling setup. By understanding how the tool works and following the right cleaning and maintenance practices, you ensure it performs effectively every time. From immediate post-grilling wipes to thorough machine washes and proper drying, each step contributes to the longevity and hygiene of your Grill Rescue.
Remember, a clean Grill Rescue means cleaner grill grates and a safer cooking experience. Do not let stubborn grease build up on your cleaning tool. Keep your Grill Rescue pristine. This dedication helps you enjoy delicious meals without the worry of old grime or ineffective cleaning. Get ready to enjoy perfectly grilled food every time.
- Grill Rescue cleaning
- grill maintenance
- clean grill grates
- grill cleaning tool
- steam cleaning

Todd Martin
Senior Writer
With over 15 years of experience in home renovation and design, I started HEG to share what I’ve learned with homeowners who want to create spaces that are both beautiful and functional. I’ve always believed in a hands-on approach, and over the years, I’ve picked up practical solutions that actually work. Through HEG, I aim to make home improvement more approachable, sharing real tips that help you create a home you truly love.