· Todd Martin · Home Maintenance · 19 min read
How To Clean Hinges On Doors
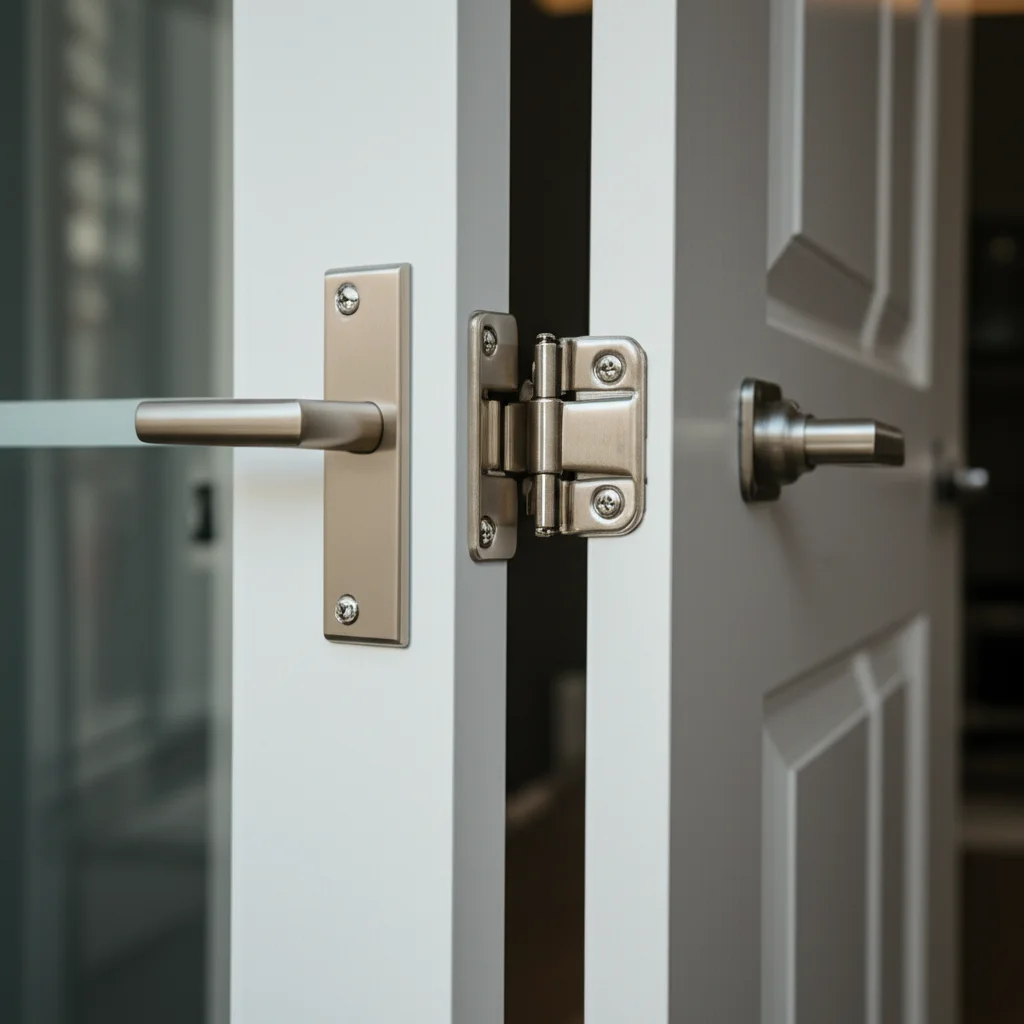
Restore Your Door Hinges: A Guide on How To Clean Hinges On Doors
Are your doors squeaking, sticking, or looking a bit dingy around the hinges? Over time, door hinges collect dust, dirt, grime, and even paint drips. This buildup can affect how your doors function and detract from their overall appearance. Knowing how to clean hinges on doors properly ensures they work smoothly and look their best.
Cleaning your door hinges is a simple task that makes a big difference in your home’s comfort and aesthetics. A well-maintained hinge extends the life of your doors and prevents irritating noises. In this comprehensive guide, I will walk you through the process of cleaning door hinges, from light dusting to deep rust removal. We will cover necessary tools, various cleaning methods, and important maintenance tips. Get ready to transform your doors into silent, smoothly operating fixtures.
Takeaway
- Gather essential tools like screwdrivers, cleaning solutions, and cloths before starting.
- Decide whether to clean hinges in place for light dirt or remove them for deep cleaning.
- Use appropriate cleaning agents based on the hinge material and the type of grime.
- Address specific issues like rust, paint, and squeaks with targeted solutions.
- Lubricate hinges after cleaning to ensure smooth, silent operation.
A Quick Answer to Your Query
To clean door hinges, first assess if removal is needed. For light dirt, wipe with a damp cloth. For heavy grime or rust, remove the hinge, scrub with a wire brush, and use a suitable cleaner like vinegar or specialized rust remover. Always lubricate hinges after cleaning for best performance.
Why Clean Door Hinges? Understanding the Benefits
Door hinges play a vital role in your home’s functionality. They allow doors to open and close smoothly. Over time, these hard-working components accumulate various forms of dirt and debris. This buildup affects their performance and appearance.
Dirt, dust, and grime can lodge in the hinge’s moving parts. This causes friction and leads to annoying squeaks. Paint drips can also dry on hinges, restricting movement and making them look unsightly. Rust, especially on older or outdoor hinges, can severely impede function and damage the metal. Regular cleaning prevents these issues. Clean hinges operate quietly and smoothly. They also extend the lifespan of your doors and hinges. Furthermore, clean hinges improve the overall cleanliness and aesthetic of your home. A small cleaning effort provides significant benefits.
Gathering Your Hinge Cleaning Arsenal: Essential Tools and Supplies
Before you begin cleaning your door hinges, gather all necessary tools and supplies. Having everything ready saves time and ensures a smooth cleaning process. The specific items you need depend on how dirty your hinges are and whether you plan to remove them.
Basic cleaning supplies include a soft cloth, warm water, and mild dish soap. For tougher grime or rust, you will need more specialized items. A screwdriver is essential if you plan to remove the hinges. Safety gear, like gloves, protects your hands from cleaning solutions. Having the right tools makes the job easier and more effective.
Tools and Supplies You Might Need:
- Screwdriver: A Phillips head or flathead, depending on your hinge screws.
- Soft cloths or rags: For wiping and drying.
- Small brush: An old toothbrush or a stiff-bristled brush for scrubbing tight spots.
- Wire brush or steel wool: For removing stubborn rust or paint.
- Bucket or small container: For mixing cleaning solutions or soaking hinges.
- Pliers: To remove stubborn hinge pins.
- Safety gloves: To protect your hands from chemicals.
Cleaning Solutions:
- Warm water and dish soap: Good for light dirt and grease.
- White vinegar: Excellent for dissolving grime, rust, and mineral deposits. You can learn more about how vinegar helps with cleaning by checking out our guide on how to clean with vinegar and baking soda.
- Baking soda: A gentle abrasive, especially when mixed with vinegar or water.
- Rust remover: For heavy rust (ensure it’s safe for your hinge material).
- Mineral spirits or paint stripper: For removing dried paint.
- Lubricant: Such as silicone spray, graphite, or household oil (e.g., 3-in-One oil, WD-40).
Cleaning Door Hinges Without Removing Them: Quick Solutions
Sometimes, you do not need to remove your door hinges for cleaning. If your hinges have only light dust, grime, or minor squeaks, an in-place cleaning method is perfect. This approach saves time and effort. It is ideal for routine maintenance or quick touch-ups.
This method involves wiping down the visible parts of the hinge and applying lubricant. It is a great way to keep your doors functioning well without much disruption. You avoid the hassle of taking the door off its frame. This method is also suitable for hinges that are difficult to remove. For a detailed guide on this specific approach, consider reading how to clean door hinges without removing them.
Steps for In-Place Cleaning:
- Wipe Down: Use a damp soft cloth to wipe away any visible dust or dirt on the hinge surfaces. You can dampen the cloth with warm water and a drop of mild dish soap.
- Scrub Crevices: Dip an old toothbrush into your soapy water solution. Gently scrub around the hinge pin and the plates. Focus on areas where dust and grime tend to accumulate.
- Address Minor Squeaks: After cleaning, apply a small amount of lubricant to the top of the hinge pin. Work the door back and forth several times to allow the lubricant to penetrate.
- Dry Thoroughly: Use a clean, dry cloth to wipe off any excess moisture or lubricant. Ensure no residue remains.
This quick cleaning method keeps your hinges looking good and prevents minor issues from becoming bigger problems. I often use this method for my interior doors during my weekly cleaning routine. It keeps them quiet and clean with minimal effort.
Deep Cleaning Door Hinges: Removal and Restoration
When hinges are heavily soiled, rusted, or covered in paint, a deep cleaning method is necessary. This involves removing the hinges from the door. While it takes more effort, removing the hinges allows for thorough cleaning and restoration. This process ensures every part of the hinge is clean and functional.
Deep cleaning is especially important for how to clean old metal hinges. Old hinges often accumulate layers of grime, rust, or old paint that superficial cleaning cannot address. Removing them lets you soak them in cleaning solutions, use more aggressive scrubbing, and inspect them closely for damage. Always support the door or remove it from the frame before detaching the hinges to prevent accidents.
Steps for Deep Cleaning:
- Remove the Door (Optional but Recommended): For easier access and safety, remove the door from its frame. Place it on sawhorses or a protected floor. This step prevents the door from swinging unexpectedly.
- Remove Hinge Pins: Use a hammer and a nail punch or a flathead screwdriver to tap the hinge pins out from the bottom. Place a cloth under the hinge to catch the pin and protect the floor.
- Unscrew Hinges: Once the pins are out, use a screwdriver to remove the hinge leaves from both the door and the door frame. Keep the screws organized so you can easily reattach them.
- Soak Hinges: For heavily soiled or rusty hinges, soak them in a cleaning solution.
- For dirt and grime: Soak in warm water with strong dish soap for several hours or overnight.
- For rust: Soak in white vinegar for several hours or overnight. The acetic acid in vinegar helps dissolve rust.
- For paint: Soak in mineral spirits or a specialized paint stripper according to product instructions. Be cautious with paint strippers, as they can be harsh.
- Scrub Thoroughly: After soaking, use a stiff brush or a wire brush to scrub away loosened dirt, rust, or paint. For stubborn areas, steel wool can be effective.
- Rinse and Dry: Rinse the hinges thoroughly under running water to remove all cleaning solution and debris. Dry them completely with a clean cloth. Any remaining moisture can lead to rust.
- Inspect and Lubricate: Inspect hinges for any damage. Apply a lubricant to the hinge pin and barrel. This ensures smooth operation when reinstalled.
- Reinstall Hinges: Screw the hinge leaves back onto the door and frame. Reinsert the hinge pins, tapping them gently into place. Rehang the door if you removed it.
This deep cleaning process brings new life to your door hinges. I find it especially satisfying when tackling old, neglected doors. The transformation is remarkable.
Tackling Specific Hinge Issues: Rust, Paint, and Squeaks
Door hinges face various specific challenges beyond general dirt. Rust, dried paint, and persistent squeaks are common problems that require targeted solutions. Addressing these issues not only improves the hinge’s function but also enhances its appearance. Knowing the right approach for each problem is key.
These problems often stem from neglect or environmental factors. Rust forms due to moisture exposure. Paint drips occur during renovations. Squeaks indicate a lack of lubrication or debris. My aim is to provide practical, effective methods for each issue. We can restore your hinges to their optimal condition.
Removing Rust from Door Hinges
Rust is a common issue for metal hinges, especially in humid environments. Removing it is crucial for both aesthetics and function.
- Disassemble: Remove hinges from the door. Detach hinge pins.
- Soak: Place rusty hinges in a container filled with white vinegar. Ensure hinges are fully submerged. Let them soak overnight. For severe rust, extend soaking time.
- Scrub: After soaking, use a wire brush, steel wool, or an old toothbrush to scrub off the softened rust. The vinegar should have loosened most of it.
- Rinse and Dry: Rinse hinges thoroughly with water. Dry them immediately and completely to prevent new rust from forming.
- Lubricate: Apply a rust-inhibiting lubricant to protect the metal.
Removing Paint from Door Hinges
Dried paint on hinges can be unsightly and restrict movement. This happens frequently during painting projects.
- Disassemble: Remove hinges from the door. Paint removal is easier when hinges are separate.
- Scrape (Carefully): Use a plastic scraper or a dull knife to gently scrape off loose paint. Be careful not to scratch the hinge.
- Soak in Stripper: For stubborn paint, soak hinges in a paint stripper designed for metal. Follow product instructions carefully. Work in a well-ventilated area.
- Scrub: Use a stiff brush or wire brush to remove the softened paint. An old toothbrush can reach tight spots.
- Clean Residue: Wipe hinges with mineral spirits or a clean cloth to remove any stripper residue.
- Rinse and Dry: Rinse thoroughly and dry completely.
- Lubricate: Apply a light lubricant to restore smooth movement.
Silencing Squeaky Door Hinges
A squeaky door is one of the most common and annoying hinge problems. It usually indicates a lack of lubrication.
- Identify the Squeak: Pinpoint which hinge is squeaking. Sometimes it’s more than one.
- Lubricate In-Place: Lift the door slightly to relieve pressure on the hinges. Apply a few drops of lubricant directly to the top of the hinge pin. Work the door back and forth several times to distribute the lubricant.
- Remove Pin for Better Access (Optional): If the squeak persists, remove the hinge pin. Clean any gunk off the pin and inside the hinge barrel with a cloth.
- Apply Lubricant to Pin: Coat the entire hinge pin with lubricant before reinserting it.
- Test: Open and close the door a few times. The squeak should disappear. If it doesn’t, repeat the lubrication process or consider deeper cleaning.
I find that a quick squirt of silicone spray usually does the trick for squeaky hinges. It’s an instant fix that makes a big difference.
Cleaning Different Hinge Materials: Brass, Stainless Steel, and Painted
Door hinges come in various materials, each requiring a slightly different cleaning approach. Using the correct method for your specific hinge material prevents damage and ensures an effective clean. Common hinge materials include brass, stainless steel, and painted finishes. Understanding these differences helps maintain the integrity and appearance of your hardware.
Improper cleaning can dull finishes, remove protective coatings, or even corrode the metal. My goal is to guide you in preserving the beauty and functionality of your hinges. I will provide material-specific advice for each type.
Cleaning Brass Hinges
Brass hinges are popular for their elegant, warm appearance. They can tarnish over time, losing their luster.
- Mild Cleaning: For light tarnish and dirt, mix warm water with a few drops of mild dish soap. Wipe hinges with a soft cloth dipped in this solution.
- Polishing: To restore shine, use a brass polish. Apply a small amount to a soft cloth and rub gently. Follow product instructions.
- Natural Method: A paste of lemon juice and baking soda can also clean and polish brass. Apply, let sit for a few minutes, then rub gently and rinse thoroughly.
- Dry Completely: Always dry brass hinges thoroughly after cleaning to prevent water spots and re-tarnishing.
Avoid abrasive cleaners or steel wool on brass, as they can scratch the surface.
Cleaning Stainless Steel Hinges
Stainless steel hinges are durable and resistant to rust, but they can show fingerprints and smudges.
- Mild Soap and Water: For everyday cleaning, a solution of warm water and mild dish soap works well. Wipe the hinges with a soft cloth.
- Vinegar for Smudges: For fingerprints or smudges, dampen a soft cloth with white vinegar. Wipe the hinges, following the grain of the steel.
- Oil Polish: After cleaning, a tiny amount of mineral oil or olive oil on a clean cloth can enhance the shine. Buff it in gently.
- Avoid Chlorine: Never use cleaners containing chlorine bleach on stainless steel, as it can cause pitting and rust.
Cleaning Painted Hinges
Painted hinges are often found on older doors where the hinges were painted over. Removing the paint without damaging the hinge or the door frame can be tricky.
- Softening Paint: For fresh or thin paint layers, try rubbing with a cloth dampened with mineral spirits or paint thinner. Test in an inconspicuous area first.
- Paint Stripper: For thick, dried paint, a chemical paint stripper might be necessary. Apply it carefully with a brush, avoiding contact with the door or frame. Follow product instructions precisely.
- Scraping: Once the paint softens, use a plastic scraper or a nylon brush to gently remove it. Do not use metal tools that could scratch the hinge.
- Rinse and Dry: Rinse the hinges thoroughly to remove all stripper residue. Dry completely.
- Repaint (Optional): If the original paint cannot be fully removed or the hinge looks worn, consider repainting it with a suitable metal paint.
- Consider Replacement: If hinges are severely caked in paint, sometimes replacing them is more cost-effective than cleaning them.
I always advise caution when using chemical strippers. Proper ventilation is key.
Maintaining Door Hinges for Lasting Performance
Cleaning your door hinges is a crucial step in their care, but maintenance does not stop there. Regular upkeep ensures your hinges continue to operate smoothly, quietly, and reliably for years to come. Proper maintenance prevents future problems like squeaks, stiffness, and premature wear. It extends the life of your hardware and contributes to the overall longevity of your doors.
Think of it as preventive care for your doors. A little bit of effort goes a long way in avoiding bigger issues down the line. I always make sure to include hinge maintenance in my home care routine. It keeps everything running perfectly.
Regular Lubrication
The most important aspect of hinge maintenance is regular lubrication. This reduces friction and prevents squeaks.
- Frequency: Lubricate hinges every 6-12 months, or whenever you notice a squeak starting. High-traffic doors might need it more often.
- Type of Lubricant:
- Silicone Spray: My personal favorite. It’s clean, doesn’t attract dust, and provides long-lasting lubrication.
- Graphite Powder: Good for very old or unpainted hinges. It’s dry, so it doesn’t attract dirt.
- Household Oil: Products like 3-in-One oil or light machine oil work well. Apply sparingly to avoid drips.
- WD-40: While useful for loosening sticky parts, it’s not a long-lasting lubricant. It can attract dust over time. Use it to break up grime, then follow with a proper lubricant.
- Application: Apply lubricant directly to the hinge pin, top and bottom. Open and close the door several times to distribute the lubricant. Wipe away any excess.
Preventative Measures
Beyond lubrication, a few simple habits can extend the life of your hinges.
- Regular Dusting: Include hinges in your regular dusting routine. A quick wipe with a dry cloth prevents dust and grime buildup.
- Address Spills Immediately: If anything spills on a hinge, wipe it clean immediately before it dries or causes damage.
- Check for Loose Screws: Periodically check hinge screws. If they are loose, tighten them with a screwdriver. Loose screws can strain the hinge and the door frame.
- Avoid Over-Painting: If painting doors, protect the hinges with painter’s tape or remove them entirely. Painting over hinges restricts movement and makes future cleaning difficult.
- Proper Door Alignment: Ensure your doors are properly hung and aligned. A misaligned door can put undue stress on hinges, leading to wear and tear.
By following these maintenance tips, your door hinges will remain in excellent condition. This ensures your doors function perfectly for many years.
Advanced Cleaning Techniques for Stubborn Issues
Sometimes, regular cleaning and basic remedies are not enough. Certain hinge issues can be particularly stubborn, requiring more advanced techniques. This is often the case with extremely old, neglected hinges, or those subjected to harsh conditions. These methods demand more time and effort, but they can rescue hinges that seem beyond repair.
My experience shows that patience and the right approach can revive even the most challenging hinges. These techniques go beyond simple wiping or lubricating. They address deep-seated problems like embedded grime or extensive corrosion.
Using Ultrasonic Cleaners for Hinges
An ultrasonic cleaner is a device that uses high-frequency sound waves to agitate a cleaning solution, creating microscopic bubbles that remove dirt from surfaces. It’s highly effective for small, intricate items like hinge parts.
- Preparation: Remove hinges and pins. Gently scrub off any large debris.
- Solution: Fill the ultrasonic cleaner with water and a small amount of mild detergent or a specialized cleaning solution for metals.
- Process: Place the hinge components in the cleaner’s basket. Run the cleaner for the recommended cycle time, usually 5-10 minutes. For very dirty hinges, multiple cycles might be needed.
- Rinse and Dry: After cleaning, rinse the hinges thoroughly under clean water and dry them completely to prevent re-rusting.
- Lubricate: Apply a fresh coat of lubricant before reassembling.
This method is excellent for getting into all the tiny nooks and crannies of a hinge that a brush cannot reach.
Electrolysis for Heavy Rust Removal
Electrolysis is a more advanced technique for removing heavy rust, particularly from steel or iron hinges. It involves using an electric current to convert rust back into iron. This method is effective but requires caution and specific equipment.
- Setup: You will need a plastic container, water, washing soda (sodium carbonate, not baking soda), a sacrificial anode (a piece of scrap steel, not stainless steel), a battery charger (12V), and jumper cables.
- Procedure:
- Mix washing soda with water in the plastic container (1 tablespoon per gallon).
- Suspend the rusty hinge in the solution, ensuring it does not touch the anode.
- Connect the negative (-) terminal of the battery charger to the hinge (the item to be cleaned).
- Connect the positive (+) terminal of the battery charger to the sacrificial anode.
- Turn on the charger. Bubbles will form as the rust is removed.
- Duration: The process can take several hours to overnight, depending on the rust severity.
- Safety: Always perform this in a well-ventilated area. Do not let the anode and cathode touch. Monitor the process.
- Post-Treatment: Once rust is gone, rinse the hinge thoroughly, dry completely, and apply a protective coating or lubricant.
This method is powerful for restoring severely rusted hinges, but it does require a DIY approach and safety awareness.
Addressing Stripped Screw Holes
Sometimes, cleaning reveals another problem: stripped screw holes in the door or frame. This means the hinge cannot be reattached securely.
- Wood Filler: For minor stripping, fill the hole with wood filler. Let it dry completely, then pre-drill a small pilot hole before reinserting the screw.
- Wood Dowels/Toothpicks: For larger stripped holes, insert several wood toothpicks or a small wooden dowel into the hole with wood glue. Let the glue dry completely. Trim flush, then pre-drill a new pilot hole and insert the screw. The new wood provides a fresh grip for the screw.
- Longer Screws: As a last resort, use slightly longer or wider screws, but ensure they do not protrude through the other side of the door or frame.
These advanced techniques provide solutions for the toughest hinge challenges. They ensure your door hardware is not just clean, but fully functional and secure.
Frequently Asked Questions About Cleaning Door Hinges
How often should I clean my door hinges?
For general maintenance, wipe down your door hinges every few months. This prevents dust and grime buildup. Deep cleaning, which may involve removing the hinges, is usually needed every 1-2 years or whenever you notice significant rust, paint accumulation, or persistent squeaks. High-traffic doors might require more frequent attention.
Can I use WD-40 to lubricate door hinges?
WD-40 can temporarily quiet a squeak. It is excellent for displacing moisture and loosening rusty parts. However, it is not a long-term lubricant. It tends to evaporate and can attract dust and dirt over time. For lasting lubrication, I recommend using silicone spray, graphite, or a dedicated household oil after cleaning the hinge.
How do I remove old, caked-on paint from hinges?
To remove old, caked-on paint, first remove the hinge from the door. You can then soak the hinge in a chemical paint stripper, following the product’s instructions. Alternatively, you can boil the hinges in water for about 15-20 minutes to soften the paint, then carefully scrape it off with a plastic scraper or stiff brush. Always wear gloves and work in a well-ventilated area.
What causes door hinges to squeak?
Door hinges typically squeak due to friction. This friction results from a lack of lubrication, rust buildup, or accumulated dirt and grime within the hinge barrel. Over time, the factory lubricant wears off, allowing metal-on-metal contact. Cleaning the hinges and applying a suitable lubricant will almost always resolve the squeak.
Is it necessary to remove the door to clean the hinges?
No, it is not always necessary. For light cleaning, dusting, or minor lubrication, you can clean hinges without removing them. However, for deep cleaning, rust removal, or paint stripping, removing the door and hinges allows for much more thorough and effective cleaning. This provides better access to all parts of the hinge.
How do I prevent hinges from rusting after cleaning?
To prevent hinges from rusting, ensure they are completely dry after cleaning. Apply a rust-inhibiting lubricant or a protective clear coat designed for metal. In humid environments, consider using stainless steel hinges, which are naturally more rust-resistant. Regular lubrication also helps create a protective barrier against moisture.
Conclusion
Cleaning your door hinges is a simple yet impactful home maintenance task. It transforms sticky, squeaky, or dirty doors into silent, smoothly operating fixtures. We have explored everything from quick wipe-downs to deep cleaning methods for tackling rust and paint. You now know the right tools and solutions for every hinge material, including brass, stainless steel, and painted finishes.
Remember, a little preventive care goes a long way. Regular lubrication and occasional spot cleaning keep your hinges in top condition. By following these steps on how to clean hinges on doors, you not only improve their functionality but also enhance your home’s overall appearance. Take the time to show your door hinges some love; your quiet, smoothly opening doors will thank you. Start today and enjoy the peaceful function of well-maintained doors.
- door hinges
- cleaning tips
- hinge maintenance
- squeaky doors

Todd Martin
Senior Writer
With over 15 years of experience in home renovation and design, I started HEG to share what I’ve learned with homeowners who want to create spaces that are both beautiful and functional. I’ve always believed in a hands-on approach, and over the years, I’ve picked up practical solutions that actually work. Through HEG, I aim to make home improvement more approachable, sharing real tips that help you create a home you truly love.