· Todd Martin · Electronics Maintenance · 15 min read
How To Clean Iphone Microphone

How to Clean Your iPhone Microphone for Clearer Audio
Have you noticed your voice sounding muffled during calls? Do your voice recordings lack clarity? A dirty iPhone microphone is often the cause. Dust, lint, and debris accumulate in these tiny openings over time. This build-up affects sound quality. Learning how to clean your iPhone microphone improves its performance. It ensures your voice is heard clearly.
This guide will show you safe and effective methods to restore your iPhone’s microphone function. We will explain where each microphone is located on your device. We will detail the tools you need for the job. Then, we will provide step-by-step instructions for cleaning each microphone type. You will also learn troubleshooting tips for persistent issues and preventative measures. Let’s get your iPhone sounding its best again.
Takeaway
- Identify the three microphone locations on your iPhone.
- Gather the correct, safe cleaning tools.
- Use gentle methods to remove debris from microphone grilles.
- Test audio quality after cleaning.
- Adopt preventative habits to keep microphones clear.
To clean your iPhone microphone, carefully use a soft-bristled brush or a dry toothpick to remove visible debris from the grille. Follow up with a gentle wipe using a microfiber cloth. Always avoid liquids and sharp objects to prevent damage. This restores clear audio performance.
Understanding Your iPhone’s Microphones and Their Locations
Many people do not realize an iPhone has more than one microphone. Knowing where each microphone is helps you clean them properly. Each microphone serves a specific purpose in capturing audio. If one is blocked, your device’s overall audio performance suffers.
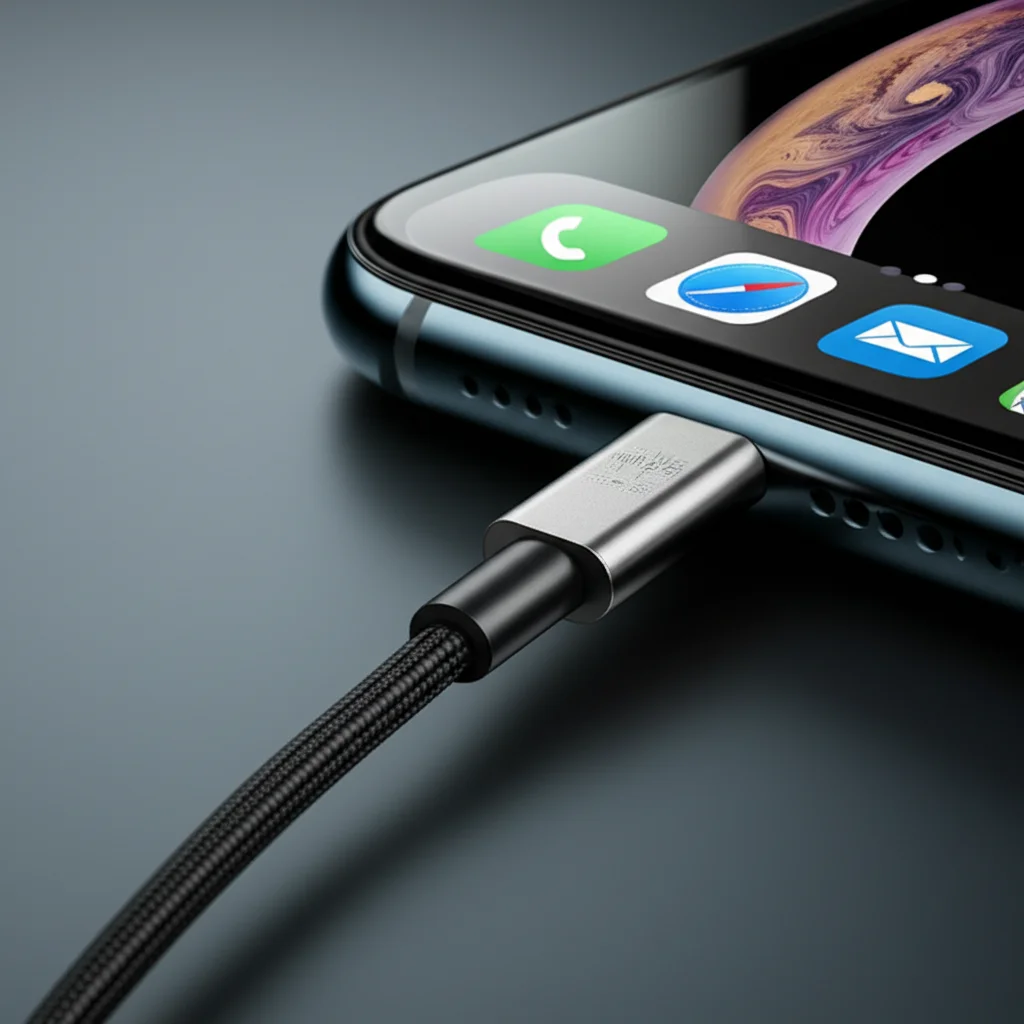
Your iPhone typically has three main microphones. The first and most commonly used is the main microphone. It is on the bottom of the device, next to the charging port. This microphone captures your voice during phone calls and voice memos. It is often the first to collect dust and lint from pockets or bags. Keeping this area clean is important for everyday communication.
The second microphone is at the top of the device. It is often located near the earpiece. This microphone assists with noise cancellation during calls. It also picks up audio when you use the front-facing camera for videos. Its location means it can gather earwax or skin oils. Regular cleaning helps maintain its noise-canceling function. This improves call clarity for you and the person you are speaking with.
The third microphone is on the back of the iPhone. It is usually near the rear camera lens. This microphone primarily captures audio for videos recorded with the back camera. It also helps with noise cancellation. Dirt or smudges on this microphone can lead to muffled video sound. Inspecting this area regularly is a good practice. Understanding these locations is the first step to successful iPhone microphone cleaning.
Essential Tools for Safe iPhone Microphone Cleaning
Cleaning delicate electronics like an iPhone requires the right tools. Using improper tools can cause permanent damage to your device. This can lead to costly repairs or even a broken phone. I always make sure I have these specific items ready before I start cleaning my iPhone microphone.
First, you will need a soft-bristled brush. An old, clean toothbrush works well, or you can buy a dedicated electronics cleaning brush. The bristles must be soft enough not to scratch the delicate microphone grilles. They should also be stiff enough to dislodge trapped particles. Avoid using brushes with hard plastic bristles. They can push dirt further in or scratch surfaces.
Second, a wooden or plastic toothpick is useful. These tools are much safer than metal objects. Metal can scratch the microphone grille or damage internal components. A wooden toothpick can gently pick out larger pieces of lint or debris. Always use caution and light pressure when working with a toothpick. Break off the tip if it becomes dull.
Third, a can of compressed air is a good option. Use it with extreme care. Hold the can upright and spray in short bursts from a distance. Directing a strong blast of air directly into the microphone can damage internal components. It can also push debris deeper into the device. Avoid using canned air for sensitive components.
Finally, a microfiber cloth is essential for wiping away dust. Use a clean, dry cloth. Microfiber is soft and lint-free. It will not leave fibers behind. Avoid using paper towels or abrasive cloths. They can scratch your iPhone’s finish. Having these tools ready ensures a safe and effective cleaning process for your iPhone’s microphones.
Step-by-Step Guide: Cleaning the Bottom Microphone
The bottom microphone is often the most frequently used and therefore the most prone to clogging. It is crucial for clear phone calls and voice recordings. Cleaning this area requires precision and gentle handling. I tackle this one first whenever my audio quality drops.
Begin by inspecting the microphone grille. It is a small mesh opening located at the bottom edge of your iPhone, often near the charging port. Look closely for any visible dirt, lint, or dust trapped in the tiny holes. Sometimes, you can see a thick layer of compacted debris. This visual inspection helps you determine how much effort the cleaning will need.
Next, take your soft-bristled brush. Gently brush the microphone grille in a sweeping motion. Do not press hard. The goal is to loosen and lift the debris out of the holes. Work from different angles to ensure you reach all parts of the mesh. Continue brushing until no more visible dust comes out. This step removes most of the surface grime.
If stubborn debris remains, carefully use a wooden or plastic toothpick. Angle the toothpick slightly and gently scrape across the grille. Be extremely careful not to poke directly into the microphone hole. The aim is to dislodge compacted lint without pushing it further inside. Use minimal pressure. If you see any particles move, try brushing them away again with your soft brush. This part requires patience and a steady hand. You can also carefully clean your iPhone charging port using similar methods if it also has lint.
After dislodging debris, lightly blow over the area to remove any loose particles. You can use a can of compressed air for this, but remember to use short, controlled bursts from a distance. Hold the can upright. This prevents moisture from entering your device. Do not blow directly into the microphone with your mouth, as moisture from your breath can cause damage. Finally, wipe the area with a clean microfiber cloth. This ensures no residual dust remains.
Cleaning the Top and Rear Microphones
While the bottom microphone sees the most action, the top and rear microphones are just as important for overall audio performance. They contribute to noise cancellation and clear video recordings. These microphones also collect debris, although sometimes different types. Keeping them clear ensures your iPhone performs at its best.
Let’s start with the top microphone. You will find this tiny opening near the earpiece speaker, often along the top edge of the screen. This location makes it prone to collecting earwax, skin oils, and makeup residue. First, examine the earpiece area. If you need to clean your ear speaker on iPhone, you can use similar tools and methods. Begin by gently brushing the top microphone grille with your soft-bristled brush. Use light, sweeping motions to dislodge any dry debris. You might notice small flakes of earwax coming loose. Continue brushing until the grille appears clean.
For the rear microphone, locate it near the main camera lenses on the back of your iPhone. This microphone is critical for capturing clear audio when you record videos. It can accumulate dust from surfaces or pocket lint. Take your soft-bristled brush and gently brush this microphone grille. Work carefully around the camera lenses themselves. Ensure you remove any visible dust or dirt trapped in the mesh. This step is important for maintaining optimal video recording quality.
Sometimes, especially for the top microphone, you might find oily residue or compacted earwax. For these cases, you can lightly dampen a corner of your microfiber cloth with isopropyl alcohol (70% or higher). Make sure the cloth is only slightly damp, not wet. Gently dab the damp cloth onto the microphone grille. Do not rub vigorously. The alcohol helps break down oils and waxy buildup. Let the area air dry completely before using your phone. Using alcohol for cleaning electronics should always be done with caution. Always ensure the device is powered off first.
After cleaning both the top and rear microphones, use a clean, dry part of your microfiber cloth to wipe down the areas. This removes any remaining dust or smudges. Periodically cleaning these often-overlooked microphones contributes significantly to your iPhone’s overall sound quality. It also ensures that all audio functions, from calls to videos, work as intended.
Troubleshooting After Cleaning: Still Facing Microphone Issues?
You have meticulously cleaned all your iPhone’s microphones, but the audio still sounds poor. This can be frustrating. Do not give up just yet. Several factors might still be at play. We need to explore other potential causes before concluding the issue is hardware-related.
First, check your software. Sometimes, a software glitch can cause microphone problems. Restart your iPhone. A simple restart often resolves minor bugs. If that does not work, check for iOS updates. Apple frequently releases updates that fix software issues. Go to Settings > General > Software Update to see if an update is available. Installing the latest iOS version might surprisingly fix your audio problems.
Next, test your microphones thoroughly in different scenarios.
- Voice Memos App: Open the Voice Memos app and record yourself speaking. Play it back. Does it sound clear? This tests the main bottom microphone.
- Front Camera Video: Open the Camera app, switch to the front camera, and record a short video while speaking. Play it back. Does the audio sound good? This tests the top microphone.
- Rear Camera Video: Switch to the rear camera and record a short video. Play it back. Does the audio sound clear? This tests the rear microphone.
These tests help isolate which specific microphone might still be faulty. If one test fails but others pass, it points to an issue with that particular microphone.
Consider app permissions. Some apps might have permission issues with your microphone. Go to Settings > Privacy & Security > Microphone. Check if the app you are having trouble with (e.g., a messaging app, a video calling app) has permission to use the microphone. Toggle it off and on again. This can refresh the permission.
Finally, think about accessories. If you use a case or screen protector, ensure it is not blocking any microphone ports. Some bulky cases can cover the tiny holes. Remove your case and screen protector (if it interferes) and retest the microphones. Sometimes, the simplest solutions are the most effective. If you encounter issues with other iPhone components, guides on how to clean your iPhone speaker or even how to clean your iPhone screen protector might offer further assistance. If all these troubleshooting steps fail, the problem might be hardware-related beyond simple cleaning.
Preventative Measures: Keeping Your iPhone Microphones Clean
Cleaning your iPhone microphones regularly is important. However, preventing debris buildup in the first place saves you time and ensures consistent audio quality. I have found a few simple habits make a big difference in maintaining clean microphones. Incorporating these practices into your daily routine helps keep your iPhone’s audio pristine.
First, invest in a good quality phone case. A case protects your iPhone from drops and scratches. Many cases also offer some protection for ports and speakers, including the microphones. Look for cases that have precise cutouts rather than large, open sections. This helps reduce the amount of dust and lint that can enter the microphone grilles. Some cases even come with dust plugs for the charging port, which indirectly helps protect the nearby main microphone.
Second, be mindful of where you store your iPhone. Pockets, especially those in jeans, are notorious for collecting lint. When you put your iPhone in a linty pocket, the microphone grilles act like tiny filters. They trap all that debris. Consider carrying your iPhone in a separate pouch or a pocket known to be clean. Avoid placing it face down on dusty surfaces. Keeping your phone away from excessive dust helps a lot.
Third, make quick, superficial cleaning a habit. Every few days, or whenever you clean your iPhone screen, take a moment to lightly brush the microphone areas. Use your soft-bristled brush. This quick sweep can dislodge loose dust before it becomes compacted. It is much easier to remove fresh dust than embedded grime. This simple, regular maintenance can prevent significant build-up. Similarly, remember to regularly clean your iPhone bottom speakers as they are often located near the main microphone and collect similar debris.
Fourth, avoid exposing your iPhone to environments with high levels of dust, dirt, or moisture. Construction sites, sandy beaches, or very humid places are harsh on electronics. If you must be in such environments, consider using a waterproof or dustproof phone pouch. This offers an extra layer of protection. By being proactive and incorporating these preventative measures, you significantly reduce the chances of your iPhone microphones becoming clogged. This ensures clearer calls and better audio for a longer time.
When to Seek Professional Help for iPhone Microphone Problems
Sometimes, despite your best efforts, cleaning your iPhone microphones might not resolve the issue. There are situations where the problem goes beyond simple debris. At this point, it is wise to consider seeking professional help. Attempting advanced repairs yourself can cause further damage. Knowing when to get expert assistance saves you stress and potential costs.
One clear sign to seek professional help is if the microphone issue persists after thorough cleaning and troubleshooting. You have tried brushing, picking, restarting, and testing. Yet, your voice still sounds muffled or distorted. This suggests a deeper hardware problem. The microphone itself might be faulty. Internal connections could be loose or damaged. These types of issues require specialized tools and expertise to diagnose and repair.
Another reason is if you suspect water damage. Even if your iPhone has some water resistance, direct exposure or submersion can damage internal components. If your microphone stopped working after an encounter with liquid, cleaning alone will not fix it. Water damage can lead to corrosion and short circuits. Only a trained technician can properly assess and repair water-damaged components. Do not try to open your phone yourself if you suspect water damage.
If your iPhone has been dropped or suffered other physical impacts, the microphone problem could be due to internal damage. A fall can dislodge components or break solder joints. These issues are not visible from the outside. A professional repair shop has diagnostic tools to identify such internal damage. They can perform precise repairs that are impossible to do at home.
Lastly, consider professional help if you are uncomfortable performing the cleaning yourself or feel you might cause more damage. The tiny openings and delicate components of an iPhone require a steady hand and patience. If you lack confidence, it is better to let a professional handle it. Taking your iPhone to an Apple Store or an authorized service provider ensures the repair is done correctly. They use genuine parts and have certified technicians. This protects your device and your investment.
Frequently Asked Questions
Q1: Can I use rubbing alcohol to clean my iPhone microphone?
A1: Yes, you can use isopropyl alcohol (70% or higher) sparingly. Lightly dampen a microfiber cloth and gently dab the microphone grille. Do not apply alcohol directly to the microphone or use excessive amounts. Ensure the device is powered off before cleaning. Let it air dry completely before turning it back on.
Q2: What are the signs of a dirty iPhone microphone?
A2: Common signs include muffled or distorted audio during phone calls, voice memos, or video recordings. People might struggle to hear you, or your voice may cut in and out. Siri might also have trouble understanding your commands. Reduced audio clarity is a key indicator.
Q3: Is it safe to use a needle to clean the microphone?
A3: No, it is not safe to use a needle or any metal object. Needles can easily scratch the microphone grille or, worse, puncture the delicate membrane inside. This can cause irreparable damage to the microphone. Always opt for soft-bristled brushes or wooden/plastic toothpicks.
Q4: How often should I clean my iPhone microphone?
A4: The frequency depends on your usage and environment. If you often carry your phone in dusty pockets or work in dirty areas, clean it monthly. For average use, a quarterly cleaning is usually sufficient. Regular visual checks for visible debris help determine when cleaning is needed.
Q5: Can a dirty microphone affect Face ID or Siri?
A5: Yes, a dirty microphone can affect Siri’s ability to understand your voice commands, as it relies on clear audio input. While Face ID primarily uses the TrueDepth camera system, some advanced features or troubleshooting might indirectly involve microphone function, though it’s not its primary sensor.
Q6: Will cleaning my microphone void my iPhone’s warranty?
A6: Generally, external cleaning with recommended tools will not void your warranty. However, using improper tools that cause damage, or attempting to open the device to clean internal components, would likely void your warranty. Always stick to the safe, external cleaning methods described.
Conclusion
A clean iPhone microphone is crucial for clear communication and high-quality audio recordings. We have explored how to clean your iPhone microphone safely and effectively. You now know the locations of all three microphones on your device. You understand the essential tools required. This includes soft brushes, wooden toothpicks, and microfiber cloths. Remember to use only gentle methods.
By following our step-by-step instructions, you can remove stubborn dust, lint, and debris. This restores your device’s audio performance. We also covered important troubleshooting steps for persistent issues. Plus, we discussed simple preventative measures. These help keep your microphones clear in the long term. If cleaning does not resolve the problem, remember when to seek professional help. Your iPhone is an essential tool. Keeping its microphones clean ensures it functions optimally for all your needs. Take action today to enjoy clearer calls and recordings.
- iPhone cleaning
- microphone repair
- audio quality
- phone maintenance
- tech tips

Todd Martin
Senior Writer
With over 15 years of experience in home renovation and design, I started HEG to share what I’ve learned with homeowners who want to create spaces that are both beautiful and functional. I’ve always believed in a hands-on approach, and over the years, I’ve picked up practical solutions that actually work. Through HEG, I aim to make home improvement more approachable, sharing real tips that help you create a home you truly love.