· Todd Martin · Printer Maintenance · 21 min read
How To Clean Print Head Brother
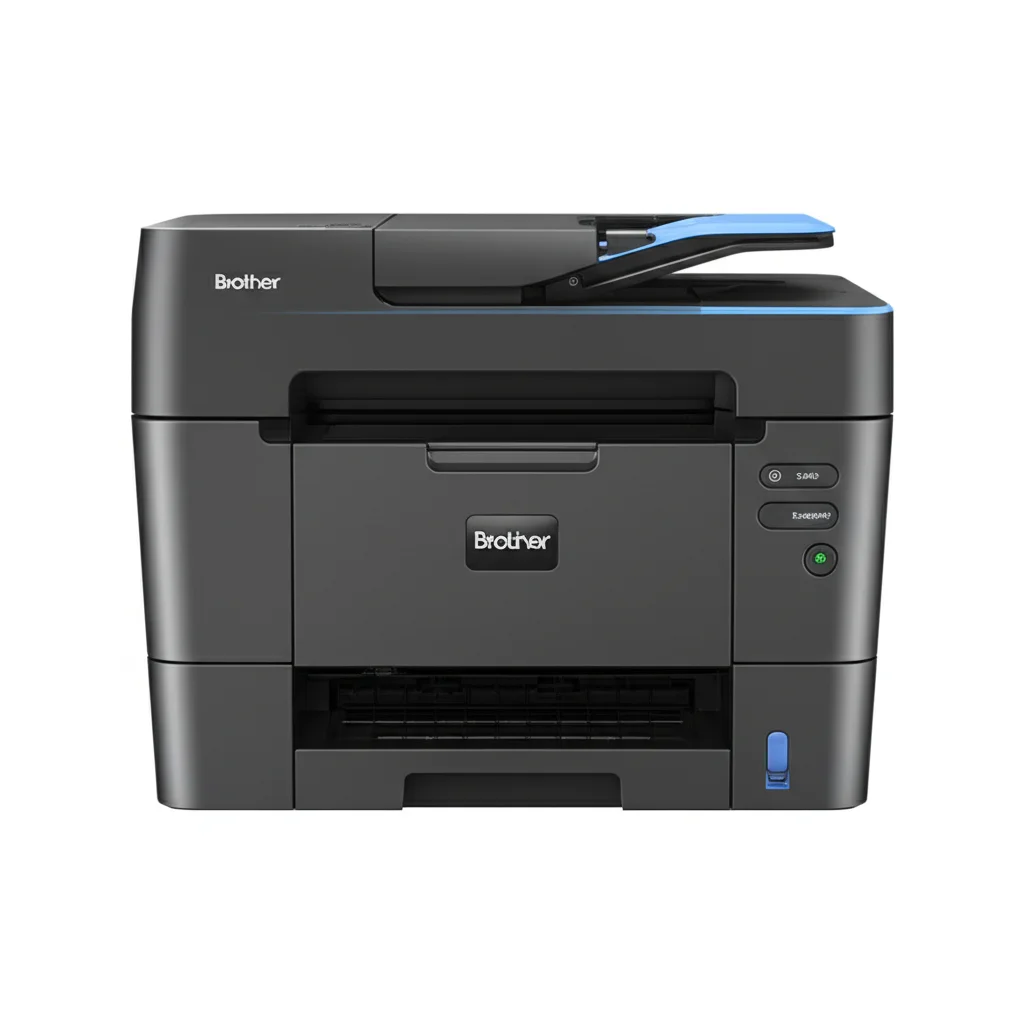
How To Clean Brother Print Head for Clear Prints
Has your Brother printer started producing streaky pages or missing lines of text? You are not alone. Many printer users face this common issue. The culprit is often a clogged print head. Dried ink, dust, and debris build up over time. This build-up prevents ink from flowing properly.
Knowing how to clean print head Brother printers use is vital. It restores print quality. It also extends your printer’s life. This guide will walk you through various cleaning methods. We start with simple automatic options. Then we move to advanced manual techniques. By the end, you will have the knowledge to keep your Brother printer printing perfectly.
Takeaway
- Run Built-in Cycles First: Always start with your Brother printer’s automatic cleaning cycle.
- Use Proper Supplies: Gather isopropyl alcohol, distilled water, and lint-free cloths for manual cleaning.
- Be Gentle and Patient: Manual cleaning requires care to avoid damaging delicate print head nozzles.
- Prevent Future Clogs: Print regularly and use genuine ink to keep print heads clear.
To clean a Brother print head, first run the printer’s built-in cleaning cycle through its menu or computer software. If issues persist, gently clean the print head nozzles manually using a lint-free cloth moistened with isopropyl alcohol or distilled water. For stubborn clogs, a syringe method with a specialized cleaning solution can be used, but this requires caution.
Why Your Brother Print Head Needs Cleaning
Printers are essential tools for many homes and offices. They produce documents and images. Brother printers are popular for their reliability. However, even the best printers encounter issues. A common problem is poor print quality. This often points to a dirty print head.
The print head is a crucial component. It has tiny nozzles. These nozzles spray ink onto the paper. Over time, these small openings can become blocked. Dried ink is a primary cause of blockages. If you do not use your printer often, ink can dry inside the nozzles. Dust and other debris can also accumulate. These particles further restrict ink flow.
A clogged print head leads to several printing defects. You might see horizontal lines across your prints. Colors may appear faded or incorrect. Sometimes, entire sections of text or images are missing. These signs indicate that your print head needs attention. Ignoring these warnings can worsen the problem. It might even lead to permanent damage. Regular cleaning prevents these issues. It ensures your printer delivers sharp, vibrant prints every time. Understanding the signs helps you act quickly.
Understanding Brother Printer’s Built-in Cleaning Cycle
Brother printers include a convenient feature. They have an automatic print head cleaning cycle. This is your first line of defense against clogs. This cycle flushes the nozzles with ink. It aims to dislodge dried ink and debris. It is a simple and safe method. You should always try this first.
Accessing this function is straightforward. You can usually do it from the printer’s control panel. Look for “Maintenance” or “Setup” options. Then, find “Cleaning” or “Print Head Cleaning.” Follow the on-screen prompts. Some Brother models also allow you to start the cleaning cycle from your computer. Use the printer’s utility software for this. The software often provides more detailed options.
Running the cleaning cycle uses a small amount of ink. This is normal. It is part of the cleaning process. After running one cycle, print a test page. Check if the print quality has improved. If it has not, you can run the cycle two or three more times. Avoid running it too many times consecutively. This wastes ink. It also might not fix severe clogs. For stubborn issues, manual cleaning becomes necessary. The built-in cycle is a good routine maintenance step. It helps keep your print head in good condition.
Here are the general steps to run the built-in cleaning cycle:
- Using the Printer’s Control Panel:
- Turn on your Brother printer.
- Press the “Menu” or “Setup” button.
- Navigate to “Maintenance” or “Ink.”
- Select “Head Cleaning” or “Print Head Cleaning.”
- Choose which colors to clean (all, black, or color).
- Confirm your selection and let the printer complete the cycle.
- Print a test page to check the results.
- Using Your Computer (Windows/macOS):
- Open your printer’s software or control panel.
- Go to “Printer Properties” or “Printing Preferences.”
- Look for a “Maintenance” or “Utilities” tab.
- Select “Nozzle Check” to diagnose the clog.
- Then, select “Head Cleaning” or “Deep Cleaning.”
- Follow the instructions on your screen.
- Print a nozzle check pattern after cleaning.
Remember, a single cycle may not be enough for a heavily clogged print head. You might need to repeat the process a few times. Allow a few minutes between each cycle. This gives the ink time to soak into the dried residue. If repeated cycles do not work, consider manual cleaning. Brother printers, like other inkjet printers, benefit from regular attention. If you also own an Epson printer, you might find similarities in their maintenance. You can learn how to clean print head on Epson printer to see some shared principles. Keeping both types of printers in good condition ensures consistent print jobs.
Manual Cleaning Techniques for Brother Print Heads
When the automatic cleaning cycle fails, manual methods are next. These methods are more involved. They directly address the print head nozzles. Always proceed with caution. The print head is a delicate part. Handle it gently. Make sure your printer is off and unplugged. This prevents electrical hazards.
You will need specific supplies. Gather lint-free cloths or paper towels. Isopropyl alcohol (70% or 90%) is effective for dissolving dried ink. Distilled water is also an option for milder clogs. Avoid tap water. It contains minerals that can cause new clogs. Cotton swabs are useful for small areas. Wearing gloves protects your hands from ink.
Manual cleaning has two main approaches. The first is a gentle wipe. This method cleans the surface of the print head. The second is a deep clean using a syringe. This is for severe clogs. Choose the method based on your clog’s severity. Always start with the gentlest option.
Gentle Cleaning with Isopropyl Alcohol
This method is for surface clogs or minor print quality issues. It is less intrusive than deep cleaning. It can often resolve streaks and faded colors.
Materials Needed:
- Lint-free cloth or sturdy paper towels
- Isopropyl alcohol (70% or 90%) or distilled water
- Gloves (optional, but recommended)
- Flashlight (optional, for better visibility)
Step-by-Step Guide:
- Power Off and Unplug: Turn off your Brother printer. Unplug it from the wall outlet. This is a critical safety step. It prevents accidental shocks. It also stops the print head from moving unexpectedly.
- Open Printer Cover: Open the access cover. This usually reveals the ink cartridge carriage. The print head is attached to this carriage.
- Remove Ink Cartridges: Carefully remove all ink cartridges. Place them on a paper towel. Make sure they are upright to prevent leaks.
- Move Print Head (if necessary): If the print head carriage is not centered, gently slide it. It should move freely once the printer is unplugged. Move it to a position where you can access the bottom of the print head.
- Prepare Cleaning Cloth: Dampen a lint-free cloth or a folded paper towel with isopropyl alcohol. Do not soak it. It should be moist, not dripping. Excess liquid can damage electronics.
- Gently Wipe the Print Head: Locate the bottom of the print head. You will see small metallic or plastic nozzles. Gently wipe these nozzles with the dampened cloth. Wipe in one direction. Avoid scrubbing harshly. You might see ink transfer onto the cloth. This is normal. It means you are removing residue.
- Clean Contacts (Optional): You can also gently wipe any electrical contacts. These are usually on the back of the print head. Ensure they are dry before reassembling.
- Allow to Dry: Let the print head air dry completely. This takes about 5-10 minutes. Ensure no alcohol residue remains.
- Reinstall Cartridges and Test: Reinsert the ink cartridges. Close the printer cover. Plug the printer back in and turn it on. Run a nozzle check or print a test page. Check if the print quality has improved. You may need to run one or two built-in cleaning cycles after manual cleaning. This primes the ink system.
This gentle method is a good starting point. It often fixes minor clogs. If the problem persists, a more aggressive method might be needed.
Deep Cleaning with a Syringe (Advanced Method)
This method is for very stubborn clogs. It involves forcing a cleaning solution directly through the nozzles. This is more risky. It should only be attempted if gentle cleaning fails. Proceed with extreme caution. Improper use can damage your print head.
Materials Needed:
- Small syringe (5ml or 10ml) without a needle. Often found in pharmacies or online.
- Plastic tubing or small rubber hose (optional, to fit over the nozzle).
- Print head cleaning solution or distilled water. Specific cleaning solutions are available online.
- Lint-free cloths or paper towels.
- Gloves.
- Small container to catch excess liquid.
Step-by-Step Guide:
- Safety First: Power off your Brother printer. Unplug it from the wall outlet. Remove all ink cartridges. Place paper towels underneath the print head area. This absorbs excess cleaning solution.
- Access Print Head: As before, open the printer cover. Move the print head carriage to an accessible position.
- Identify Clogged Nozzles: If you have run a nozzle check, you will know which colors are blocked. This helps you target specific nozzles.
- Prepare Syringe: Fill the syringe with 1-2 ml of cleaning solution or distilled water. Avoid overfilling. Too much pressure can damage the print head.
- Apply Solution to Nozzle:
- Direct Application: Carefully place the tip of the syringe directly over the small ink port for the clogged color. If you have a small plastic tube that fits snugly over the port, use it. This creates a better seal.
- Gentle Pressure: Slowly and gently push the plunger. You should see a small amount of liquid seep through the nozzles onto the paper towel below. Do NOT apply too much force. You are flushing the clog, not blasting it.
- Repeat for Each Clogged Color: Repeat this process for all clogged colors.
- Let Soak (Optional but Recommended): After applying the solution, let it sit for 10-15 minutes. This allows the solution to dissolve the dried ink. For very stubborn clogs, you can let it soak for a few hours or even overnight.
- Wipe and Dry: Gently wipe away any excess cleaning solution from the print head. Ensure it is dry before moving on.
- Reassemble and Test: Reinstall the ink cartridges. Close the printer cover. Plug the printer in and turn it on. Run 1-2 built-in cleaning cycles. This primes the ink system and clears any remaining solution. Then, print a nozzle check and a test page.
This deep cleaning method can be very effective. However, it carries risks. Only attempt it if other methods fail. If you are unsure, consult a professional. Always consider preventative measures to avoid such clogs in the future. Regular printer use helps prevent ink from drying. Also, using how to clean brother printer drum can be another important maintenance step for your Brother device. For those who also use other brands, knowing how to clean print head on Epson printer can also provide valuable insights into general print head maintenance.
Preparing for Print Head Cleaning: Safety and Supplies
Before you begin any print head cleaning, preparation is key. This ensures your safety. It also makes the cleaning process efficient. Having the right tools at hand saves time. It prevents frustration. A well-prepared workspace protects your printer and your surroundings.
First, focus on safety. Your printer is an electronic device. It uses electricity. Always turn off your Brother printer. Then, unplug it from the wall outlet. This removes any risk of electrical shock. It also prevents the print head from moving unexpectedly. This movement could injure you. It could also damage the printer. Wear gloves, especially when dealing with ink. Ink can stain skin and clothes. Disposable latex or nitrile gloves work well.
Next, gather your supplies. You need specific items for effective cleaning. Do not substitute materials unless you are sure. Using improper chemicals can harm your print head. It can even permanently damage your printer.
Essential Supplies Checklist:
- Lint-Free Cloths or Paper Towels: These are crucial. Standard cloths can leave fibers behind. These fibers can cause new clogs. Lint-free cloths are smooth. They absorb liquids without leaving residue. Paper towels can work if they are sturdy and don’t shed.
- Isopropyl Alcohol (IPA): Get 70% or 90% concentration. This evaporates quickly. It effectively dissolves dried ink. It is safe for electronics when used correctly. Avoid higher concentrations like 99% sometimes used for electronics; they evaporate too fast to dissolve ink effectively.
- Distilled Water: Use this as an alternative to IPA for milder clogs. It is also good for flushing after IPA cleaning. Tap water contains minerals. These minerals can clog nozzles. Distilled water is pure. It leaves no residue.
- Small Syringe (Optional): A 5ml or 10ml syringe without a needle is useful for deep cleaning. It allows precise application of cleaning solution.
- Small Plastic Tubing (Optional): This can fit over the syringe tip. It helps create a seal around the ink port. This ensures the cleaning solution goes directly into the nozzle.
- Small Container: Use this to mix solutions. You can also use it to hold components.
- Protective Surface: Lay down old newspapers or a plastic sheet. This protects your work surface from ink spills.
Types of Cleaning Solutions:
- Isopropyl Alcohol: As mentioned, it is excellent for dissolving stubborn, dried ink.
- Distilled Water: A gentle option for minor clogs or as a rinse.
- Commercial Print Head Cleaning Solutions: Several brands sell specific solutions. These are formulated to dissolve various ink types. Read reviews and instructions carefully before using them. They can be very effective. Ensure they are compatible with Brother inkjet printers.
Never use harsh chemicals like ammonia, Windex, or general household cleaners. These can damage the delicate components of the print head. They can corrode plastic parts. They can also ruin rubber seals. Stick to recommended solutions for best results. Proper preparation ensures a smooth and safe cleaning process. It helps achieve the best possible outcome for your Brother printer.
Troubleshooting Common Issues After Cleaning
You have cleaned your Brother print head. You followed all the steps carefully. But the print quality is still not perfect. Do not despair. This is a common scenario. Several factors can cause persistent issues. Knowing how to troubleshoot helps. It saves you from immediate panic. It can also prevent unnecessary expenses.
First, run another nozzle check pattern. This step is crucial. It shows exactly which nozzles are still blocked. Compare it to your initial nozzle check. Has there been any improvement? Even partial improvement is a good sign. It means the cleaning is working. If the pattern shows complete gaps, the clog is still severe.
If the problem persists after manual cleaning, repeat the built-in cleaning cycle a couple more times. Sometimes, dislodged ink or cleaning solution needs to be fully flushed out. The automatic cycle helps with this. After each cycle, wait a few minutes. Then, print another nozzle check. This helps distribute the ink properly. It also allows any remaining residue to clear.
Consider the age of your ink cartridges. Low ink levels can mimic print head clogs. Check your ink levels. Replace any cartridges that are low. Old or aftermarket ink can also cause issues. Inferior ink dries out faster. It can also contain impurities. These impurities can clog nozzles more easily. Using genuine Brother ink is always recommended for optimal performance.
Check for air bubbles in the ink lines. If you recently replaced cartridges, air might have entered the system. Running a few cleaning cycles often resolves this. The printer tries to prime the ink lines.
If deep cleaning and repeated cycles do not work, the clog might be very severe. It could be due to long-term disuse. Or, it could be dried, hardened ink. In such cases, the print head might be damaged. There are limits to what cleaning can achieve.
When to Seek Professional Help or Consider Replacement:
- No Improvement After Multiple Attempts: If you have tried all cleaning methods several times and seen no change in print quality, the print head may be permanently damaged.
- Error Messages: Your printer might display error messages related to the print head. This suggests a more serious hardware fault.
- Physical Damage: If you notice any physical damage to the print head (e.g., bent nozzles), cleaning will not help.
- Cost vs. New Printer: Print heads are often expensive. Replacing one might cost almost as much as a new entry-level printer. Compare the cost of repair with a new purchase. For older models, replacement is often more economical.
Sometimes, despite your best efforts, a print head cannot be fully restored. This is a normal part of a printer’s lifespan. However, effective troubleshooting helps you identify when to give up. It also tells you when to seek expert advice.
Preventative Maintenance for Brother Print Heads
Cleaning a clogged print head can be time-consuming. It is also a bit of a hassle. The best approach is to prevent clogs from forming. Regular preventative maintenance extends your Brother printer’s life. It ensures consistent print quality. Proactive steps reduce the need for deep cleaning. They save you time and money in the long run.
Here are key strategies for preventing future clogs:
- Print Regularly: The most effective preventative measure is frequent use. Inkjet printers are designed to be used regularly. Printing at least once a week keeps the ink flowing. It prevents ink from drying and hardening in the nozzles. Even printing a simple test page is beneficial. This is particularly important if you only print occasionally.
- Use Genuine Brother Ink Cartridges: While third-party ink might seem cheaper, it can be a false economy. Genuine Brother ink is formulated for your specific printer. It has the right viscosity. It also has the correct chemical composition. This prevents clogs and ensures optimal print quality. Aftermarket inks can dry out faster. They can also contain impurities. These impurities contribute to blockages.
- Store Ink Cartridges Properly: When not in use, keep spare ink cartridges in their sealed packaging. Store them upright in a cool, dark place. Avoid extreme temperatures. Heat can cause ink to dry out. Cold can thicken it. Both conditions negatively impact ink flow.
- Keep Your Printer in a Clean Environment: Dust and pet hair are enemies of printers. They can enter the printer’s internal mechanisms. They can settle on the print head. This contributes to clogs. Keep your printer covered when not in use. Place it in an area free from excessive dust. Regularly wipe down the exterior of your printer.
- Run Built-in Cleaning Cycles Periodically: Even if you do not see print quality issues, running the automatic cleaning cycle monthly can be a good habit. It helps flush out any microscopic particles. It keeps the nozzles clear. Think of it as a routine check-up for your printer.
- Proper Shutdown: Always turn off your printer using its power button. Do not just pull the plug. Proper shutdown allows the print head to park itself. It parks in a sealed position. This protects the nozzles from air exposure. This minimizes drying.
- Address Issues Promptly: If you notice even minor print quality issues, act immediately. Do not wait for the problem to worsen. A small streak can quickly become a severe clog. Early intervention makes cleaning much easier.
Implementing these preventative measures can significantly reduce print head problems. It contributes to your Brother printer’s longevity. It also ensures reliable performance for all your printing needs. Remember, a little regular care goes a long way. This approach saves you from frustrating troubleshooting sessions. Just as you might consider how to clean thermal print head for a label printer, similar principles of prevention apply to your Brother inkjet.
Specific Brother Models and Print Head Cleaning Nuances
While the general steps for cleaning a Brother print head apply broadly, some nuances exist. These depend on your specific Brother printer model. Brother produces a wide range of inkjet printers. These include the MFC (Multi-Function Center) series and the DCP (Digital Copier Printer) series. Each series, and even specific models within them, might have slight differences.
For example, the layout of the control panel varies. How you access the maintenance menu might be different. Some older models might have simpler menus. Newer, more advanced models often feature touchscreens. These touchscreens provide more detailed options and visual guides. Always consult your printer’s user manual first. The manual provides model-specific instructions. It details how to access the cleaning functions. It also shows how to physically locate the print head.
Key Model-Specific Considerations:
- Accessing the Print Head: On most Brother inkjet printers, the print head is integrated with the ink cartridge carriage. When you open the top cover, the carriage moves to the center. This allows access to the ink cartridges and the print head below. However, the exact mechanism for opening the printer or moving the carriage can vary.
- Control Panel Navigation: The buttons and menu structure differ. For example, some models might have a dedicated “Ink” button. Others might require navigating through a “Menu” or “Settings” option. Look for terms like “Maintenance,” “Tools,” or “Utilities.”
- Driver Software: Brother’s printer drivers and utility software also vary by model. Newer drivers might offer more advanced cleaning options. They might also provide better diagnostic tools. Always ensure your printer drivers are up to date. You can usually download the latest drivers from the official Brother support website.
- Print Head Design: While the fundamental concept is similar, the precise design of the print head nozzles can vary. This might slightly impact the effectiveness of manual cleaning methods. Some older models might have easily accessible nozzles. Newer ones might be more recessed.
- Ink Cartridge Types: Brother uses various ink cartridge types. Some are individual color cartridges. Others might combine colors into one. This affects how you remove and reinstall them during manual cleaning. Always handle cartridges carefully.
Tips for Model-Specific Differences:
- Refer to Your Manual: This is the golden rule. Your printer’s user manual is the most accurate source of information. It provides step-by-step instructions tailored to your exact model.
- Brother Support Website: Brother’s official website offers extensive support. You can find digital copies of manuals. They also provide FAQs and troubleshooting guides for specific models.
- Online Forums and Videos: If you cannot find information in the manual, search online. Many user communities and video tutorials exist. They often show cleaning procedures for specific Brother models.
Understanding these model-specific nuances helps you perform cleaning safely and effectively. It ensures you do not accidentally damage your printer. It also helps you achieve the best possible print quality.
FAQ Section
Q1: How often should I clean my Brother print head?
A: You should run the built-in cleaning cycle only when you notice print quality issues like streaks or missing colors. For preventative maintenance, printing something at least once a week helps. If you rarely print, running a quick cleaning cycle or a nozzle check once a month can help prevent serious clogs. Regular use is the best prevention.
Q2: Can I use tap water to clean my print head?
A: No, you should not use tap water. Tap water contains minerals like calcium and magnesium. These minerals can leave deposits inside the print head nozzles as the water evaporates. This can lead to new, and often more severe, clogs. Always use distilled water or a dedicated print head cleaning solution for manual cleaning.
Q3: What if the built-in cleaning cycle doesn’t work?
A: If the automatic cleaning cycle does not improve print quality after two or three attempts, you should consider manual cleaning. This involves gently wiping the print head nozzles with a lint-free cloth dampened with isopropyl alcohol or distilled water. For very stubborn clogs, an advanced syringe method might be necessary.
Q4: How do I know if my print head is truly clogged or just low on ink?
A: Run a nozzle check pattern from your printer’s utility software or control panel. This pattern shows if specific nozzles are blocked (clogged) or if the print is generally faded/missing across all colors (low ink). If individual lines are missing, it’s a clog. If all colors are weak, check ink levels.
Q5: Is it safe to use third-party cleaning solutions?
A: Use caution with third-party cleaning solutions. While some are effective, others might contain chemicals that can damage your print head’s delicate components. Always research the product. Read reviews. Ensure it specifies compatibility with inkjet printers. Distilled water or isopropyl alcohol are generally safer, tried-and-true alternatives.
Q6: Can a print head be too damaged to clean?
A: Yes, a print head can become too damaged. This happens if clogs are severe and left untreated for a long time. The dried ink can harden excessively. Physical damage to the nozzles or internal electronic components can also occur. If cleaning efforts show no improvement after multiple attempts, the print head might need professional repair or replacement.
Conclusion
A clean print head is essential for optimal performance of your Brother printer. We have covered why clogs happen and how to address them. From running the printer’s built-in cleaning cycle to performing gentle and advanced manual cleaning, you now have a comprehensive toolkit. Remember, preparation, safety, and choosing the right supplies are crucial for success.
Troubleshooting common issues helps you refine your approach. Persistent problems might indicate a deeper issue. Preventative measures, such as regular printing and using genuine Brother ink, are your best defense against future clogs. Understanding your specific Brother model’s nuances also enhances your cleaning effectiveness.
Do not let streaky prints or missing colors frustrate you. Take action. By following these steps, you can restore your Brother printer’s print quality. You can also extend its lifespan.
- Brother printer
- print head cleaning
- clogged print head
- printer maintenance


