· Todd Martin · Home Maintenance · 18 min read
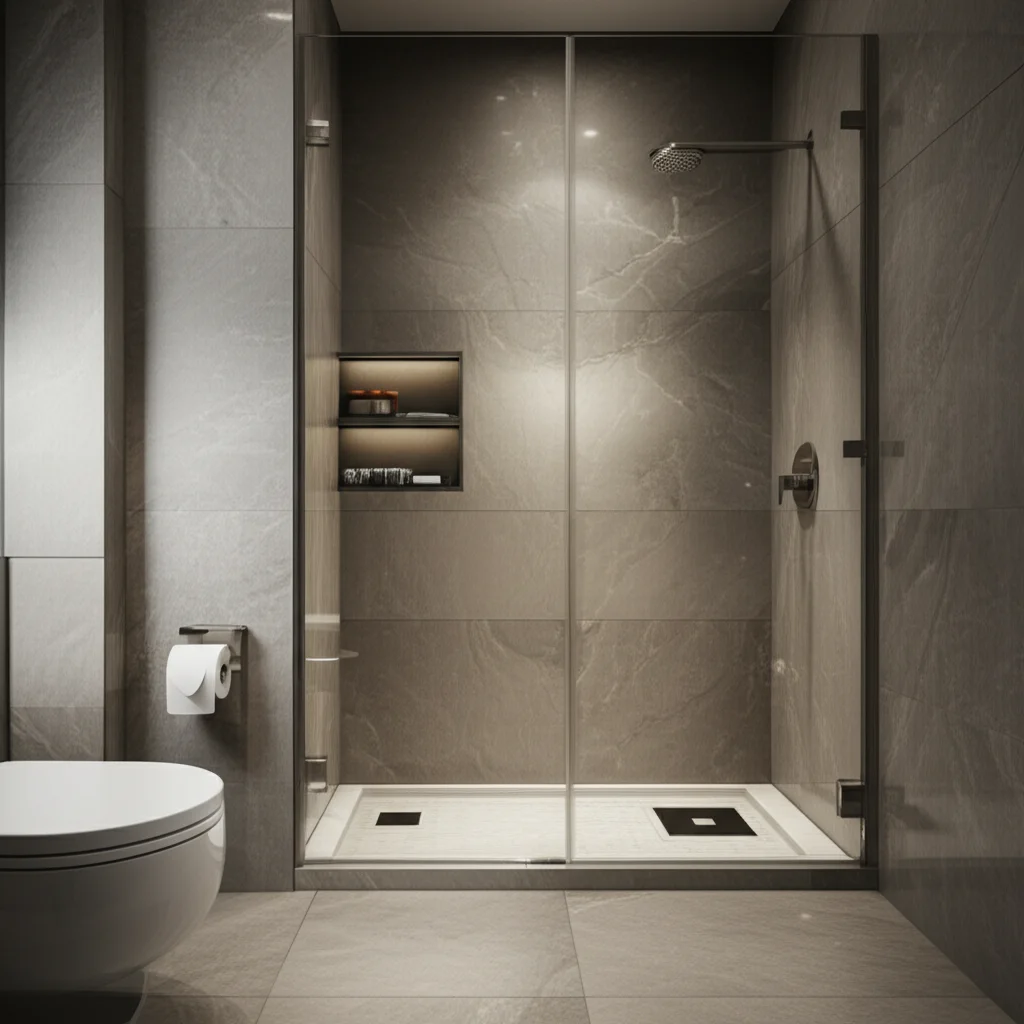
How To Clean Stone Shower
Clean Stone Shower: Essential Tips for Lasting Beauty
A stone shower adds a touch of natural beauty and luxury to any bathroom. You invested in its unique texture and elegant appearance. However, maintaining this beauty requires specific care. Standard cleaning products or harsh chemicals can damage natural stone, leading to etching, discoloration, or permanent dullness. Knowing how to clean stone shower surfaces properly ensures they stay pristine for years.
This guide explores effective, safe methods for cleaning your stone shower. We will cover daily maintenance routines and address common issues like soap scum and mold. I will provide a step-by-step approach to keep your stone looking its best. Get ready to transform your cleaning routine and protect your beautiful stone investment.
Takeaway:
- Use pH-neutral cleaners specifically designed for natural stone.
- Avoid acidic or abrasive cleaners on stone showers.
- Clean your stone shower regularly to prevent buildup.
- Seal your stone shower periodically to protect it from stains.
- Address mold and mildew with stone-safe solutions promptly.
To clean a stone shower, use a soft cloth or sponge with a pH-neutral stone cleaner or a mild dish soap solution. Always rinse thoroughly with clean water. Dry the stone completely to prevent water spots and mineral buildup. Avoid acidic cleaners like vinegar or citrus-based products, as these can etch and damage natural stone surfaces.
Understanding Your Stone Shower Material
Before you clean any stone surface, you must identify your specific stone type. Different natural stones react differently to various cleaning agents. For example, marble and travertine are softer and more porous than granite or slate. This knowledge helps you choose the right cleaning products and techniques.
My own experience tells me that guessing can lead to costly mistakes. I once used a slightly acidic cleaner on a client’s marble vanity, not realizing the stone type. It left a dull, etched spot instantly. This incident taught me the importance of stone identification. Always check with the installer or original documentation if you are unsure about your stone.
Common Stone Types in Showers:
- Marble: This is a classic choice. Marble is beautiful, but it is also a soft, porous stone. It etches easily from acids. It stains quickly without proper sealing.
- Travertine: This is a form of limestone. Travertine often features natural pits and voids. It is also very porous and susceptible to etching and staining. Cleaning travertine shower surfaces requires gentle care.
- Granite: Granite is a harder, denser stone. It is more resistant to scratches and etching. It is still porous and requires sealing.
- Slate: This is a durable, non-porous stone. Slate has a distinctive, often uneven texture. Cleaning slate shower involves understanding its unique surface.
- Onyx: Onyx is a translucent, exotic stone. It is softer and more prone to scratching and etching than granite. It needs very careful cleaning.
- Pebble: Often used for shower floors, pebble stone involves numerous small stones. These are typically sealed, but the grout lines require specific attention. How to clean pebble shower floor focuses on both the stones and the grout.
Each stone has unique properties that dictate the appropriate cleaning methods. Using the wrong product can cause irreversible damage. Always test any new cleaner in an inconspicuous area first. This step protects your beautiful stone investment.
Daily and Weekly Maintenance for Stone Showers
Consistent, gentle cleaning is the secret to a long-lasting stone shower. Daily and weekly routines prevent soap scum, hard water stains, and mold from accumulating. This proactive approach saves you from more intensive cleaning later. It also protects the stone’s integrity. I find that a little effort each day makes a huge difference.
After every shower, I quickly wipe down the stone surfaces. This simple habit stops water spots and soap residue from drying. It only takes a minute or two, but it significantly reduces buildup. This quick wipe also helps keep the grout lines cleaner.
Daily Routine:
- Rinse thoroughly: After showering, rinse all stone surfaces. Use clean, cool water. This washes away soap, shampoo, and body oils.
- Wipe down: Use a squeegee or a soft microfiber cloth. Wipe down all stone walls and the shower floor. This removes excess water. It helps prevent hard water spots. It also reduces mold growth.
Weekly Routine:
- Prepare your cleaner: Mix a few drops of pH-neutral dish soap with warm water in a spray bottle. Or use a specialized pH-neutral stone cleaner. Avoid harsh detergents or abrasive cleaners.
- Spray and let sit: Lightly spray all stone surfaces. Let the solution sit for 5-10 minutes. This allows the cleaner to break down light grime.
- Gentle scrub: Use a soft-bristle brush or a non-abrasive sponge. Gently scrub the stone in small sections. Do not press too hard. You want to lift the dirt, not scratch the stone. Pay attention to corners and edges.
- Rinse completely: Rinse all surfaces with clean, warm water. Make sure no cleaner residue remains. Residue can attract more dirt.
- Dry thoroughly: Use a clean, dry microfiber cloth. Wipe all stone surfaces until dry. This prevents water spots and streaks. Proper drying is crucial for stone maintenance.
- Ventilate: After cleaning, keep the bathroom well-ventilated. Open windows or turn on the exhaust fan. This helps the stone dry faster. It also discourages mold and mildew growth. Good ventilation is key for any shower space.
By following these simple steps, you keep your stone shower looking new. This consistent care also extends the life of your stone. It prevents future problems that require harsher methods.
Tackling Soap Scum and Hard Water Stains on Stone
Soap scum and hard water stains are common enemies of a beautiful stone shower. They create an unsightly film and dull your stone’s natural luster. Because natural stone is porous, these deposits can adhere strongly to the surface. It is important to address them safely. Using the wrong product can cause permanent damage, such as etching or discoloration.
I’ve seen many people try to scrub away soap scum with abrasive pads. This only scratches the stone surface. Others resort to vinegar, which is a major no-no for most natural stones. Acids in vinegar will etch and dull the stone, leaving irreversible marks. Always remember that prevention is easier than cure.
Removing Soap Scum:
- Choose the right cleaner: Use a specialized soap scum remover formulated for natural stone. These cleaners are pH-neutral. They effectively dissolve soap scum without harming the stone. You can find these at home improvement stores.
- Apply the cleaner: Spray the stone-safe soap scum remover directly onto the affected areas. Ensure good coverage.
- Allow dwell time: Let the cleaner sit for the time specified on the product label. This typically ranges from 5 to 15 minutes. This dwell time allows the cleaner to penetrate and loosen the soap scum.
- Gentle agitation: Use a soft-bristle nylon brush or a non-abrasive scrubbing pad. Gently scrub the soap scum. Work in small, circular motions. You should see the scum lifting.
- Rinse thoroughly: Rinse the area completely with clean water. Make sure all cleaner and dissolved soap scum washes away. Leftover residue can create new problems.
- Dry the surface: Wipe the stone dry with a clean microfiber cloth. This prevents new water spots from forming.
Dealing with Hard Water Stains:
Hard water leaves mineral deposits, especially around faucets and showerheads. These stains appear as white, chalky marks. They are stubborn.
- Identify the stain: Confirm it is a hard water stain. It usually looks white or grayish.
- Create a paste (for tough stains): For persistent hard water stains, make a poultice. Mix baking soda with a small amount of pH-neutral stone cleaner or water. This creates a thick paste.
- Apply the poultice: Apply the paste directly over the hard water stain. Cover the paste with plastic wrap. Tape the edges down to create a seal. This keeps the paste moist.
- Let it work: Allow the poultice to sit for several hours, or even overnight. The longer it sits, the more it draws out the minerals.
- Remove and rinse: Scrape off the dried paste with a plastic scraper. Rinse the area thoroughly with clean water.
- Buff dry: Use a clean, dry microfiber cloth to buff the surface. This helps restore shine and prevents new spots.
Remember, consistent daily wiping is the best defense against soap scum and hard water. If stains do appear, act quickly and use stone-specific products. Do not use acidic cleaners like vinegar or lemon juice, as they will damage the stone permanently. You can also explore how to clean hard water from shower head as this often contributes to the problem.
Removing Mold and Mildew Safely from Stone
Mold and mildew thrive in the warm, damp environment of a shower. These fungi not only look unsightly but also pose health risks. More importantly, mold can penetrate porous natural stone. This makes it challenging to remove without damaging the stone itself. It’s crucial to use stone-safe methods to effectively eliminate these growths.
I’ve dealt with stubborn mold patches in many stone showers. My first rule is never to use bleach directly on natural stone. Bleach can strip sealants and discolor certain types of stone. It can also cause pitting over time. Always opt for gentler, stone-specific solutions. Keeping the shower dry and well-ventilated is the best preventive measure. If you have severe mold issues, understanding how to clean mold off natural stone is vital.
Steps to Remove Mold and Mildew:
- Improve Ventilation: Before you even start cleaning, ensure good airflow. Open windows, turn on the exhaust fan. Good ventilation helps dry the area. It also helps prevent future mold growth.
- Prepare a Safe Cleaning Solution:
- Option 1 (Hydrogen Peroxide): Mix a 3% hydrogen peroxide solution with water (50/50 ratio). Hydrogen peroxide is a good disinfectant. It is generally safe for most stones. Always test in a small, hidden area first.
- Option 2 (Mildew Remover for Stone): Purchase a mildew cleaner specifically formulated for natural stone. These products are pH-neutral. They are designed to kill mold without harming the stone.
- Apply the Solution:
- Spray the hydrogen peroxide solution or stone mildew cleaner directly onto the moldy areas.
- Ensure the mold is fully saturated.
- Allow Dwell Time:
- Let the solution sit for 15-30 minutes. For severe mold, you might need to leave it longer, up to an hour. The solution needs time to penetrate and kill the mold spores.
- Gentle Scrubbing:
- Use a soft nylon brush or an old toothbrush for grout lines.
- Use a non-abrasive sponge or soft cloth for stone surfaces.
- Gently scrub the moldy areas. Avoid harsh scrubbing that could scratch the stone or damage the grout.
- Rinse Thoroughly:
- Rinse the entire area with clean, warm water. Ensure all cleaner and mold residue is completely washed away. Leftover residue can become a new dirt magnet.
- Dry Completely:
- Use a clean, dry microfiber cloth to wipe the stone surfaces dry.
- Ensure the area dries completely. Residual moisture encourages mold regrowth.
- Repeat if Necessary:
- For stubborn mold, you may need to repeat the process. Multiple applications are sometimes necessary.
- Ongoing Prevention:
- Maintain good ventilation after every shower.
- Wipe down stone surfaces daily to remove moisture.
- Consider applying a stone sealer regularly. This creates a barrier against moisture and mold.
If mold has deeply penetrated the stone or grout, professional stone restoration might be necessary. Professionals can use specialized poultices or treatments that draw out deep-seated mold. For general mold issues in your shower, you might also find tips on how to clean mold in shower helpful.
Sealing Your Stone Shower for Protection
Sealing your stone shower is not just a suggestion; it is a critical step in long-term maintenance. Natural stone is porous. This means it has tiny openings that can absorb liquids, oils, and dirt. A good sealer penetrates these pores. It creates an invisible barrier. This barrier helps repel water, prevents staining, and inhibits mold growth. Without a sealer, your stone is much more vulnerable to damage and difficult to clean.
I always emphasize the importance of sealing to my clients. I have seen firsthand how much easier sealed stone is to maintain. It resists etching from accidental spills and everyday shower products. A properly sealed stone shower looks better and lasts longer. It makes your cleaning efforts much more effective.
Why Sealing is Important:
- Stain Prevention: Sealers prevent liquids from soaking into the stone. This minimizes permanent staining from shampoo, soap, or hard water.
- Etching Protection: While sealers do not completely prevent etching from acids, they offer a degree of protection. They buy you time to wipe up spills before damage occurs.
- Easier Cleaning: Sealed stone is smoother. Dirt, soap scum, and grime sit on the surface rather than soaking in. This makes daily and weekly cleaning much simpler.
- Mold and Mildew Resistance: By reducing moisture absorption, sealers make it harder for mold and mildew to take root in the stone’s pores.
How to Seal Your Stone Shower:
- Clean the Stone Thoroughly: Before applying a sealer, the stone must be perfectly clean and dry. Any dirt or residue trapped under the sealer will become permanent. Use a pH-neutral cleaner. Rinse and dry completely.
- Choose the Right Sealer:
- Use a penetrating (impregnating) sealer specifically designed for natural stone in wet environments. These sealers penetrate the stone. They do not form a film on the surface.
- Avoid topical sealers. They can create a slippery film in a shower.
- Test the Sealer: Apply the sealer to a small, inconspicuous area first. This helps confirm it does not alter the stone’s appearance. It also lets you check for proper absorption.
- Apply the Sealer:
- Follow the manufacturer’s instructions precisely. Application methods vary by product.
- Typically, you apply the sealer with a clean, lint-free cloth or a paint pad.
- Apply it evenly in thin coats.
- Ensure saturation, but do not let it puddle.
- Allow Dwell Time:
- Let the sealer penetrate for the recommended time (usually 10-20 minutes).
- Wipe Off Excess:
- Crucially, wipe off any excess sealer before it dries. Dried excess sealer can leave a hazy film that is difficult to remove. Use a clean, dry cloth. Buff lightly.
- Cure Time:
- Allow the sealer to cure for the recommended period. This can be 24-72 hours or more. Do not use the shower during this time.
- Reapply as Needed:
- The frequency of re-sealing depends on the stone type, shower usage, and sealer quality. For showers, I recommend re-sealing every 6-12 months.
- You can test if your stone needs re-sealing. Sprinkle a few drops of water on the surface. If the water beads up, the sealer is still working. If it soaks in, it’s time to re-seal. This simple test confirms whether your stone needs attention.
Sealing your stone shower is a protective measure. It significantly prolongs the beauty and life of your stone. It also simplifies your regular cleaning routine.
Best Cleaning Products and Tools for Stone Showers
Choosing the right cleaning products and tools is crucial for maintaining your stone shower without damage. Natural stone, especially softer varieties like marble and travertine, is sensitive. Using harsh chemicals or abrasive tools can lead to irreversible etching, scratching, or discoloration. My cleaning philosophy for stone is always gentle first.
I have seen people ruin their beautiful stone showers by using general bathroom cleaners. These cleaners often contain acids, alkalis, or abrasive components. They are fine for ceramic tile or fiberglass but deadly for stone. Investing in stone-specific products is a small price to pay to protect your significant investment.
Recommended Cleaning Products:
- pH-Neutral Stone Cleaner: This is your primary cleaning agent. These cleaners are specifically formulated for natural stone. They effectively remove dirt and grime without altering the stone’s pH balance. Look for labels that say “stone safe,” “pH-neutral,” or “for natural stone.” Many stone and tile suppliers carry these.
- Mild Dish Soap (Alternative for light cleaning): For daily or very light weekly cleaning, a few drops of mild, pH-neutral dish soap (like Dawn) mixed with water can work. However, avoid dish soaps with added moisturizers, degreasers, or strong fragrances, as they can leave residue.
- Stone Soap Scum Remover: For stubborn soap scum, use a specialized product designed to dissolve soap scum on natural stone. These are typically pH-neutral and break down the scum safely.
- Stone Poultice (for deep stains): For deep-set stains like hard water or mold, a stone poultice is effective. You can buy pre-made poultices or mix your own using specific powders (like diatomaceous earth or kaolin clay) and a stone-safe cleaner.
- Stone Sealer: As discussed, a penetrating sealer is essential. Choose one formulated for showers and natural stone.
Tools You Will Need:
- Soft Microfiber Cloths: These are indispensable. Use them for wiping, rinsing, and drying. They are highly absorbent and non-abrasive. Keep separate cloths for cleaning and drying.
- Non-Abrasive Sponges: Look for sponges that are non-scratch and gentle. Avoid any sponges with scrubbing pads that feel rough.
- Soft-Bristle Nylon Brush: This is ideal for cleaning grout lines and textured stone surfaces. Ensure the bristles are soft enough not to scratch the stone. An old toothbrush works well for tight corners and grout.
- Squeegee: A high-quality squeegee is perfect for wiping down shower walls after each use. It quickly removes water and prevents spots.
- Spray Bottle: Handy for mixing and applying your diluted cleaners.
- Bucket: For mixing cleaning solutions and rinsing cloths.
Products to Absolutely Avoid:
- Acidic Cleaners: Vinegar, lemon juice, citrus-based cleaners, rust removers, and many common bathroom cleaners (like toilet bowl cleaners) are highly acidic. They will etch, dull, and permanently damage most natural stones. This etching looks like dull spots or rings.
- Alkaline Cleaners: While some very mild alkaline solutions might be okay for specific stones, strong alkaline cleaners (like ammonia-based cleaners, oven cleaners, or heavy-duty degreasers) can also damage sealers and some stone types.
- Abrasive Cleaners/Pads: Scouring powders, steel wool, abrasive scrubbing pads, or stiff brushes will scratch the stone surface. These scratches make the stone look dull and can make it more prone to staining.
- Bleach: Avoid using pure bleach. It can discolor certain stones and break down sealants over time. While some stone-safe mold removers might contain a very small, diluted amount of bleach, it is generally best to avoid direct application. You should also be careful if you are considering how to clean shower with bleach on other shower components.
- Oil-Based Cleaners/Soaps: These can leave an oily residue on porous stone. This residue attracts dirt and can be difficult to remove.
By using the correct products and tools, you can keep your stone shower looking beautiful for many years. Regular and gentle care is the key.
Grout Cleaning and Maintenance for Stone Showers
Grout lines are an integral part of your stone shower’s appearance. They provide structure and enhance the stone’s design. However, grout is typically porous. This means it can absorb water, soap scum, and dirt, leading to discoloration, mold, and mildew. Cleaning grout in a stone shower requires extra care. The cleaner you use for the grout must also be safe for the surrounding stone.
I often see grout lines darken over time, especially in high-moisture areas. This darkening is usually a mix of soap residue, mineral deposits from hard water, and mold growth. While it might be tempting to use harsh bleach-based grout cleaners, these can damage natural stone. I always recommend a gentle approach that protects both the grout and the beautiful stone. Remember, how to clean grout in shower when you have stone requires specific consideration.
Steps for Cleaning Grout in a Stone Shower:
- Prepare a Stone-Safe Grout Cleaner:
- Option 1 (DIY): Mix baking soda with a small amount of warm water to form a thick paste. Baking soda is a mild abrasive and odor absorber. It is safe for most natural stone and grout.
- Option 2 (Commercial): Use a pH-neutral, stone-safe grout cleaner. Many natural stone cleaning product lines offer specific grout cleaners that won’t harm the stone.
- Apply the Cleaner:
- Apply the baking soda paste or commercial cleaner directly onto the grout lines. You can use an old toothbrush or a small spatula.
- Ensure the grout lines are fully covered.
- Allow Dwell Time:
- Let the cleaner sit for 10-15 minutes. This allows the cleaner to penetrate the grime and loosen it. For stubborn stains, you can let it sit longer, up to 30 minutes.
- Scrub the Grout:
- Use a soft-bristle nylon brush or a dedicated grout brush.
- Gently scrub the grout lines in a circular motion. Apply moderate pressure. Avoid scrubbing the stone too much, especially with harder brushes.
- You should see the dirt lifting from the grout.
- Rinse Thoroughly:
- Rinse the entire shower area with clean, warm water. Make sure all the cleaning solution and dislodged dirt are washed away.
- Leaving residue can lead to new stains or attract more dirt.
- Dry the Grout and Stone:
- Wipe down all surfaces with a clean, dry microfiber cloth.
- Ensure the grout lines dry completely. This is crucial for preventing mold and mildew recurrence.
Preventing Grout Issues:
- Daily Rinse and Wipe: As with the stone itself, rinse and wipe down your grout lines after every shower. This removes soap and water before they can settle.
- Good Ventilation: Keep your bathroom well-ventilated. An exhaust fan running during and after showers helps dry out the grout quickly.
- Grout Sealing: Just like your stone, grout can be sealed. Use a penetrating grout sealer. This creates a barrier against moisture and stains. Apply it after cleaning the grout, and reapply annually or as needed. A sealed grout line is much easier to keep clean.
- Address Issues Promptly: Don’t let mold or excessive soap scum build up on grout. Address small issues immediately before they become larger problems.
By regularly cleaning and sealing your grout, you maintain the overall pristine look of your stone shower. It’s a small effort for a big impact on your bathroom’s appearance and hygiene. For more general advice on maintaining your shower’s cleanliness, consider looking at how to clean shower floor and how to clean bottom of shower.
Preventing Future Stone Shower Problems
Preventing problems is always easier and less costly than fixing them. Your stone shower represents a significant investment in your home’s aesthetics and value. By adopting smart habits and proactive measures, you can minimize future cleaning challenges. You also extend the life and beauty of your natural stone. I believe that a little prevention goes a long way in home maintenance.
My personal routine includes a quick wipe-down after every shower, and it saves me hours of deep cleaning. This simple step stops hard water and soap scum before they even have a chance to set. It’s about consistent, small efforts.
- stone shower cleaning
- natural stone care
- shower maintenance
- mold removal stone
- soap scum stone

Todd Martin
Senior Writer
With over 15 years of experience in home renovation and design, I started HEG to share what I’ve learned with homeowners who want to create spaces that are both beautiful and functional. I’ve always believed in a hands-on approach, and over the years, I’ve picked up practical solutions that actually work. Through HEG, I aim to make home improvement more approachable, sharing real tips that help you create a home you truly love.