· Todd Martin · Home Care · 22 min read
How To Deep Clean Tile Floors

Achieve Spotless Tiles: Your Guide to Deep Cleaning Tile Floors
Do your tile floors look dull, even after a regular mop? Over time, dirt and grime settle into textured surfaces and grout lines. This makes your once-shiny tiles lose their appeal. A superficial clean just moves dirt around. You need a full deep clean for tile floors to restore their beauty. I will show you how to truly deep clean tile floors, making them look new again. This guide covers everything from preparing your space to choosing the right cleaners for different tile types. We will also tackle stubborn grout and give you tips for ongoing maintenance. Get ready to transform your home.
Takeaway
To deep clean your tile floors and grout effectively:
- Understand your tile type to choose safe cleaning methods.
- Gather the correct tools and supplies before you start.
- Always sweep or vacuum thoroughly to remove loose dirt.
- Use appropriate cleaning solutions for both tiles and grout.
- Dry the floor completely to prevent streaks and mildew.
- Maintain cleanliness with regular, less intensive cleaning.
Deep cleaning tile floors means removing embedded dirt, grime, and stains from both the tile surface and grout lines. This process typically involves pre-sweeping, specialized cleaning solutions, scrubbing, and thorough rinsing. It aims to restore the original appearance of the floor, going beyond daily surface cleaning.
Understanding Your Tile Type for Effective Deep Cleaning
Before you start any deep cleaning project, you must know your tile type. Different tiles require different care methods. Using the wrong cleaning solution or tool can damage your floor permanently. I always check my tile material first. This ensures I pick the best and safest approach.
Common Tile Materials and Their Needs
Ceramic and porcelain tiles are common choices. They are durable and water-resistant. These tiles handle most cleaning solutions well, including mild detergents and some acidic cleaners for tough stains. However, unglazed ceramic can be more porous. Natural stone tiles, like marble, travertine, or granite, need special care. These stones are porous and sensitive to acidic cleaners. Acids can etch the surface, causing permanent damage. For these, use pH-neutral cleaners specifically designed for stone. If you have any doubts about cleaning natural stone, please read our guide on how to clean natural stone tile and grout.
Saltillo tiles are another unique type. They are highly porous and often unglazed. Saltillo requires specific cleaning agents and sealants. Using water alone can cause issues. Cement tiles also need gentle, pH-neutral cleaners. They can absorb liquids easily. Knowing your tile type prevents damage. It also makes your deep cleaning efforts more effective.
How to Identify Your Tile Type
Sometimes, you might not know what type of tile you have. Look for clues. Ceramic and porcelain tiles often have a uniform color. They may also have a pattern that does not go all the way through the tile body if chipped. Natural stone shows natural variations in color and pattern. It often feels cooler to the touch. You might also find chips that show the material goes all the way through. If you are still unsure, test a small, hidden area. This could be in a closet or under a rug. Apply a tiny amount of your chosen cleaner and observe the reaction. This step is crucial for porous or delicate tiles.
Knowing your tile type helps you select the right products. It ensures the deep clean is safe and effective. This careful preparation saves you from potential damage and extra costs later. I always take this step seriously.
Gathering Your Deep Cleaning Arsenal: Tools and Supplies
A successful deep clean for tile floors starts with having the right tools. You need more than just a mop and bucket for a truly thorough clean. I make sure I have everything ready before I begin. This saves time and frustration during the process. Having the right supplies makes the job easier and more effective.
Essential Cleaning Tools
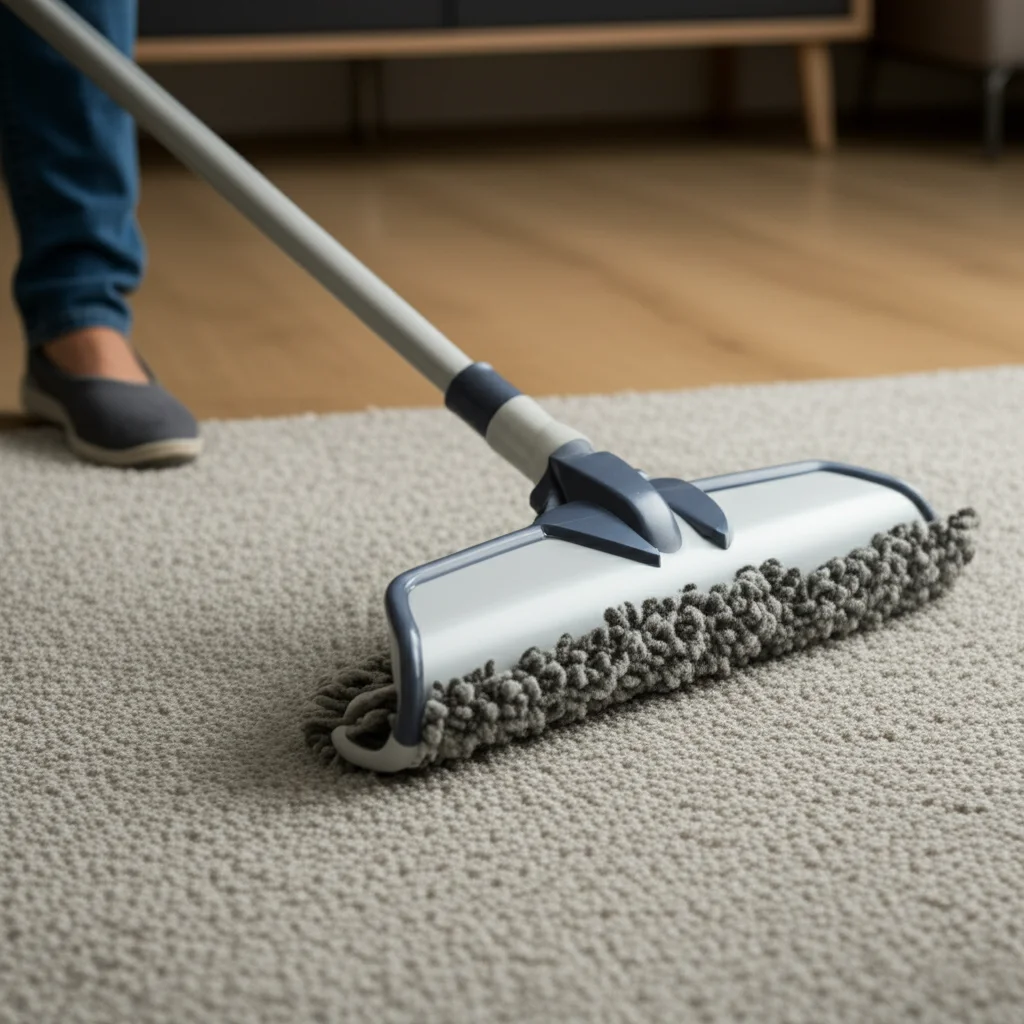
First, you need a good broom or a vacuum cleaner. This removes loose dirt and debris. I prefer a vacuum with a hard floor attachment. This prevents scratching. You will also need a stiff-bristled brush, especially for grout lines. Do not use metal brushes as they can scratch tiles. A grout brush is small and precise, perfect for those narrow spaces. A standard mop is fine for rinsing, but a microfibre mop head works best for picking up dirt. You might also want a squeegee. This helps push dirty water towards a drain or into a bucket. Large sponges or rags are useful for wiping and rinsing.
For very tough stains or large areas, consider a steam cleaner. Steam cleaners use hot steam to loosen dirt and sanitize surfaces without chemicals. They are excellent for deep cleaning both tile and grout. Another option is a spin mop and bucket system. This allows for better wringing. This prevents excess water on the floor.
Necessary Cleaning Solutions
The cleaning solution depends on your tile type. For most ceramic and porcelain tiles, a general-purpose, pH-neutral floor cleaner works well. Always dilute it according to the manufacturer’s instructions. For natural stone tiles, use cleaners specifically labeled as safe for stone. These are usually pH-neutral. Avoid anything acidic.
For grout lines, you will need a dedicated grout cleaner. Many grout cleaners contain bleach or oxygen bleach. These are effective at removing mold and mildew stains. However, always test them in an inconspicuous area first. Some grout cleaners are acid-based, which are good for removing mineral deposits but should not be used on natural stone or colored grout that might fade. A mixture of warm water and a little dish soap can work for light grout cleaning. For an in-depth guide on grout cleaning, check out our article on how to clean tile grout on floors.
Finally, have plenty of clean water. You will need it for rinsing. Two buckets are ideal: one for clean solution, one for dirty rinse water. Safety gear, such as gloves, is also a must. Some cleaning chemicals can irritate your skin. Always read labels and follow safety instructions.
Pre-Deep Clean Preparations: Clearing and Initial Sweep
Before you introduce any cleaning solutions, proper preparation is key. I always spend time on this initial step. It makes the actual deep cleaning process much more efficient. Skipping this part means you are just pushing dirt around. A thorough preparation saves you time and effort in the long run.
Clearing the Area
First, remove everything from your tile floor. This means furniture, rugs, mats, and any other items. Move them to an adjacent room or a safe spot. This gives you full access to the entire floor area. It also prevents items from getting wet or damaged by cleaning solutions. I find it helpful to move smaller items first. Then, I tackle the larger pieces of furniture. If something is too heavy to move, place plastic sheeting or old towels under its legs. This protects the floor and the furniture.
Do not forget to clear obstacles. Make sure there are no wires or cords on the floor. This prevents tripping hazards. Open windows and doors if possible. This helps with ventilation once you start using cleaning solutions. Good airflow is important for drying and reducing fumes.
Initial Sweep or Vacuum
Once the floor is clear, perform a thorough sweep or vacuum. This step removes all loose dirt, dust, crumbs, and debris. If you skip this, you will just turn the dry debris into muddy paste once you add water. This makes your cleaning solution dirty quickly.
Use a high-quality broom with stiff bristles or a vacuum cleaner with a hard floor attachment. Pay close attention to corners, edges, and under cabinets. These areas tend to accumulate more dust. If using a vacuum, go over the area twice. This ensures maximum removal of dry particles. For very fine dust, a dust mop can be effective after vacuuming. I always make sure the floor is as free of loose particles as possible. This sets the stage for a truly deep clean. It allows your cleaning solutions to work directly on the embedded grime. This prevents them from being wasted on surface dust.
Tackling Tile Surfaces: Step-by-Step Deep Cleaning Solutions
Once your floor is prepped, it is time to deep clean the tile surfaces themselves. This involves applying the right cleaner and using the correct scrubbing technique. The goal is to lift and remove embedded dirt without damaging your tiles. I approach this systematically, working in sections.
Choosing and Applying Your Cleaning Solution
Based on your tile type, select the appropriate cleaning solution. For ceramic and porcelain, I mix a pH-neutral tile cleaner with warm water according to package directions. If you have natural stone tiles, stick to cleaners specifically formulated for stone. These cleaners are gentle. They will not etch or dull the surface. Never use harsh acids or ammonia on natural stone. If you are cleaning porcelain tiles, you might also find useful tips on how to prevent streaks in our guide on how to clean porcelain tile floors without streaks.
Pour your cleaning solution into a bucket. Use a clean mop or sponge to apply the solution to a small section of the floor. Avoid saturating the floor with too much water. Work on an area that you can easily manage, usually about 5x5 feet. Let the solution sit on the tiles for 5-10 minutes. This allows it to break down dirt and grime. Do not let it dry on the surface.
Scrubbing the Tile Surface
After the solution has had time to work, it is time to scrub. For tile surfaces, a stiff-bristled brush attached to a pole or a sturdy scrub brush works well. Scrub in small, circular motions. Apply firm but not excessive pressure. Pay extra attention to high-traffic areas and visible stains. For stubborn spots, you might need to apply a bit more cleaner and scrub longer. If you have a steam cleaner, this is an excellent time to use it. Steam effectively loosens dirt without chemicals.
Rinse your scrubbing brush frequently in a separate bucket of clean water. This prevents you from spreading dirt around. The goal is to lift the dirt, not just move it. Ensure you cover every part of the tile surface in the section you are working on. This detailed scrubbing makes a big difference. It brings out the hidden shine of your tiles.
Rinsing and Drying the Tiles
Once you have scrubbed a section, it is crucial to rinse it thoroughly. Fill a clean bucket with plain, clean water. Use a clean mop or large sponge to wipe up the dirty solution. Rinse the mop frequently. Change the rinse water often. You want to remove all traces of the cleaning solution and lifted dirt. Remaining residue can leave streaks or attract new dirt faster. I usually rinse each section two or three times until the water runs clear.
After rinsing, dry the tiles quickly and completely. Use a clean, dry microfiber mop or a large towel. You can also use a squeegee to push excess water towards a drain. Quick drying prevents water spots and streaks. It also helps prevent mildew growth, especially in damp areas. Proper drying ensures your deep clean truly shines. Repeat these steps for each section of your tile floor until the entire area is clean.
Mastering Grout Lines: The Key to a Truly Clean Floor
While cleaning the tile surface is important, it is the grout lines that often betray a floor’s true cleanliness. Grout is porous and absorbs dirt, spills, and mildew, turning dark and dingy. Deep cleaning tile floors means tackling the grout. This step can transform your floor from good to truly spotless. I focus heavily on this part.
Pre-Treating and Applying Grout Cleaner
Before you apply a specific grout cleaner, ensure the tile surface itself is relatively clean. This prevents more dirt from getting into the grout. For heavily stained grout, I recommend a pre-treatment. You can make a paste of baking soda and water. Apply this paste directly to the grout lines. Let it sit for 10-15 minutes. This helps loosen some of the surface grime.
Next, apply a dedicated grout cleaner. Choose one that is appropriate for your type of grout and tile. For typical cement-based grout, an oxygen bleach-based cleaner works very well. Apply it directly to the grout lines. Follow the product instructions for dwell time. This is usually 5-15 minutes. Do not let the cleaner dry on the grout. If it starts to dry, mist it lightly with water. Always work in small sections. This way, the cleaner stays active on the grout.
Scrubbing the Grout Lines
This is where the real work happens. You need a stiff-bristled grout brush for this step. These brushes are specifically designed to fit into the narrow grout lines. Apply firm pressure. Scrub back and forth along the grout lines. You will see dirt and grime lift away. For particularly stubborn spots, you may need to apply a little more cleaner and scrub harder. An old toothbrush can also be useful for very tight corners or intricate patterns.
Some people use electric scrubbers with brush attachments. These can save a lot of manual effort, especially for large areas. If using a steam cleaner, direct the nozzle along the grout lines. The hot steam helps break down grime and sanitize the area. This makes scrubbing easier. My experience shows that consistent, focused scrubbing is what makes grout lines bright again.
Rinsing and Final Wipe-Down
After scrubbing a section of grout, you must rinse it thoroughly. Use a clean mop or a bucket of clean water and a large sponge. Wipe away the dirty cleaning solution and lifted grime. Rinse your mop or sponge frequently in a separate bucket of clean water. You want to remove all residue from the grout and surrounding tiles. Any remaining cleaner can attract dirt later or leave a haze. Change your rinse water often. This ensures you are not just spreading dirty water back onto the clean floor.
After rinsing, dry the grout and tiles completely. A clean, dry towel or microfiber cloth works well. Ensure no standing water remains in the grout lines. This prevents new dirt from sticking or mildew from forming. Once dry, your grout lines should look significantly cleaner and brighter. This completes the deep cleaning of the tile floor.
Drying and Sealing: Protecting Your Deep Cleaned Tiles
After the rigorous scrubbing and rinsing, the next critical steps are drying and, for many tile types, sealing. These steps protect your newly deep-cleaned floors and help maintain their shine. Improper drying can lead to streaks and moisture issues. Sealing helps keep dirt out. I never skip these parts.
The Importance of Thorough Drying
Prompt and complete drying is essential. If you leave water on your tile floors, it can cause several problems. First, standing water can lead to water spots and streaks, especially on glossy tiles. This undoes all your hard work. Second, moisture in grout lines encourages mold and mildew growth. This makes your grout dingy again quickly. Third, for unglazed or porous tiles, prolonged wetness can lead to absorption issues or even damage.
To dry your floors effectively, use a clean, dry microfiber mop or several clean, absorbent towels. For large areas, a squeegee can quickly push excess water into a drain or a designated collection point. You can also use fans or open windows to increase airflow. This speeds up the drying process. I make sure the floor feels completely dry to the touch before moving to the next step or putting furniture back. This can take some time, especially in humid environments. Patience here pays off.
When and How to Seal Tile and Grout
Sealing is crucial for many tile types and almost all grout. Grout is inherently porous, acting like a sponge for dirt, spills, and moisture. Sealing creates a protective barrier. This barrier makes the grout less absorbent and easier to clean in the future. Natural stone tiles (like marble, travertine, or slate) are also porous and require sealing. This protects them from staining and etching. Glazed ceramic and porcelain tiles typically do not need sealing. Their glaze provides a protective layer.
To determine if your grout needs sealing, drop a few drops of water on it. If the water beads up, your sealer is still working. If it soaks in immediately, it is time to reapply. I usually recommend sealing grout every 1-2 years, depending on traffic and cleaning frequency.
To seal, first ensure the grout and tile are completely dry. Apply a grout or tile sealer according to the product instructions. Most sealers are liquid. You can apply them with a small brush, sponge applicator, or spray bottle. Wipe away any excess sealer from the tile surface immediately. Let the sealer penetrate for the recommended time, then wipe off any remaining residue. Some sealers require a second coat. Allow the sealer to cure fully before reintroducing traffic. This curing time can range from a few hours to 24-48 hours. Sealing extends the life of your deep clean. It keeps your floors looking great longer.
Maintaining the Shine: Post-Deep Clean Care Tips
You have put in the effort to deep clean your tile floors. Now, the goal is to keep them looking fantastic for as long as possible. Regular maintenance is key to extending the life of your deep clean. It prevents grime buildup. This means you will not need to deep clean as often. I follow these simple steps to keep my tile floors sparkling.
Regular Cleaning Routine
Consistency is crucial. Sweep or vacuum your tile floors regularly. Do this daily in high-traffic areas and a few times a week elsewhere. This removes loose dirt and grit. This grit can scratch your tiles and grind into grout lines. Use a soft-bristled broom or a vacuum with a hard floor attachment.
Mop your tile floors with a pH-neutral cleaner once a week or as needed. Do not use too much cleaning solution. Excessive water can leave streaks or seep into grout. Change your mop water frequently. This prevents spreading dirt. Always dry your floors after mopping to prevent water spots and mildew. For common cleaning tasks, our guide on how to clean tile floors offers general tips. For specific challenges like cleaning off building materials, you might also find value in articles like how to clean paint off tile or how to clean caulk off tile.
Protecting Your Tile Floors
Prevention is easier than cure. Place mats at all entrances to your home. These mats trap dirt and debris before it gets tracked onto your tile floors. Use area rugs in high-traffic areas, like hallways and living rooms. Rugs protect the tile from wear and tear. They also add comfort. Ensure your rugs have a non-slip backing, especially on smooth tile surfaces. You can learn more about this in our article on how to keep rugs from slipping on tile.
Wipe up spills immediately. Acids from food or drinks can stain or etch unsealed natural stone and even some glazed tiles if left too long. For sticky spills, use a damp cloth and a mild cleaner. Avoid dragging heavy furniture across tile floors. Use furniture pads under legs to prevent scratches.
Addressing Stains Promptly
Even with good maintenance, stains can happen. Address them as soon as you notice them. The longer a stain sits, the harder it is to remove. For general stains, a mixture of warm water and dish soap often works. For tougher stains on ceramic or porcelain, you might use a mild abrasive cleaner or a paste of baking soda and water. Always test any stain remover in an inconspicuous area first.
For natural stone, use poultices for oil-based stains or specialized stone cleaners for other types. Never use harsh chemicals on natural stone. Prompt action keeps small issues from becoming big problems. These maintenance tips will keep your deep-cleaned tile floors beautiful for a long time.
Troubleshooting Common Tile Deep Cleaning Challenges
Even with the best plan, you might face some challenges when deep cleaning tile floors. Stubborn stains, lingering odors, or hazy finishes can be frustrating. I have encountered these issues myself. Here are some solutions to common problems you might face.
Dealing with Stubborn Stains
Some stains just do not want to go away with regular cleaning.
- Rust Stains: For rust spots on ceramic or porcelain tile, try a commercial rust remover designed for tiles. Apply it carefully and follow instructions. For natural stone, consult a professional cleaner or use a specialized stone rust remover, as many common removers are acidic.
- Grease and Oil Stains: On unsealed tiles, grease can soak in. For fresh stains, sprinkle cornstarch or baking soda to absorb the oil. Let it sit, then sweep it up. For older stains, a poultice (a paste of absorbent material and a strong cleaner) might be needed.
- Hard Water Spots/Soap Scum: These are common in bathrooms. A solution of white vinegar and water (1:1 ratio) works well for ceramic and porcelain. Spray it on, let it sit, then scrub. For natural stone, use a specialized stone cleaner for hard water. Vinegar will etch natural stone.
Always test stain removers in a hidden spot first. This checks for any adverse reactions.
Tackling Hazy or Streaky Finishes
After cleaning, sometimes floors look hazy or streaky. This is usually due to residue.
- Too Much Cleaner: Using too much cleaning solution or not diluting it properly leaves a film.
- Insufficient Rinsing: Not rinsing thoroughly enough leaves cleaner residue behind.
- Dirty Mop Water: Using dirty mop water to rinse just puts dirt back on the floor.
To fix a hazy floor, re-mop the entire area with clean, plain water. Rinse the mop frequently. You might need to change the rinse water multiple times. Dry the floor immediately and completely after rinsing. A microfiber mop or clean, dry towels work best. Ensure good air circulation during drying. Sometimes, a clean buff with a dry mop can help remove light haze.
Removing Persistent Odors
Tile floors can sometimes hold onto odors, especially in areas with pet accidents or spills.
- Enzymatic Cleaners: For pet urine, use an enzymatic cleaner specifically designed to break down organic matter. These cleaners do not just mask the odor. They eliminate it at the source. Apply, let it sit, then blot it up.
- Baking Soda: Sprinkle baking soda generously over the affected area. Let it sit overnight to absorb odors. Vacuum it up the next day.
- Ventilation: Ensure good air circulation. Open windows or use fans. This helps odors dissipate.
If odors persist, the issue might be deeper, possibly in the subfloor or behind baseboards. If that is the case, further investigation may be necessary. By addressing these challenges systematically, you can achieve a truly pristine and fresh-smelling tile floor.
Frequently Asked Questions About Deep Cleaning Tile Floors
Q1: How often should I deep clean my tile floors?
A1: The frequency depends on foot traffic and household activity. For high-traffic areas like kitchens and entryways, deep clean every 3-6 months. Low-traffic areas like bedrooms or formal dining rooms might only need deep cleaning once a year. Regular maintenance reduces the need for frequent deep cleaning.
Q2: Can I use a steam cleaner for all types of tile floors?
A2: Steam cleaners are excellent for most ceramic and porcelain tiles and grout. They use heat and water, minimizing chemical use. However, be cautious with natural stone, unsealed terracotta, or delicate tiles. Excessive heat or moisture can be damaging. Always check your tile manufacturer’s recommendations first.
Q3: What is the best way to clean very dirty grout lines?
A3: For very dirty grout, start by applying a specialized oxygen bleach-based grout cleaner. Let it sit for the recommended time. Then, scrub vigorously with a stiff grout brush. For tough stains, a paste of baking soda and hydrogen peroxide applied for several hours can also be effective. Rinse thoroughly afterwards.
Q4: How can I prevent my tile floors from getting dirty quickly after deep cleaning?
A4: To keep floors clean longer, place mats at entrances to trap dirt. Use area rugs in high-traffic zones. Wipe up spills immediately. Sweep or vacuum regularly to remove loose grit. Re-seal your grout every 1-2 years to maintain its protective barrier and prevent dirt absorption.
Q5: Is vinegar safe to use for deep cleaning tile floors?
A5: White vinegar diluted with water is safe and effective for cleaning glazed ceramic and porcelain tiles. It helps cut through grease and hard water stains. However, never use vinegar on natural stone tiles (like marble or travertine) or on unsealed grout, as its acidity can etch surfaces or damage the grout.
Q6: What should I do if my tile floor still looks dull after deep cleaning?
A6: If your tile floor looks dull after deep cleaning, it might be due to residue from cleaning products or hard water. Re-mop the floor with plain, clean water, rinsing the mop frequently. Ensure the floor dries completely and quickly. If it’s natural stone, it might need re-sealing or professional polishing.
Transforming Your Home with Truly Clean Tile Floors
Taking the time to deep clean tile floors provides immense satisfaction. You not only restore the beauty of your living space but also contribute to a healthier environment. We covered every aspect, from understanding your specific tile type to meticulously cleaning and protecting both the tiles and the often-overlooked grout lines. You now know the essential tools, the right cleaning solutions for different materials, and the critical steps for drying and sealing. I truly believe that following this guide will make a significant difference.
Remember, the true longevity of your deep clean relies on consistent maintenance. Regular sweeping, prompt spill cleanup, and strategic use of mats and rugs will keep your tile floors looking pristine for longer. Deep cleaning tile floors is a rewarding task. It makes your home feel fresh and inviting. Ready to get started? Gather your supplies and embark on this transformative cleaning project today. Your tile floors, and your home, will thank you.
- tile cleaning
- grout cleaning
- floor maintenance

Todd Martin
Senior Writer
With over 15 years of experience in home renovation and design, I started HEG to share what I’ve learned with homeowners who want to create spaces that are both beautiful and functional. I’ve always believed in a hands-on approach, and over the years, I’ve picked up practical solutions that actually work. Through HEG, I aim to make home improvement more approachable, sharing real tips that help you create a home you truly love.