· Todd Martin · Home Repair · 21 min read
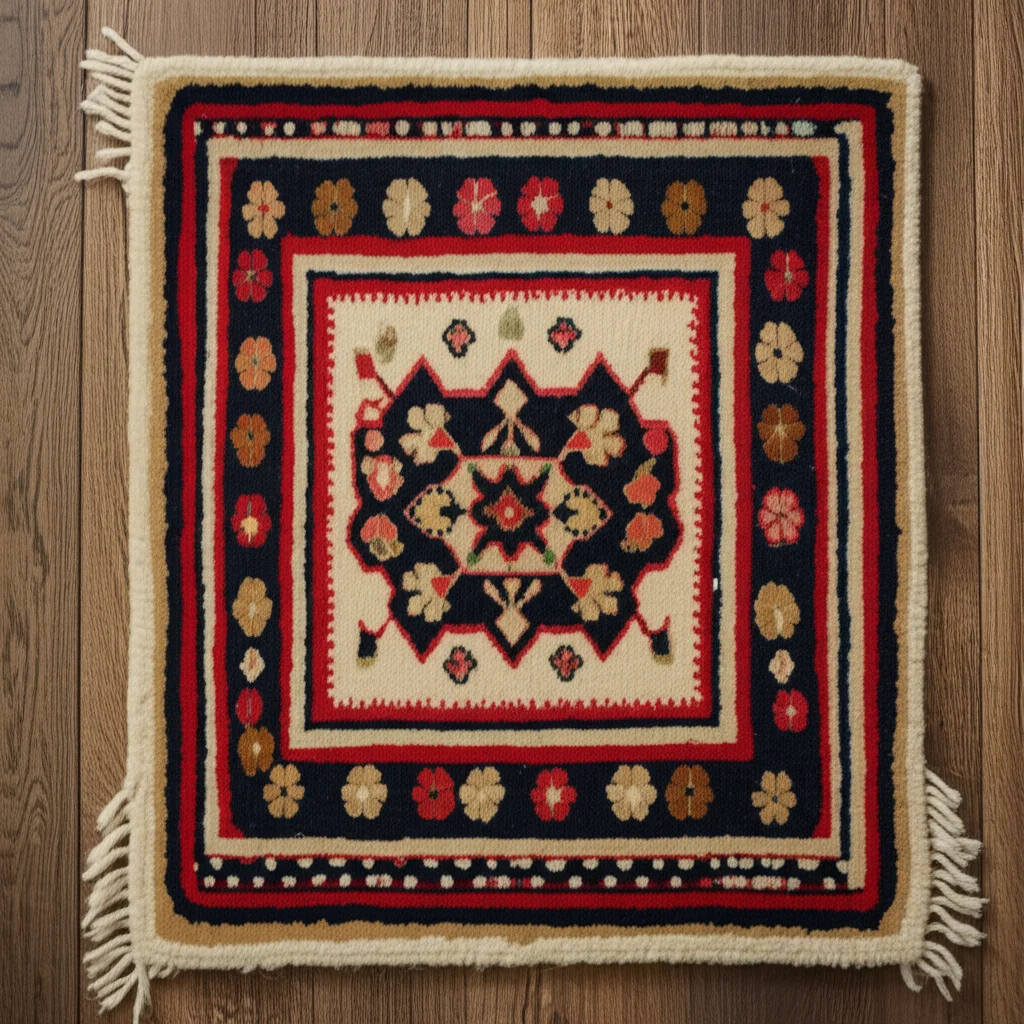
How To Do Turned Wool Stitches To Fix Wool Rugs
Master Turned Wool Stitches for Effective Rug Repair
Have you ever looked at a beloved wool rug, seen a worn spot or a small tear, and wished you could bring it back to life? Many people believe professional repair is the only option. However, learning how to do turned wool stitches allows you to fix wool rugs yourself. This traditional mending technique helps restore the beauty and extend the life of your cherished pieces. It is a rewarding skill for any homeowner.
This guide will teach you the fundamentals of turned wool stitches. We will cover preparing your rug, selecting the right materials, and executing each step. You will discover how this precise stitching method blends seamlessly with existing fibers. By the end, you will feel confident tackling minor damage. This hands-on approach keeps your wool rugs looking their best for years to come.
Takeaway
- Assess Damage: Determine if turned wool stitches are appropriate for your rug’s specific damage type.
- Gather Tools: Collect essential supplies like matching wool yarn, needles, and a thimble before you begin.
- Prepare Area: Clean and stabilize the damaged section to ensure a strong, lasting repair.
- Master Technique: Practice the turned wool stitch to create a secure and visually blended repair.
- Maintain Rug: Implement proper care routines to prevent future damage and preserve your repaired rug.
Clear, Concise Answer to the Main Query
To fix wool rugs with turned wool stitches, you pass a needle through the rug’s foundation, wrap the thread around the needle, and pull it through. This creates a secure, turned loop. Repeat this action, closely mirroring the original pile, to invisibly mend damaged areas, ensuring a durable and seamless repair.
Understanding Turned Wool Stitches for Rug Mending
Turned wool stitches are a specific hand-stitching technique. This method is crucial for repairing woven wool rugs. It involves re-creating the rug’s pile by looping wool yarn around a foundation thread. This process ensures the new fibers stand upright, just like the original ones. Understanding this stitch is the first step to successfully mend your wool rugs.
The stitch name “turned” comes from how the yarn wraps and twists around the needle. This turning action creates a secure knot at the base of each new pile tuft. It locks the fiber in place, preventing unraveling. This makes the repair robust and long-lasting, even in high-traffic areas. This technique is especially useful for small to medium-sized holes or worn spots.
The beauty of turned wool stitches lies in their ability to blend. When done correctly, the repaired area becomes almost invisible. This is because you use yarn that matches the rug’s original wool. The method replicates the rug’s texture and density. This attention to detail preserves the rug’s original appearance and value.
This traditional repair method demands patience and precision. It is not a quick fix, but the results are worth the effort. It allows you to tackle common rug issues like moth damage or wear. Many people find the process meditative. It connects them to the craft of rug making itself. This deep engagement ensures a high-quality, durable repair for your cherished wool rugs.
Identifying Damage Suitable for Turned Wool Stitch Repair
Before you begin, you must assess the damage on your wool rug. Not all rug issues are suitable for turned wool stitches. This method works best for specific types of damage where the rug’s foundation is still intact or can be easily stabilized. Knowing what to look for will save you time and effort. It also ensures a successful repair.
Look for areas where the pile has worn away but the backing threads remain. Small holes, thinning spots, or areas chewed by pets are often good candidates. If the damage extends to the foundation, but the hole is small (up to a few inches), you can often stabilize the foundation first. This provides a base for your new stitches.
Damage like large tears where the foundation is completely severed across a wide area may need more extensive reweaving. Also, a very large section of missing pile, such as a large burn mark, might be beyond this technique alone. For these, professional rug repair services might be necessary. My focus is on empowering you with skills for manageable repairs.
Consider the rug’s overall condition and age. An antique rug with a small worn spot is a perfect candidate for this careful repair. A very fragile rug with widespread dry rot might be too delicate for hand stitching. Always check the rug’s stability around the damaged zone. A firm foundation is key to securing your turned wool stitches. This careful evaluation ensures you choose the right repair method.
Essential Tools and Materials for Wool Rug Mending
Gathering the correct tools and materials is a vital step. Having everything ready before you start makes the repair process smooth and efficient. You do not want to stop mid-stitch to search for a missing item. The right supplies ensure a durable and aesthetically pleasing repair for your wool rugs.
Here is what you will need:
- Matching Wool Yarn: This is the most crucial item. You need yarn that closely matches the color, thickness, and fiber type of your rug’s original wool. Sometimes, you can carefully snip a tiny piece of yarn from an inconspicuous area of your rug, like the underside or edge, to use for color matching. If you cannot find an exact match, choose a slightly darker shade rather than a lighter one, as it will blend better. Consider the specific type of wool for your rug; for example, if you have an oriental rug, ensure the wool is suitable.
- Upholstery or Curved Needle: These needles are strong and have a sharp point. A curved needle can be especially helpful for navigating the tight weaves of a rug. Choose a needle size appropriate for the thickness of your wool yarn.
- Thimble: Protecting your finger is important when pushing a needle through dense rug material. A thimble provides necessary protection.
- Small, Sharp Scissors: You will need these for trimming yarn ends cleanly. Precision is key for neat work.
- Tweezers: These are useful for pulling out stray fibers or helping to guide the yarn. They allow for delicate manipulation.
- Fabric Adhesive (Optional): A small amount of clear-drying fabric adhesive can be used to stabilize the rug’s foundation threads if they are loose. Apply it sparingly and let it dry completely before stitching.
- Strong Thread for Foundation Repair (Optional): If the foundation itself has a small tear, you might need a strong, thin thread (like upholstery thread or dental floss) to mend it before adding the wool pile.
- Vacuum Cleaner: Before any repair, clean the rug. A thorough vacuuming removes loose debris. For deep cleaning, refer to guides on how to clean a wool rug.
- Cleaning Supplies: Depending on your rug’s condition, you might need specific rug cleaning products. Knowing how to clean a wool rug at home can prepare your repair area well.
Having these items ready ensures you can focus on the stitching technique. It helps you avoid interruptions. This prepared approach leads to a better quality repair for your wool rugs.
Preparing Your Wool Rug for Stitching
Proper preparation is essential for a successful rug repair. A clean and stable foundation is crucial for turned wool stitches to hold securely. Skipping these steps can lead to a less durable or visible repair. Taking your time now ensures a lasting fix for your wool rugs.
First, thoroughly clean the damaged area and the surrounding rug. Use a vacuum cleaner to remove loose dirt, dust, and debris. Gently brush away any embedded particles. If the rug needs more extensive cleaning, consider how you clean a wool rug as per common guidelines. A clean surface helps the new wool blend better. It also prevents dirt from becoming trapped in the repair.
Next, stabilize the rug’s foundation. If the backing threads around the damage are loose or frayed, you need to secure them. You can use a strong, fine thread and a regular sewing needle to loosely stitch any separated warp or weft threads back together. This creates a firm base. For very small tears in the foundation, a tiny drop of clear-drying fabric adhesive can help. Apply it to the back of the rug and let it dry completely.
Ensure the area is flat and taut. You might place a heavy book under the rug to create a firm surface. For larger repairs, using an embroidery hoop or stretching the rug gently can help keep the fabric stable. A stable surface prevents puckering. It also makes it easier to achieve even stitches.
Trim any frayed or excessively long original wool fibers around the edge of the damage. You want a clean, defined edge to work from. This preparation ensures your new turned wool stitches have a clear starting point. This meticulous preparation sets the stage for a strong, invisible repair.
Step-by-Step Guide to Executing Turned Wool Stitches
Now comes the heart of the repair: executing the turned wool stitches. This technique might seem complex at first, but with practice, it becomes intuitive. Remember to work slowly and methodically. Your goal is to recreate the rug’s original pile density and texture. Follow these steps carefully to fix wool rugs effectively.
1. Threading Your Needle
Cut a length of your matching wool yarn, about 18-24 inches long. Longer pieces can tangle easily. Thread one end of the yarn through your upholstery or curved needle. Do not knot the end of the yarn yet. You will secure it differently within the rug’s foundation.
2. Securing the Starting Point
Start on the underside of the rug, just outside the damaged area. Bring the needle up through the rug’s foundation, a tiny bit away from the edge of the hole. Leave a small tail of yarn (about an inch) on the underside. Now, push the needle back down very close to where you came up, creating a small stitch. On the underside, weave the tail end of the yarn through a few existing foundation threads. This secures your starting point invisibly.
3. Creating the First Turned Stitch
Bring your needle up from the underside of the rug, emerging directly inside the edge of the damaged area. Let’s imagine this is point ‘A’. Now, hold the yarn taut with one hand. With your other hand, wrap the yarn around the needle, creating a loop. The yarn should cross over itself and around the needle. This is the “turn.”
4. Completing the Loop
Push the needle back down into the rug foundation very close to point ‘A’, where you came up. It should be almost the same hole, or just a thread away. Pull the needle and yarn through to the underside. As you pull, gently guide the loop you created around the needle. This loop will form a small standing tuft on the rug’s surface. Ensure the loop stands upright, mirroring the rug’s existing pile.
5. Repeating the Process
Continue this process, working systematically across the damaged area. Each stitch should be placed very close to the previous one. Aim for even tension with each pull. This helps maintain a consistent pile height. Work from one side of the damaged area to the other. Fill the entire space with these turned stitches.
6. Adjusting and Trimming
As you add more stitches, periodically check the pile height. If some loops are too long, you can gently snip them to match the surrounding rug’s pile. Use sharp scissors for a clean cut. Fluff the repaired area with your fingers. This helps blend the new stitches with the old ones.
7. Finishing the Yarn
When you are nearing the end of your yarn or the repair, bring the needle to the underside of the rug. Secure the yarn by weaving it through several existing foundation threads. Make a few small stitches on the underside to knot it securely. Trim any excess yarn close to the rug’s backing.
Practice on a scrap piece of wool rug if you have one. This helps you get a feel for the stitch before working on your valuable rug. Patience and repetition will refine your technique.
Blending and Finishing Your Rug Repair
After you have completed all the turned wool stitches, the repair is not quite finished. Blending and finishing are crucial steps that transform your new stitches into a seamless part of the rug. This attention to detail determines how “invisible” your repair will be. Your goal is to make the repaired spot indistinguishable from the rest of the wool rug.
First, gently fluff the repaired area with your fingers. Use a soft brush or the palm of your hand to help the new pile stand upright. This motion encourages the fibers to mingle with the surrounding existing pile. It breaks up any stiffness from the new stitches. This initial blending helps the repair integrate visually.
Next, carefully examine the height of the new pile. You may find some new loops are slightly taller than the original rug pile. Use your sharp, small scissors to carefully trim any rogue threads. Snip only a tiny amount at a time. Hold the scissors parallel to the rug’s surface, mimicking a shearing action. Be extremely cautious not to cut the rug’s original pile or the foundation. This step requires a steady hand and good lighting.
Once the pile height is even, inspect the color blend. If you used a slightly different shade, the new fibers might stand out initially. Over time, with natural light exposure and gentle wear, the new wool will often blend more. You can also try gently rubbing the area with a clean, damp cloth. This can help settle the fibers and sometimes slightly soften the color contrast.
Finally, give the entire rug a gentle vacuum. This helps remove any tiny trimmings and further settles the repaired area. This finishing touch ensures the repaired section feels and looks like a natural part of your wool rug. With careful blending, your turned wool stitches will extend the life and beauty of your cherished piece for years to come.
Maintaining Your Repaired Wool Rug
Repairing your wool rug with turned wool stitches is a significant investment of time and care. To ensure your hard work lasts, proper ongoing maintenance is essential. A well-cared-for rug will show fewer signs of past damage. It will also resist future wear and tear. My goal is to help you keep your wool rugs beautiful for a long time.
Regular vacuuming is the cornerstone of rug maintenance. Vacuum your wool rug at least once a week, more often in high-traffic areas. Use a vacuum cleaner with adjustable height settings and turn off the beater bar. The beater bar can damage wool fibers. Regular vacuuming removes dirt and grit that can abrade the fibers. This prevents future thinning or holes. For tips on cleaning large rugs, consider guides on how to clean rugs without a machine if your rug is delicate.
Address spills immediately. Wool is naturally resistant to staining, but prompt action is always best. Blot liquid spills with a clean, white cloth. Do not rub. Rubbing can push the spill deeper into the fibers. For solid spills, gently scrape them off. Then, blot with a damp cloth. Always test any cleaning solution on an inconspicuous area first. For specific guidance, refer to comprehensive guides on how to clean a wool rug.
Rotate your rug periodically. If your rug is in a sunny spot or a high-traffic pathway, rotate it every six to twelve months. This ensures even wear and fade. Consistent exposure to sunlight can lead to fading. Uneven wear can create new thin spots. Rotating your rug distributes these effects.
Protect your rug from pests. Moths and other insects love wool. Regular vacuuming helps deter them. Store rugs in a cool, dry place if not in use. Use moth repellents specifically designed for wool. If you suspect a moth infestation, immediate action is vital. Learn how to get rid of moths in oriental rugs to protect your valuable textiles.
Consider professional cleaning every few years. Even with regular home care, wool rugs benefit from professional cleaning. Professionals have specialized equipment and knowledge to deep clean without damaging the fibers. This removes deeply embedded dirt that regular vacuuming misses. This comprehensive approach to care extends the life of your repaired wool rug, keeping it a treasured part of your home.
Common Challenges and Troubleshooting Turned Wool Stitches
Even with careful instruction, you might encounter some challenges when performing turned wool stitches. It is normal for a hand craft to have a learning curve. Do not get discouraged if your first attempts are not perfect. Understanding common issues helps you troubleshoot and improve your technique. My aim is to help you overcome these hurdles.
Challenge 1: Uneven Pile Height
This is perhaps the most common issue. Some new stitches might stand taller or shorter than the surrounding pile.
- Troubleshooting:
- Consistent Tension: Ensure you pull the yarn through with consistent tension for each stitch. Too loose, and the loop stands too high; too tight, and it sinks.
- Needle Insertion Point: Make sure you insert the needle back into the rug very close to where it emerged. This ensures the loop is properly formed at the base.
- Trimming: Use sharp, small scissors to carefully trim the pile after stitching is complete. Trim very slowly, a tiny bit at a time, until the height matches.
Challenge 2: Yarn Not Blending Seamlessly
The new yarn might look distinct from the original rug.
- Troubleshooting:
- Perfect Match: Re-evaluate your yarn choice. Color is key, but so is fiber thickness and texture. If your rug is old, its wool might have felted slightly; new yarn will feel different.
- Fluffing: Aggressively but gently fluff and brush the repaired area. This helps the new fibers integrate with the old ones.
- Time: Sometimes, new wool needs time to settle and slightly felt with the existing fibers. With gentle wear and vacuuming, it often blends better.
Challenge 3: Stitches Are Loose or Pull Out
If your new stitches are not holding firmly, the repair will not last.
- Troubleshooting:
- Secure Start/End: Make sure you have properly secured the beginning and end of your yarn on the underside of the rug. Weave it through multiple foundation threads.
- Foundation Stability: Check if the rug’s foundation was truly stable before you started. If the backing is too weak, the stitches will not hold. You might need to reinforce the foundation more thoroughly with fine thread or fabric adhesive.
- Proper Loop: Ensure you are correctly wrapping the yarn around the needle to form a secure “turn” or knot at the base of each loop. Without this, the stitch will not lock.
Challenge 4: Difficulty Pushing Needle Through Rug
Rug foundation can be very dense, making it hard to push the needle.
- Troubleshooting:
- Thimble: Always use a thimble. It protects your finger and gives you more pushing power.
- Needle Type: Use a strong upholstery or curved needle. These are designed for dense fabrics.
- Angle: Try different angles of insertion. Sometimes, a slight angle helps the needle slip through the fibers. Do not force the needle; you risk bending or breaking it.
Practice is your best friend when learning turned wool stitches. Start with a less visible area or a scrap piece of wool. Each attempt will teach you something new. Soon, you will master this skill and be able to fix wool rugs with confidence.
Beyond Basic Repairs: Advanced Considerations for Wool Rugs
Once you master basic turned wool stitches, you might wonder about more advanced rug repair scenarios. While this guide focuses on smaller, manageable repairs, understanding broader aspects of wool rug care enriches your skill set. It helps you decide when to DIY and when to call a professional. This knowledge safeguards your valuable rugs.
Consider the rug’s construction type. Most wool rugs are either hand-knotted or machine-made. Hand-knotted rugs, like many Persian rugs or Turkish rugs, have individual knots tied to their foundation. Machine-made rugs often have tufts punched through a backing. Turned wool stitches are most effective on hand-knotted rugs, where you are re-creating individual knots or filling in missing pile areas. For machine-made rugs, the technique might need adaptation, or a different repair method could be more suitable.
Dealing with foundation damage is a step up. If a hole in your rug involves severed warp (vertical) or weft (horizontal) threads, you need to reconstruct this foundation before adding pile. This involves re-weaving these foundational threads to create a stable grid. Only then can you begin to apply turned wool stitches. This advanced skill requires understanding rug weaving basics. It is often where DIY repair meets professional restoration.
Fringe repair is another common issue. Rug fringes are an extension of the rug’s warp threads. When they fray or detach, specific techniques are needed to re-secure or re-create them. This is distinct from pile repair. Sometimes, you can re-wrap existing fringe threads or add new ones. For significant fringe loss, professional re-fringing may be needed.
Preventing future damage is also an advanced consideration. Understanding common culprits like moth infestations (and how to get rid of moths in oriental rugs), pet accidents, and furniture indentations helps you take proactive steps. Using rug pads can prevent slipping and reduce wear. Rotating rugs prevents uneven sun exposure and traffic wear.
While turned wool stitches empower you for many repairs, knowing the limits is key. For extensive damage, antique rugs, or very valuable pieces, professional rug restorers are invaluable. They possess the specialized tools and deep expertise for complex reweaving, dyeing, and structural repairs. However, for everyday wear and tear, mastering these stitches means you can confidently fix wool rugs and keep them beautiful.
Frequently Asked Questions
What kind of yarn do I need for turned wool stitches?
You need 100% wool yarn that closely matches your rug’s original color, thickness, and texture. Ideally, it should be rug wool or tapestry wool, which is durable and holds its shape. You can often find small skeins of suitable wool at craft stores or specialized rug repair suppliers. Matching the fiber content is important for consistent wear and appearance.
How long does it take to learn turned wool stitches?
Learning the basic motion of turned wool stitches can take a few hours of practice. Mastering the technique to create an invisible repair on a real rug takes more time. It requires patience and attention to detail. Start with small, less visible areas. Your speed and precision will improve with each repair you undertake.
Can I use turned wool stitches on any type of rug?
Turned wool stitches are most effective on hand-knotted wool rugs, where the pile is made of individual knots. They are less suitable for tufted or machine-made rugs, which have a different construction. For these, other repair methods like re-tufting or patching might be more appropriate. Always assess your rug’s construction before choosing a repair method.
How durable are repairs made with turned wool stitches?
Repairs made with turned wool stitches can be very durable if done correctly. The “turn” in the stitch secures the wool fiber firmly to the rug’s foundation. This method creates a strong, lasting pile that integrates well with the original rug. Proper yarn choice and consistent tension contribute to the longevity of the repair, allowing the rug to withstand regular use.
What if my rug’s foundation is damaged?
If the rug’s foundation (the warp and weft threads) is damaged, you must repair it before adding turned wool stitches. Use strong, thin thread to carefully re-weave or secure the broken foundation threads. This creates a stable grid for your new pile. Without a stable foundation, your turned wool stitches will not hold securely. For large foundation repairs, professional help may be needed.
Conclusion
Bringing a worn wool rug back to life with turned wool stitches is a deeply satisfying process. We have covered the essentials, from understanding what these unique stitches are to gathering your tools and performing the step-by-step repair. You now understand how to fix wool rugs, tackling common damage with a skilled hand. This traditional technique preserves not just the appearance, but also the history and value of your cherished textiles.
The journey involves careful preparation, precise execution, and thoughtful finishing. Remember that patience is your greatest asset. Each stitch you place adds to the rug’s renewed strength and beauty. By blending new wool seamlessly with the old, you ensure your repair is not only strong but also nearly invisible. This extends the life of your wool rugs, letting them continue to enrich your home. Embrace the satisfaction of restoring your own pieces. Start your next rug repair project with confidence, knowing you have the skills to make a lasting difference.
- wool rug repair
- rug mending
- hand stitching
- rug restoration
- DIY rug fix

Todd Martin
Senior Writer
With over 15 years of experience in home renovation and design, I started HEG to share what I’ve learned with homeowners who want to create spaces that are both beautiful and functional. I’ve always believed in a hands-on approach, and over the years, I’ve picked up practical solutions that actually work. Through HEG, I aim to make home improvement more approachable, sharing real tips that help you create a home you truly love.