· Todd Martin · Home Repair · 19 min read
How To Fix Glass On Table Top
Repairing Your Table Top: How To Fix Glass Damage
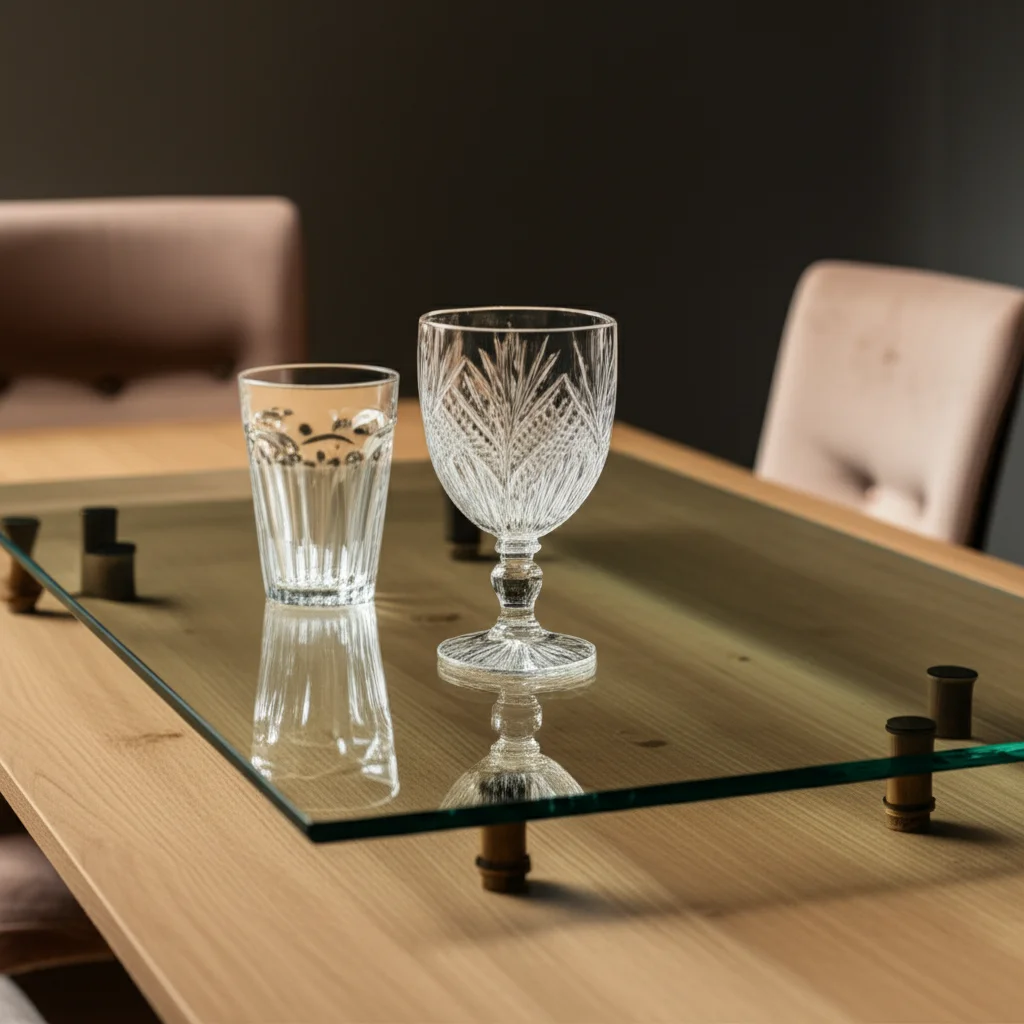
A beautiful glass table top adds elegance to any room. However, accidents happen, and your pristine glass can suffer damage. Finding a chip or crack can be disheartening. Fortunately, you can often fix glass on your table top without needing a full replacement. I’ve seen many glass tables restored to their former glory with the right approach.
This article will guide you through the entire process. We will cover how to assess different types of glass damage. You will learn about essential tools and materials for successful repairs. We will walk you through step-by-step methods for fixing minor chips, scratches, and even cracks. Finally, we will discuss when replacement is the best option and important safety precautions.
Takeaway
- Assess Damage Carefully: Identify if your glass table top has chips, scratches, or cracks before starting.
- Gather Proper Tools: Collect safety gear, cleaning supplies, and specific repair kits or adhesives.
- Follow Step-by-Step Instructions: Clean the area, apply the chosen repair method, and allow it to cure properly.
- Prioritize Safety: Always wear protective gloves and eye protection when working with broken or damaged glass.
- Know When to Replace: For severe cracks or shattered glass, replacement is often safer and more practical than repair.
How do you fix glass on a table top?
You can fix glass on a table top by first assessing the damage. For minor chips and scratches, use a specialized glass repair kit or polishing compound. For small cracks, apply a UV-curing resin specifically designed for glass. Ensure thorough cleaning before repair and always wear safety gear.
Assessing Glass Damage on Your Table Top
Before you attempt to fix glass on your table top, you must understand the type of damage. Different types of damage require different repair methods. A small scratch is much easier to manage than a large crack. Proper assessment helps you choose the correct approach.
I always start by cleaning the glass thoroughly. This lets me see every detail of the damage. You can use a standard glass cleaner or even a mixture of vinegar and water. A clean surface makes it easier to evaluate the extent of the problem. For tips on cleaning, check out our guide on how to clean glass table top or discover how to clean glass with vinegar.
Minor Chips and Scratches
Minor chips are often small indentations where a piece of glass has flaked away. These are usually not structural. Scratches are lines on the surface. They can range from very light surface marks to deeper grooves. You can often feel deeper scratches with your fingernail.
Light scratches may only affect the coating or the very top layer. They often appear as hazy lines. Deep scratches penetrate further into the glass. They can weaken the glass over time. Chips are typically circular or irregular. They are often found near the edges of the table top.
Cracks in Table Glass
Cracks are more serious than chips or scratches. They are linear fractures that extend through the glass. A crack indicates a structural weakness. Even a small crack can spread under pressure. You should address cracks quickly.
Cracks can be hairline thin or quite wide. They might start from an impact point and radiate outwards. Running your finger along a crack will reveal its depth. Fixing cracks requires specific types of repair materials. Ignoring a crack can lead to the glass shattering unexpectedly.
Shattered Table Tops
A shattered table top is not repairable. Tempered glass shatters into small, blunt pieces. This is a safety feature to prevent large, sharp shards. Laminate glass may crack but often stays in one piece because of an inner layer. In either case, a shattered table top needs replacement.
Do not try to fix shattered glass. It is unsafe to handle. Cleaning up shattered glass requires extreme caution. You must wear thick gloves and eye protection. Proper disposal is also important. Our guide on how to dispose of large glass table top can help you with this task.
Essential Tools and Materials for Glass Repair
Having the right tools and materials is crucial for successful glass table top repair. Using improper items can worsen the damage. It can also create an unsafe situation. I always make sure I have everything ready before I start a project. This saves time and frustration.
Safety should always come first when working with glass. Glass can be sharp, even when damaged. Protect your hands and eyes from potential hazards. These tools and materials are generally accessible. You can find them at most hardware stores or online.
Safety Gear You Need
Personal protective equipment is non-negotiable. Glass shards can cause serious injury. Always wear sturdy work gloves. These gloves should be cut-resistant. Regular gardening gloves may not offer enough protection. Eye protection, such as safety glasses or goggles, is also essential.
A dust mask is helpful, especially when cleaning or sanding. Small glass particles can become airborne. Protect your respiratory system. Work in a well-lit area. This helps you see clearly and avoid accidents. A clean workspace is also a safer workspace.
Adhesives and Fillers
The type of adhesive or filler depends on the damage. For minor chips, a clear epoxy resin or a specialized glass repair kit works well. These kits often contain a resin that fills the void. They might also include a curing strip and a razor blade for finishing.
For cracks, a UV-curing resin is often the best choice. This resin penetrates the crack. It then hardens when exposed to ultraviolet light. Some kits include a small UV light. Make sure the adhesive is clear and dries transparent. You do not want a cloudy repair.
Cleaning Supplies
Before any repair, the glass must be spotless. Dirt, dust, and oils prevent adhesives from bonding properly. You will need a good glass cleaner. Alternatively, you can use isopropyl alcohol or acetone. A microfiber cloth is ideal for cleaning. It leaves no lint or streaks.
Cotton swabs can help clean small, intricate areas. A soft brush can remove loose debris from chips or cracks. I often use compressed air to blow out fine dust. Remember, a clean surface ensures a strong bond. If you want to know more about cleaning glass effectively, you can read about how to clean glass without glass cleaner.
Step-by-Step Guide to Fixing Minor Glass Damage
Fixing minor glass damage on your table top is a manageable DIY project. This includes small chips and light scratches. With the right technique, you can make these imperfections nearly invisible. I find it very satisfying to restore something to its original condition. Take your time with each step for the best results.
Patience is key during this process. Rushing can lead to a messy repair. Ensure you have good lighting to see what you are doing. Proper ventilation is also important if you are using strong chemicals. Always refer to the instructions provided with your specific repair kit.
Cleaning the Damaged Area
First, thoroughly clean the damaged area. Use glass cleaner and a microfiber cloth. Make sure there is no dust, dirt, or grease. The repair resin needs a perfectly clean surface to adhere. If the area is not clean, the repair will not hold.
After cleaning, allow the glass to dry completely. Any moisture can also affect the repair. Use a cotton swab or a fine brush to clear out any debris from within a chip. For deep scratches, ensure the groove is free of particles. I often use compressed air to remove tiny dust specks.
Applying Repair Kits for Chips
Most glass chip repair kits come with a special resin. This resin fills the void created by the chip. Apply the resin directly into the chip. Make sure the resin slightly overfills the chip. This ensures complete coverage.
Place a clear curing strip over the resin. This strip helps to spread the resin evenly. It also keeps air bubbles out. Press down gently on the strip. This pushes the resin deep into the chip. Follow the kit’s instructions for curing time. This usually involves sunlight or a UV light.
Polishing Light Scratches
For very light scratches, polishing can be effective. Start with a non-abrasive cleaner or polishing compound designed for glass. Apply a small amount to a clean, soft cloth. Rub the compound into the scratch in a circular motion. Apply moderate pressure.
Continue polishing until the scratch fades. This might take several minutes. You may need to repeat the process. For slightly deeper scratches, you might use a very fine-grit sandpaper (like 2000-grit wet/dry). Always use water as a lubricant with sandpaper. Finish with a glass polishing compound. Our guide on how to clean scratched glass provides more details on this. After polishing, clean the area again to remove any residue. A good streak-free clean is important, you can read more here: how to clean glass without streaks.
Repairing Cracks in Table Top Glass
Repairing a crack in a glass table top is more challenging than fixing a chip or scratch. It requires a specific type of adhesive and careful application. Cracks compromise the structural integrity of the glass. While a repair can make the crack less visible and prevent it from spreading, it may not restore full strength. Always consider professional help for large or complex cracks.
I have found that small, hairline cracks are the most suitable for DIY repair. Larger cracks might require a different approach. The goal is to fill the crack completely. This stops it from expanding. It also restores a clearer appearance.
Preparing the Crack for Repair
Clean the cracked area thoroughly. Use isopropyl alcohol or a strong glass cleaner. Ensure no dust, dirt, or oil remains in the crack itself. Use a very fine brush or compressed air to get into the crevice. Any contamination will prevent the resin from bonding properly.
Allow the glass to dry completely. Make sure the area is at room temperature. Extreme temperatures can affect the resin’s performance. Clear away any loose glass fragments around the crack. This ensures a smooth surface for the repair. Always wear your safety gloves during this step.
Using UV-Curing Resin for Cracks
Most crack repair kits use a UV-curing resin. This resin is designed to penetrate narrow cracks. Apply the resin directly onto the crack. Use the applicator tip to work the resin into the crack. You want the resin to fill the crack completely from edge to edge.
Capillary action will help draw the resin into the crack. If the crack is deep, you may need to apply more resin. Place a curing film or strip over the filled crack. This flattens the resin and helps push it deeper. Press firmly to remove any air bubbles.
Curing and Finishing the Repair
Expose the resin to ultraviolet light. Many kits come with a small UV lamp. If not, direct sunlight works too. The UV light cures the resin, turning it from a liquid to a solid. The curing time varies, usually a few minutes. Check your kit’s instructions for exact times.
Once cured, remove the curing film. You may find some excess resin on the surface. Use a razor blade held at a shallow angle to carefully scrape off any hardened excess. Be gentle to avoid scratching the surrounding glass. Wipe the area clean with a glass cleaner. If there is any adhesive residue, you can refer to our guide on how to clean adhesive off glass for effective removal methods. The crack should now be much less visible.
When to Replace Your Glass Table Top
Sometimes, repairing a glass table top is not the best option. Certain types of damage make repair unsafe or impractical. Knowing when to replace can save you time, effort, and potential injury. I always advise people to prioritize safety above all else.
A new glass top can breathe new life into an old table base. It can also be an opportunity to upgrade to a different type of glass. Consider the overall value of the table. A very expensive or sentimental piece might warrant professional repair or replacement. A standard piece might be better off with a full replacement if damage is severe.
Severe Damage Assessment
If your glass table top has large, extensive cracks, replacement is generally the safest choice. Multiple cracks radiating from a central point indicate significant structural weakness. Any crack that spans more than a few inches or reaches the edge of the glass is problematic. Small repairs might not hold under daily use.
Shattered glass, as mentioned before, cannot be repaired. Even if the glass is tempered and breaks into small pieces, the entire top must be replaced. Attempting to piece it back together is futile and dangerous. If the glass has large missing sections, replacement is also necessary.
Sourcing New Glass
Once you decide to replace the glass, you need to source a new piece. Measure your existing table top accurately. Note the thickness, shape (round, square, rectangular, oval), and any special features like polished edges or drilled holes. Take photos of the table base if you plan to get a custom cut.
You can order custom glass from local glass shops or online suppliers. Specify the type of glass you need. Options include tempered glass (most common for safety), annealed glass, or even laminated glass. Tempered glass is stronger and safer if it breaks. Compare prices and delivery times from different suppliers.
Professional Installation vs. DIY Replacement
Installing a new glass table top can be a DIY project for smaller, lighter pieces. Always ensure you have help if the glass is large or heavy. Glass can be surprisingly cumbersome. Use suction cups designed for glass handling to move the new top safely. Make sure the table base is clean and level before placing the new glass. Consider using clear rubber bumpers or anti-slip pads between the glass and the base. These pads prevent the glass from sliding around.
For very large, heavy, or uniquely shaped glass tops, professional installation is recommended. Professionals have the right equipment and experience. They can ensure proper fit and safety. They also take responsibility for any breakage during installation. It might cost more, but it offers peace of mind.
Safety Measures and Post-Repair Care
Working with glass, even damaged glass, demands careful attention to safety. Your well-being is more important than any repair. Once the repair is complete, proper care helps extend its life. Taking preventative measures can save you from future headaches. I always emphasize safety in my DIY projects.
A little planning goes a long way. Think about where you are working. Ensure good lighting and a stable surface. Keep pets and children away from the work area. This prevents accidents during the repair process.
Handling Glass Safely
Always wear heavy-duty, cut-resistant gloves when handling any glass, especially broken pieces. Even small chips can have sharp edges. Safety glasses or goggles are also a must. Protect your eyes from flying fragments. If the glass is shattered, use a broom and dustpan for large pieces. Follow up with a damp paper towel to pick up tiny shards.
Never place broken glass directly into a regular trash bag. Wrap it in several layers of newspaper or cardboard first. Then, place it in a sturdy bag. Label the bag as “BROKEN GLASS” to alert waste handlers. For very large pieces, consult your local waste disposal guidelines. Our resource on how to dispose of large glass table top offers more detailed guidance.
Maintaining Your Repaired Glass Table
After you fix glass on table top, proper maintenance helps keep it looking good. Clean the repaired area gently. Avoid harsh abrasive cleaners or scrubbers. These can damage the repair or cause new scratches. Use a soft cloth and a gentle glass cleaner.
Inspect the repair periodically. Look for any signs of cracking or lifting. Address any new damage promptly. Regular cleaning keeps your table sparkling. For best results, use a microfiber cloth. This prevents streaks and lint. Learn more about effective glass cleaning in our guide on how to clean glass table top.
Preventing Future Damage
Prevention is always better than repair. Use coasters under drinks and placemats under plates. This protects the glass from rings, heat, and scratches. Avoid placing heavy or sharp objects directly on the glass. Consider using a decorative runner or tablecloth for added protection.
If your table top glass slides, consider adding clear silicone bumpers. These create friction and prevent movement. You can also purchase non-slip pads. Keeping the glass stable reduces the risk of impact damage. Regularly check the table base for stability. A wobbly table increases the risk of glass damage. Explore options for how to keep a glass table top from sliding to add an extra layer of protection.
Advanced Tips for Durable Glass Table Top Repairs
Achieving a lasting repair on your glass table top involves more than just basic steps. Understanding the nuances of glass and repair materials can significantly improve your results. I often delve deeper into materials and techniques to ensure my fixes truly last. These advanced tips can help you create a more durable and invisible repair.
A high-quality repair does not just look good. It also stands up to daily use. Investing a little extra time and care pays off in the long run. Consider these points before and during your repair process. They can make a difference in the outcome.
Understanding Glass Types
Different types of glass behave differently when damaged. Most table tops are made of tempered glass. This glass is stronger and designed to shatter into small, relatively harmless pieces when broken. Annealed glass breaks into large, sharp shards. Laminated glass has a plastic layer between two glass sheets. This holds shattered pieces together.
Knowing your glass type helps you predict how it will react to damage. It also informs your repair approach. You cannot repair a shattered tempered glass top. You must replace it. You can often fix cracks in annealed or laminated glass. However, laminated glass might show clouding if the inner layer is compromised. Always confirm your glass type if possible.
Enhancing Adhesion
For any glass repair, strong adhesion is key. Proper surface preparation is paramount. Ensure the glass is not just clean but also free of any unseen residues. Using an adhesion promoter designed for glass can help. These liquids prepare the glass surface for better bonding. They create a stronger connection between the resin and the glass.
Temperature also plays a role. Perform repairs in a moderate temperature environment. Extreme cold or heat can affect the curing process of the adhesive. The resin needs time to properly bond. Avoid putting stress on the repaired area too soon. Give the adhesive ample time to fully cure, even if it feels dry.
Long-Term Protection
After the repair, protect your table top to prevent new damage. Consider adding a clear protective film. These films are usually made of plastic. They can add a layer of defense against scratches and minor impacts. They are often used for car paint protection. Some are designed specifically for glass surfaces.
Regularly apply a good quality glass polish or sealant. These products can fill in microscopic pores. They also create a smoother surface. This makes the glass easier to clean. It also helps repel water and dirt. Such care maintains the clarity and integrity of your repaired area. A well-maintained surface is less likely to suffer new damage. For an optimal finish, ensure your cleaning process leaves no streaks behind. Our guide on how to clean glass without streaks can help.
FAQ Section
Can I fix a deep scratch on glass?
You can often improve the appearance of deep scratches. However, completely removing them is difficult for a DIYer. Glass polishing compounds or fine-grit sandpaper can reduce their visibility. For very deep scratches that you can catch your fingernail on, replacement might be the best option. Professionals have specialized equipment for deep scratch removal.
What is the best adhesive for glass table tops?
For small chips, clear epoxy resin or a dedicated glass repair kit is effective. For cracks, UV-curing resin is typically the best choice. These resins are designed to penetrate and harden quickly. Always ensure the adhesive dries clear and is waterproof. Check the product specifications for transparency and bonding strength.
Is it safe to repair a cracked glass table?
Repairing a small, hairline crack can be safe if done correctly. However, a crack does compromise the glass’s strength. Large or multiple cracks are a safety risk. The glass could shatter unexpectedly. For significant cracking, replacing the glass top is a safer solution than attempting a repair.
How long does glass repair last?
The longevity of a glass repair depends on the extent of the original damage and the quality of the repair. A well-done repair on a minor chip or scratch can last for many years. Repairs on cracks are generally less permanent. They might need reapplication over time, especially if the table sees heavy use.
When should I call a professional?
You should call a professional for large cracks, extensive chips, or any damage that affects the structural integrity of the glass. If your table top is shattered, a professional can safely remove and replace it. For high-value or antique tables, a professional repair can ensure the best outcome. They have specialized tools and expertise.
How do I prevent future damage to my glass table?
Prevent future damage by using coasters, placemats, and tablecloths. Avoid dragging heavy or sharp objects across the surface. Use clear silicone bumpers or non-slip pads under the glass to prevent movement. Regularly clean the table with a soft cloth and gentle glass cleaner.
Conclusion
Fixing glass on your table top can seem daunting, but it is often a manageable task. You can restore your glass table’s appearance and extend its life with the right approach. We covered everything from assessing damage to the specific steps for repair. Remember to always prioritize safety by wearing protective gear. I find great satisfaction in bringing damaged items back to life.
Whether you’re tackling a minor chip or a small crack, proper preparation is key. Choosing the correct adhesive and following the curing instructions will ensure a durable fix. For severe damage, replacement remains the safest and most practical choice. By applying these tips, you can enjoy your beautiful glass table for many more years. Take the first step and give your glass table top the care it deserves.
- glass table repair
- DIY glass fix
- broken glass table
- table top maintenance
- glass furniture care
- home improvement

Todd Martin
Senior Writer
With over 15 years of experience in home renovation and design, I started HEG to share what I’ve learned with homeowners who want to create spaces that are both beautiful and functional. I’ve always believed in a hands-on approach, and over the years, I’ve picked up practical solutions that actually work. Through HEG, I aim to make home improvement more approachable, sharing real tips that help you create a home you truly love.