· Todd Martin · Home Appliances · 21 min read
How To Install Charcoal Filter In Ge Microwave Jvm3160
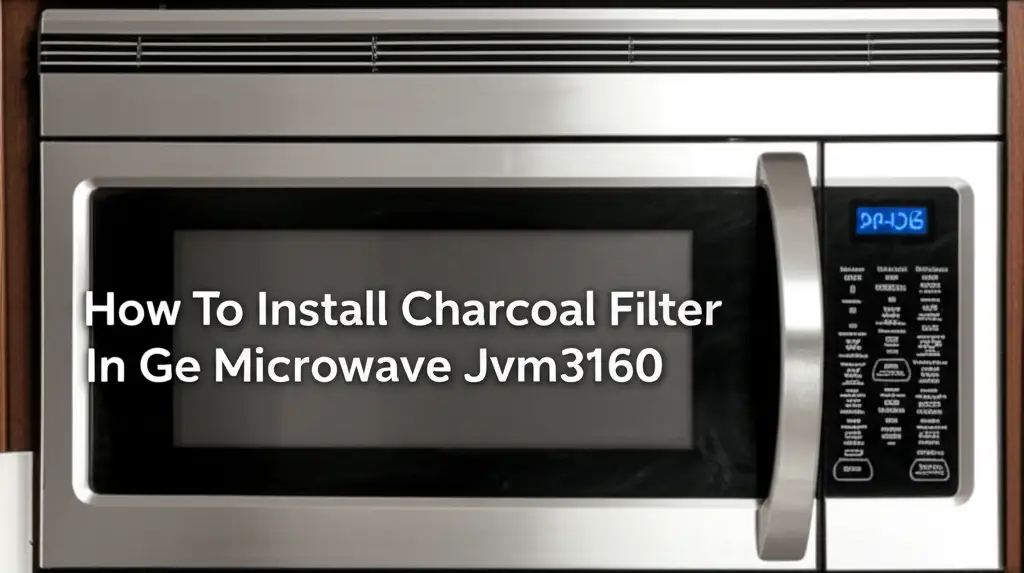
Install Charcoal Filter in GE JVM3160 Microwave
Having a clean kitchen is important for me. One appliance that often gets overlooked is the microwave. Specifically, the charcoal filter inside your GE Microwave JVM3160 plays a big role in keeping your kitchen air fresh. This small component works hard to remove cooking odors and grease from the air vented by your microwave. When it gets clogged, your kitchen can start to smell stale, and the microwave’s ventilation system struggles.
I remember the first time I noticed my kitchen smelling off after cooking. I realized it was time to check the microwave filter. Knowing how to install a charcoal filter in a GE Microwave JVM3160 is a simple task. It does not require special skills. I want to help you understand the process. This guide will walk you through each step. We will cover safety, locating the filter, removing the old one, and putting in the new one. You will also learn about maintaining your filter for long-lasting freshness.
Takeaway
- Regularly replace your GE JVM3160 microwave’s charcoal filter to ensure effective odor and grease removal.
- Always disconnect power before beginning any maintenance or installation work on your appliance.
- Identify the correct filter location, typically behind the vent grille, before attempting removal or installation.
- Follow specific steps to correctly remove the old filter and securely install the new charcoal filter.
- Plan for filter replacement every 6-12 months depending on cooking frequency.
Installing a charcoal filter in your GE Microwave JVM3160 involves first disconnecting power. Then, you locate the vent grille, often at the top front of the microwave. Next, you remove the grille, usually by pushing or pulling clips. Finally, you slide out the old filter and slide in the new one, securing the grille back in place.
Why Your GE Microwave Needs a Charcoal Filter
Your GE Microwave JVM3160 does more than just heat food. It also helps to keep your kitchen air clean. Many over-the-range microwaves, like yours, have a built-in ventilation system. This system pulls cooking fumes, steam, and odors from your stovetop. It then filters this air before releasing it back into your kitchen. The charcoal filter is a key part of this system.
This filter traps grease particles and absorbs strong cooking odors. Think about cooking fish, garlic, or other pungent foods. Without a working charcoal filter, these smells would linger in your home. The filter acts like a sponge for bad smells. It keeps your kitchen smelling fresh. It also helps to prevent grease buildup on your cabinets and walls. A clean filter ensures the ventilation system works as it should.
Over time, this filter gets saturated. It becomes full of absorbed odors and trapped grease. When the filter is full, it cannot do its job anymore. Air cannot pass through it easily. This reduces the effectiveness of your microwave’s ventilation. It can even lead to more strain on the microwave’s fan motor. Replacing the charcoal filter regularly is a small step. It makes a big difference in air quality.
Some microwaves might display a “filter” reminder on their screen when it is time to change the filter. Even if your JVM3160 does not have this feature, paying attention to lingering odors is a good sign. When cooking smells start to stick around, it means your filter needs attention. A fresh filter ensures optimal performance. It helps maintain a pleasant kitchen environment for everyone.
Identifying the Right Charcoal Filter for GE JVM3160
Finding the correct charcoal filter is an important first step. You cannot just use any charcoal filter. Each microwave model often requires a specific size and type. Your GE Microwave JVM3160 is no exception. Using the wrong filter will not fit properly. It also will not perform its job well. This could leave your kitchen air smelling bad.
The best way to identify the correct filter is to check your microwave’s owner’s manual. The manual will list the exact part number for the charcoal filter. If you do not have the manual, you can look for a label inside the microwave door. Sometimes, the model number and part information are there. You can also search online. Use your microwave’s full model number, “JVM3160,” when you search.
GE Appliances usually uses specific filter part numbers. For the JVM3160, a common charcoal filter part number is WB02X11550 or a similar variation. Always double-check this before making a purchase. You can find these filters at appliance parts stores. Major online retailers also sell them. Make sure you buy from a reputable seller to ensure you get a genuine part.
Some generic or aftermarket filters are available. These filters might cost less. However, always check reviews and compatibility carefully. A poorly fitting or low-quality filter may not capture odors and grease as effectively. It could also impact the airflow. For peace of mind, I usually recommend sticking with an OEM (Original Equipment Manufacturer) part. This ensures the best fit and performance.
Safety First: Preparing for Charcoal Filter Replacement
Safety is my top priority whenever I work on an appliance. Before you touch your GE Microwave JVM3160, you must take essential safety steps. Ignoring these steps can lead to serious injury or damage. I always make sure the power is off first. This avoids electric shock hazards.
The very first step is to unplug the microwave. If your microwave is an over-the-range model, it is likely plugged into an outlet in the cabinet above it. Reach into the cabinet and pull the plug from the wall socket. If you cannot reach the plug, go to your home’s circuit breaker box. Turn off the breaker that controls the microwave’s power. It is important to confirm there is no power to the unit before proceeding. Sometimes, a breaker might be mislabeled. You can test it by trying to turn the microwave on after flipping the breaker. If it does not power on, you are good to go. If your GE microwave is not working but has power, there might be other issues, but for filter replacement, power must be off.
Next, gather your tools. You might need a Phillips head screwdriver. Some models use a flat-head screwdriver. Check your manual if you are unsure. I also recommend having a pair of gloves. This protects your hands from old grease and dirt. A small towel or paper towels can also be useful for cleaning up any residue. You will probably find some dust and grease around the old filter.
Finally, ensure you have good lighting. You will be working in a somewhat confined space. A flashlight or headlamp can help you see clearly. Keep children and pets away from the work area. This prevents accidents. Taking a few minutes to prepare properly saves time and prevents problems later. If your microwave often causes power issues, like tripping the breaker, ensure the electrical system is checked by a professional. This step is about protecting yourself and your home.
Locating the Charcoal Filter in Your JVM3160
Finding the charcoal filter in your GE Microwave JVM3160 is a straightforward task. Most GE over-the-range microwaves, including the JVM3160, place the charcoal filter in a common spot. It is typically located behind the vent grille. This grille runs along the top front of the microwave. This design makes it easy to access for routine maintenance.
You will see this vent grille when you look at the top edge of your microwave. It often has a series of slats or openings. This is where the cooking odors and steam are drawn into the microwave’s ventilation system. The charcoal filter sits directly behind this grille. Its position allows it to capture grease and odors before the air exits the microwave, either through a duct to the outside or back into the kitchen.
To access the filter, you need to remove this grille. The method for removing the grille can vary slightly. Many JVM3160 models have release clips or tabs. You might need to push the grille slightly inwards and then pull it down. Some models require you to slide the grille a bit to one side before pulling it free. Other models might have a couple of small screws at the top edge of the grille or on the sides that you need to unscrew first. I recommend consulting your specific JVM3160 manual if you are unsure. The manual often provides diagrams.
Once the grille is released or unscrewed, it will typically pivot down or come completely off. With the grille out of the way, you will see one or two rectangular slots. The charcoal filter slides into these slots. It looks like a thin, black mesh rectangle. Sometimes, there is also a metal grease filter nearby. Do not confuse the two. The charcoal filter is usually black and fibrous, designed to absorb odors. The grease filter is shiny metal mesh. The location is designed for easy user access. This simplifies the filter replacement process.
Step-by-Step Guide: Removing the Old Filter
Once you have prepared and located the filter, removing the old one is simple. This process requires a gentle touch. It also requires an understanding of how the filter is held in place. I always approach this step calmly. I ensure I have good lighting.
First, make sure the microwave is unplugged or the circuit breaker is off. This is the most important safety rule. Next, open the microwave door. This can give you better access or visibility depending on the model. Now, locate the vent grille at the top front of the microwave. As discussed, this grille covers the charcoal filter.
The method to remove the grille varies. For many JVM3160 models, you might find two small plastic tabs on the underside of the grille. You may need to press these tabs. As you press, gently pull the grille forward and down. The grille will pivot open like a hinge or detach completely. Some models have two screws securing the grille. If so, use your Phillips head screwdriver to loosen and remove these screws. Once the screws are out, the grille will lift off or pivot down. Take care not to drop the screws.
With the grille open or removed, you will see the charcoal filter. It is a black, rectangular filter. It slides into a designated slot or set of clips. Often, it has a small handle or tab. Grab this tab firmly. Gently pull the filter straight out towards you. It should slide out of its slot without much resistance. If it feels stuck, check for any small clips or tabs holding it. You might need to push a small plastic tab to release it. Be prepared for some dust and grease to fall from the old filter. Have a paper towel ready. You might also notice a fan running when you open the door. This is normal. It indicates the ventilation system.
Once the old filter is out, you can set it aside. It is now ready for disposal. Take a moment to wipe away any visible grease or dust from the filter housing area. A damp cloth can clean this space. This ensures a clean environment for your new filter.
Step-by-Step Guide: Installing the New Charcoal Filter
Installing the new charcoal filter is usually quicker than removing the old one. This is because you now know the location and method. I always ensure the new filter is the correct one before I start. This prevents any fitting issues.
With the old filter removed and the filter housing cleaned, take your new charcoal filter out of its packaging. Check the filter for any arrows or labels. Some filters have an arrow indicating the direction of airflow. This arrow should point inwards, towards the microwave. This ensures the filter works properly. It directs the air correctly into the fan system.
Now, align the new charcoal filter with the empty slot. The filter should slide smoothly into place. If it has a plastic frame or tab, ensure these align with any guides or clips in the housing. Push the filter gently but firmly into the slot. It should sit securely. You will often feel a small click or resistance as it locks into position. This confirms it is properly seated.
Do not force the filter. If it does not slide in easily, recheck its orientation. Make sure the arrow is pointing the correct way. Also, ensure no debris is blocking the slot. A properly installed filter fits snugly. It does not wobble or hang loose. This ensures all air passes through the filter. It maximizes its odor-absorbing capabilities.
Finally, reattach the vent grille. If your grille pivoted down, simply push it back up until it snaps into place. If you removed screws, align the grille and replace the screws. Tighten the screws until the grille is secure. Do not overtighten, as this can strip the screw holes or crack the plastic. Give the grille a gentle tug to ensure it is firm. Once the grille is secure, plug the microwave back into the wall outlet. Alternatively, flip the circuit breaker back on. Your GE Microwave JVM3160 is now ready for use. It has a fresh, efficient charcoal filter.
Post-Installation Checks and Filter Maintenance Tips
After installing the new charcoal filter, it is a good idea to perform a quick check. This ensures everything is working correctly. It also helps you get into a routine for future maintenance. I always test the microwave’s ventilation function first. This confirms the new filter is properly seated and airflow is good.
Turn on the microwave and use the fan or vent function. You should hear the fan running smoothly. Place your hand near the vent openings on the top grille. You should feel air being drawn in. This indicates the ventilation system is working. You might even notice less noise from the fan, as a clean filter allows air to pass through more easily. If you notice strange noises or very little airflow, recheck the filter installation. Ensure the grille is secure.
Now, let’s talk about maintenance. How often should you change the charcoal filter in your GE JVM3160? The frequency depends on how often you cook. It also depends on the types of food you prepare. As a general rule, manufacturers recommend replacing the charcoal filter every 6 to 12 months. If you cook frequently, especially greasy or strong-smelling foods, you might need to change it more often. I typically mark my calendar or set a reminder on my phone for every six months. This helps me remember.
You cannot wash or reuse charcoal filters. They are designed for one-time use. Once the charcoal is saturated with odors and grease, it loses its effectiveness. Washing it will not restore its absorbent properties. It might even damage the filter material. Regularly checking for lingering odors in your kitchen is another good indicator. If your kitchen smells stale after cooking, even with the fan on, it is likely time for a new filter.
Regular replacement of the charcoal filter maintains your kitchen’s air quality. It also extends the life of your microwave’s ventilation system. A clean filter prevents excessive strain on the fan motor. It ensures efficient removal of cooking byproducts. This simple maintenance step makes a big difference in your home environment.
Troubleshooting Common Filter Issues
Even with clear instructions, sometimes small issues can arise during filter replacement. I want to address some common problems you might encounter. Knowing these solutions can save you time and frustration. My goal is to make your filter installation smooth.
One common issue is the new filter not fitting. This usually happens for a few reasons. First, you might have the wrong part number. Double-check the filter’s part number against your microwave’s manual or the old filter. Second, the filter might be oriented incorrectly. Look for arrows on the filter itself. Ensure it is facing the right direction for airflow. Charcoal filters often need to be inserted in a specific way. Third, there might be debris in the filter slot. Clear any dust or grease buildup. This allows the filter to slide in smoothly.
Another issue could be the vent grille not closing properly. This usually means the filter is not seated all the way. It might be slightly out of alignment. Open the grille again. Carefully push the filter fully into its slot. Ensure it clicks or sits flush. Also, check the grille’s hinges or tabs. They might be bent. Gently straighten them if needed. If screws hold the grille, ensure they align with the holes. Do not force the grille closed.
Sometimes, after replacing the filter, you might notice the fan still seems loud. Or it does not pull air effectively. This could be due to a few factors. If the fan was struggling before the replacement, it might have other issues. A dirty or damaged fan blade could be the cause. This is less common immediately after a filter change. It points to a problem beyond the filter itself. You might need to check the microwave’s internal components. Why your GE microwave fan might run when you open the door can sometimes relate to the vent system.
Lastly, if your microwave seems to be having broader power issues after you’ve touched it, like it’s not working but has power, it is important to re-check your power connection. Ensure the plug is fully seated in the outlet. Or check if the circuit breaker is fully on. Always disconnect power again if you need to investigate further inside the appliance. For persistent issues, contacting a qualified appliance technician is the safest and most effective solution.
Expanding Your Microwave’s Lifespan: Beyond the Filter
Replacing the charcoal filter is a vital part of microwave maintenance. But it is only one piece of the puzzle. To truly extend the life and efficiency of your GE Microwave JVM3160, I suggest a few other practices. These steps ensure your appliance runs smoothly for years. They also maintain a clean and healthy kitchen.
Regular cleaning is fundamental. Grease and food splatters accumulate inside the microwave. They also build up on the exterior. Use a damp cloth with mild soap to wipe down the interior and exterior surfaces regularly. Pay special attention to the door seal. Food particles can get trapped there. This can affect the door’s ability to close tightly. A clean microwave prevents odors from baking into the appliance itself.
Another filter to check is the grease filter. Many over-the-range microwaves, including the JVM3160, have metal grease filters. These are typically located on the underside of the microwave. They trap larger grease particles before the air reaches the charcoal filter. These grease filters are usually washable. Remove them and wash them in hot, soapy water. You can also run them through your dishwasher. Clean them every month or two, depending on your cooking habits. A clogged grease filter reduces airflow significantly.
Consider the microwave’s placement and ventilation. If your microwave is an over-the-range model with a vent, ensure nothing blocks the exterior vent. Birds’ nests or debris can sometimes obstruct outside vents. This restricts airflow and puts strain on the fan motor. Good ventilation is key for efficient operation.
Pay attention to any unusual sounds or behaviors from your microwave. A humming sound when the door closes, or the clock turning off, could indicate underlying issues. While replacing a filter, you might notice these subtle changes. Address small problems early. This prevents them from becoming bigger, more expensive repairs. Regular upkeep, beyond just the filter, ensures your microwave serves you well.
When to Seek Professional Help
Most microwave charcoal filter installations are simple DIY tasks. I often find satisfaction in fixing things myself. However, there are times when seeking professional help is the best course of action. Knowing when to call an expert saves you time, money, and potential headaches. It also ensures your safety.
If you encounter persistent electrical issues, stop immediately. Do not attempt to fix electrical problems yourself. If your GE Microwave JVM3160 is tripping the breaker repeatedly, or if you see sparks, or smell burning, disconnect the power. Then call a certified electrician or appliance technician. Electrical work requires specialized knowledge. Attempting it yourself can be very dangerous.
If the fan motor is not working after filter replacement, this might also require professional attention. The filter replacement itself rarely causes fan issues. If the fan was not working before, or it stops working right after, there could be a deeper problem. This might be a faulty motor or wiring issue. A technician can diagnose and repair these components safely.
When you cannot locate the filter or remove the grille, despite checking the manual, a professional can help. Some microwave models have unusual designs. Or, parts can become stiff or damaged over time. Forcing components can cause more damage. A technician has the experience and tools to handle tricky situations. They can often quickly identify the access points.
Finally, if you find yourself uncomfortable with any part of the process, it is okay to call for help. Appliance repair technicians are trained for these situations. They ensure the job is done correctly and safely. Investing in professional service for complex issues can extend your microwave’s lifespan. It gives you peace of mind.
Frequently Asked Questions
How often should I change the charcoal filter in my GE JVM3160?
I recommend changing the charcoal filter in your GE JVM3160 microwave every 6 to 12 months. This frequency depends on how often you cook. If you frequently prepare greasy or strong-smelling foods, you might need to replace it closer to the 6-month mark. Regular replacement ensures optimal odor and grease absorption.
Can I wash the charcoal filter instead of replacing it?
No, you cannot wash or reuse the charcoal filter in your GE JVM3160 microwave. Charcoal filters are designed for one-time use. Once the charcoal becomes saturated with trapped odors and grease particles, its ability to absorb effectively is gone. Washing it will not restore its function and may damage the filter material.
What happens if I don’t replace the charcoal filter?
If you do not replace the charcoal filter, your microwave’s ventilation system will become less effective. Cooking odors and grease will linger in your kitchen. Airflow will decrease, potentially straining the microwave’s fan motor. This can reduce the lifespan of your appliance and lead to a stale kitchen environment.
Where can I buy a replacement charcoal filter for my JVM3160?
You can buy a replacement charcoal filter for your GE JVM3160 microwave from several places. Check appliance parts stores, major online retailers, or directly from GE Appliances’ website. Always use your microwave’s full model number (JVM3160) to ensure you get the correct part number for a perfect fit and proper function.
Are all GE microwave charcoal filters the same?
No, not all GE microwave charcoal filters are the same. GE manufactures many microwave models, and each often requires a specific size and design of charcoal filter. Always check your microwave’s owner’s manual or the existing filter’s part number to ensure you purchase the correct replacement for your JVM3160 model.
What tools do I need to replace the charcoal filter?
I usually only need a few basic tools to replace the charcoal filter. You will likely need a Phillips head screwdriver or a flat-head screwdriver, depending on how your specific JVM3160 model’s vent grille is secured. I also suggest having gloves and a paper towel handy for cleaning.
Conclusion
Taking care of your GE Microwave JVM3160 is simple. Installing a charcoal filter in your GE Microwave JVM3160 is a straightforward maintenance task. It ensures your kitchen stays fresh. It also helps your appliance run efficiently. I hope this detailed guide gave you the confidence to tackle this important job yourself. Remember to prioritize safety by always unplugging your microwave first.
Regular filter replacement helps your microwave’s ventilation system work its best. It reduces cooking odors. It prevents grease buildup. This small step contributes to a cleaner, more pleasant home environment. By following the steps I outlined, you can easily remove the old filter and install a new one. I encourage you to make this a regular part of your home maintenance routine.
Don’t let lingering cooking smells become a permanent fixture in your kitchen. A clean charcoal filter makes a big difference. If you found this guide helpful, consider exploring other appliance maintenance tips on our site. A well-maintained home starts with empowered homeowners. Get your new filter today and breathe easier knowing your GE microwave is operating at its best!
- GE microwave
- JVM3160 filter
- charcoal filter replacement
- microwave maintenance
- odor control

Todd Martin
Senior Writer
With over 15 years of experience in home renovation and design, I started HEG to share what I’ve learned with homeowners who want to create spaces that are both beautiful and functional. I’ve always believed in a hands-on approach, and over the years, I’ve picked up practical solutions that actually work. Through HEG, I aim to make home improvement more approachable, sharing real tips that help you create a home you truly love.