· Todd Martin · DIY & Home Organization · 21 min read
How To Make A Baby Crate Closet
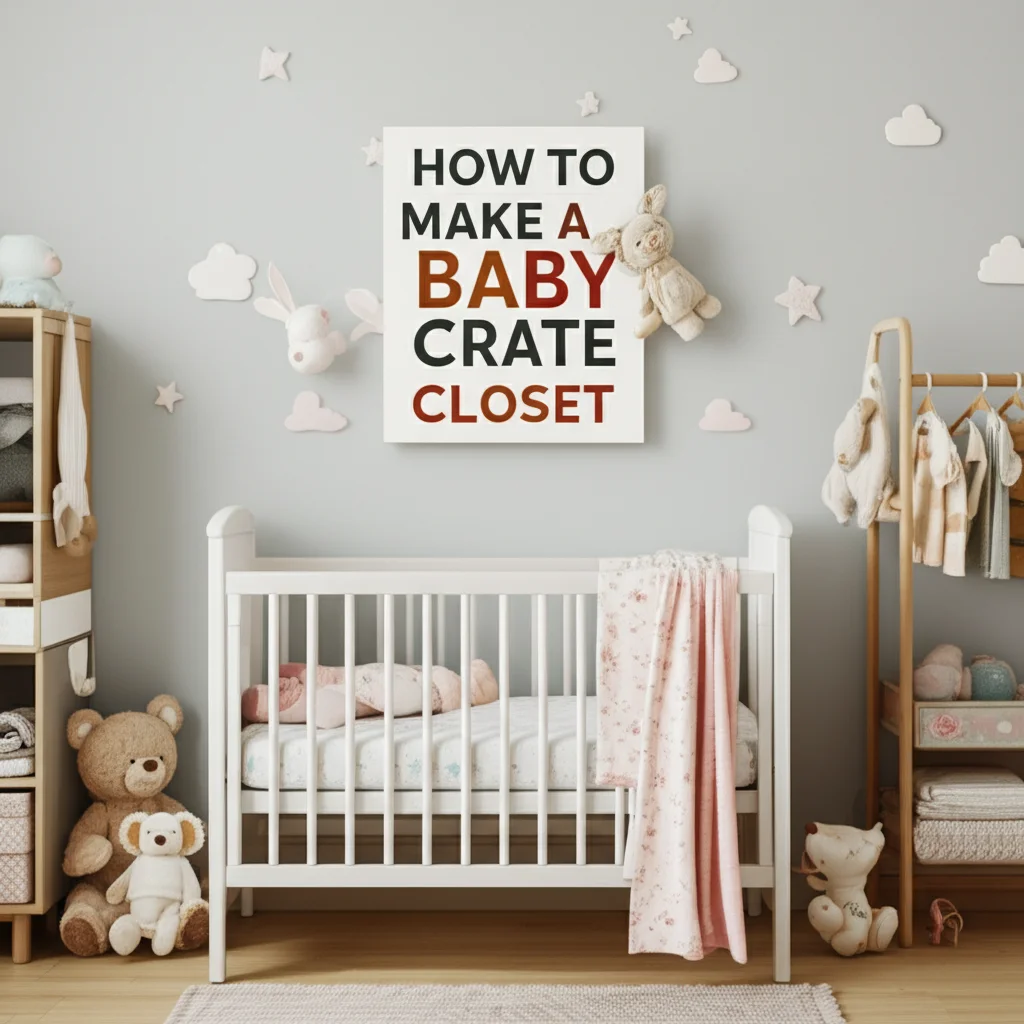
Crafting a Baby Crate Closet: DIY Nursery Storage
Welcome to the exciting journey of preparing for a new baby! Creating a functional and adorable nursery is a top priority for many parents. One smart solution for organizing baby essentials is to make a baby crate closet. This DIY project offers a customizable and budget-friendly way to store clothes, diapers, toys, and more.
In this article, I will guide you through the process of designing, building, and finishing your own baby crate closet. We will cover everything from choosing the right materials to ensuring safety and maximizing storage space. Get ready to transform simple wooden crates into a beautiful and practical addition to your baby’s room.
Takeaway
Creating a baby crate closet provides versatile, affordable, and safe storage. Key steps include:
- Careful Planning: Assess space, choose safe crates, gather tools.
- Thorough Preparation: Clean, sand, and finish crates properly.
- Secure Assembly: Stack and reinforce crates for stability.
- Smart Customization: Add shelves, rods, and drawers as needed.
- Prioritize Safety: Anchor the unit, child-proof edges.
- Organize Smartly: Maximize space with labels and thoughtful arrangement.
Answer to the Main Query
You can make a baby crate closet by securely stacking and fastening prepared wooden crates together, then customizing the interior with shelves, hanging rods, and storage bins. This project transforms simple crates into a versatile and affordable storage solution for a nursery.
Why a Baby Crate Closet is a Smart Choice for Nurseries
Creating a comfortable and organized nursery often feels like a big task. Many parents look for solutions that are both practical and charming. A baby crate closet offers an excellent answer to these needs. It provides a unique storage option that fits various styles and budgets.
This type of closet is more than just a place to put things. It becomes a central piece of furniture that grows with your child. You can adapt its configuration over time, making it useful for many years. I have seen how effective these units are in small spaces, where every inch counts.
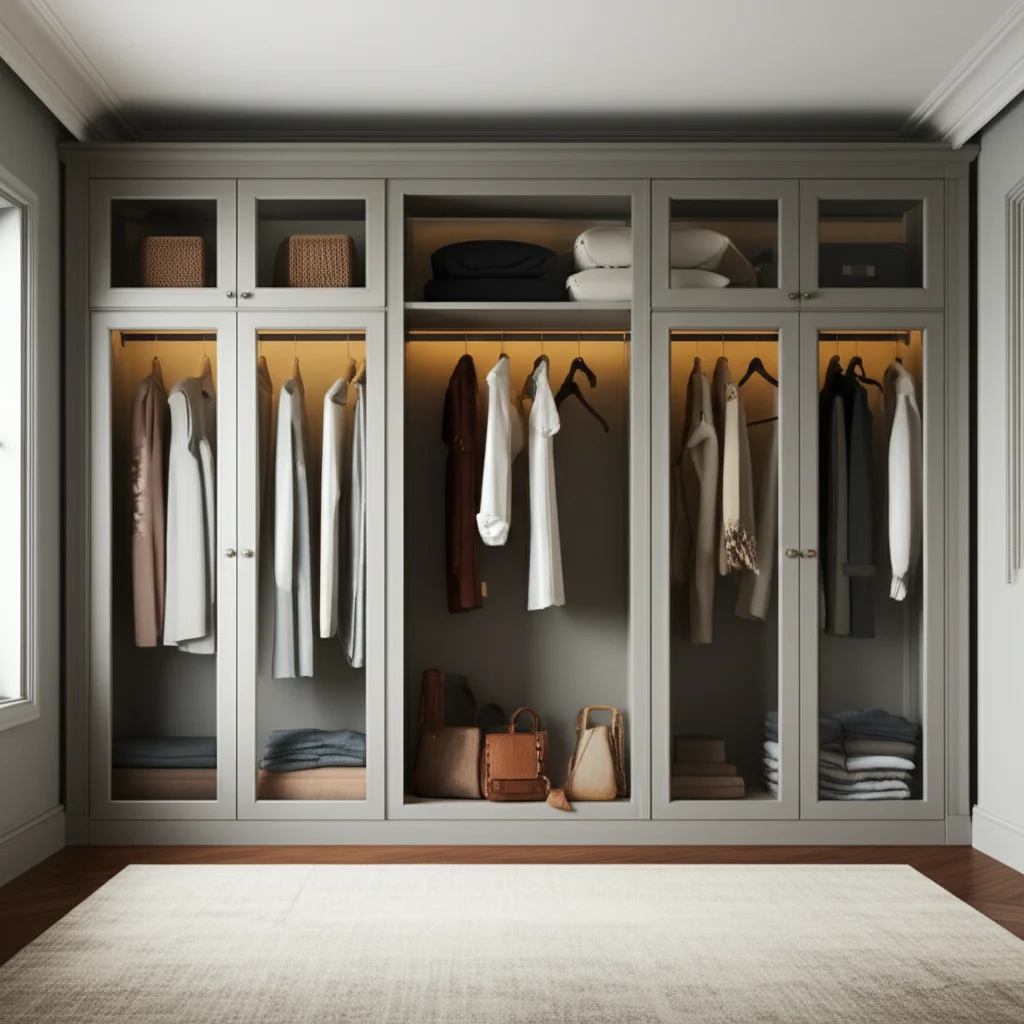
Space-Saving and Versatile Design
Wooden crates offer incredible flexibility in design. You can arrange them in countless ways to fit any room layout. Stacking them vertically uses height, which is important in smaller nurseries. This approach creates a custom storage unit without taking up much floor space.
Imagine a tall tower of crates for clothes, or a low-lying structure for toys. Each crate acts as a distinct compartment. This makes organizing different types of baby items much simpler. The open design also allows easy access to frequently used items like diapers or wipes. You can also add doors or curtains later if you want to enclose the space for a tidier look.
Cost-Effective Nursery Solution
Buying pre-made nursery furniture can be very expensive. A baby crate closet provides a budget-friendly alternative without sacrificing style or function. Wooden crates are often affordable, especially if you source them from craft stores, hardware stores, or even second-hand markets. This significantly cuts down on overall costs.
The DIY nature of this project means you save money on labor. You invest your time and effort instead. This allows you to allocate more of your budget to other essential baby items. Plus, you gain the satisfaction of building something unique for your child. It feels good to create something with your own hands.
Sustainable and Adaptable Storage
Using wooden crates for a baby closet is an environmentally friendly choice. You give new life to existing materials or choose sustainable wood options. This reduces waste compared to buying new, mass-produced furniture. It aligns with a conscious lifestyle.
The adaptability of a crate closet is a huge benefit. When your baby outgrows their tiny clothes, the crates can hold books, art supplies, or larger toys. You can rearrange them into new configurations as needed. Perhaps they become a sturdy bookshelf or a decorative display unit in a child’s bedroom. This adaptability ensures your initial effort continues to serve a purpose for years to come. This makes the baby crate closet a truly sustainable investment.
Planning Your Baby Crate Closet Project
Starting any DIY project requires careful planning. This ensures a smooth process and a successful outcome. When building a baby crate closet, thinking ahead saves time and prevents mistakes. I always begin by visualizing the finished product.
Consider the specific needs of your nursery. How much storage do you actually need? What type of items will you store? Asking these questions helps define the scope of your project. Let’s explore the key planning steps.
Assessing Your Space and Needs
Before buying any materials, measure the area where your baby crate closet will go. Note the height, width, and depth available. This determines how many crates you can use and how you will stack them. Think about whether you want a tall, narrow unit or a wider, lower one.
Consider what you need to store. Will it hold only clothes, or also diapers, wipes, blankets, and toys? If you plan to store many hanging clothes, you will need space for a rod. If you primarily need bins for smaller items, more open compartments work well. Understanding your storage needs directly influences the design and internal configuration of your closet. Visualize where everything will go inside the crates.
Choosing the Right Crates
The quality and type of wooden crates matter greatly for a baby crate closet. Look for sturdy, solid wood crates, not flimsy ones. Pine or untreated wood is generally a good choice. Avoid crates made from particle board or plywood that might off-gas chemicals. Always check for any splinters, sharp edges, or loose nails.
New, unfinished crates from craft or hardware stores are often the safest and easiest to work with. If you use reclaimed crates, ensure they are thoroughly cleaned and disinfected. Inspect them for any signs of mold, pests, or chemical stains. The safety of your baby is paramount, so selecting high-quality, safe crates is the first step. Aim for consistent sizes if you plan to stack them evenly.
Essential Tools and Materials
Having all your tools and materials ready before you start saves countless trips to the store. For this project, you will need:
- Wooden Crates: The star of your closet.
- Sandpaper: Various grits (medium to fine) for smoothing.
- Wood Glue: For strong, durable bonds between crates.
- Screws (wood screws): Different lengths for securing crates together.
- Drill: With appropriate drill bits for pre-drilling and screwing.
- Measuring Tape and Pencil: For accurate measurements and markings.
- Level: To ensure your stacked crates are straight.
- Safety Gear: Gloves, safety glasses, and a dust mask.
- Paint or Stain (child-safe): If you plan to finish the crates.
- Brushes or Rollers: For applying finishes.
- Wall Anchors/Straps: Essential for securing the unit to the wall.
- Optional: Small wooden dowels or closet rods, fabric bins, drawer slides, plywood for backings/shelves.
Gathering these items in advance makes the building process much more efficient. I find that organization before starting reduces stress during the actual construction.
Preparing Your Wooden Crates for Baby Use
Once you have chosen your crates, the next crucial step is preparation. This phase focuses on making the crates safe and ready for finishing. Skipping these steps can lead to splinters, an uneven finish, or even stability issues. Remember, this closet is for a baby, so safety is the top priority.
I recommend working in a well-ventilated area for sanding and painting. This protects your lungs and helps finishes dry properly. Give each crate individual attention during this stage.
Cleaning and Sanding for Safety
Even new crates need thorough cleaning and sanding. Begin by wiping down each crate with a damp cloth to remove dust and dirt. For older or reclaimed crates, use a mild soap and water solution, then allow them to dry completely. This prevents any residue from interfering with the finishing process.
Next, sand every surface of the crates. Start with a medium-grit sandpaper (around 100-120 grit) to smooth rough spots and remove splinters. Pay close attention to edges and corners, as these are areas where tiny hands might explore. Follow up with a fine-grit sandpaper (220 grit or higher) for a silky smooth finish. This ensures the crates are soft to the touch and completely free of hazards for your baby. Smooth wood also takes paint or stain much better.
Painting or Staining Your Crates
Now comes the fun part: adding color or warmth to your crate closet. When choosing a finish, always select child-safe, non-toxic paints or stains. Look for products labeled “Zero VOC” or “Low VOC” (Volatile Organic Compounds). These are safer for indoor use, especially in a baby’s room. Consider the overall nursery theme and color palette.
Apply paint or stain evenly with brushes or rollers. You may need two or three coats for full coverage, especially with lighter colors or if you want a deeper hue. Allow each coat to dry completely according to the manufacturer’s instructions before applying the next. If staining, wipe off excess stain for an even look. A clear, child-safe sealant or topcoat can add extra protection and durability once the paint or stain is dry. This also makes the surfaces easier to clean, which is a great benefit in a nursery.
Reinforcing Crates for Durability
Even sturdy crates can benefit from reinforcement, especially since they will hold baby items. This step adds extra strength and ensures the unit can withstand daily use. It also makes the overall structure more stable. I find that a few strategic additions make a big difference in longevity.
You can reinforce crates in several ways. For the base crates, consider adding a thin piece of plywood to the bottom for a solid floor. This prevents small items from falling through gaps. If crates have open slatted sides, you might want to line them with thin plywood or fabric to prevent items from slipping out. For crates that will bear significant weight, you can add small wooden blocks or metal brackets inside the corners. This enhances their load-bearing capacity. These small reinforcements contribute to the overall sturdiness and safety of your baby crate closet.
Assembling Your Baby Crate Closet Structure
With your crates prepared, it is time to assemble them into the final closet structure. This step requires precision and attention to detail to ensure stability and safety. A well-built structure will last for years and provide reliable storage for your baby’s belongings. I find that working slowly and double-checking each connection makes the process smoother.
The goal is to create a solid, immovable unit. This is especially important in a child’s room. Let’s go through the steps to build your crate closet.
Stacking and Securing Crates Vertically
The most common way to make a baby crate closet is by stacking crates. Decide on your desired configuration first. Will it be a tall tower, a low dresser-like unit, or a staggered design? Once you have a plan, begin stacking your crates. For maximum stability, stack them with their openings facing out or sideways, depending on your preferred access.
Apply a generous amount of wood glue to the surfaces where two crates will meet. Press them firmly together. While the glue is still wet, pre-drill pilot holes through the crate walls where they overlap. Then, insert wood screws to secure them tightly. Use at least two screws per joint for strong connections. Repeat this process for each crate you stack. This combination of glue and screws creates a very strong bond, crucial for preventing the unit from shifting or collapsing.
Creating a Stable Base
A stable base is essential for any freestanding furniture, especially one for a baby’s room. The bottom layer of your crate closet needs to be exceptionally secure. You can place the first layer of crates directly on the floor. However, consider adding a solid base platform underneath.
This platform can be made from a piece of sturdy plywood cut to the exact footprint of your crate structure. Elevating the crates slightly can also protect them from floor moisture. Attach the first layer of crates to this plywood base using wood glue and screws. This creates a wide, stable foundation that distributes the weight evenly. If your crates have open bottoms, adding a solid plywood floor to each bottom crate also adds stability and prevents small items from falling through.
Installing Backing for Enclosure
While crates often have open backs, adding a backing to your baby crate closet can enhance its appearance and functionality. A back panel prevents items from falling out the back. It also gives the unit a more finished, built-in look. This can make the closet feel more like a traditional piece of furniture.
Measure the entire back area of your assembled crate structure. Cut a piece of thin plywood or hardboard to fit these dimensions. You can paint or cover this backing material to match your crates or nursery decor. Attach the backing to the rear of your crate structure using small screws or finishing nails. Ensure the nails do not poke through the front. This step adds rigidity to the entire unit. It also helps contain items better. For those interested in fully enclosing their closet, consider exploring ideas on how to make barn doors for a closet which could be adapted for larger crate closet designs.
Customizing the Interior of Your Crate Closet
The beauty of a DIY baby crate closet lies in its ability to be perfectly customized. Once the main structure is built, you can tailor the interior to hold specific baby items. This ensures maximum efficiency and organization. Think about what you need to store and how you want to access it.
This is where your vision for the closet truly comes to life. I love this stage because it allows for so much creativity and practical problem-solving.
Adding Shelves and Dividers
Not all crates need to be open cubbies. You can add shelves within individual crates to create more storage layers. This is great for smaller items like onesies, bibs, or socks. Measure the inside of a crate and cut thin pieces of plywood or hardboard to size. You can create fixed shelves by attaching small wooden cleats to the inside walls of the crate, then resting the shelf on top. Alternatively, for flexible storage, you can insert removable shelves.
Dividers can also be added to separate different types of items within a single crate. For example, one crate could hold diapers on one side and wipes on the other. These can be simple pieces of wood or cardboard covered in fabric, inserted vertically. If you’re looking for detailed guidance on creating sturdy storage solutions, consider reading about how to build wood shelves in a closet for further inspiration. For less permanent options, learning how to add shelves to a closet without drilling might also offer creative insights for your crate setup.
Incorporating Hanging Rods for Tiny Clothes
Baby clothes are incredibly small and cute, and hanging them keeps them neat and wrinkle-free. Incorporating hanging rods into your crate closet is a smart way to store outfits. Identify one or more crates that can serve as hanging sections. These crates should be tall enough to accommodate baby hangers.
You can install a small wooden dowel or a tension rod across the inside width of the crate. Drill pilot holes on opposite sides of the crate’s interior walls. Insert the dowel, securing it with a bit of wood glue if desired. For adjustable options, small tension rods work well. This allows you to hang little dresses, tiny shirts, and special outfits, keeping them easily accessible and visible. This feature makes your crate closet feel like a real wardrobe for your little one.
Utilizing Drawers and Baskets
Open crates are convenient, but sometimes you need to hide clutter or store smaller items. Incorporating drawers or baskets offers a neat solution. Fabric bins or woven baskets that fit perfectly within a crate opening can act as pull-out drawers. They are soft, lightweight, and often come in various colors to match your nursery decor.
For a more permanent drawer solution, you can build simple wooden drawers that slide into the crates. This requires a bit more woodworking skill. You would attach drawer slides to the inside of the crate and to the drawer box. This provides a clean, enclosed storage space for small socks, burp cloths, or tiny accessories. Using a mix of open cubbies, shelves, hanging space, and closed storage maximizes the functionality of your baby crate closet.
Safety and Finishing Touches for Your Baby Closet
Building a beautiful and functional baby crate closet is rewarding. However, ensuring it is completely safe for your child is the most important step. Babies are curious and mobile, and any furniture in their room must be secure. Always double-check every connection and consider potential hazards.
This final stage is about making the closet secure and perfect for its new occupant. I always emphasize safety above all else in children’s spaces.
Anchoring to the Wall for Stability
This step is non-negotiable for any tall piece of furniture in a child’s room. To prevent tipping, you must anchor your baby crate closet to the wall. Furniture tip-overs are a serious hazard for children. Even if your crate closet feels stable, little ones can climb on it or pull drawers out.
Use anti-tip furniture straps or L-brackets. Secure one end of the strap or bracket to the top or upper back of your crate closet and the other end to a wall stud. If you cannot find a stud, use appropriate drywall anchors. Follow the instructions for the specific anchoring hardware you purchase. Install at least two anchor points for wider units. This critical step ensures the closet cannot accidentally fall forward, providing peace of mind. It transforms a freestanding unit into a permanently secure fixture.
Child-Proofing and Edge Protection
Even after anchoring, inspect the entire crate closet for any remaining potential hazards. Run your hands over all surfaces, feeling for rough spots, sharp edges, or protruding screws. Address any new splinters that may have appeared during assembly by sanding them down.
Consider adding corner protectors, especially if the crates have sharp corners that are at head height for your crawling or walking baby. These soft, clear guards adhere to corners and cushion any accidental bumps. Check that all screws are fully recessed and that no small parts could become choking hazards. Ensure paint or stain is completely dry and cured, emitting no lingering fumes. Creating a safe environment means thinking like a curious toddler.
Decorating and Organizing Baby Essentials
Once your baby crate closet is structurally sound and safe, you can add the final decorating and organizing touches. This is where your personal style shines through. Start by thinking about the overall aesthetic of the nursery.
- Add decorative elements: You can stencil designs on the crates, add custom knobs to drawers, or drape fairy lights around the frame for a soft glow.
- Use cute storage bins: Select fabric bins or woven baskets that fit the crate openings. These can hold diapers, smaller toys, or burp cloths. Choose colors and patterns that complement your nursery theme.
- Categorize items: Organize baby clothes by size or type. Use labels on baskets or on the front of crates to easily identify contents. This makes it simple for parents and caregivers to find items quickly.
- Display cherished items: Reserve a few open shelves for displaying adorable baby shoes, framed photos, or special keepsakes. This adds a personal touch. A well-decorated and organized closet becomes a functional and beautiful part of the nursery.
Maximizing Storage in Your Crate Closet
A baby crate closet is an excellent storage solution, but its efficiency truly shines when you maximize every inch. Babies come with a lot of tiny things, and their needs change quickly. Smart organization strategies ensure your closet remains functional and tidy as your child grows. I find that a little planning goes a long way in keeping clutter at bay.
These tips will help you make the most of your crate closet space, ensuring everything has its place.
Seasonal Rotation and Decluttering
Baby clothes seem to multiply, and babies outgrow them at an astonishing rate. Implement a system of seasonal rotation and regular decluttering. Store out-of-season clothes or items that are too large for your baby in separate bins, perhaps on the highest shelves or in another storage area. This frees up prime space for current sizes.
Every few months, or as your baby grows, take time to go through the closet. Remove clothes that no longer fit. Decide whether to store them for future children, donate them, or repurpose them. This prevents the closet from becoming overcrowded and makes it easier to find what you need. A regular closet clean-out is essential for maintaining order. For more tips on organizing your space, consider how to clean out closet clothes.
Labeling and Categorizing Items
Clear labeling is a game-changer for any organized space, especially a baby closet. When sleep-deprived, you do not want to hunt for socks. Use labels on each crate, shelf, or bin to clearly indicate its contents.
- Categories can include:
- “Diapers & Wipes”
- “0-3 Months Onesies”
- “Sleepers”
- “Blankets”
- “Small Toys”
- “First Aid”
- “Socks & Shoes”
You can use handwritten labels, printed labels, or even picture labels for visual cues, which also helps when your child gets older. This system ensures everyone knows where things belong. It makes putting away laundry and finding items incredibly fast and easy. Consistency in labeling brings great peace of mind.
Adapting as Your Baby Grows
One of the greatest advantages of a baby crate closet is its adaptability. As your baby transitions from infant to toddler to child, their storage needs evolve. Your crate closet can evolve with them. The flexible nature of stacked crates allows for easy reconfiguration.
For example:
- Infant Stage: Focus on hanging space for tiny clothes and bins for diapers and burp cloths.
- Toddler Stage: Lower some crates to become accessible toy bins. Transform hanging sections into shelves for books or puzzles. You might even consider if you could adapt it, conceptually, from how people turn a small closet into a mudroom to create a specific zone for shoes or backpacks within the crates.
- Child Stage: The unit can become a personal bookshelf, a display for collectibles, or storage for art supplies.
You can add more crates, remove some, or rearrange their positions. This ensures your initial investment continues to provide valuable storage for many years, eliminating the need to buy new furniture as often. This makes the crate closet a truly sustainable and smart long-term solution for your home.
FAQ Section
How many crates do I need for a baby crate closet?
The number of crates depends on your available space and storage needs. A typical baby crate closet might use 6 to 12 crates. Measure your desired area first. Then, plan how many crates will fit. Consider both vertical and horizontal arrangements.
What kind of wood crates are best for a nursery?
Choose sturdy, unfinished wooden crates made from solid pine or similar untreated wood. Ensure they are free of splinters, sharp edges, and loose nails. Avoid crates made from particle board or chemically treated wood to ensure safety for your baby’s environment.
How do I make the crate closet safe for a baby?
Safety is paramount. First, thoroughly sand all surfaces smooth and apply child-safe, non-toxic finishes. Second, and most importantly, securely anchor the entire crate closet to the wall using anti-tip furniture straps or L-brackets. This prevents accidental tipping.
Can I paint my wooden crates?
Yes, you can paint or stain your wooden crates. Always use child-safe, non-toxic paints or stains that are low-VOC or zero-VOC. Apply multiple thin coats for a durable finish. Allow plenty of drying time in a well-ventilated area before use in the nursery.
How can I add hanging space for baby clothes?
You can add hanging space by installing small wooden dowels or tension rods inside individual crates. Choose crates tall enough to accommodate baby hangers. Drill pilot holes for dowels and secure them with wood glue. Tension rods offer a drill-free alternative.
Is a baby crate closet a permanent solution?
A baby crate closet can be a semi-permanent to permanent solution. When properly assembled and anchored, it becomes a sturdy piece of furniture. Its modular nature also allows you to reconfigure it as your child grows, adapting to changing storage needs for years to come.
Conclusion
Creating a baby crate closet is a truly rewarding DIY project that brings both charm and unparalleled functionality to your nursery. We have explored every step, from the initial planning and careful selection of materials to the crucial assembly and vital safety measures. This unique storage solution not only offers a cost-effective alternative to traditional furniture but also allows for complete customization to fit your specific needs and aesthetic preferences.
By diligently following these steps, you build a durable, adaptable, and beautiful piece that organizes your baby’s essentials efficiently. Remember to prioritize safety by meticulously sanding, finishing with child-safe products, and most importantly, anchoring your baby crate closet securely to the wall. This ensures peace of mind for you and a safe environment for your little one. Embrace the satisfaction of building something truly special for your family. Start your baby crate closet project today and enjoy a perfectly organized nursery!
- baby storage
- nursery organization
- DIY closet
- wooden crates
- baby room decor
- budget nursery
- small space storage

Todd Martin
Senior Writer
With over 15 years of experience in home renovation and design, I started HEG to share what I’ve learned with homeowners who want to create spaces that are both beautiful and functional. I’ve always believed in a hands-on approach, and over the years, I’ve picked up practical solutions that actually work. Through HEG, I aim to make home improvement more approachable, sharing real tips that help you create a home you truly love.