· Todd Martin · Home Decor, DIY, Crafts · 19 min read
How To Make A Chair Cover From A Sheet
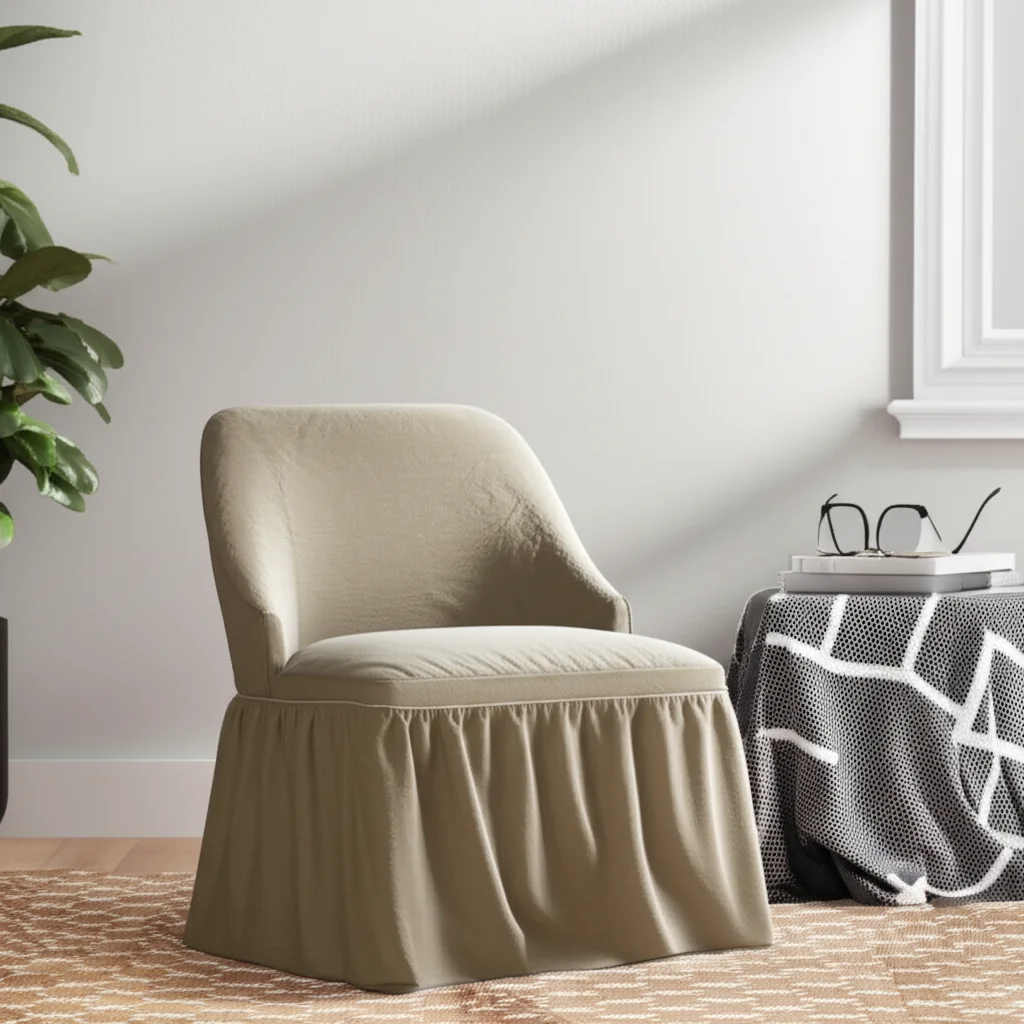
Transform Your Chairs: How To Make A Chair Cover From A Sheet
Do you look at your old, worn-out chairs and wish for a fresh new look? Maybe you want to protect your current chairs from spills or pets. I have found an incredibly simple and affordable solution: learn how to make a chair cover from a sheet. This DIY project breathes new life into your furniture. It also saves money and reduces waste by repurposing old linens.
Transforming your seating does not require expensive upholstery services. You can achieve amazing results with a little creativity and an old bed sheet. This comprehensive guide will walk you through everything. We will cover selecting the right sheet, taking accurate measurements, and mastering both no-sew and basic sewing techniques. Get ready to give your chairs a stunning makeover.
Takeaway
- Repurpose old bed sheets into stylish and protective chair covers.
- Choose the right sheet material for durability and aesthetics.
- Measure your chair accurately to ensure a snug and professional fit.
- Learn both no-sew and basic sewing methods for different skill levels.
- Personalize your chair covers with creative embellishments.
- Maintain your DIY covers with simple cleaning and care practices.
Clear, Concise Answer
You can make a chair cover from a sheet by measuring your chair, selecting an appropriately sized sheet, and then either artfully draping and tucking for a no-sew solution or cutting and sewing the fabric to create a fitted slipcover. This budget-friendly DIY project refreshes furniture, adds protection, and allows for personalized home decor.
Why Create a Chair Cover from an Old Sheet?
Making a chair cover from a sheet offers many fantastic benefits for your home. This project is a smart way to update your decor without spending much money. You use materials you already own. This makes it an incredibly budget-friendly option. I personally love how it helps me refresh my living space on a dime.
Beyond saving money, this DIY approach is highly sustainable. Repurposing old bed sheets keeps them out of landfills. It gives them a second life as a functional and attractive item. This reduces waste and promotes eco-friendly living. It feels good to give old things new purpose.
Customization is another major advantage. When you make your own chair cover, you control the design. You can choose any sheet pattern, color, or texture that suits your style. This allows you to match your existing decor or introduce a bold new element. It is much easier to find the perfect look this way. For more ideas on refreshing your furniture’s appearance, explore how to make old furniture look modern without paint.
Chair covers also provide excellent protection for your furniture. They guard against spills, stains, and pet fur. This extends the life of your original upholstery. If the cover gets dirty, you can simply remove it and wash it. This makes cleaning much simpler than deep-cleaning the chair itself. It also ensures your furniture remains in good condition for longer.
Selecting the Best Sheet and Gathering Your Tools
Choosing the right bed sheet is crucial for a successful chair cover project. Not all sheets are created equal when it comes to durability and drape. I recommend using flat sheets over fitted ones. Flat sheets offer more continuous fabric, which simplifies cutting and fitting. A twin flat sheet often works well for dining chairs, while a full or queen size might be better for larger armchairs.
Consider the fabric content of your sheet. Cotton sheets are a popular choice. They are durable, breathable, and easy to work with. Cotton blends also perform well. They offer some stretch and wrinkle resistance. Avoid very thin or sheer sheets, as they may not provide adequate coverage or hold up to regular use. Thick, stiff fabrics can be harder to manipulate. Look for a sheet with a medium weight.
Gathering all your tools beforehand saves time and frustration. You will need a good quality measuring tape to get accurate dimensions. Sharp fabric scissors are essential for clean cuts. Pins will help you hold fabric in place before sewing or securing it. A fabric marker or tailor’s chalk is useful for marking cut lines.
For a no-sew cover, you might need fabric glue, iron-on hemming tape, or decorative ties. If you plan to sew, a sewing machine is ideal. However, basic hand-sewing skills can also work for simpler designs. An iron and ironing board are helpful for crisp seams and hems. Preparing your supplies makes the process much smoother. Remember, maintaining your new cover is key, so consider how you would clean similar fabric items like how to clean fabric chair seats. If you decide to add specific cushion covers, knowing how to sew a box cushion cover with velcro closure can also be very useful.
Essential Tools and Materials Checklist
- Old flat bed sheet: Choose based on chair size and desired fabric type (cotton, cotton blend).
- Measuring tape: For accurate dimensions of your chair.
- Sharp fabric scissors: To cut the sheet precisely.
- Straight pins: To hold fabric in place.
- Fabric marker or tailor’s chalk: For marking cutting lines.
- Iron and ironing board: For pressing seams and hems.
Optional Tools for Specific Methods
- No-Sew Method:
- Fabric glue or hot glue gun with fabric glue sticks.
- Iron-on hemming tape.
- Velcro strips or fabric ties.
- Sewing Method:
- Sewing machine (recommended for efficiency).
- Matching thread.
- Hand-sewing needle (for minor adjustments or if machine is unavailable).
- Elastic or zippers (for fitted designs).
Precise Measurements for a Flawless Chair Cover Fit
Accurate measurements are the foundation of a great-fitting chair cover. Do not rush this step. I always double-check my numbers to avoid mistakes later on. Measure your chair carefully from all angles. This ensures the cover will drape nicely and stay in place.
Start by measuring the widest part of the chair back. Measure from the top edge down to the seat. Add extra inches for seam allowances and for tucking the fabric. Next, measure the seat cushion. Measure its width and depth. Also, measure from the back of the seat down to the floor for the skirt length, if you want a full-length cover.
For chairs with arms, measure the length and width of each armrest. Also, measure the distance from the top of the arm to the seat. Note any curves or unique shapes. These details are important for creating a truly custom look. If you are covering a couch, the approach to putting on a couch cover with foam roller can offer similar insights into fitting large fabric pieces smoothly.
It is smart to sketch your chair and label all measurements. This visual guide will help you visualize the fabric pieces you need. Remember to add at least 1/2 inch to 1 inch extra to all edges for seam allowances. If you are doing a no-sew cover, add even more fabric for generous tucks and hems. A generous fabric allowance gives you room to adjust and ensures enough material for a good drape.
Step-by-Step Measurement Guide
- Chair Back:
- Width: Measure across the widest part of the chair back.
- Height: Measure from the top of the chair back down to the seat. Add 6-12 inches for tucking into the seat crease.
- Chair Seat:
- Width: Measure across the widest part of the seat.
- Depth: Measure from the back of the seat to the front edge.
- Front drop: Measure from the front edge of the seat down to the floor (for a skirted look) or to where you want the cover to end. Add 1-2 inches for a hem.
- Chair Arms (if applicable):
- Length: Measure from the back of the arm to the front.
- Width: Measure across the top of the armrest.
- Drop: Measure from the top of the arm down to the seat cushion.
- Side drop: Measure from the outside edge of the arm down to the floor (if you want the skirt to extend here).
- Overall Drape: For a simpler, draped cover, measure the entire chair from the back top edge, over the seat, and down to the floor in front, and similarly for the sides. This gives you a large rectangle of fabric.
Crafting Your No-Sew Chair Cover: A Simple Approach
Creating a no-sew chair cover is perfect for beginners or anyone wanting a quick refresh. This method relies on clever draping, tucking, and securing. You can achieve a neat look without any stitching. It’s an excellent way to experiment with different sheet patterns or colors.
Start by laying your chosen flat sheet over the chair. Center it carefully. For a basic cover, begin by draping the sheet over the back of the chair. Allow enough fabric to fall over the front and sides. Smooth out any wrinkles. I find it easiest to start from the top and work my way down.
Next, focus on the seat. Push excess fabric deeply into the creases where the seat meets the back and arms. This creates a more defined shape. Use your hands to smooth the fabric tightly around the chair’s contours. The goal is to make it look tailored. If your chair has separate cushions, consider removing them, covering them individually, and then replacing them to help secure the sheet.
For the armrests, gently wrap the fabric around them. Tuck excess fabric into the sides of the seat. You can use fabric pins underneath the chair or at inconspicuous spots to hold the fabric in place. Decorative ties or ribbons can also be used. Tie them around the chair legs or back for a charming effect. This not only secures the cover but adds a touch of style. For a similar concept of adding padding and then covering, you might find inspiration from how to add a padded seat to a wooden chair. Cleaning the seat cushions of your chair, covered or uncovered, is also a vital part of maintaining your furniture’s overall freshness. Learn how to clean chair cushions for best practices.
Step-by-Step No-Sew Method
- Prepare the Chair: Remove any existing cushions or loose parts. Ensure the chair is clean.
- Drape the Sheet: Lay the flat sheet evenly over the entire chair. Start from the top of the back and let it fall naturally over the front and sides. Center the sheet so you have equal overhang on all sides.
- Form the Back: Smooth the fabric over the chair back. Pull the fabric taut but not stretched.
- Tuck the Seat: Push the excess fabric deeply into the crease where the chair back meets the seat. Continue tucking into the creases where the seat meets the arms. This defines the seat area.
- Shape the Arms: Gently pull the fabric around the chair arms. Tuck any extra fabric into the inner and outer sides of the armrests. You want a smooth, unbunched appearance.
- Create the Skirt (Optional): Allow the remaining fabric to hang down to the floor, forming a skirt. You can trim the length if it’s too long. For a neater edge, use iron-on hemming tape along the bottom.
- Secure the Cover:
- Fabric Pins: Use long upholstery pins or straight pins to secure the tucked fabric in inconspicuous areas, such as along the bottom edge of the seat or under the arms.
- Ties/Ribbons: Wrap and tie decorative ribbons or fabric strips around the chair legs or back to cinch the cover and add a stylish touch.
- Fabric Grippers: Place non-slip fabric grippers (foam tubes or strips) into the creases to prevent the sheet from shifting.
- Fabric Glue/Hemming Tape: For a more permanent no-sew option, you can use fabric glue or iron-on hemming tape to create small hems or secure folds.
Basic Sewing Techniques for a Custom Chair Cover
For a more tailored and durable chair cover, basic sewing techniques are ideal. Even simple straight seams can make a big difference. This method provides a custom fit that stays in place. It requires a bit more effort, but the results are often more professional.
Begin by cutting your sheet according to the measurements you took. You will essentially create separate panels for the chair back, seat, and arms. Remember to add your seam allowances to each piece. Typically, a 1/2-inch to 1-inch seam allowance is sufficient. Pin the fabric pieces together with right sides facing.
Use your sewing machine to stitch along your marked lines. A simple straight stitch is all you need for most seams. Start by sewing the back panel to the seat panel. Then, attach the arm panels. Go slowly and carefully to keep your lines straight. Ironing your seams flat as you go helps create a crisp finish.
You can add elastic to the bottom edge of the chair cover for a snugger fit. Create a casing by folding the bottom hem over and stitching it down, leaving a small opening. Thread elastic through this casing. Pull it to your desired tension. Then stitch the opening closed. This helps the cover hug the chair’s base. If you are tackling a larger piece of furniture, the process is similar to how you might approach how to upholster the back of a wooden dining chair, which also involves precise cutting and stitching for a custom fit. Knowing how to wash a duvet cover is also useful, as it involves handling large fabric pieces for cleaning, similar to a chair cover.
Step-by-Step Basic Sewing Method
- Cut Fabric Pieces: Based on your precise measurements (including seam allowances), cut the sheet into the necessary panels:
- Chair Back (front and back pieces if covering entirely)
- Seat (top and side pieces)
- Arms (top, side, and possibly front pieces)
- Skirt panels (if desired)
- Hem Edges: Finish all raw edges that will be visible or under stress. A simple double-fold hem works well. Fold the edge 1/4 inch, press, then fold another 1/4 inch, press, and stitch.
- Assemble the Back and Seat:
- Place the front back panel right side up.
- Align the seat panel to the bottom edge of the back panel, right sides together. Pin and stitch along this seam.
- If your chair has a separate back cushion, you may create a separate cover for it.
- Attach the Arms:
- Pin the armrest panels (top and side pieces) to the main body (back and seat sections), right sides together. Ensure all curves and angles align.
- Carefully stitch these seams. Clip curves after stitching to allow the fabric to lay flat.
- Create the Skirt (Optional):
- If adding a skirt, stitch the skirt panels together at the sides to form a continuous loop.
- Attach the top edge of the skirt to the bottom edge of the seat section, right sides together.
- Add Elastic or Ties (Optional):
- Elastic: For a snug fit, create a casing along the bottom hem of the cover. Fold the hem up (e.g., 1 inch), press, and stitch, leaving a 1-inch opening. Thread elastic through the casing, secure both ends, and stitch the opening closed.
- Ties: Attach fabric ties at strategic points, like the back legs or under the arms, to secure the cover to the chair.
- Finishing Touches: Turn the cover right side out. Press all seams for a neat, professional look. Try the cover on the chair and make any final adjustments.
Personalizing Your Chair Cover with Creative Touches
Making a chair cover from a sheet is just the beginning. The real fun starts when you add personal flair. Customizing your DIY chair cover transforms it from a simple fabric piece into a unique decor statement. I always look for ways to make my projects truly my own.
Consider adding decorative trim. You can sew or glue on ribbon, fabric fringe, or piping along the seams or bottom edge. This instantly elevates the cover’s appearance. Choose colors that complement the sheet fabric. It gives the cover a more finished and professional look.
Appliques are another wonderful way to personalize. Cut shapes from contrasting fabric and stitch or glue them onto your chair cover. Think leaves, flowers, or geometric designs. You can also use iron-on patches for an even easier solution. This adds visual interest and a touch of whimsy.
Don’t forget functional embellishments. Adding pockets to the sides of an armchair cover is incredibly practical. They are perfect for holding remote controls, books, or magazines. Stitch simple fabric rectangles onto the side panels before assembling the cover. This makes your chair not just stylish but also highly convenient. Making your home comfortable and beautiful involves many such small details. Thinking about your overall home aesthetic can inspire further projects, such as how to make your bed look like a magazine.
You can even experiment with different sheet patterns or colors to create a patchwork effect. Stitch together squares or strips of various sheets for a unique, eclectic design. This is an excellent way to use up smaller fabric remnants. The possibilities for personalization are endless. Let your creativity guide you.
Creative Customization Ideas
- Decorative Trim:
- Sew or glue contrasting ribbon, braid, or fringe along the bottom hem or seams.
- Add piping to define edges for a more upholstered look.
- Appliques and Patches:
- Cut shapes (flowers, leaves, geometric patterns) from contrasting fabric and machine or hand-stitch them onto the cover.
- Use iron-on patches for a quick and easy decorative touch.
- Functional Pockets:
- Sew large pockets onto the side panels of the chair cover for remote controls, books, or magazines.
- Attach smaller pockets for glasses or phone storage.
- Fabric Ties and Bows:
- Use contrasting fabric strips or ribbons to create decorative ties at the back or sides of the chair.
- Tie them in bows for an elegant or playful accent.
- Stenciling or Fabric Paint:
- Use fabric stencils and fabric paint to add patterns or designs directly onto the sheet.
- Ensure the paint is suitable for fabric and follow curing instructions.
- Button and Buttonholes:
- Add large, decorative buttons along the back or sides for a rustic or classic look.
- Create corresponding buttonholes or fabric loops for a removable element.
- Layering and Ruching:
- For a more elaborate look, gather and stitch sections of fabric (ruching) on the back or arms.
- Layer different types of fabric for textural contrast.
Care and Maintenance for Your DIY Chair Cover
Proper care ensures your homemade chair cover stays looking great for a long time. Since you are using a bed sheet, cleaning is generally straightforward. I always check the original sheet’s care tag before washing. This gives me the best guidance for fabric type.
Most cotton or cotton-blend sheets are machine washable. Use cold water on a gentle cycle to prevent shrinking or fading. Harsh detergents can damage fabric fibers or colors. Opt for a mild detergent. Avoid bleach unless specifically recommended for your sheet’s material.
For minor spills or spots, tackle them immediately. Blot the stain with a clean cloth. Use a gentle stain remover or a mixture of mild soap and water. Always test any cleaning solution on an inconspicuous area first. This prevents accidental discoloration. For stubborn stains on similar materials, considering tips for how to clean polyester chair or even how to clean fabric office chair can be helpful, adapting the advice to your specific sheet fabric.
When drying, tumble dry on low heat or air dry. High heat can cause cotton to shrink significantly. Remove the cover from the dryer while it is still slightly damp. This helps prevent excessive wrinkling. You can then iron it on a low setting for a crisp finish. Store extra covers in a clean, dry place. This keeps them fresh and ready for use. By following these simple steps, your DIY chair covers will remain beautiful and functional for years. Even if you have a leather chair, understanding general cleaning principles for furniture covers like how to clean leather chair can help you appreciate the specific care needs of different materials.
Maintaining Your Chair Cover: Best Practices
- Regular Shaking and Brushing: Regularly shake out your chair cover to remove loose dust, crumbs, and pet hair. Use a soft brush or a lint roller for daily tidiness.
- Spot Cleaning: Address spills and stains immediately.
- Blot the affected area with a clean, dry cloth. Avoid rubbing, as this can spread the stain.
- Use a mild fabric spot cleaner or a solution of gentle soap and water. Test on an inconspicuous area first.
- Machine Washing (Most Common):
- Check Fabric Tag: Refer to the original bed sheet’s care label for specific washing instructions (temperature, cycle).
- Cold Water, Gentle Cycle: For most cotton or cotton-blend sheets, wash in cold water on a gentle cycle. This helps prevent shrinkage and color fading.
- Mild Detergent: Use a gentle, color-safe laundry detergent. Avoid harsh chemicals or bleach unless the fabric specifically allows it.
- Wash Separately: Wash the chair cover by itself or with similar colors to prevent dye transfer.
- Drying:
- Low Heat Tumble Dry: Tumble dry on a low heat setting. High heat can cause significant shrinkage, especially with cotton.
- Air Dry/Line Dry: For best results and to prevent shrinking, consider air drying or line drying your cover.
- Remove Promptly: Remove the cover from the dryer while slightly damp to minimize wrinkles.
- Ironing:
- If needed, iron the chair cover on a low to medium setting, according to the fabric type. This will give it a crisp, smooth appearance.
- Rotation (If You Have Multiple Covers): If you have multiple DIY chair covers, rotate them regularly. This distributes wear and tear evenly, extending the life of each cover.
- Protection: Consider using fabric protector sprays designed for upholstery. These can help repel spills and make cleaning easier.
FAQ Section
Q1: What type of sheet is best for making a chair cover?
Flat sheets are generally best for making chair covers because they offer a continuous piece of fabric. Look for cotton or cotton-blend sheets with a medium weight. These fabrics are durable, easy to work with, and stand up well to washing. Avoid very thin or overly stretchy materials for the best results.
Q2: Can I make a chair cover without sewing?
Yes, absolutely! You can make a chair cover without sewing by strategically draping, tucking, and securing the sheet. Use fabric pins, decorative ties, or even non-slip fabric grippers to hold the sheet in place. This method is quick, easy, and requires no special tools beyond basic household items.
Q3: How do I ensure my chair cover fits properly?
Precise measurements are key to a proper fit. Measure all parts of your chair: the back, seat, and arms. Add extra inches for tucking or seam allowances, depending on whether you are sewing. A snug fit prevents the cover from shifting. Double-check your measurements before cutting any fabric.
Q4: How can I protect my new chair cover from stains?
You can protect your new chair cover by regularly shaking out crumbs and pet hair. For liquid spills, blot them immediately with a clean cloth. Consider applying a fabric protector spray designed for upholstery. This creates a barrier against spills, making cleaning easier and preventing stains from setting in.
Q5: How often should I wash my DIY chair cover?
The frequency of washing depends on use. For everyday chairs, washing the cover every 1-3 months is generally sufficient. If you have pets, small children, or frequently eat on the chair, you might need to wash it more often. Spot clean minor spills as they happen to extend the time between full washes.
Q6: Can I use this method for different chair types (dining, armchair, office)?
Yes, this method is versatile for various chair types. For dining chairs, a twin flat sheet often works well. Larger armchairs or recliners may require a full, queen, or even king-sized sheet. The key is to adapt your measurements and the amount
- DIY chair cover
- Upcycle bed sheet
- Furniture slipcover

Todd Martin
Senior Writer
With over 15 years of experience in home renovation and design, I started HEG to share what I’ve learned with homeowners who want to create spaces that are both beautiful and functional. I’ve always believed in a hands-on approach, and over the years, I’ve picked up practical solutions that actually work. Through HEG, I aim to make home improvement more approachable, sharing real tips that help you create a home you truly love.