· Todd Martin · Coffee Brewing · 19 min read
How To Make Coffee Aeropress
Master How To Make Coffee Aeropress
Do you want to brew great coffee at home? Many people love the rich, smooth taste of Aeropress coffee. The Aeropress coffee maker offers a unique way to enjoy your daily cup. It is portable and easy to use. I find it provides an incredibly clean cup of coffee with minimal effort. This guide will show you how to make coffee Aeropress style. You will learn about the equipment, brewing steps, and important tips. We will cover both classic and inverted methods. By the end, you will make delicious Aeropress coffee every time.
Takeaway
- Gather essential equipment: Aeropress, grinder, kettle, fresh beans, scale.
- Choose between the classic or inverted brewing methods based on preference.
- Follow precise steps for grind size, water temperature, coffee-to-water ratio, and steep time.
- Clean your Aeropress thoroughly after each use for lasting performance.
- Experiment with variables to find your perfect brew recipe.
Clear, Concise Answer
To make coffee with an Aeropress, grind fresh beans to a medium-fine consistency. Heat water to 175-205°F (80-96°C). Assemble the Aeropress using either the classic or inverted method. Add coffee grounds and hot water, stir briefly, then plunge slowly. This process extracts a concentrated, smooth coffee shot ready for dilution or immediate enjoyment.
Discover the Aeropress Coffee Maker
The Aeropress coffee maker is a popular brewing device. It creates smooth, full-bodied coffee quickly. Many coffee lovers choose it for its simplicity and versatility. The Aeropress uses total immersion brewing, like a French press. It then uses pressure to push the coffee through a paper filter. This process gives a clean cup without silt. I really enjoy how easy it is to carry and clean. It is perfect for home or travel.
This small device has three main parts. There is a plunger, a chamber, and a filter cap. The chamber holds the coffee and water. The plunger presses the brew down. The filter cap holds a small paper filter. This filter keeps coffee grounds out of your cup. The Aeropress is known for its low acidity brew. It makes a rich concentrate that you can enjoy as espresso-style shots or dilute into a full mug of coffee. This flexibility makes it a favorite for many.
Using an Aeropress requires minimal space. You can store it in a drawer or pack it in a suitcase. This makes fresh coffee accessible anywhere. Compared to other coffee makers, it is very durable. You do not need electricity to operate it. This is great for camping or power outages. I appreciate its simple design. It means fewer parts can break or wear out.
Many people consider the Aeropress a game-changer for home brewing. It offers consistency that drip coffee makers might lack. You have full control over brew time and water temperature. This lets you experiment easily. The unique pressure system ensures efficient extraction. This leads to a delicious cup every single time. It truly simplifies coffee making.
Essential Gear for Making Aeropress Coffee
Having the right tools makes a big difference when you make Aeropress coffee. You do not need many things, but quality matters for a great cup. I always start with fresh, high-quality coffee beans. The type of bean affects flavor greatly. Choose beans that you enjoy. A good starting point is medium roast beans. These offer a balanced flavor.
Next, you need a coffee grinder. A burr grinder is best. It grinds coffee beans evenly. Uneven grounds cause uneven extraction. This leads to a less flavorful brew. For Aeropress, a medium-fine grind is ideal. It should feel like table salt. If you do not have a grinder, buy whole beans and grind them just before brewing. This preserves freshness. You can read more about how to clean your coffee grinder to keep it working well. how to clean coffee grinder
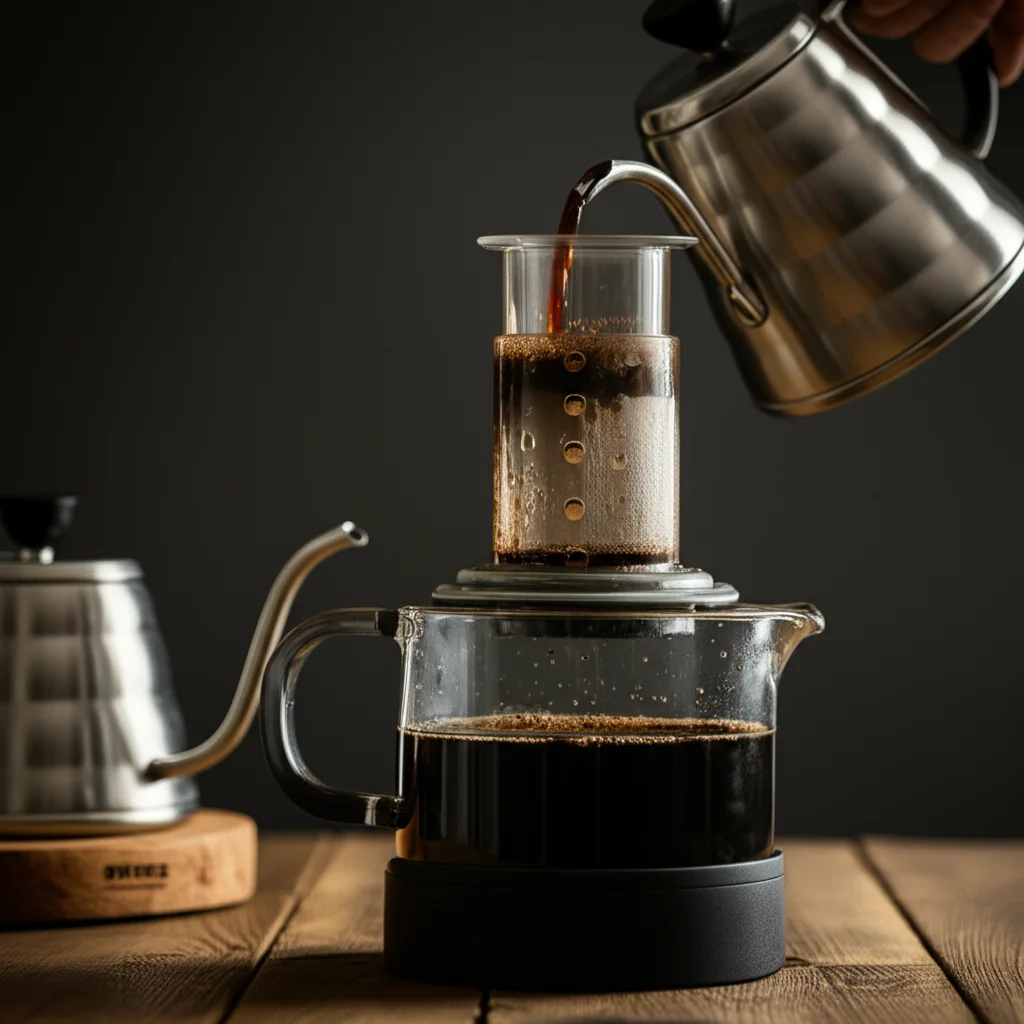
You also need a reliable hot water kettle. A gooseneck kettle offers better pouring control. This is helpful for precise brewing. Water temperature is crucial. It should be between 175°F and 205°F (80°C to 96°C). Water too hot can make coffee bitter. Water too cold can make it weak. I often use water just off the boil for a few seconds. This brings it to the right temperature range.
A digital scale helps with accuracy. Measuring coffee and water by weight is better than volume. It ensures consistency every time you brew. Most recipes use grams. Aim for about 15-17 grams of coffee for 240ml of water. This gives a strong concentrate. You also need paper filters for the Aeropress. These are small, round filters that fit into the filter cap. They provide a very clean cup. Learn about how to clean various coffee filters here. how to clean coffee filter
Lastly, you will need a mug or serving vessel. The Aeropress brews directly into your cup. Make sure it is sturdy enough to withstand the pressing force. A stirring paddle also comes in handy. The Aeropress usually comes with one. This helps mix the coffee grounds with water evenly. Having these tools ready ensures a smooth brewing process.
The Classic Aeropress Brewing Method
The classic Aeropress method is simple and effective. Many people start with this technique. I find it very straightforward for a consistently good cup. First, you need to prepare your ingredients. Grind your coffee beans to a medium-fine consistency. It should resemble table salt. Heat your water to the correct temperature. Aim for 175-205°F (80-96°C).
Now, let’s set up the Aeropress.
- Place a paper filter into the filter cap.
- Twist the filter cap onto the bottom of the Aeropress chamber.
- Place the Aeropress chamber directly on top of your mug or serving vessel. Ensure your mug is stable and fits well.
- Add your freshly ground coffee into the Aeropress chamber. I usually use about 15-17 grams of coffee.
Once the coffee is in, it is time for the water.
- Pour hot water over the coffee grounds. Pour slowly and evenly. Aim for about 240ml of water, but adjust based on your desired strength. This will fill the chamber to level 1 or 2, depending on the coffee amount.
- Stir the coffee and water gently for about 10 seconds. This ensures all grounds are wet. You can use the provided stirring paddle.
- Insert the plunger into the top of the chamber. Push it down just enough to create a seal. This stops the coffee from dripping too fast.
- Let the coffee steep for 1 to 2 minutes. Steeping time depends on your preference. Shorter times yield brighter coffee, longer times create a stronger brew.
The final step is pressing.
- Press the plunger down slowly and steadily. Use consistent pressure. This process should take about 20-30 seconds. Listen for a hissing sound. This sound means you have pressed out all the liquid. Stop pressing when you hear it.
- Remove the Aeropress from your mug. You now have a concentrated shot of coffee.
- Dilute your coffee concentrate. Add hot water or milk to taste. This turns the concentrate into a full cup. You can also enjoy it as an espresso-style shot.
This classic method produces a clean and rich coffee. It is a great starting point for any Aeropress user.
The Inverted Aeropress Brewing Method
The inverted Aeropress method is another popular technique. Many coffee enthusiasts prefer it. I find it gives me more control over the steep time. This method prevents any coffee from dripping out before you are ready to press. It makes brewing less messy for some. You still need the same basic equipment. Grind your coffee to a medium-fine consistency. Heat your water to 175-205°F (80-96°C).
Here is how you set up the inverted method:
- Place the plunger into the Aeropress chamber. Push it in just enough so it feels stable. The Aeropress should be standing upside down on the plunger. This creates a sealed bottom.
- Add your freshly ground coffee into the inverted chamber. I often use 15-17 grams of coffee here too.
- Pour hot water over the coffee grounds. Slowly pour about 240ml of water. This fills the chamber.
- Stir the coffee and water gently for about 10-15 seconds. Make sure all grounds are saturated.
Now, let it steep.
- Let the coffee steep for 1 to 2 minutes. Adjust this time based on your desired strength and bean type. For a stronger brew, steep longer. For a lighter brew, steep less. This method gives you full control over the immersion time.
- Prepare your filter cap. Place a paper filter into the filter cap. Rinse it with a little hot water if you want to remove any paper taste.
- Carefully twist the filter cap onto the top of the Aeropress chamber. Make sure it is secure.
The next step requires a bit of care.
- Place your mug upside down on top of the filter cap. Ensure the mug covers the entire opening.
- Hold the Aeropress and mug firmly together. Flip them over quickly and carefully. The Aeropress is now upright on your mug.
- Press the plunger down slowly and steadily. This should take about 20-30 seconds. Stop when you hear a soft hiss. That means all the liquid is out.
- Remove the Aeropress from your mug. You now have a concentrated coffee shot.
- Dilute your coffee concentrate with hot water or milk. This creates a full cup of coffee. Or, drink it as a strong espresso-style shot.
The inverted method is great for those who want to prevent accidental drips. It offers a slightly different control over the brew. Try both methods to see which one you prefer.
Mastering Your Aeropress Coffee Recipe
Achieving the perfect cup of Aeropress coffee involves fine-tuning several elements. I always tell people to think about ratios, water temperature, and steep time. These three factors hugely impact the final taste. Experimenting with them helps you find your ideal recipe. Every coffee bean behaves differently. Adjustments are often needed.
Coffee-to-Water Ratio
The ratio of coffee to water affects strength. A common starting point is 1:15 or 1:17 for a full cup. This means 1 gram of coffee for every 15-17 ml of water. For Aeropress, you often brew a concentrate. So, you might use a higher coffee dose. I often use 15-17 grams of coffee for about 240ml of water. This creates a strong base. Then, I add more hot water to dilute it. If you like stronger coffee, use more coffee grounds or less water. If you like lighter coffee, use less coffee or more water. Consistency in measurement is key. Use a digital scale for best results.
Water Temperature
Water temperature significantly impacts extraction.
- For lighter roasts: Use hotter water, around 200-205°F (93-96°C). This helps extract more flavors.
- For darker roasts: Use cooler water, around 175-185°F (80-85°C). Hotter water can make dark roasts taste bitter.
I usually let my water come to a boil, then wait 30-60 seconds before pouring. This brings the temperature down slightly. This range prevents burning the coffee or underextracting it. Find a temperature that suits your specific beans.
Grind Size
The grind size affects how quickly water passes through the coffee. For Aeropress, a medium-fine grind is generally recommended. It should look like table salt.
- Too coarse: Water passes too quickly. This results in weak, sour coffee (underextraction).
- Too fine: Water passes too slowly. This results in bitter coffee (overextraction). It also makes plunging very difficult.
Adjust your grinder slightly if your brew is not balanced. A properly sized grind makes plunging smooth. Remember to clean your coffee equipment regularly, including your grinder, to maintain optimal performance. how to clean coffee grinder
Steep Time
Steep time is how long the coffee grounds stay in contact with water.
- Shorter steep (30-60 seconds): Yields a brighter, lighter-bodied cup.
- Longer steep (1-2 minutes): Produces a stronger, fuller-bodied coffee.
I often start with a 1-minute steep. Then I adjust based on taste. If the coffee tastes too weak, I increase the steep time. If it tastes too strong or bitter, I reduce it. These variables interact. Small changes to one can affect the others. Experiment. Keep notes on your favorite recipes. This helps you replicate perfect cups. You will become an Aeropress master with practice.
Cleaning and Maintaining Your Aeropress
Keeping your Aeropress clean is vital for delicious coffee. It also extends the life of your device. The Aeropress is incredibly easy to clean. This is one of its best features. I always clean mine immediately after each use. This prevents coffee oils from building up. Built-up oils can turn rancid and affect the taste of your next brew. You do not want that.
Here is a simple cleaning process:
- After pressing, remove the filter cap.
- Hold the Aeropress over a trash can or compost bin.
- Push the plunger all the way through. The compressed coffee puck and paper filter will pop out easily. This is the “puck” that makes Aeropress cleaning so easy. It pushes out nearly all the grounds.
- Rinse the plunger and chamber with warm water. You can do this right in the sink. A quick rinse usually suffices. You do not need soap every time.
- Wipe down any remaining residue if needed.
For a deeper clean, you can use mild dish soap. I do this about once a week or every few uses.
- Disassemble the Aeropress fully. Separate the plunger from the chamber.
- Wash all parts with warm, soapy water. Use a soft sponge or cloth.
- Rinse thoroughly to remove all soap residue.
- Allow parts to air dry completely before reassembling. This prevents moisture buildup.
Do not use abrasive cleaners or scouring pads. These can scratch the plastic. Scratches can harbor bacteria and affect the seal of the plunger. The rubber seal on the plunger also needs care. It can shrink over time. If your plunger becomes harder to press, or the seal feels loose, apply a tiny amount of food-grade mineral oil to it. This helps keep it pliable.
Proper storage is also important. Store the Aeropress with the plunger removed from the chamber. This prevents compression of the rubber seal. It helps the seal last longer. If you keep the plunger inside the chamber for long periods, the seal can flatten. This makes it less effective.
Regular cleaning ensures your Aeropress consistently produces great coffee. It helps maintain the integrity of the plastic parts. A clean Aeropress provides a pure coffee taste without off-flavors. It keeps your coffee tasting fresh. Maintaining your coffee maker also makes sure it performs well for years. You can apply similar cleaning principles to other coffee brewing equipment, such as when you clean a drip coffee maker or other types of coffee pots. how to clean drip coffee maker or how to clean coffee pot. For more intensive cleaning, especially if you notice mold, consult guides like how to clean mold out of coffee maker. how to clean mold out of coffee maker
Troubleshooting Common Aeropress Issues
Even with a simple device like the Aeropress, problems can arise. Knowing how to fix them ensures you keep enjoying your coffee. I have run into a few issues myself, and they are usually easy to solve.
Plunger Too Hard to Press
If the plunger is difficult to press, several factors might be at play.
- Grind is too fine: This is the most common reason. A very fine grind creates too much resistance. It clogs the filter. Try a slightly coarser grind. Aim for a medium-fine consistency.
- Too much coffee: Overfilling the chamber can make pressing hard. Reduce the amount of coffee grounds.
- Worn out rubber seal: Over time, the rubber seal on the plunger can lose its flexibility. It might also dry out. Apply a small amount of food-grade mineral oil to the seal. If it is still stiff, you might need a replacement seal.
- Uneven pressure: Pressing unevenly can cause the plunger to stick. Apply steady, even pressure straight down.
Coffee Tastes Weak or Sour (Underextracted)
Underextracted coffee lacks flavor. It can taste thin or sour.
- Grind is too coarse: Water passes too quickly through coarse grounds. This does not allow enough time for flavor extraction. Grind your coffee finer.
- Water temperature too low: Cold water does not extract flavors efficiently. Use water between 175-205°F (80-96°C).
- Too short steep time: The coffee needs enough contact time with water. Increase your steep time. Try 1 to 2 minutes.
- Insufficient coffee-to-water ratio: You might not be using enough coffee for the amount of water. Increase your coffee dose slightly.
Coffee Tastes Bitter or Harsh (Overextracted)
Overextracted coffee often tastes bitter, dry, or overly strong.
- Grind is too fine: Too fine a grind extracts too much from the coffee. Try a slightly coarser grind.
- Water temperature too high: Very hot water can burn the coffee grounds. This leads to bitterness. Reduce your water temperature.
- Too long steep time: Leaving coffee in contact with water for too long causes overextraction. Reduce your steep time.
- Too much coffee: Using too much coffee can lead to an overly concentrated and bitter brew. Reduce your coffee dose.
- Hard pressing: Pressing too hard or too long can also contribute to overextraction. Aim for a 20-30 second steady press.
By adjusting these variables, you can fix most Aeropress issues. It is all about finding the right balance for your coffee beans and personal taste. Keep notes on what works. This makes replicating perfect coffee easier.
Exploring Aeropress Coffee Variations
The Aeropress is incredibly versatile. It can do more than just make a standard cup of coffee. I love experimenting with different styles. It is like having several coffee makers in one small device. You can create espresso-style shots, cold brew, and even use it for tea. This flexibility adds to its appeal.
Espresso-Style Concentrates
The Aeropress can produce a concentrated shot that mimics espresso. While it is not true espresso (which requires much higher pressure), it is excellent for espresso-based drinks.
- Use a finer grind: Grind your coffee slightly finer than for a regular Aeropress brew.
- Higher coffee-to-water ratio: Use more coffee. I usually go for 20-25 grams of coffee with only 60-80ml of hot water.
- Quick steep: Steep for 30-60 seconds.
- Firm, steady press: Press slowly and consistently. The result is a strong, rich concentrate. You can add hot milk for a latte or cappuccino. You can also mix it with hot water for an Americano.
Aeropress Cold Brew
Yes, you can make cold brew with an Aeropress! It is surprisingly simple and fast compared to traditional cold brew methods.
- Use a coarser grind: Grind your coffee to a medium-coarse setting. This is coarser than your usual Aeropress grind.
- Use cold or room temperature water: Do not use hot water for this method.
- Longer steep time: Steep for 12-24 hours. You can do this in the fridge.
- Inverted method recommended: This prevents drips during the long steep.
- Filter and press: After steeping, place a filter, flip, and press slowly. The result is a smooth, low-acid cold brew concentrate. Dilute it with water, milk, or ice. It is perfect for hot days.
Tea Brewing
The Aeropress is not just for coffee. I have used it to brew loose-leaf tea too. It is great for separating tea leaves from your brew quickly.
- Add loose-leaf tea to the chamber.
- Add hot water. Use the recommended temperature for your type of tea (e.g., green, black, herbal).
- Steep for the appropriate time.
- Press slowly. This makes a clean, sediment-free cup of tea. It is a quick way to enjoy your favorite loose leaf.
Filtering Options
You can also experiment with different filtering methods:
- Multiple paper filters: Using two paper filters can result in an even cleaner cup.
- Metal filters: These reusable filters allow more coffee oils to pass through. This gives a fuller body and slightly different flavor. They are also eco-friendly.
Experimentation is part of the fun with the Aeropress. It lets you customize your coffee experience fully. Do not be afraid to try new ratios, grind sizes, or water temperatures. You might discover your new favorite way to make coffee.
FAQs About Making Aeropress Coffee
What is the best coffee grind for Aeropress?
The best grind for Aeropress coffee is typically medium-fine. It should feel similar to table salt. This grind allows for efficient extraction and a smooth plunge. Too fine a grind can make plunging difficult and lead to bitter coffee. Too coarse a grind results in weak, underextracted coffee.
How much coffee should I use in an Aeropress?
A good starting point for an Aeropress is 15-17 grams of coffee. This usually works with about 240ml of water to create a strong concentrate. You can adjust this ratio based on your taste preference. More coffee leads to a stronger brew, while less coffee makes a lighter cup.
What water temperature is ideal for Aeropress coffee?
Ideal water temperature for Aeropress coffee is between 175-205°F (80-96°C). For lighter roasts, use hotter water. For darker roasts, use slightly cooler water to avoid bitterness. Letting water cool for 30-60 seconds after boiling often brings it into the right range.
Can I make espresso with an Aeropress?
The Aeropress can make a strong coffee concentrate that resembles espresso. It is not true espresso, which requires higher pressure. However, it is excellent for making espresso-style shots. You can use these for lattes, cappuccinos, or Americanos. Use a finer grind and a higher coffee-to-water ratio for this.
How do I clean my Aeropress?
Cleaning an Aeropress is very easy. After brewing, push the plunger all the way through to eject the coffee puck. Then, rinse the plunger and chamber with warm water. For a deeper clean, wash all parts with mild dish soap and water. Allow them to air dry completely. Regular cleaning prevents oil buildup.
What is the difference between classic and inverted Aeropress methods?
The classic method involves placing the Aeropress directly on the mug. This can cause some coffee to drip through prematurely. The inverted method stands the Aeropress upside down on its plunger, creating a seal. This prevents dripping during steeping. It offers more control over immersion time.
Conclusion
Making coffee with an Aeropress is a rewarding experience. You now know the key steps and techniques to brew fantastic coffee at home. We covered setting up your Aeropress, whether using the classic or inverted method. We also discussed the importance of grind size, water temperature, and coffee-to-water ratios. These elements help you fine-tune your perfect cup. Remember, cleaning your Aeropress regularly keeps it performing well. Keep experimenting with different beans and recipes. The Aeropress offers endless possibilities for delicious coffee. Grab your Aeropress, fresh beans, and start brewing your best cup today!
- Aeropress
- coffee brewing
- home coffee
- manual brewing
- coffee recipes

Todd Martin
Senior Writer
With over 15 years of experience in home renovation and design, I started HEG to share what I’ve learned with homeowners who want to create spaces that are both beautiful and functional. I’ve always believed in a hands-on approach, and over the years, I’ve picked up practical solutions that actually work. Through HEG, I aim to make home improvement more approachable, sharing real tips that help you create a home you truly love.