· Todd Martin · Baking · 23 min read
How To Make Puerto Rican Bread Pan Sobao
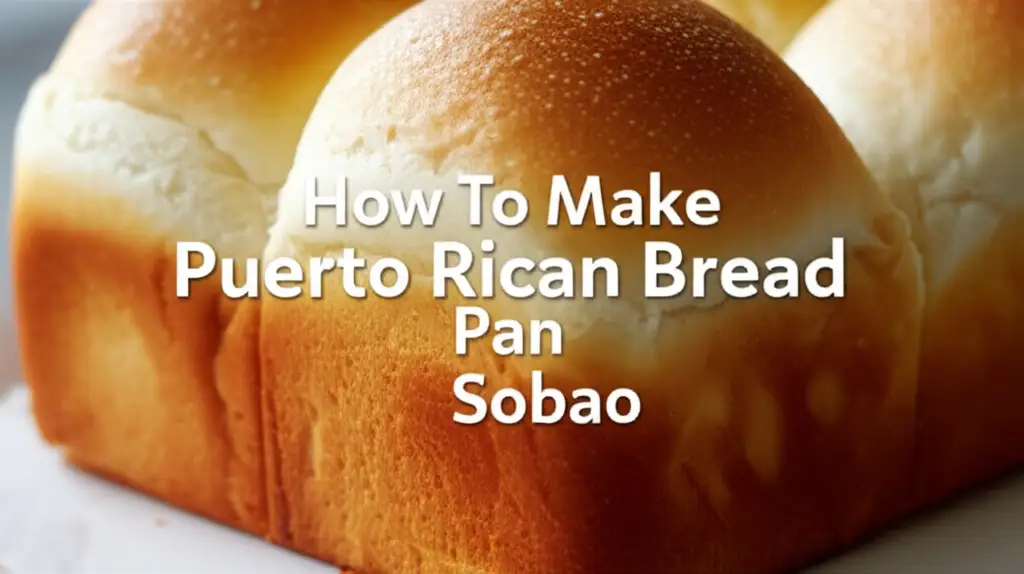
Mastering Puerto Rican Bread Pan Sobao at Home
Have you ever tasted a slice of warm, soft bread, perfect for dipping in coffee or serving with any meal? If not, get ready to experience the magic of Puerto Rican Bread Pan Sobao. This staple in Puerto Rican homes is famous for its uniquely soft, slightly sweet, and wonderfully rich texture. Many people consider it the heart of a good meal.
Learning how to make Pan Sobao at home might seem difficult at first. I assure you, it is a rewarding process that brings incredible aroma and taste into your kitchen. This article will guide you through every step. We cover essential ingredients, the right tools, and detailed instructions for mixing, kneading, proofing, and baking. By the end, you will create your own authentic Pan Sobao, ready to enjoy with family and friends.
Takeaway
- Gather Ingredients: Use high-quality flour, fresh yeast, and precise measurements for the best dough.
- Master Kneading: Develop gluten properly for a soft, elastic texture.
- Ensure Proper Proofing: Allow the dough to rise in a warm, draft-free place for optimal volume and lightness.
- Shape Correctly: Form uniform loaves for even baking and a good appearance.
- Bake to Perfection: Control oven temperature and baking time for a golden crust and fully cooked interior.
To make Puerto Rican Pan Sobao, combine flour, yeast, sugar, salt, milk, and butter to create a soft, slightly sweet dough. Knead the dough until smooth and elastic. Allow it to rise, shape into loaves, and then proof again. Bake in a hot oven until golden brown for a traditional, comforting bread.
Understanding Pan Sobao: A Puerto Rican Staple
Pan Sobao is more than just bread in Puerto Rico; it is a cultural icon. The name “Pan Sobao” translates to “kneaded bread,” which highlights a key part of its creation. This bread is famous for its very soft interior and a slightly crisp crust. People enjoy it with coffee for breakfast, alongside dinner, or as a base for sandwiches.
The unique texture comes from the generous amount of fat, usually butter, and milk in the dough. This makes Pan Sobao distinct from other breads. Unlike crusty European loaves, Pan Sobao stays soft for days. Its slight sweetness also sets it apart. This sweetness makes it appealing for various uses, from savory to sweet accompaniments. I find it perfectly balanced.
Pan Sobao holds a special place in my heart, reminding me of family gatherings. Many families have their own slight variations passed down through generations. The process of making it is often a communal activity. It connects people to their heritage and to each other. This bread is a symbol of comfort and hospitality in Puerto Rican homes.
Knowing the history and role of Pan Sobao helps you appreciate the baking process even more. It is not just about making bread; it is about creating a piece of cultural tradition. My goal is to help you achieve that authentic taste and texture in your own kitchen. Let’s begin our journey to bake this beloved Puerto Rican bread.
Essential Ingredients for Authentic Pan Sobao
Creating the perfect Pan Sobao starts with selecting the right ingredients. Each component plays a crucial role in achieving the bread’s signature soft and slightly sweet profile. Using high-quality ingredients ensures a superior result. I always recommend using fresh items for the best flavor and texture.
First, flour is the base. All-purpose flour works well for Pan Sobao. Look for unbleached varieties; they often have better flavor and performance. The flour provides the structure for the bread, holding everything together as the dough rises. Measuring flour by weight, using a kitchen scale, gives more consistent results than measuring by volume.
Next, yeast is vital for rising. Instant yeast is convenient because you can mix it directly with dry ingredients. Active dry yeast also works, but you may need to activate it in warm liquid first. Ensure your yeast is fresh; old yeast will not allow the bread to rise properly. I always check the expiration date.
Milk adds richness and softness to the dough. Whole milk gives the best flavor and texture, but lower-fat milk can also work. Warm the milk to an ideal temperature, around 105-115°F (40-46°C), to activate the yeast without killing it. This warm liquid also helps the dough come together smoothly.
Sugar contributes to the slight sweetness and helps brown the crust. It also feeds the yeast, aiding in the fermentation process. Granulated sugar is standard for this recipe. Salt balances the flavors and controls yeast activity. Do not skip the salt; it enhances the overall taste of the bread.
Finally, butter is key to Pan Sobao’s tender crumb. Use unsalted butter, softened to room temperature. This makes it easier to incorporate into the dough. The butter adds richness, moisture, and contributes significantly to the bread’s distinctive soft texture. I find that good quality butter truly makes a difference in the final product.
Tools and Equipment You Need for Baking Pan Sobao
Having the right tools makes the bread-making process much smoother and more enjoyable. You do not need a lot of specialized equipment to bake Pan Sobao, but a few key items are important. I find that simple, reliable tools yield the best results.
A large mixing bowl is essential for combining your ingredients and allowing the dough to rise. Choose one that can hold at least double the volume of your dough. This prevents overflow during the first proofing. I prefer a glass or stainless steel bowl for easy cleaning.
A stand mixer with a dough hook attachment is a valuable asset, especially for a sticky dough like Pan Sobao. Kneading by hand is possible but requires more effort and time. The mixer automates the kneading process, ensuring the dough develops proper gluten structure. If you do not have a stand mixer, a sturdy wooden spoon and your hands will work fine.
You will need a measuring cups and spoons set for precise ingredient measurements. For flour and larger ingredients, a kitchen scale is highly recommended. It provides accuracy, which is crucial in baking. A slight difference in flour can change the dough’s consistency significantly.
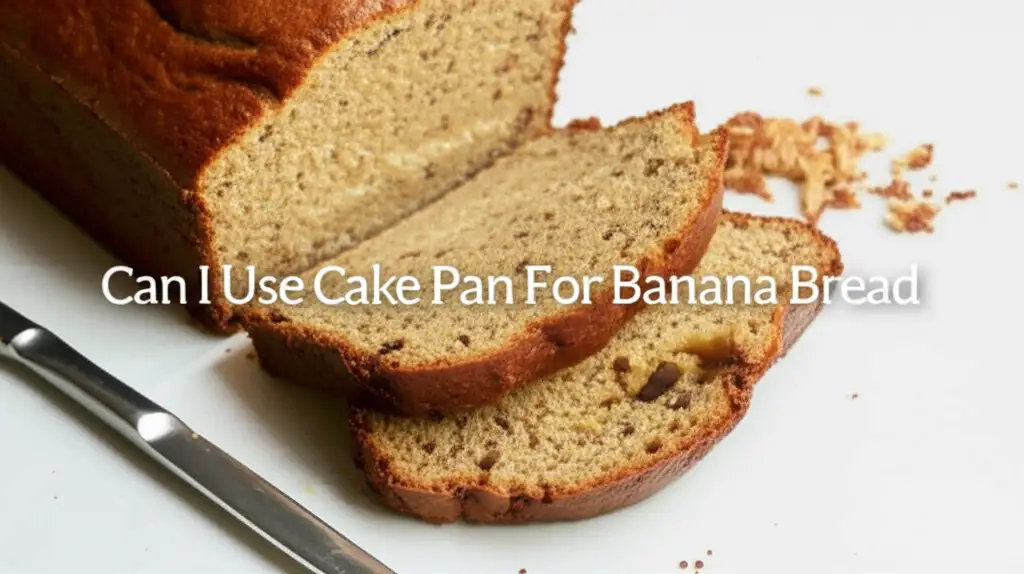
For baking, you will need bread pans. Standard loaf pans, usually 9x5 inches or 8.5x4.5 inches, work best. Using the right pan size helps the bread maintain its shape and bake evenly. You can find information on how to line bread pans with parchment paper for easy removal. This helps prevent sticking and makes cleanup simpler. If you’re curious about alternatives, you can also explore if you can use cake pan to bake bread, though a dedicated bread pan is ideal for the classic loaf shape.
Other helpful items include a dough scraper for handling sticky dough, a pastry brush for applying egg wash, and cooling racks for letting the bread cool completely after baking. An oven thermometer ensures your oven is at the correct temperature. This prevents under or over-baking. Having these items ready before you start streamlines the entire process.
Step-by-Step Pan Sobao Recipe: The Dough
Making the dough for Pan Sobao is a journey from simple ingredients to a living, breathing mixture. This part requires attention to detail but is incredibly rewarding. I always enjoy watching the dough transform.
Activating the Yeast
First, activate your yeast. In a small bowl, combine warm milk (around 105-115°F or 40-46°C) with a teaspoon of sugar and your yeast. Stir gently. Let this mixture sit for 5-10 minutes. It should become foamy and bubbly, which shows the yeast is active and ready. If it does not foam, your yeast may be old or the water was too hot or cold. You will need to start this step again with fresh yeast.
Mixing the Ingredients
In a large mixing bowl or the bowl of your stand mixer, combine the remaining sugar, salt, and half of the all-purpose flour. Make a well in the center of the dry ingredients. Pour in the activated yeast mixture. Begin mixing on low speed with a dough hook, or use a sturdy spoon if mixing by hand. Gradually add the softened butter, piece by piece, as the dough comes together.
Continue adding the remaining flour, a little at a time, until a shaggy dough forms. The dough may seem sticky at this point. Do not add too much extra flour unless absolutely necessary. A sticky dough often makes a softer bread. I find that resisting the urge to over-flour is key here.
Kneading the Dough
Kneading is crucial for Pan Sobao’s texture. If using a stand mixer, increase the speed to medium-low and knead for 8-10 minutes. The dough should become smooth, elastic, and pull away from the sides of the bowl. It might still be slightly sticky to the touch, but it should not stick to your fingers excessively.
If kneading by hand, turn the dough out onto a lightly floured surface. Knead for 12-15 minutes, pushing the dough away with the heels of your hands and folding it back. The dough will become less sticky and more manageable as you knead. It should pass the “windowpane test,” meaning you can stretch a small piece thin enough to see light through it without tearing. This indicates good gluten development.
First Proofing (Bulk Fermentation)
Once kneaded, lightly grease a clean bowl with a little oil. Place the dough in the bowl, turning it once to coat all sides. Cover the bowl tightly with plastic wrap or a clean kitchen towel. Place it in a warm, draft-free place for its first proof. This usually takes 1 to 1.5 hours.
The dough should double in size. A warm spot, like a slightly warm oven (turned off!) or a sunny windowsill, works well. This bulk fermentation allows the flavors to develop and the dough to become airy. Do not rush this step. It is essential for a light and fluffy Pan Sobao.
Shaping and Second Proofing Your Pan Sobao
After the first proofing, your Pan Sobao dough is ready for the next exciting stage: shaping. This step gives your bread its classic loaf form and prepares it for its final rise. I find this part very satisfying, as the dough transforms into recognizable loaves.
Gently Punching Down the Dough
Once the dough has doubled in size, gently punch it down. This releases the gases built up during the first fermentation. You do not want to deflate it completely; just lightly press the air out. Turn the dough out onto a lightly floured surface. Avoid adding too much extra flour, as this can make the bread tough.
Dividing and Shaping the Loaves
For two standard loaves, divide the dough into two equal pieces. If you have a kitchen scale, weigh them for even results. Each piece will become one Pan Sobao loaf.
To shape each loaf, gently flatten one piece of dough into a rectangle. It should be roughly 8-10 inches long, depending on your pan size. Fold one long edge over to the center, pressing down gently to seal. Then, fold the other long edge over to meet the first, pressing to seal. Finally, roll the dough tightly from one end to the other, creating a log shape. Pinch the seam closed along the bottom to ensure it holds its shape during baking. Ensure the ends are tucked in neatly.
Place the shaped loaves, seam-side down, into your prepared bread pans. You can line your bread pan with parchment paper for easy removal. This prevents the dough from sticking and ensures a clean release after baking. If you are using a bread maker pan, you can also learn how to remove a bread pan from a Hamilton Beach bread maker, as these often have non-stick coatings that might not need parchment, but it’s good practice for general baking.
Second Proofing (Final Rise)
Cover the bread pans loosely with plastic wrap or a clean kitchen towel. Place them back in a warm, draft-free spot for the second proofing. This final rise usually takes about 45-60 minutes. The loaves should almost double in size again and look visibly puffed up.
This second proof is vital for the bread’s final texture. It allows the gluten to relax and the yeast to produce more gas, resulting in a light, airy crumb. Do not let the dough over-proof; if it rises too much, it might collapse during baking. A gentle touch on the dough will feel airy and soft, indicating it is ready for the oven. This stage is all about patience and observation.
Baking Your Puerto Rican Bread to Perfection
Baking is the moment when all your hard work comes to fruition. Getting the oven temperature right and knowing when the bread is done are key steps to achieving a perfect Puerto Rican bread Pan Sobao. I always preheat my oven well in advance to ensure an even bake.
Preheating the Oven
About 20 minutes before your dough finishes its second proof, preheat your oven to 375°F (190°C). It is important that the oven reaches and holds this temperature consistently. An oven thermometer can help verify the actual temperature inside your oven, as some home ovens can vary significantly from their dial settings. A fully preheated oven ensures the bread starts baking immediately, helping it rise quickly in the initial stages.
Preparing the Loaves for Baking
Just before placing the loaves in the oven, you can give them an optional egg wash. Whisk one egg with a tablespoon of water or milk. Gently brush this mixture over the top of each loaf. The egg wash gives the Pan Sobao a beautiful golden-brown crust and a slight sheen. Some traditional recipes may not call for an egg wash, but I find it adds to the visual appeal.
You can also make a few shallow diagonal slits on the top of each loaf with a sharp knife or a bread lame. These cuts, called scoring, help guide the expansion of the bread as it bakes. This prevents uncontrolled cracking and gives a nice, rustic look to your homemade Pan Sobao.
Baking Time and Temperature
Carefully place the bread pans into the preheated oven. Bake for approximately 25-35 minutes. The exact baking time can vary depending on your oven and the size of your loaves.
During baking, the bread will expand further, known as “oven spring.” The crust will start to turn golden brown. After about 20 minutes, if the tops are browning too quickly, you can loosely tent the loaves with aluminum foil to prevent over-browning.
The bread is done when it is golden brown all over and sounds hollow when tapped on the bottom. The internal temperature should reach about 200-210°F (93-99°C) when measured with an instant-read thermometer. I always check the internal temperature to be sure it’s fully cooked.
Cooling the Bread
Once baked, remove the bread pans from the oven. Let the loaves cool in their pans for about 5-10 minutes. This allows them to firm up slightly. Then, carefully remove the loaves from the pans and transfer them to a wire cooling rack. Allow the bread to cool completely before slicing. Slicing warm bread can sometimes make it gummy inside. Cooling on a rack prevents the bottom from becoming soggy. This waiting period is the hardest part, but it is essential for the best texture.
Tips for a Perfect Pan Sobao Every Time
Baking Puerto Rican bread Pan Sobao consistently well involves understanding a few key principles. These tips will help you avoid common pitfalls and achieve delicious results every time you bake. I’ve learned these through my own baking experiences.
Pay Attention to Ingredient Temperatures
Yeast is sensitive to temperature. Ensure your milk is warm, not hot. Liquids that are too hot will kill the yeast, preventing your dough from rising. Cold liquids will make the yeast sluggish, slowing down the rise. Room temperature butter also incorporates more easily into the dough, leading to a smoother texture. This precision helps in achieving a consistent rise and crumb.
Do Not Over-Flour Your Dough
Pan Sobao is meant to be a soft, somewhat sticky dough. When kneading or shaping, resist the urge to add too much extra flour. Adding too much flour can make the bread dense and dry. Use just enough flour on your work surface to prevent sticking. A dough scraper can be very helpful for managing sticky dough without excessive flour. I often tell myself, “less is more” when it comes to flouring.
Achieve Proper Kneading
Kneading develops the gluten in the flour, which gives bread its structure and elasticity. Under-kneading results in a crumbly, dense bread. Over-kneading can make the dough tough and hard to work with. Aim for a dough that is smooth, elastic, and passes the windowpane test. This means you can stretch a small piece of dough thinly without it tearing. If using a stand mixer, make sure your dough hook is properly reaching and folding the dough.
Be Patient with Proofing
Proofing is the rising process, and it requires patience. The dough needs time to double in size for both the first and second rises. If your kitchen is cool, it might take longer. Placing the dough in a warm, draft-free spot, like a turned-off oven with the light on, can help. Do not rush this step. Proper proofing leads to a light, airy texture. Under-proofed bread will be dense, while over-proofed bread might collapse.
Ensure Correct Oven Temperature
An accurate oven temperature is critical. If your oven is too cool, the bread will not rise properly and can become dry. If it is too hot, the crust might burn before the inside cooks through. An oven thermometer can help you verify your oven’s actual temperature. Adjust baking time as needed based on your oven’s performance. Baking bread in an outdoor pizza oven can also be an option for some, offering unique crust characteristics if you are adventurous. However, for traditional results, a conventional oven is standard.
Cooling Completely
It is tempting to slice into a warm loaf of Pan Sobao, but patience is a virtue here. As the bread cools, the starches inside continue to set, and moisture distributes evenly. Slicing too early can result in a gummy texture. Allow the bread to cool completely on a wire rack for the best results. This makes slicing easier and improves the overall eating experience.
Serving and Storing Your Homemade Pan Sobao
You have successfully baked a beautiful Puerto Rican bread Pan Sobao! Now comes the best part: enjoying it. Knowing how to serve and store your homemade bread properly will ensure you get the most out of every delicious bite. I always look forward to this stage.
The Best Ways to Serve Pan Sobao
Pan Sobao is incredibly versatile. Its soft, slightly sweet nature makes it perfect for many uses. Here are some of my favorite ways to enjoy it:
- Breakfast Staple: The most common way to enjoy Pan Sobao is with a cup of hot coffee or hot chocolate. Its absorbent quality makes it ideal for dipping. A simple slice with butter or jam is also a classic.
- Sandwiches: Pan Sobao makes a fantastic base for both savory and sweet sandwiches. For savory options, try it with ham, cheese, or even leftover roasted pork. Its softness means it does not overwhelm the fillings. For a sweet treat, spread it with cream cheese or a fruit preserve.
- Accompaniment to Meals: Serve slices of warm Pan Sobao alongside traditional Puerto Rican stews, rice and beans, or any main dish. It is perfect for soaking up delicious sauces and gravies. Its mild flavor complements a wide range of foods.
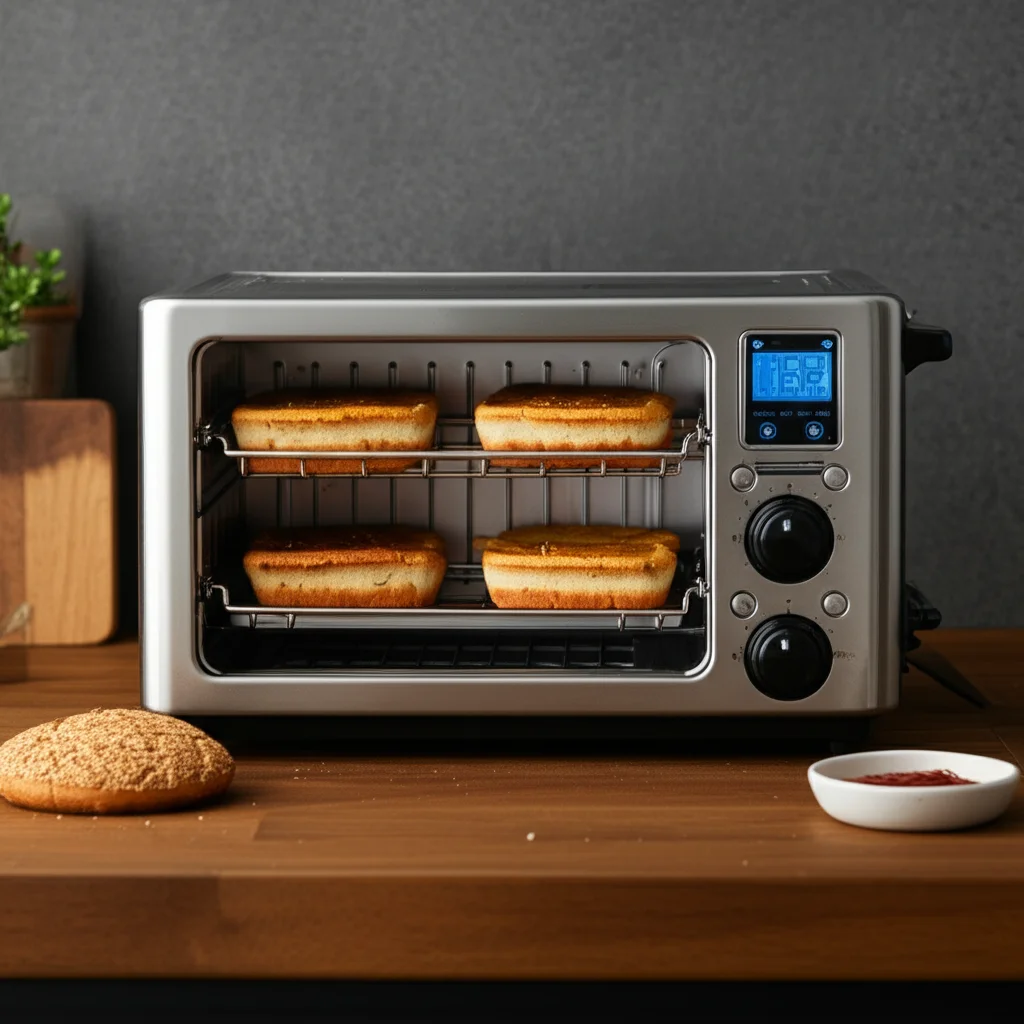
- Toasted: While soft bread is its hallmark, a lightly toasted slice of Pan Sobao can also be delightful. Toast it briefly in a toaster or a toaster oven until golden. This adds a slight crispness while maintaining its tender interior. You can even learn how to use a bread toaster oven for this purpose.
Storing Homemade Pan Sobao
Proper storage helps keep your homemade Pan Sobao fresh and soft for as long as possible. Since it lacks the preservatives found in commercial bread, its shelf life is shorter, but good storage practices extend its deliciousness.
- Room Temperature (1-2 days): For short-term storage, wrap the cooled bread tightly in plastic wrap, aluminum foil, or place it in an airtight bread bag. Store it at room temperature on your counter. This helps retain its moisture and prevents it from drying out. Avoid putting it in the refrigerator, as this can make bread stale faster due to a process called retrogradation.
- Freezing for Longer Storage (up to 3 months): If you baked two loaves or do not plan to eat it all quickly, freezing is your best option. Once the bread is completely cool, slice it or keep it whole. Wrap it tightly in plastic wrap, then an additional layer of aluminum foil, or place it in a freezer-safe bag. Remove as much air as possible to prevent freezer burn.
- To thaw slices, you can pop them directly into a toaster.
- To thaw a whole loaf, remove it from the freezer and let it sit at room temperature for a few hours, or warm it gently in a low oven (around 250°F / 120°C) for 15-20 minutes until soft. This method can help it regain some of its freshly baked warmth and aroma.
By following these serving and storage tips, you can enjoy your delicious Pan Sobao for days to come. There is nothing quite like a freshly baked loaf of this traditional Pan Sobao to elevate any meal or snack.
Troubleshooting Common Pan Sobao Problems
Even experienced bakers encounter issues sometimes. When you make Pan Sobao, facing problems like dense bread or a hard crust can be frustrating. Knowing how to troubleshoot helps you learn and improve. I have certainly encountered my share of baking challenges.
My Pan Sobao is Dense and Heavy
This is one of the most common complaints. A dense loaf usually means one of two things:
- Insufficient Kneading: The dough was not kneaded enough. This prevents proper gluten development. Without enough gluten, the dough cannot trap the gases produced by the yeast, leading to a heavy, brick-like texture. Ensure your dough passes the windowpane test.
- Under-Proofing: The dough did not rise long enough or in a warm enough environment during either proofing stage. If the yeast did not have enough time to produce gas, the bread will be dense. Be patient and ensure the dough doubles in size.
- Too Much Flour: Adding too much flour during mixing or kneading can make the dough stiff and heavy. Pan Sobao dough is naturally soft and slightly sticky. Reduce the amount of flour you add if you notice your dough is very firm.
My Pan Sobao Did Not Rise
If your bread did not rise, the problem usually lies with the yeast or the rising conditions.
- Dead Yeast: Your yeast might be old or inactive. Always check the expiration date. Activate active dry yeast in warm water (105-115°F) first to ensure it’s alive. If it doesn’t foam, get new yeast.
- Incorrect Water Temperature: Water that is too hot will kill the yeast, and water that is too cold will inhibit its activity. Aim for the specified temperature range.
- Cold Environment: Yeast works best in warm conditions. If your kitchen is cold, find a warm, draft-free spot for proofing. A turned-off oven with the light on is a good option.
My Pan Sobao Has a Hard or Thick Crust
While Pan Sobao should have a delicate crust, a very hard or thick crust suggests issues with moisture or baking.
- Over-baking: Baking the bread for too long or at too high a temperature can dry it out and harden the crust. Check for doneness using an internal thermometer, aiming for 200-210°F.
- Lack of Humidity: Some ovens are very dry. Placing a pan of hot water on the bottom rack of your oven during the first 10-15 minutes of baking can add steam, which helps keep the crust soft.
- No Egg Wash: While optional, an egg wash can contribute to a softer, more golden crust.
My Pan Sobao Collapsed After Rising
If your bread rises beautifully but then sinks, it is usually a sign of over-proofing.
- Over-Proofing: The yeast produced too much gas, and the gluten structure could not hold it. The dough essentially ran out of food and energy. Pay attention to the visual cues: the dough should look puffed, but not overly bubbly or “blown out.” A gentle poke with a floured finger should leave a slight indentation that slowly springs back. If it springs back too quickly, it needs more time. If it collapses, it is over-proofed.
By understanding these common issues and their solutions, you can refine your technique and consistently bake wonderful Puerto Rican soft bread. Each bake is a learning opportunity.
Exploring Variations and Enhancements for Pan Sobao
While traditional Pan Sobao is perfect on its own, there are many ways to adapt and enhance this beloved Puerto Rican bread. Exploring variations allows you to customize the recipe to your taste or dietary needs. I love experimenting with flavors once I master the basic recipe.
Sweetness Adjustments
The classic Pan Sobao has a subtle sweetness. You can easily adjust this. If you prefer a sweeter bread, increase the sugar by a tablespoon or two. This makes it more dessert-like, similar to a brioche, and even better with coffee. For a less sweet loaf, reduce the sugar by the same amount. Be mindful that sugar also aids yeast activity and browning, so significant reductions might affect these aspects.
Adding Flavors
You can infuse your homemade Pan Sobao with various flavors.
- Citrus Zest: Add the zest of an orange or lemon to the dough. This provides a bright, aromatic note that pairs well with the bread’s sweetness.
- Spices: A pinch of cinnamon, nutmeg, or even a tiny bit of cardamom can add warmth and complexity. Start with small amounts, perhaps half a teaspoon, and adjust in future batches.
- Vanilla Extract: A teaspoon of pure vanilla extract can deepen the sweet flavor profile. Add it with the wet ingredients.
- Coconut: For a tropical twist, substitute some of the milk with coconut milk, or add a quarter cup of shredded coconut to the dough. This gives a subtle coconut flavor and texture.
Incorporating Mix-Ins
Once you have mastered the basic dough, consider adding mix-ins for extra texture and flavor. Add these during the last few minutes of kneading.
- Raisins or Dried Cranberries: For a classic sweet bread addition, mix in half a cup of dried fruit. Plump them in warm water first if they are very dry.
- Cheese: Small cubes of a mild, semi-hard cheese, like cheddar or a Puerto Rican queso de papa, can add a savory element. This creates a wonderful savory-sweet bread.
- Nuts: Chopped pecans or walnuts can provide a nice crunch and earthy flavor.
- Chocolate Chips: For a truly indulgent treat, fold in some chocolate chips. This turns your Pan Sobao into a delightful dessert bread.
Glazes and Toppings
After baking, you can add a simple glaze or topping to your Pan Sobao.
- Simple Sugar Glaze: Whisk powdered sugar with a little milk or water until it
- Pan Sobao
- Puerto Rican bread
- bread recipe
- homemade bread
- traditional baking

Todd Martin
Senior Writer
With over 15 years of experience in home renovation and design, I started HEG to share what I’ve learned with homeowners who want to create spaces that are both beautiful and functional. I’ve always believed in a hands-on approach, and over the years, I’ve picked up practical solutions that actually work. Through HEG, I aim to make home improvement more approachable, sharing real tips that help you create a home you truly love.