· Katria Melrose · DIY Projects · 20 min read
How To Make Solar Oven For School Project
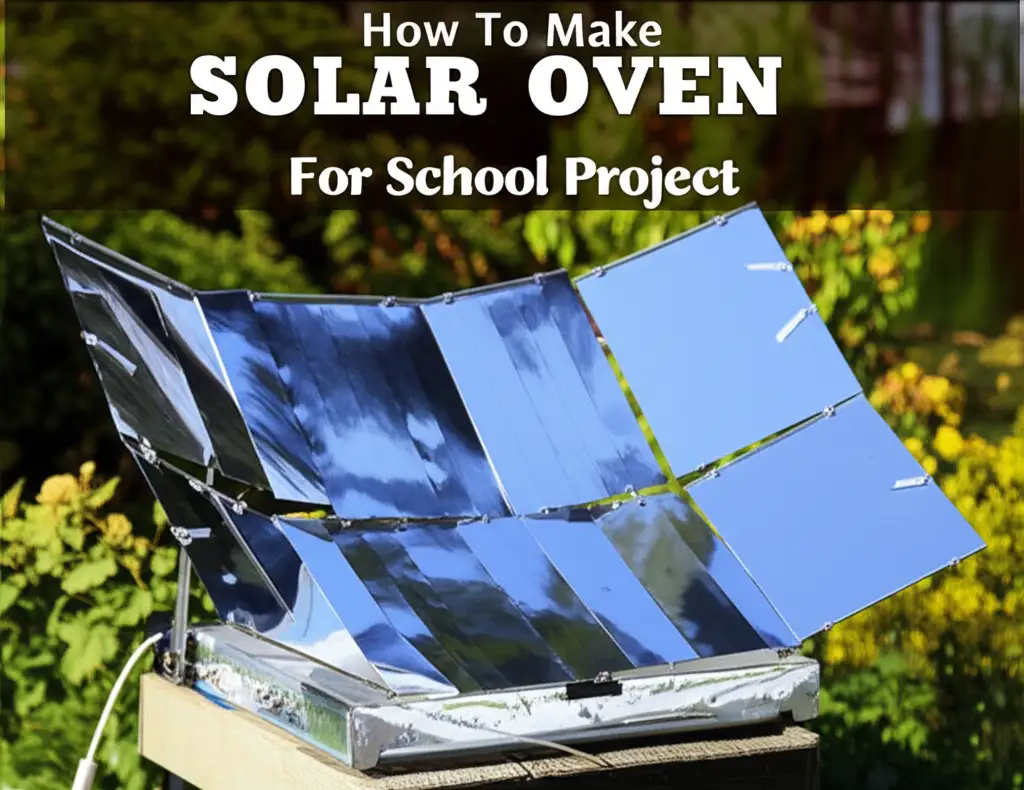
Build a Solar Oven for Your School Project
Have you ever thought about harnessing the sun’s power to cook food? This sounds like something from a futuristic movie, right? Actually, it is a fun, hands-on activity you can do right now. Learning how to make a solar oven for a school project is an exciting way to explore renewable energy. This project combines science, engineering, and environmental awareness. It offers practical experience with solar power.
Building a solar oven teaches you about heat transfer and insulation. You will see how different materials capture and trap heat. This project is perfect for science fairs or classroom demonstrations. It uses simple, low-cost materials. We will walk you through each step. You will learn how to gather materials, build your oven, and even optimize its performance. Get ready to create something amazing with the power of the sun.
Takeaway
- Gather common household materials to build your solar oven.
- Follow a clear, step-by-step guide for assembly.
- Understand the science of heat absorption and insulation.
- Optimize your oven for better cooking performance.
- Present your project effectively with documented results.
Making a solar oven for a school project involves assembling common materials like cardboard and foil to create a device that traps sunlight and converts it into heat, allowing you to cook or warm food using only solar energy. This hands-on experiment demonstrates principles of physics, engineering, and environmental science. It is a practical and engaging way to learn about renewable energy.
Understanding Solar Ovens for School Projects
A solar oven is a device that cooks food using direct sunlight. It does not use electricity or gas. This makes it an eco-friendly cooking method. For a school project, a solar oven demonstrates key scientific principles. It shows how energy converts from light to heat. This process is called the greenhouse effect. The oven traps solar radiation inside a confined space.
Solar ovens are great for school projects because they are easy to build. They use readily available materials. You do not need specialized tools or skills. This project helps you understand renewable energy sources. It also teaches you about heat transfer. You will see conduction, convection, and radiation at work. Designing and building your own solar oven makes science come alive. It is a memorable learning experience.
Choosing this project allows you to experiment. You can test different materials. You can also try various designs. This helps you understand what makes an oven work better. It is a fantastic way to apply classroom knowledge to real-world problems. Think about how many people around the world rely on solar cooking. This project offers practical insights. It connects you to global sustainability efforts.
Gathering Materials for Your Solar Oven
Starting your solar oven project requires gathering the right materials. Most items are common household goods. You might already have many of them. The main components are typically cardboard, aluminum foil, and plastic wrap. These materials are chosen for their ability to reflect, absorb, and insulate heat. Always check your supplies before starting. This ensures you have everything you need.
Here is a list of essential materials:
- Large Cardboard Box: This will be the main structure of your oven. A pizza box works well for smaller, simpler designs. If you want to learn how to make a solar oven from pizza box, this is your starting point. You need a box with flaps that can be easily cut and folded.
- Aluminum Foil: This is crucial for reflecting sunlight. You will line the inside of your oven with it. Heavy-duty foil works best because it is more durable. It reflects more efficiently.
- Black Construction Paper or Fabric: This material absorbs heat. It converts light energy into thermal energy. You will place this at the bottom of your cooking area. A black baking pan also works well.
- Clear Plastic Wrap or Plexiglass Sheet: This creates a transparent lid. It traps heat inside the oven. It acts like a greenhouse window. Make sure it is clear and clean.
- Newspaper or Insulating Material: This is for insulation. It helps keep the heat inside your oven. You can crumple newspaper. Styrofoam or old fabric scraps also work.
- Tape (Duct Tape or Masking Tape): You need strong tape to secure parts. It also helps seal gaps. Sealing is important for trapping heat.
- Scissors or Utility Knife: For cutting the cardboard and other materials. Always use caution with sharp tools. Get adult supervision if needed.
- Ruler and Marker: For measuring and marking cuts on the cardboard. Precision helps create a better seal.
- Oven Bag or Dark Metal Pot: This is where you place the food you want to cook. A dark, thin metal pot absorbs heat efficiently. Oven bags also work well to create a mini-greenhouse effect for your food.
- Thermometer: To measure the internal temperature of your solar oven. This helps you track its effectiveness. It is key for your school project data.
Gathering these items is the first big step. Once you have them, you are ready to start building. Each material plays a vital role in the oven’s function.
Step-by-Step Guide to Building a Basic Solar Oven
Building a solar oven is a straightforward process. You will transform simple materials into a functional cooking device. This guide provides clear steps. Follow them carefully for the best results. Remember, patience makes a good project. We are making a box-style solar oven. This design is simple and effective. You can also explore a more general how to make solar oven step by step guide for other variations.
Step 1: Prepare the Outer Box
Start with your large cardboard box. Choose one that is clean and sturdy. Cut off the top flaps if your box has them. You want a box with a solid bottom and four upright sides. This forms the outer shell of your oven.
Step 2: Create the Inner Box
You need a smaller cardboard box. This inner box should fit inside the larger one. Leave about 1-2 inches of space between the inner and outer boxes on all sides. This space is crucial for insulation. If you do not have a smaller box, you can create one from cardboard sheets. Cut and fold them to form a box.
Step 3: Insulate the Space Between Boxes
Crumple newspaper tightly. Fill the gap between the outer and inner boxes with this newspaper. Pack it in as densely as possible. This creates an insulating layer. It prevents heat from escaping. You can also use other insulating materials. Foam peanuts or old fabric work well too. Good insulation is vital for high temperatures.
Step 4: Line the Inner Box with Foil
Cover the inside of the smaller, inner box with aluminum foil. Shiny side faces outwards. Use tape to secure the foil smoothly. Try to avoid wrinkles. Wrinkles create hot spots. The foil reflects sunlight towards the center. This helps concentrate the heat. Make sure all internal surfaces are covered.
Step 5: Make the Reflector Flap
Cut a flap from the top of the outer box. You want to create a lid with a flap that can be propped up. This flap will serve as your main reflector. Leave one side attached to the box. The flap should be roughly the same size as the top opening.
Step 6: Line the Reflector Flap with Foil
Cover the inside of this reflector flap with aluminum foil. Again, shiny side faces outwards. Smooth it out as much as possible. This flap will direct sunlight into the oven chamber. It is a critical component for maximizing heat.
Step 7: Create the Viewing Window
Cut a window opening in the reflector flap. This window will allow sunlight to pass through. Leave a border around the edges. Then, tape clear plastic wrap over this window opening. Use multiple layers of plastic wrap for better heat retention. This creates a transparent cover. It traps heat like a greenhouse.
Step 8: Add the Dark Absorber Surface
Place a piece of black construction paper or a black baking pan at the bottom of the foil-lined inner box. This dark surface absorbs sunlight. It converts it into heat. This is where your food will sit. The darker the material, the more heat it absorbs.
Step 9: Assemble the Lid and Prop
Close the reflector flap. You will need a way to prop it up at an angle. This angle directs the most sunlight into your oven. A stick, ruler, or another piece of cardboard works well. Experiment with different angles to find the best one for the sun’s position. Secure it firmly with tape.
Step 10: Test Your Oven
Place your solar oven in direct sunlight. Use a thermometer inside the oven. Monitor the temperature. It might take some time to heat up. On a sunny day, it should reach temperatures hot enough to cook simple foods. You are now ready to start solar cooking experiments.
Following these steps will help you construct a basic, yet effective, solar oven for your school project. Remember to document your process and observations for your presentation.
Optimizing Your Solar Oven’s Performance
Building a solar oven is a great start. Making it work even better is the next step. Optimizing its performance means getting higher temperatures. It also means cooking food faster. There are several ways to improve your solar oven. These modifications can significantly enhance its efficiency. This also makes your school project more impressive. Consider how you can modify your solar oven to work more effectively.
Improving Insulation
Insulation is key to retaining heat. The more heat you trap, the hotter your oven gets.
- Add More Layers: Use thicker layers of newspaper or insulation between the inner and outer boxes.
- Seal Gaps: Use tape or caulk to seal any small gaps. Check seams where cardboard meets. Air leaks allow heat to escape. A good seal makes a big difference.
- Elevate the Oven: Place your oven on bricks or blocks. This lifts it off the cool ground. The ground can absorb heat from the bottom. Elevating it prevents this heat loss.
Enhancing Reflection
More reflected sunlight means more heat inside.
- High-Quality Foil: Use heavy-duty aluminum foil. Ensure it is very smooth. Wrinkles scatter light instead of reflecting it cleanly.
- Multiple Reflectors: Add extra foil-lined flaps. These can be attached to the sides or front of the main reflector. Angle them to direct even more sunlight into the cooking chamber.
- Mirror Panels: Small, inexpensive mirrors can replace foil on reflectors. Mirrors reflect light more efficiently than foil. This can significantly boost temperature.
Maximizing Absorption
The darker the absorber, the better it works.
- Matte Black Paint: Paint the inside of your inner box with matte black, non-toxic paint. This absorbs more heat than black paper. Ensure it is completely dry before use.
- Dark Cooking Pot: Use a thin-walled, dark-colored cooking pot or a black cast-iron pan. The dark color absorbs heat. Thin walls transfer heat quickly to the food.
- Oven Roasting Bags: Place your food inside a clear oven roasting bag. This creates a mini-greenhouse effect directly around your food. It traps moisture and increases internal food temperature.
Optimizing the Window
The window material affects how much sunlight enters and how much heat escapes.
- Double Glazing: Use two layers of plastic wrap or plexiglass with a small air gap between them. This air gap acts as an insulator. It reduces heat loss from the top.
- Tight Seal: Ensure the window material is tightly sealed around its edges. Tape it down firmly. No air should escape or enter through the window area.
Adjusting the Angle
The angle of your reflector flap is critical.
- Track the Sun: Adjust the reflector angle throughout the day. The sun moves across the sky. You want the most direct sunlight hitting the reflector. It should then bounce into the oven.
- Use an Angle Guide: Create a simple angle guide. This helps you set the reflector precisely. It ensures optimal sun capture.
By applying these optimization techniques, you can turn a basic solar oven into a more powerful cooking tool. Document these modifications. Explain how each change improved your oven’s performance in your school project. This shows a deeper understanding of solar energy principles.
Safety Tips and Best Practices for Solar Cooking
Solar cooking is generally safe. However, like any cooking method, it requires common sense and awareness. Following safety tips ensures a smooth project. It also protects you and others. Your school project should highlight safe practices. This shows you understand the practical aspects of using your solar oven.
Here are important safety tips:
- Supervise Children: Always supervise young children around the solar oven. The oven can reach high temperatures. Hot surfaces can cause burns. Adult presence is crucial during operation.
- Do Not Touch Hot Surfaces: The inside of the oven gets very hot. The cooking pot and black absorber surface will be extremely hot. Use oven mitts or heat-resistant gloves when handling food or the cooking pot.
- Avoid Direct Eye Contact with Reflected Sunlight: Never look directly at the reflective surfaces of the oven. Especially avoid looking when the sun is shining brightly. Reflected sunlight can be intense. It can harm your eyes. Wear sunglasses or protective eyewear if needed.
- Use Food-Safe Materials: Ensure all materials touching food are food-grade and non-toxic. For example, use food-safe oven bags. Do not use plastics that are not meant for cooking. Some plastics can melt or release harmful chemicals when heated.
- Place on a Stable Surface: Set your solar oven on a flat, stable, non-flammable surface. This prevents it from tipping over. A wobbly oven is a safety hazard.
- Monitor Food Temperatures: For cooking food, especially meats, use a food thermometer. Ensure food reaches safe internal cooking temperatures. Solar ovens cook slowly. Proper cooking prevents foodborne illness.
- Do Not Leave Unattended: Do not leave the solar oven unattended for long periods. Check on it regularly. Ensure it is operating safely. Also, adjust its position as the sun moves.
- Ventilation for Steam: If cooking food that produces a lot of steam, ensure there is a small vent. This prevents pressure buildup. It also helps moisture escape. Too much moisture can lower the oven’s temperature.
- Weather Conditions: Use the solar oven only on clear, sunny days. Cloudy or windy conditions reduce effectiveness. Strong winds can blow over your oven. Secure it if winds are expected.
- Proper Disposal: When your project is complete, dispose of materials responsibly. Recycle cardboard and plastic where possible.
By following these best practices, you can enjoy the educational experience of building and using a solar oven safely. Make sure to include a safety section in your school project presentation. This demonstrates thoroughness and responsibility.
Experimenting and Documenting Your Solar Oven Project
Building the solar oven is just one part of your school project. The real learning comes from experimenting and documenting your findings. This scientific process makes your project strong. It shows critical thinking and data analysis. Your documentation will be the backbone of your presentation.
Designing Your Experiments
Think about what you want to learn from your solar oven. Here are some experiment ideas:
- Temperature Tracking: Place a thermometer inside your oven. Record the temperature every 15-30 minutes. Do this for several hours on a sunny day. Create a graph showing temperature change over time. This is fundamental data.
- Cooking Different Foods: Try cooking different simple foods. Examples include s’mores, hot dogs, or warming up a slice of pizza. Note how long each item takes to cook. Compare it to conventional cooking times.
- Testing Modifications: As discussed in the optimization section, try one modification at a time. For example, first, add extra insulation. Then, test the temperature. Next, try adding more reflectors. Record the temperature after each change. This helps you identify which modifications are most effective.
- Angle Impact: Experiment with different angles for your reflector flap. Measure the internal temperature at each angle. Determine the optimal angle for your location and time of day.
- Weather Impact: Test your oven on different types of days. Compare performance on a sunny day versus a partly cloudy day. Note how clouds affect the temperature inside the oven.
Documenting Your Process
Good documentation is crucial for any science project. Keep a detailed logbook or journal.
- Initial Design: Sketch your initial solar oven design. Label all parts.
- Material List: List all materials used. Note their cost if applicable.
- Step-by-Step Build: Take photos or draw diagrams at each construction stage. Describe each step in simple terms.
- Hypothesis: State what you expect to happen. For example, “I hypothesize that adding more insulation will increase the oven’s temperature by 10 degrees.”
- Data Collection: Record all measurements accurately. Use tables for temperature data. Note the date, time, and weather conditions for each test.
- Observations: Write down anything interesting you observe. Did the food cook evenly? Did the oven struggle on a certain day?
- Results: Summarize your data. Present it using charts, graphs, and images.
- Analysis: Explain what your results mean. Did your experiments support your hypotheses? Why or why not? Discuss any challenges you faced.
- Conclusion: Summarize your findings. What did you learn? What could be improved?
This systematic approach makes your project robust. It demonstrates a true scientific investigation. It shows your understanding beyond just building the oven. This kind of documentation will impress your teachers and peers. It makes your school project stand out.
The Science Behind Solar Ovens
Building a solar oven is a practical activity. Understanding the science behind it makes your school project truly insightful. Solar ovens rely on fundamental principles of physics. These principles allow them to convert sunlight into usable heat for cooking. Let us break down how it works.
Principle 1: Absorption
The first step is absorbing sunlight. Dark, dull surfaces are excellent absorbers. When sunlight hits a dark surface, like the black paper or pot inside your oven, the light energy is converted into heat energy. The darker the surface, the more light it absorbs. This raises the temperature of the surface and the air around it. This is why we use black materials inside the cooking chamber. They act as the primary heat collectors.
Principle 2: Reflection
Reflection helps concentrate sunlight. Shiny, reflective surfaces, like aluminum foil or mirrors, bounce light. They do not absorb it. By lining the inner walls and the reflector flap with foil, we direct scattered sunlight. This focuses it onto the dark absorber inside the oven. This concentrates more solar energy into the small cooking space. More concentrated light means more heat generated. Think of it like using a magnifying glass to focus sunlight.
Principle 3: Insulation
Insulation is about trapping heat. Once heat is generated and concentrated, you want to keep it inside the oven. Materials like newspaper, cardboard, or foam are poor conductors of heat. This means heat does not easily pass through them. By creating an insulated layer between the inner and outer boxes, we prevent heat from escaping. This keeps the internal temperature high. Good insulation maintains the cooking temperature for longer periods.
Principle 4: The Greenhouse Effect
The clear plastic wrap or plexiglass window on top of your oven creates a greenhouse effect. Sunlight, which includes visible light, passes easily through this transparent layer. Once inside, the light energy hits the dark absorber. It converts into heat. This heat is primarily in the form of infrared radiation. Infrared radiation has a longer wavelength than visible light. The plastic wrap traps this infrared radiation inside the oven. It does not allow it to escape easily. This trapping of heat causes the temperature inside the oven to rise significantly, much like a real greenhouse. The window acts as a one-way filter for energy.
Principle 5: Convection
Heat also moves by convection. As the air inside the oven heats up from the dark absorber, it becomes less dense. This warm air rises. Cooler, denser air sinks. This creates a natural circulation of air. This process transfers heat from the absorber to the food. Minimizing air gaps in your oven design reduces heat loss by convection. A sealed oven prevents warm air from escaping and cool air from entering.
These five principles work together in your solar oven. They demonstrate how passive solar energy can be effectively harnessed. Explaining these concepts in your school project will show a deep understanding of the science. It ties the practical build to theoretical knowledge.
Common Questions About Solar Ovens
Many people have questions about solar ovens. Here are some common queries and their answers. These insights can further enhance your school project.
Can a solar oven really cook food?
Yes, a solar oven can absolutely cook food. On a sunny day, a well-built solar oven can reach temperatures between 200°F to 300°F (90°C to 150°C). These temperatures are sufficient to cook a variety of foods, including hot dogs, s’mores, vegetables, and even slow-cook casseroles. It takes longer than a conventional oven, but it cooks effectively using only sunlight.
What kind of food can you cook in a solar oven?
You can cook many types of food in a solar oven. Best options are those that cook slowly or do not require very high temperatures. Think about s’mores, hot dogs, baked potatoes, and hard-boiled eggs. You can also warm up leftovers, melt cheese, or cook simple rice and lentil dishes. Foods that benefit from slow cooking, like stews or roasts, are also good candidates, though they will take several hours.
How long does it take for a solar oven to heat up?
A solar oven typically takes about 30 minutes to an hour to preheat. This depends on the size of the oven, the intensity of the sun, and the efficiency of your design. Once preheated, it can maintain cooking temperatures as long as it stays in direct sunlight. Keep adjusting its position to face the sun for best results.
What are the advantages of using a solar oven?
Solar ovens offer many advantages. They are eco-friendly, using renewable energy and producing no emissions. They save energy costs as they use no electricity or gas. They are safe to use outdoors, with no flame hazard. They are also portable and quiet. For school projects, they are excellent tools for teaching about sustainable energy and physics principles.
Can a solar oven work on a cloudy day?
A solar oven’s performance significantly drops on cloudy days. It requires direct, strong sunlight to reach cooking temperatures. Light clouds might allow for some warming, but heavy clouds will prevent effective cooking. The oven works best on clear, sunny days when the sun is high in the sky.
How hot can a homemade solar oven get?
The temperature a homemade solar oven reaches depends on its design, materials, and sun conditions. Basic cardboard models often reach 200°F to 250°F (90°C to 120°C). Optimized designs with better insulation and reflectors can hit 250°F to 300°F (120°C to 150°C). More advanced designs, like parabolic solar cookers, can reach much higher temperatures, even boiling water.
Conclusion
Building a solar oven for your school project is a rewarding experience. You begin by understanding the basic concept of harnessing solar energy. You then gather simple materials, mostly household items. The step-by-step construction process transforms these materials into a functional cooking device. This hands-on activity teaches you about heat transfer, insulation, and reflection. It connects directly to real-world applications of renewable energy.
We covered how to optimize your oven for better performance. Small modifications can significantly increase its heating capacity. Safety practices are always important when experimenting with heat. Documenting your experiments and observations strengthens your project. You can track temperatures, test different foods, and analyze results. Finally, grasping the scientific principles behind absorption, reflection, insulation, and the greenhouse effect provides a deeper understanding. This project is more than just building. It is about learning, experimenting, and understanding sustainable technology. Take your solar oven out into the sun. Start cooking with clean, free energy. This is a project that truly shines.
- Solar Energy Project
- School Science Project
- DIY Solar Oven

Katria Melrose
Cleaning Specialist
With over 12 years of experience in commercial cleaning and a certification in workplace ergonomics, I’ve developed a deep understanding of what makes a workspace truly productive. At HEG, I specialize in helping people transform their home offices into clean, efficient, and comfortable environments. Through smart cleaning routines and strategic organization solutions, I empower readers to create spaces that support focus, comfort, and success—one well-organized desk at a time.