· Todd Martin · Home Organization · 16 min read
How To Make Vertical Shelf Dividers

Maximize Space: How to Make Vertical Shelf Dividers
Do you ever struggle with cluttered shelves? Items like cutting boards, baking sheets, platters, or even sweaters can fall over. They create a messy pile. Learning how to make vertical shelf dividers can transform your storage. You can keep everything upright and tidy. This simple DIY project brings order and efficiency to any space.
Vertical shelf dividers are game-changers for home organization. They help you categorize items neatly. This prevents things from toppling over. Whether you need them for a kitchen pantry, a linen closet, or a bookshelf, custom dividers make a big difference. This article will guide you through planning, material selection, and installation. We will help you create perfect vertical shelf dividers. You will learn the steps to achieve beautifully organized shelves.
Takeaway:
- Plan your dividers carefully: Measure your shelf space and items accurately.
- Choose the right material: Consider wood, plywood, or acrylic based on your needs.
- Gather essential tools: Basic woodworking tools are enough for most projects.
- Follow clear steps: Build and install fixed or adjustable dividers for better organization.
- Finish and maintain: Proper finishing ensures durability and a neat appearance.
Making vertical shelf dividers involves measuring your shelf, selecting a suitable material like wood or acrylic, cutting the material to size, and then securing the dividers in place. This can be done using fixed methods like dado joints or cleats, or adjustable options such as tension rods or shelf pins.
Why Vertical Shelf Dividers are Essential for Organization
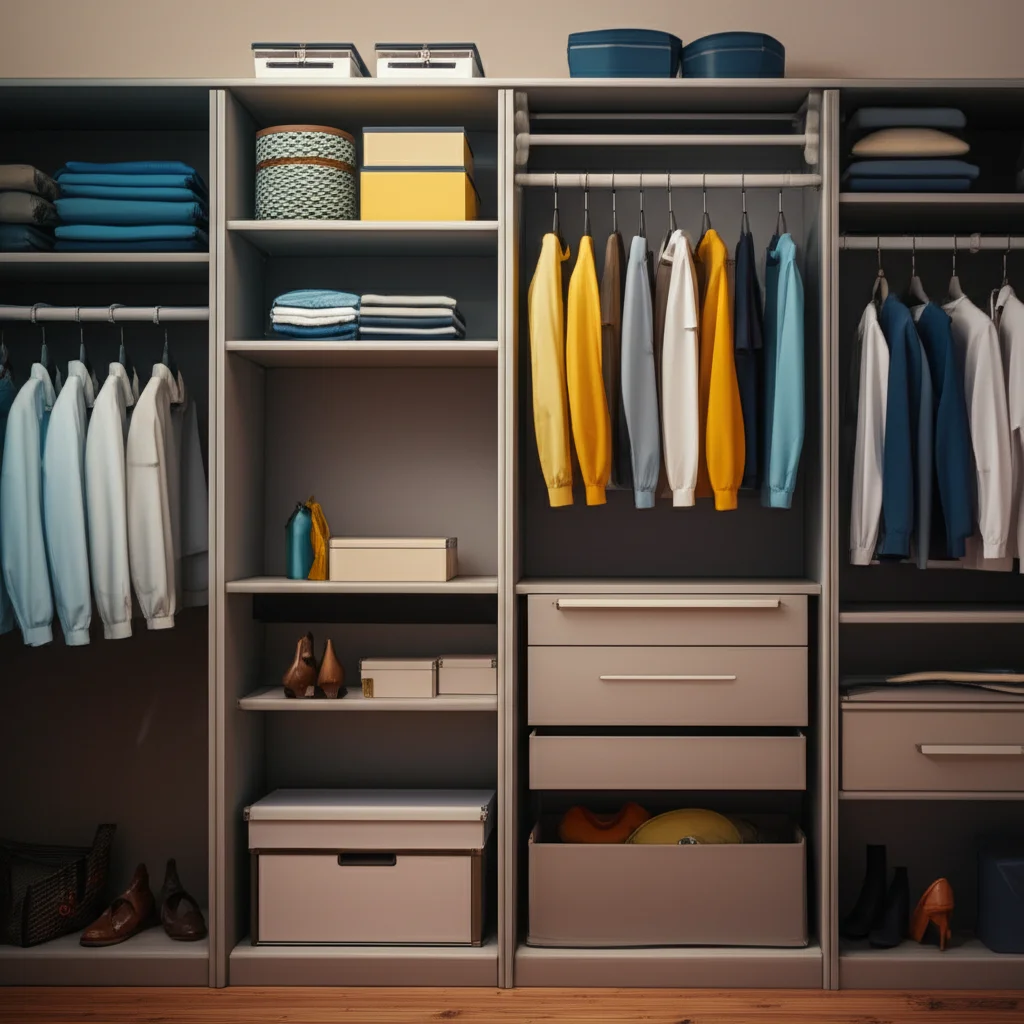
Vertical shelf dividers bring order to chaotic spaces. They help you keep things neatly separated and upright. This stops items from sliding into a mess. Imagine your kitchen cabinet, linen closet, or even a bookshelf. Without dividers, everything tends to lean or stack in an unorganized way.
These dividers create individual compartments on your shelves. For instance, in the kitchen, you can store baking sheets, cutting boards, or serving platters vertically. This makes them easy to grab. You do not have to dig through a stack. In a linen closet, they keep towels or bed sheets from falling into piles. Bookshelves also benefit; dividers keep books from slumping, making the shelf look much tidier. If you want to know more about keeping things neat, consider how to decorate a shelf in the kitchen to maximize both function and style.
The main benefit is efficient use of space. You can utilize the full height of your shelves more effectively. This is especially true for narrow or flat items. Dividers also protect your belongings. Fragile items are less likely to get chipped or broken when they stand alone. Adding these dividers can truly transform how you use your storage. For example, adding an extra shelf in a cabinet can also significantly increase usable space, similar to how dividers help organize.
Planning Your Vertical Shelf Dividers: Measurements and Design
Careful planning is the first step to successful vertical shelf dividers. You need to know your exact measurements. This ensures your dividers fit perfectly. Start by measuring the height of your shelf opening. Also, measure the depth of the shelf. These two measurements will determine the size of your divider pieces.
Think about what you want to store. Do you need narrow slots for cutting boards? Do you need wider sections for sweaters? Decide how many dividers you need. Then, calculate the spacing between them. Mark these measurements clearly on your shelf or a diagram. For instance, if you are organizing baking sheets, measure their average width to determine divider spacing. If you need a pull-out solution for a cabinet, understanding how to measure a cabinet for a pull-out shelf offers similar precision.
Consider the design of your dividers. Do you want them fixed in place? Or do you need them to be adjustable? Fixed dividers are permanent and offer strong support. Adjustable dividers give you flexibility to change spacing later. This is useful if your storage needs change. Choosing the right design impacts your material choice and installation method. Think about the aesthetic too. Do you want the dividers to blend in or stand out? This early planning saves time and effort later on.
Choosing the Best Materials for Your Shelf Dividers
Selecting the right material is key for your vertical shelf dividers. Different materials offer various strengths, looks, and ease of use. Your choice depends on the items you will store and your desired look. Each material has its own benefits and drawbacks.
Wood or Plywood: These are popular choices for their durability and natural look. Plywood is stable and less prone to warping. Solid wood offers a classic, sturdy feel. Both can be cut, sanded, painted, or stained to match your decor. They are excellent for heavy items or a more built-in appearance. If you enjoy working with wood, learning to make items like a wooden drawer can broaden your DIY skills.
MDF (Medium-Density Fiberboard): MDF is an engineered wood product. It is smooth, consistent, and affordable. MDF cuts cleanly and takes paint well. However, it is not as strong as solid wood or plywood. It can also swell if exposed to water. Use it in dry areas for lighter items.
Acrylic or Plexiglass: These clear plastic materials offer a modern, almost invisible look. They are lightweight and easy to clean. Acrylic is good for a sleek appearance, especially in cabinets with glass doors. It is best for lighter items like plates or thin books. While durable, it can scratch more easily than wood. Making glass cabinet doors for existing cabinets might inspire you to use clear materials elsewhere.
Metal or Wire: Some pre-made systems use metal or wire. These are very strong and offer an industrial look. They are often found in pantry or closet systems. While this article focuses on DIY, understanding pre-made options can inform your custom design. You can sometimes repurpose metal rods for adjustable dividers.
Consider the environment where your dividers will live. A damp basement needs different materials than a kitchen cabinet. Also, think about your tools. Some materials are easier to cut and shape at home than others. Choose a material that aligns with your skills and the demands of your storage needs.
Essential Tools and Supplies for DIY Dividers
Having the right tools makes your DIY vertical shelf divider project much smoother. You do not need a professional workshop. Basic home improvement tools will often suffice. Make sure your tools are in good working order before you begin. Safety gear is always important, such as safety glasses and gloves.
Here is a list of common tools you will need:
- Measuring Tape: Accurate measurements are critical. Use a good quality steel tape measure for precision.
- Pencil and Straightedge: For marking cut lines clearly and precisely.
- Saw: A handsaw, circular saw, or miter saw works for wood. A fine-tooth saw or specialized plastic cutter is needed for acrylic.
- Sander or Sandpaper: To smooth edges and prepare surfaces for finishing.
- Drill (optional): Needed for pilot holes if using screws or for shelf pin holes for adjustable dividers.
- Clamps (optional): Useful for holding pieces in place while assembling or drying glue.
- Level (optional): To ensure dividers are straight, especially if fixing them permanently.
For supplies, you will need:
- Chosen Material: Wood planks, plywood sheets, MDF panels, or acrylic sheets cut to size.
- Wood Glue: Strong adhesive for fixed wood dividers.
- Screws or Nails: For securing fixed dividers, choose appropriate lengths for your material thickness.
- Shelf Pins or Brackets: For adjustable systems.
- Finishing Supplies: Paint, stain, sealer, and brushes if you plan to finish the dividers.
Gathering all your tools and supplies before starting saves you trips to the store. This allows you to focus on the building process. Planning ahead for a project like building a storage shelf for your basement similarly requires a full inventory of tools and materials. Having everything ready ensures a more efficient and enjoyable DIY experience. You can also make a bat bag shelf with many of these same tools.
Step-by-Step: Crafting Fixed Vertical Shelf Dividers
Creating fixed vertical shelf dividers provides a strong and permanent organizational solution. These are great for areas where items need firm support. They are ideal for heavy items or when you want clearly defined sections. This method involves securely attaching the dividers to the shelf.
1. Measure and Cut Your Materials: First, measure the exact height and depth of your shelf. Then, cut your chosen material (wood, plywood, MDF) to these dimensions. For example, if your shelf is 12 inches deep and 10 inches high, your divider pieces should be 12 inches by 10 inches. Cut as many pieces as you planned for your dividers. If you plan to dado joint them into the shelf, remember to account for the depth of the dado in your measurements.
2. Prepare the Shelf and Dividers: Lightly sand all edges of your cut divider pieces. This removes any rough spots. If you plan to paint or stain, this is the time to do initial sanding. Clean the shelf surface where the dividers will be installed. Mark the exact positions for each divider on your shelf. Use your pencil and tape measure.
3. Choose Your Attachment Method:
- Dado Joints (Advanced): If you have woodworking skills, cutting dado grooves into the shelf and sliding the dividers in creates a very strong, flush fit. This requires a router or table saw.
- Cleats/Strips: This is a common and easier method. Cut small strips of wood (cleats) that will run along the bottom and top (or side walls if applicable) of where the divider will sit. Attach these cleats to the shelf with wood glue and small screws or nails. Then, slide the divider piece between the cleats.
- Direct Screwing/Nailing: You can screw or nail directly through the shelf into the bottom edge of the divider, or from adjacent cabinet walls into the side of the divider. Use pilot holes to prevent splitting.
- L-Brackets: Small L-brackets can be screwed to the shelf and the bottom of the divider for support.
4. Secure the Dividers: Apply wood glue to the edges that will make contact with the shelf. Place the divider firmly onto the marked position. If using cleats, fit the divider between them. If using screws, drill pilot holes and then drive the screws in. For direct screwing, ensure the screws are long enough to hold but not so long they poke through. Use clamps to hold the divider in place while the glue dries, if applicable. A project like adding an extra shelf in a cabinet often uses similar fixed attachment methods. If you are building a shelf from scratch, you might consider how to install a shelf between two cabinets for a built-in look. This method ensures maximum stability and durability for your organized items.
Step-by-Step: Creating Adjustable Vertical Shelf Dividers
Adjustable vertical shelf dividers offer great flexibility. They let you change the size of your compartments as your storage needs evolve. This is perfect for areas where items may vary in size. There are several ways to create adjustable dividers. We will explore a few common methods.
1. Measure and Cut Your Dividers: Just like with fixed dividers, measure your shelf’s height and depth. Cut your chosen material (wood, plywood, MDF, or acrylic) to these dimensions. Make sure the divider pieces are a snug but not overly tight fit in the shelf opening. Remember, these dividers need to be easily removable.
2. Shelf Pin Method: This is a very popular method, especially for existing cabinets with pre-drilled shelf pin holes. If your cabinet already has these holes, you are in luck. You will need:
- Shelf pins: These small metal or plastic pins fit into the holes.
- Divider Material: Cut your dividers slightly shorter than the shelf height. This allows them to easily lift out.
- Drilling Holes (if needed): If your shelf or cabinet side walls do not have holes, you will need to drill them. Use a drill guide to ensure holes are straight and evenly spaced. Make pairs of holes for each divider at your desired height. Once the holes are ready, simply insert shelf pins into the holes at your desired spacing. Then, rest your cut dividers on top of the pins. This creates movable vertical partitions.
3. Tension Rod Method: This is a super simple, non-damaging method. It works well for lighter items.
- Tension Rods: Purchase small tension rods, often used for curtains.
- Placement: Simply twist and extend the tension rod between the top and bottom of your shelf. Place them where you want your dividers. The tension holds them in place.
- No Dividers Needed: In this method, the tension rods are the dividers. This is ideal for things like cutting boards or cookie sheets. You just slide them between the rods.
4. Friction Fit or Base-Track Method: For a slightly more robust adjustable system without drilling many holes:
- Friction Fit: Cut your dividers to be a very snug fit, almost a hair taller than the shelf opening. You can gently tap them into place. They rely on friction to stay upright. This works best for thin, rigid materials like plywood.
- Base Track: You can attach thin strips of wood (tracks) to the shelf surface. These tracks have grooves or shallow channels. The bottom edge of your divider slides into this channel. This method allows you to slide the dividers left or right. It offers great stability. You can use a combination of these methods. For example, you might have fixed dividers at the ends of a section and adjustable ones in between. This helps you adapt to changing needs. Should you encounter issues where a shelf falls out of the wall, consider the type of support used for adjustable systems for future installations. If you prefer to avoid drilling entirely, exploring how to hang a shelf on tile without drilling might offer alternative securing ideas.
Finishing, Installation, and Maintaining Your Dividers
Once your vertical shelf dividers are built, the final steps make all the difference. Finishing them properly ensures they look good and last a long time. Proper installation makes them sturdy and functional. A little maintenance will keep them looking great for years.
Finishing Touches: If you used wood or MDF, sanding is crucial. Start with a medium-grit sandpaper (e.g., 120-grit) to smooth out any rough spots. Then, move to a finer grit (e.g., 220-grit) for a silky-smooth finish. This makes them nice to touch and ready for paint or stain.
- Painting: Apply a primer first, especially on MDF, for an even finish. Then, apply two coats of your desired paint. Lightly sand between coats for a professional look.
- Staining: Apply wood stain evenly, following the grain. Wipe off excess. Apply a protective topcoat like polyurethane or clear lacquer. This protects the wood and adds durability.
- No Finish: For some materials like certain types of plywood or if you like a rustic look, you can leave them unfinished. However, a clear sealer is still a good idea for protection. For acrylic dividers, simply polish the edges if you cut them yourself. This gives a clean, clear look.
Installation: For fixed dividers, ensure all glue is dry before placing items on the shelf. Check that screws or nails are fully seated. For adjustable dividers, double-check that shelf pins are secure. Make sure the dividers fit snugly but can still be moved if needed. Place your items carefully into the newly divided sections. Enjoy the immediate sense of order.
Maintenance:
- Cleaning: Dust your dividers regularly with a soft cloth. For wood, use a damp cloth followed by a dry one. For acrylic, use a soft cloth and mild soap and water. Avoid harsh chemicals that could damage the finish.
- Checking Stability: Periodically check fixed dividers to ensure they are still secure. Tighten any loose screws. For adjustable dividers, check that the pins or tension rods are holding firm.
- Repairs: If a divider gets scratched or damaged, touch up paint or stain as needed. For major damage, you might need to replace the divider piece.
Proper finishing and regular maintenance ensure your custom vertical shelf dividers remain a functional and attractive part of your home organization. They will continue to keep your shelves tidy and maximize your storage space effectively.
FAQ Section
Q1: What is the best material for vertical shelf dividers in a kitchen pantry?
For a kitchen pantry, durable materials like plywood or solid wood are excellent. They withstand moisture changes better than MDF. Acrylic is also a good choice for a modern, easy-to-clean option, especially for lighter items like plates or baking sheets. Choose based on what you store.
Q2: Can I make vertical shelf dividers without drilling holes?
Yes, you can make vertical shelf dividers without drilling holes. Tension rods are a popular option for lightweight items like cutting boards. You can also create friction-fit dividers by cutting them to be slightly taller than the shelf opening. They hold in place through pressure.
Q3: How do I calculate the right spacing for my shelf dividers?
To calculate spacing, first measure the total width of your shelf. Then, group the items you want to store by size. Divide the shelf width by the number of sections you need. Or, measure the width of your largest item and add a small buffer. This ensures everything fits comfortably.
Q4: Are adjustable or fixed dividers better for bookshelves?
Both types work for bookshelves. Fixed dividers offer maximum stability and a permanent neat look. They are great for heavy book collections. Adjustable dividers allow you to change section sizes as your book collection grows or changes. Consider your long-term flexibility needs.
Q5: How do I ensure my DIY dividers are sturdy and don’t wobble?
For sturdy dividers, precise measurements and good attachment methods are key. For fixed dividers, use wood glue and screws or cleats. For adjustable ones, ensure shelf pins are properly seated in well-drilled holes. A snug fit is important for all types to prevent wobbling.
Q6: Can these dividers be used in a closet for clothes?
Absolutely! Vertical shelf dividers are excellent for organizing clothes in a closet. They can keep stacks of sweaters, t-shirts, or folded pants from toppling over. They create neat compartments, making it easier to see and access your garments. Use wider spacing for bulkier items.
Conclusion
Creating your own vertical shelf dividers is a rewarding DIY project. It brings incredible order and efficiency to any cluttered space. We have explored the benefits, from maximizing storage to keeping items neat and accessible. You now understand the importance of careful planning, accurate measurements, and selecting the right materials.
We covered essential tools and guided you through both fixed and adjustable installation methods. With these steps, you can confidently build custom solutions. These vertical shelf dividers will transform your kitchen, closet, or living room. Embrace the power of organization. You will enjoy a more functional and tidy home. Start your project today and experience the satisfaction of perfectly organized shelves.
- DIY shelf dividers
- custom shelf organization
- home storage solutions
- pantry organization
- bookshelf dividers
- cabinet dividers
- woodworking projects

Todd Martin
Senior Writer
With over 15 years of experience in home renovation and design, I started HEG to share what I’ve learned with homeowners who want to create spaces that are both beautiful and functional. I’ve always believed in a hands-on approach, and over the years, I’ve picked up practical solutions that actually work. Through HEG, I aim to make home improvement more approachable, sharing real tips that help you create a home you truly love.