· Todd Martin · Home Improvement · 17 min read
How To Paint Melamine Cabinets
How To Paint Melamine Cabinets for a Fresh New Look
Are your melamine cabinets looking dated? You can give them a fresh, modern update with paint. Painting melamine cabinets can transform your kitchen or bathroom without a full replacement. Many people wonder if melamine surfaces can even hold paint. With the right steps and products, they absolutely can. This guide will show you how to paint melamine cabinets effectively. We will cover everything from preparation to the final coat. You will learn the secrets to a durable and beautiful finish.
Takeaway
- Proper cleaning and degreasing are essential for paint adhesion on melamine.
- Always use a high-quality bonding primer specifically designed for slick surfaces.
- Apply multiple thin coats of paint to achieve a smooth, professional, and durable finish.
- Allow ample drying time between coats and full curing time before heavy use.
You can paint melamine cabinets successfully by thoroughly cleaning and degreasing them, then applying a specialized bonding primer. Follow with two to three thin coats of high-quality cabinet or furniture paint for a durable, refreshed appearance.
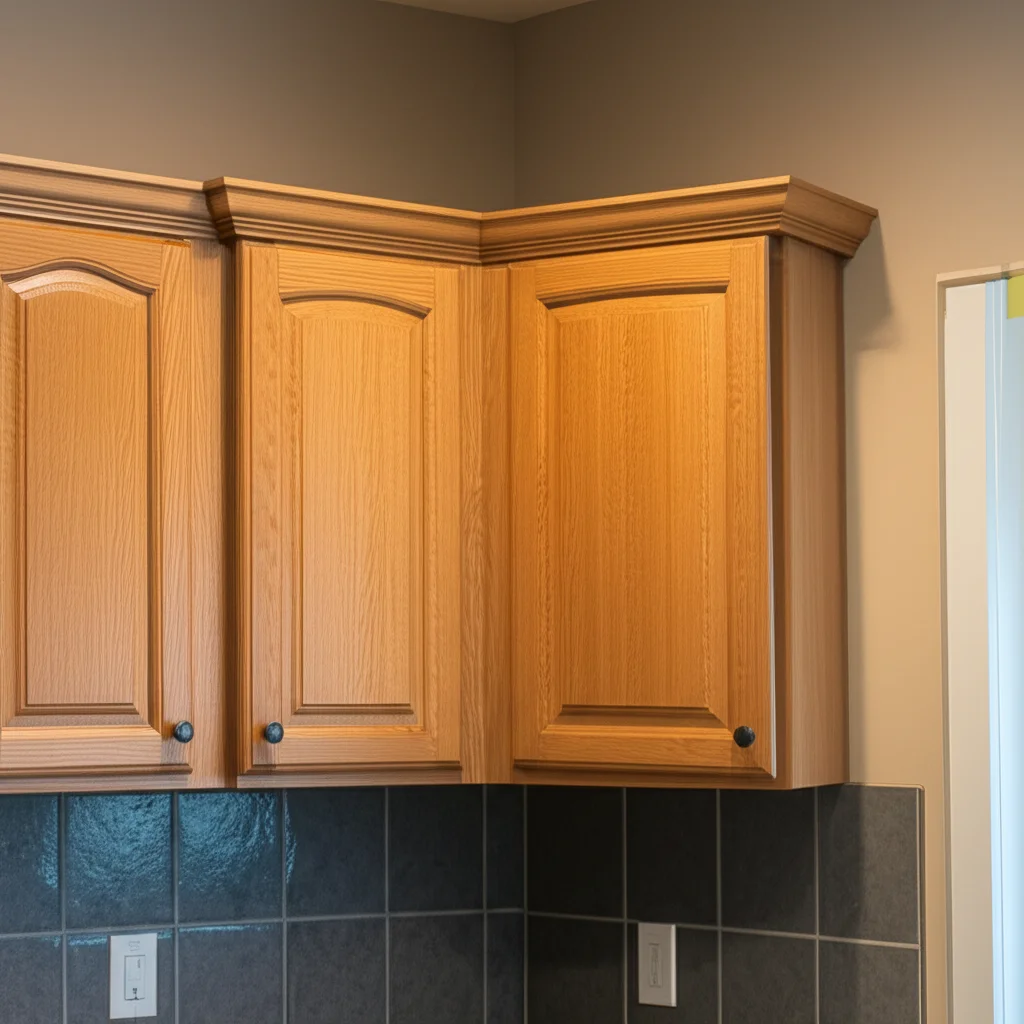
Understanding Melamine: Why It Needs Special Care
Melamine is a common material used in cabinets, especially in kitchens and bathrooms. It consists of a particleboard or MDF (medium-density fiberboard) core. This core is then covered with a thin, resin-impregnated paper layer. This layer is then heat-sealed, creating a smooth, durable, and often slick surface. It is popular because it resists moisture, stains, and scratches. Melamine offers a cost-effective alternative to solid wood.
The problem with painting melamine comes from its slick, non-porous nature. Regular paints and primers struggle to bond to this smooth surface. They often chip, peel, or scratch off easily. This happens because the paint has nothing to “grip” onto. Without proper preparation, your paint job will not last. You need to create a surface that paint can adhere to. This requires specific cleaning, light abrasion, and the right type of primer. Understanding this unique surface is the first step to a successful painting project. Do not skip these initial steps.
The key to painting melamine cabinets lies in achieving strong adhesion. This means using products designed to stick to difficult surfaces. Melamine is often categorized with other laminates and engineered wood products. Many techniques apply across these materials. For instance, painting melamine is similar to painting surfaces like Formica or some fake wood options. Proper adhesion ensures your hard work pays off with a lasting finish. We will discuss specific products and steps next.
Gathering Your Essential Tools and Materials
Before you begin painting your melamine cabinets, gathering all your supplies is important. Having everything ready saves time and ensures a smooth process. You will need a variety of cleaning agents, sanding tools, and painting supplies. I always make a checklist to ensure I do not forget anything. This preparation step makes the actual painting much easier.
First, let’s talk about cleaning supplies. You will need a good degreaser. TSP (trisodium phosphate) substitute or a strong kitchen degreaser works well. You also need clean rags or sponges and a bucket of warm water. For surface preparation, you need fine-grit sandpaper (220-grit) or a sanding sponge. This helps to lightly scuff the melamine surface, improving primer adhesion. Do not use coarse sandpaper, as it can damage the melamine.
Next, choose your primer and paint. A high-quality bonding primer is non-negotiable for melamine. Look for primers specifically labeled for slick, non-porous, or laminate surfaces. Brands like Zinsser B-I-N Shellac-Base Primer or Kilz Adhesion are popular choices. For paint, select a durable cabinet or furniture paint. Acrylic-latex or oil-based enamel paints work well. These paints offer good hardness and resistance to wear. Consider a paint designed for high-traffic areas, like your kitchen.
Finally, gather your application tools and safety gear. You will need painter’s tape to protect surrounding areas. Drop cloths are essential to cover floors and countertops. For applying paint, use a high-quality synthetic brush for cutting in details. A foam roller or a fine-nap microfiber roller will give you a smooth finish on flat surfaces. If you have access, a paint sprayer can provide the smoothest, most professional result. Do not forget safety glasses, gloves, and a respirator mask, especially when using strong cleaners, primers, or sprayers. Taking these precautions protects your health.
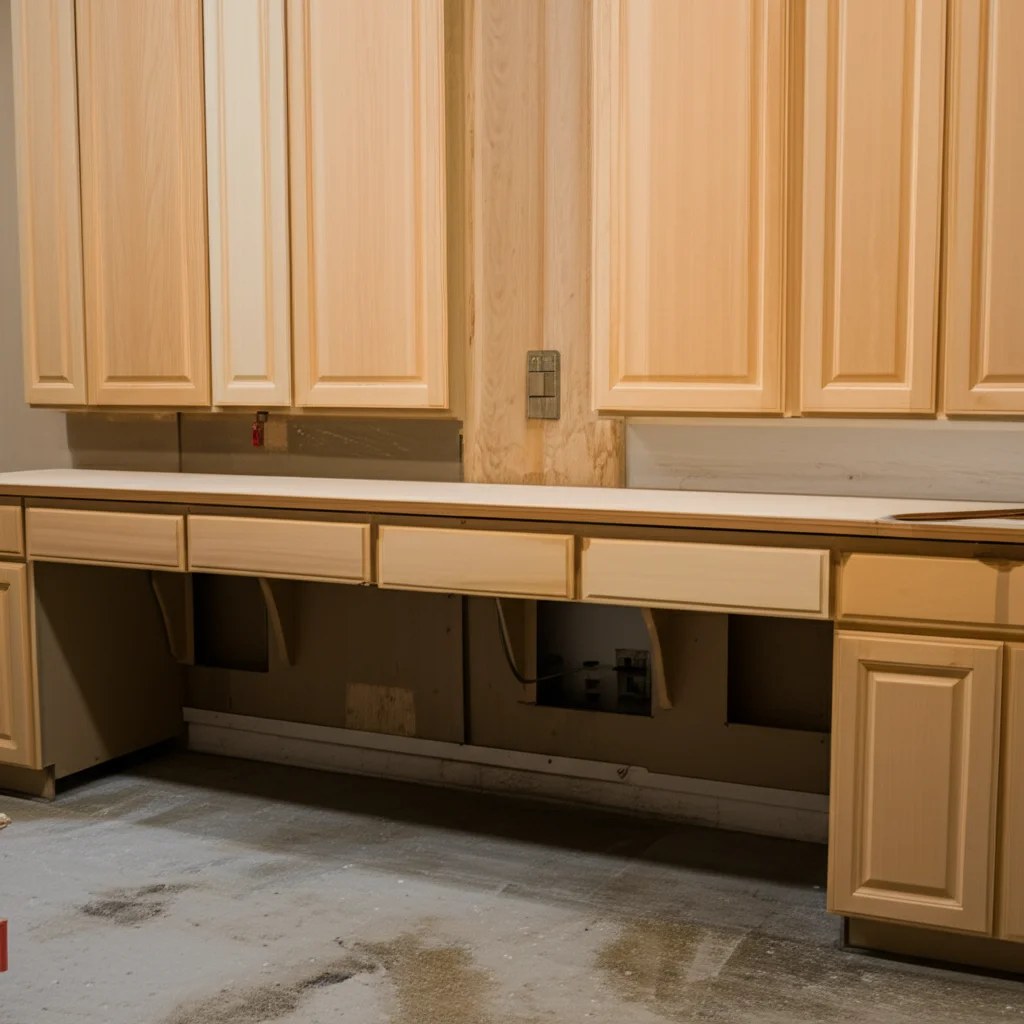
Preparing Melamine Cabinets for Painting
Proper preparation is the most critical step when painting melamine cabinets. Skipping or rushing this stage will lead to peeling paint and a disappointing result. I cannot stress enough how important this part is. Your paint job will only be as good as the surface underneath it. This meticulous preparation ensures the paint bonds correctly to the challenging melamine surface.
Start by emptying all cabinets. Remove all doors, drawers, and hardware like hinges and handles. Label everything carefully. You can use masking tape on the back of each door and inside each drawer. This helps you remember where each piece goes later. Removing hardware allows for complete coverage and a much cleaner finish. Place all hardware in a safe place, maybe a plastic bag.
Next, thoroughly clean all cabinet surfaces. Melamine cabinets, especially in kitchens, collect grease and grime. Use a strong degreaser, such as TSP substitute, or a specialized cabinet cleaner. Mix it according to product directions. Wipe down every surface of the cabinets, doors, and drawer fronts. Pay extra attention to areas around handles and cooking zones. Rinse the surfaces completely with clean water and fresh rags. Any residual cleaner or grease will prevent proper adhesion. Ensure the cabinets are completely dry before moving on. This step is similar to cleaning any cabinet before painting. For a detailed guide, you can refer to how to clean cabinets before painting.
After cleaning, lightly scuff the melamine surface. You can use 220-grit sandpaper or a sanding sponge. The goal is not to remove the melamine layer but to create a microscopic texture. This texture gives the primer something to grip. Sand lightly but evenly over all surfaces. Do not press too hard. After sanding, wipe away all dust with a tack cloth or a damp, lint-free cloth. Allow the surface to dry completely again. Finally, use painter’s tape to mask off any areas you do not want painted, such as walls, interior cabinet edges if not painting them, or hinges if you left them on.
The Crucial Step: Priming Melamine Surfaces
Priming is not an optional step when painting melamine cabinets; it is absolutely essential. Melamine’s slick, non-porous surface requires a special primer to ensure paint adhesion. Think of primer as the bridge between the difficult melamine and your desired paint. Without the right primer, your paint will not stick, and it will eventually chip or peel. I always tell people that a good primer is half the battle won.
You must use a high-quality bonding primer. Look for products specifically formulated for challenging surfaces like laminate, plastic, or melamine. Shellac-based primers, like Zinsser B-I-N, are excellent choices. They dry quickly and provide superior adhesion. Water-based bonding primers, such as Kilz Adhesion, also work very well and are easier to clean up. Avoid standard latex primers, as they will not bond properly to melamine. Read the primer label carefully to ensure it is suitable for your surface.
Apply the primer in thin, even coats. Do not try to apply one thick coat. Thick coats can lead to drips, uneven drying, and poor adhesion. Use a high-quality synthetic brush for corners and edges. Use a foam roller or a fine-nap microfiber roller for flat surfaces. Roll in one direction for a smooth finish. Ensure every part of the melamine surface receives an even coat of primer. Some primers may require two thin coats for optimal coverage and adhesion.
Allow the primer to dry completely according to the manufacturer’s instructions. This drying time is crucial for the primer to cure and create a strong bond. It typically takes 1-3 hours for shellac-based primers and longer for water-based ones. Once dry, lightly sand the primed surface with 220-grit sandpaper if needed. This step is optional but can create an even smoother base for your paint. This fine sanding removes any small imperfections or dust nibs. After sanding, wipe away all dust with a tack cloth before moving to the next stage. This preparation ensures a professional finish for your final paint coats.
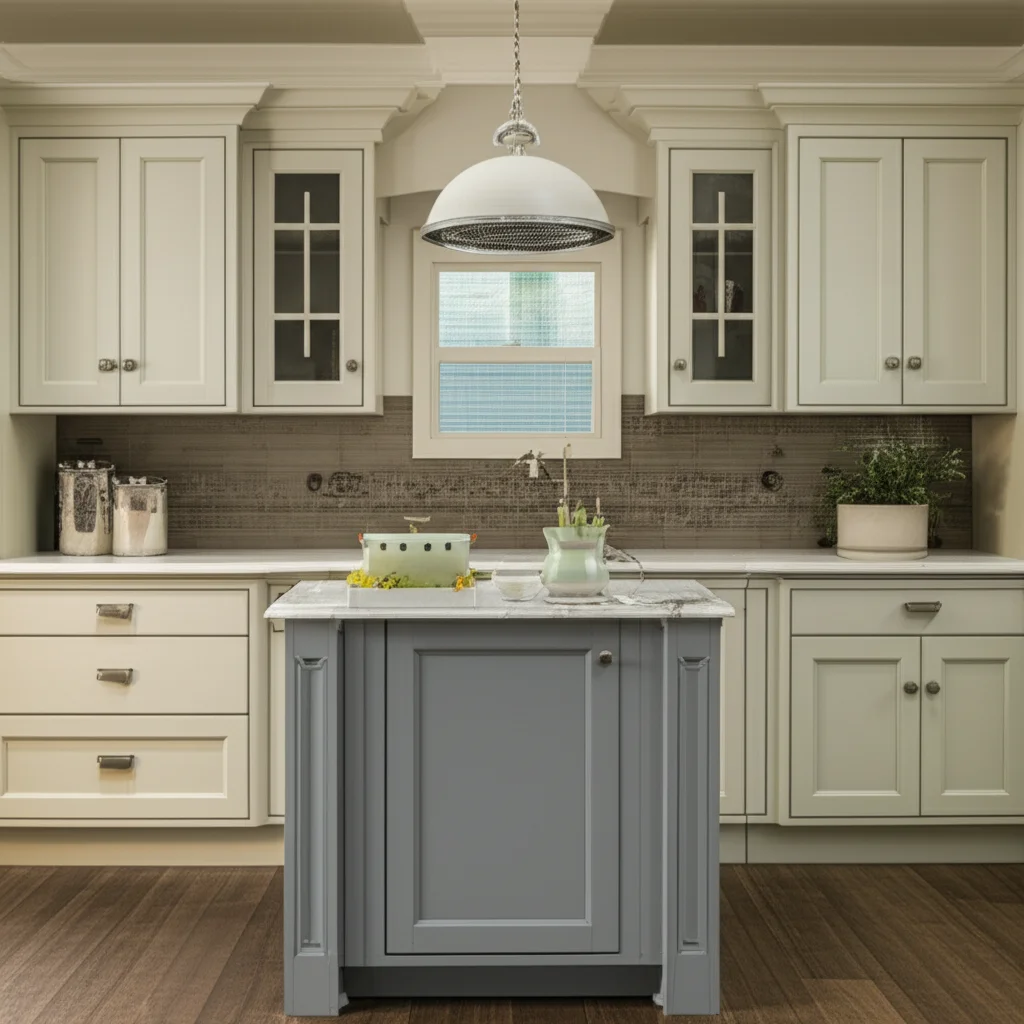
Applying Paint for a Flawless Melamine Finish
With your melamine cabinets primed, you are ready for the exciting part: applying the paint. This step transforms your cabinets. Choose the right paint type for durability and a beautiful finish. I recommend using a high-quality acrylic-latex or oil-based enamel cabinet paint. These paints are designed for high-traffic surfaces and offer excellent hardness and chip resistance. Some people might use specific paints for laminate surfaces; these are good choices too. This process is similar to how you might paint other fake wood cabinets or even laminate camper cabinets.
Always apply paint in thin, even coats. Two to three thin coats are far better than one thick coat. Thick coats can lead to drips, runs, and a longer drying time. They also increase the risk of the paint peeling later on. For applying paint, you have a few options. A good quality synthetic brush works well for cutting in edges and corners. For flat surfaces, a foam roller or a fine-nap microfiber roller delivers a smooth finish. Rollers minimize brush marks and provide even coverage. If you want the smoothest, factory-like finish, consider using a paint sprayer. A sprayer requires more setup and cleanup but can achieve exceptional results without brush marks. If you want to avoid brush marks, check out tips on how to paint kitchen cabinets without brush marks.
Apply the first coat of paint. Work in sections, ensuring even coverage. Allow each coat to dry completely before applying the next. This drying time is crucial for proper adhesion and to prevent peeling. Drying times vary based on paint type, humidity, and temperature. Always follow the paint manufacturer’s recommendations. Usually, this means waiting 4-6 hours or overnight between coats for water-based paints. Oil-based paints require even longer drying times.
After the first coat, you may notice some imperfections or areas needing more coverage. Lightly sand the surface with 220-grit sandpaper if there are any bumps or dust nibs. Wipe away all dust with a tack cloth before applying the next coat. Repeat the painting process for the second and possibly third coat. Ensure consistent application and proper drying time between each. Your patience here will be rewarded with a durable and beautiful finish.
Protecting Your Finish: Curing and Sealing
After you apply the final coat of paint, the process is not quite finished. The paint needs time to fully cure and harden. This curing period is distinct from drying time. While the paint might feel dry to the touch in a few hours, it takes much longer to reach its maximum hardness and durability. Skipping this critical step can lead to nicks, scratches, or even peeling paint. I have seen many people rush this, only to regret it later.
Most cabinet or enamel paints require a curing period of several days to a few weeks. This can be anywhere from 7 to 30 days, depending on the product and environmental conditions like humidity and temperature. During this time, avoid heavy use of the cabinets. Be gentle when reattaching hardware or putting items back inside. Do not clean the painted surfaces with harsh chemicals during the curing phase. Simply let them be. The paint’s molecular structure is still strengthening.
For added durability and protection, especially in high-traffic areas like kitchens, consider applying a clear topcoat or sealer. This step is optional but highly recommended for melamine cabinets. A clear water-based polyurethane or a durable clear coat designed for cabinets can add an extra layer of protection against scratches, moisture, and daily wear. This can also enhance the lifespan of your paint job. When choosing a topcoat, make sure it is compatible with your chosen paint type. Always read the manufacturer’s instructions for both paint and topcoat. If you are considering sealing your cabinets, learning how to seal cabinet paint can provide more in-depth information.
Apply the topcoat in thin, even layers, just like the paint. Use a high-quality synthetic brush or a foam roller. Allow each coat to dry completely before applying the next. Typically, one or two coats of a clear sealer are sufficient. Once the final topcoat is dry to the touch, you can carefully reattach all hardware. Reinstall the doors and drawers. Handle everything with care during the initial weeks. This patient approach ensures your newly painted melamine cabinets look beautiful and last for many years to come.
Troubleshooting Common Painting Issues
Even with careful preparation, you might encounter some common issues when painting melamine cabinets. Do not get discouraged. Most problems have straightforward solutions. I find that knowing what to look for helps a lot. Addressing these issues promptly helps ensure a professional and lasting finish.
One of the most common issues is paint peeling or chipping. This almost always points to an adhesion problem. The surface was likely not cleaned thoroughly enough, or the wrong type of primer was used. Perhaps you did not scuff the surface adequately. To fix this, you need to lightly sand the peeling areas. Clean them well, re-prime with a high-quality bonding primer, and then repaint. If you have widespread peeling, you might need to strip the paint and start over from scratch. Learning how to fix paint peeling off cabinets offers more detailed steps.
Another frequent complaint is visible brush marks or roller marks. This can happen if you apply paint too thickly. It also occurs if you use the wrong type of brush or roller, or if the paint dries too quickly. To fix this, lightly sand the affected areas with fine-grit sandpaper (220-grit or higher) once the paint is fully dry. Wipe off dust with a tack cloth. Then, apply another thin coat of paint using a high-quality foam roller or a fine-nap synthetic brush. Using a paint extender or conditioner can also help the paint flow more smoothly. Work quickly and maintain a wet edge to avoid overlapping dry paint, which creates lines.
Uneven coverage or patchy spots can also occur. This usually means you did not apply enough coats or did not apply them evenly. The underlying primer might also show through. To correct this, ensure the surface is clean and dry. Then, apply another thin, even coat of paint. Pay attention to consistent application across all surfaces. Do not overload your brush or roller, but make sure it has enough paint for full coverage. Sometimes, using a slightly higher quality paint can provide better coverage in fewer coats. Remember, patience with drying times and multiple thin coats is key for an even, beautiful finish.
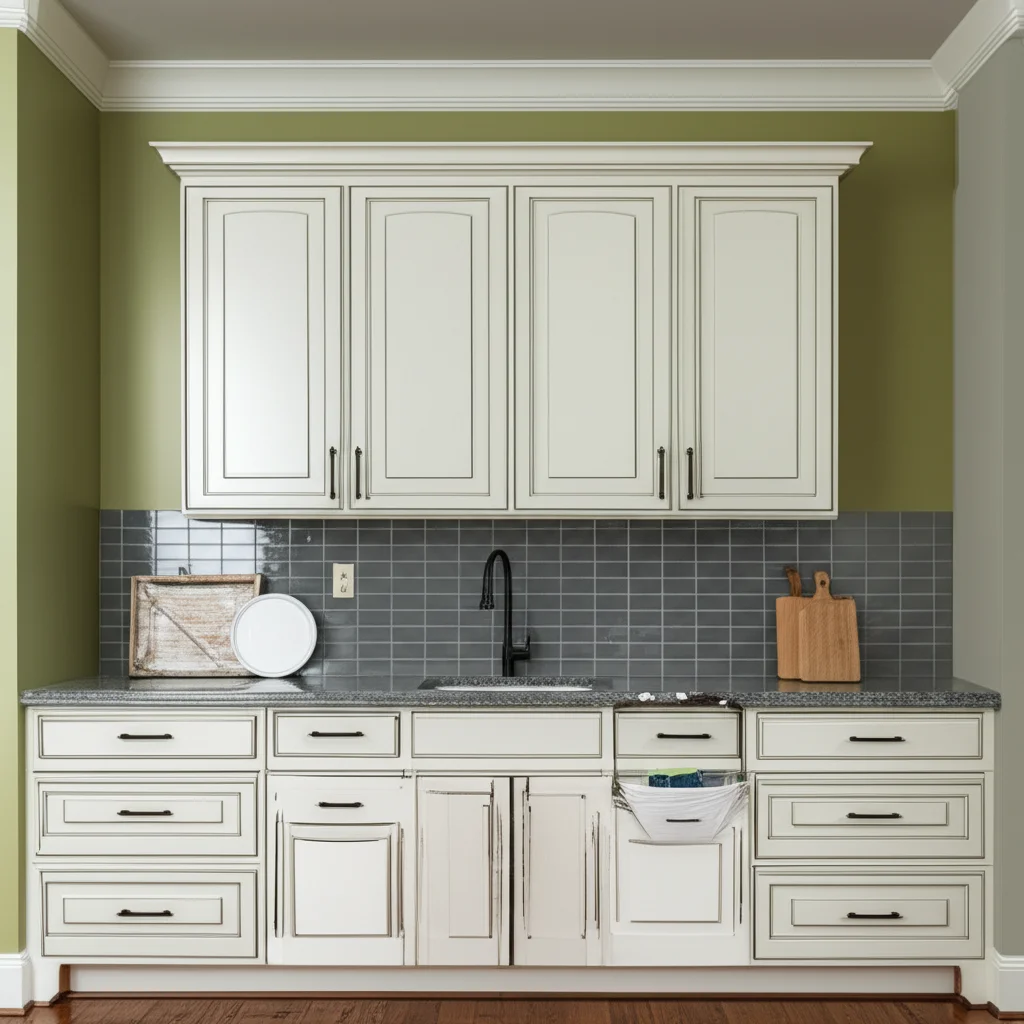
Maintaining Your Newly Painted Melamine Cabinets
Once your melamine cabinets are beautifully painted and fully cured, proper maintenance is crucial to keep them looking fresh. While the paint is durable, a little care goes a long way in preserving your hard work. I find that a simple routine can significantly extend the life of your cabinet finish. This ensures your update lasts for many years.
Cleaning your painted melamine cabinets should be gentle. Avoid harsh abrasive cleaners or scrubbing pads. These can scratch the new paint finish. Instead, use a soft cloth or sponge with mild soap and water. Dish soap is usually fine. For tougher spots, a diluted all-purpose cleaner that is safe for painted surfaces can work. Always wipe spills immediately. Acidic substances like lemon juice or vinegar can etch paint if left too long. Always test any new cleaner in an inconspicuous area first. Regular, gentle cleaning prevents grime buildup, which can be harder to remove later without damaging the paint.
Protect your cabinets from excessive moisture and heat. While paint provides some protection, standing water or steam can still affect the finish over time. Quickly wipe up any water splashes around the sink or stove. Use protective pads under small appliances that generate heat. Consider adding felt pads to the inside of cabinet doors and drawers. This prevents noise and reduces impact when closing, which can protect the paint from chipping over time.
Inevitably, small nicks or scratches may occur over time, especially in a busy kitchen. Do not worry; touch-ups are easy. Save a small amount of your leftover paint. When a scratch appears, clean the area gently. Use a small artist’s brush to carefully dab a tiny amount of paint onto the damaged spot. Feather the edges to blend it in. Let it dry completely. For deeper scratches that reveal the melamine, you might need a tiny dab of primer first. Regular touch-ups keep your cabinets looking new and prevent minor damage from worsening. With these simple maintenance tips, your painted melamine cabinets will remain a beautiful feature in your home.
Frequently Asked Questions
Can you paint over old melamine cabinets?
Yes, you can paint over old melamine cabinets. The key is thorough preparation. You must clean and degrease the surface completely. Then, lightly scuff it with fine-grit sandpaper. Apply a high-quality bonding primer designed for slick surfaces before painting. This ensures the new paint adheres well and creates a durable finish.
What kind of paint do you use on melamine cabinets?
For melamine cabinets, use a high-quality acrylic-latex or oil-based enamel paint. These paints offer good durability and a hard finish, which is important for cabinets. Always pair your chosen paint with a bonding primer specifically designed for challenging, non-porous surfaces like melamine.
Do I need to sand melamine before painting?
Yes, you should lightly sand melamine before painting. Use fine-grit sandpaper (around 220-grit). The goal is not to remove the melamine but to create a very fine “tooth” or texture on the smooth surface. This microscopic texture helps the primer and subsequent paint coats adhere better.
How do you prepare melamine for painting?
To prepare melamine for painting, first remove all hardware and clean the cabinets thoroughly with a strong degreaser. Rinse well and let dry. Then, lightly scuff all surfaces with 220-grit sandpaper to create adhesion. Wipe away all dust with a tack cloth before applying a bonding primer.
How long does paint last on melamine cabinets?
When properly prepared and painted, paint on melamine cabinets can last many years, often 5-10 years or more. Durability depends on the quality of primer and paint used, the thoroughness of preparation, and how well the cabinets are maintained. Regular cleaning and gentle care help extend the finish’s life.
Can I paint melamine cabinets without primer?
No, painting melamine cabinets without primer is not recommended. Melamine’s slick surface does not allow paint to bond directly. Without a specialized bonding primer, the paint will likely chip, peel, or scratch off very quickly. Primer creates the essential adhesion layer for a lasting finish.
Conclusion
Painting melamine cabinets is a highly effective way to refresh your home without the expense of a full replacement. We have shown that with the right approach, you can achieve a stunning and durable finish. The process involves critical steps, including thorough cleaning and proper surface preparation. Using a specialized bonding primer is non-negotiable for success. Applying thin, even coats of high-quality paint ensures a beautiful result.
Remember that patience and attention to detail make all the difference. Allow ample drying time between coats and a full curing period for the paint to harden. This dedicated effort ensures your newly painted melamine cabinets stand up to daily use. You now have the knowledge to transform your cabinets and give your space a fresh, updated look. Get started on your project today and enjoy your updated home.
- melamine cabinets
- painting cabinets
- cabinet refinishing
- DIY home improvement
- kitchen update

Todd Martin
Senior Writer
With over 15 years of experience in home renovation and design, I started HEG to share what I’ve learned with homeowners who want to create spaces that are both beautiful and functional. I’ve always believed in a hands-on approach, and over the years, I’ve picked up practical solutions that actually work. Through HEG, I aim to make home improvement more approachable, sharing real tips that help you create a home you truly love.