· Todd Martin · Kitchen Cleaning · 16 min read
How To Remove Ge Oven Door Without Hinge Latches Without
Remove Your GE Oven Door: A Guide for Latch-Free Methods
Ever found yourself needing to tackle a deep oven clean or a quick repair, only to be stumped by a GE oven door that seems permanently attached? Many GE oven owners face a common challenge: understanding how to properly detach the door. This task can appear especially confusing if your specific model does not feature obvious hinge latches, or if you are unsure how these mechanisms work. It is important to know the right steps to avoid damage. This comprehensive guide will show you precisely how to remove GE oven door without hinge latches, or when they are not the primary method for your specific model. We will cover various GE designs, emphasize safety measures, and provide clear reinstallation instructions.
Takeaway
- Identify your GE oven door’s specific hinge mechanism before starting.
- Prioritize safety by unplugging the oven and working carefully.
- Learn step-by-step methods for doors with and without visible hinge latches.
- Troubleshoot common issues like stuck doors or difficult reinstallation.
- Implement regular maintenance to ensure long-term door function.
Removing a GE oven door often involves rotating hinge locks or lifting the door straight up after opening it to a specific angle, depending on the model. While some doors have visible latches, others rely on precise positioning. Always check your oven’s manual first. Safety is key throughout the process.
Understanding GE Oven Door Designs and Hinge Mechanisms
GE manufactures many oven models. Each model can have a slightly different door removal method. Some ovens feature prominent hinge latches. These latches are usually small metal clips or arms. You can flip them into a locked position. This holds the hinge open. Other GE ovens use a cam system. This system allows the door to lift out at a specific angle. No external latches are needed.
It is crucial to consult your appliance’s owner’s manual. The manual provides the exact instructions for your specific GE model. This prevents accidental damage. The manual also shows precise details about hinge arm design. These arms slide into slots on the oven frame. Understanding these parts helps with safe removal.
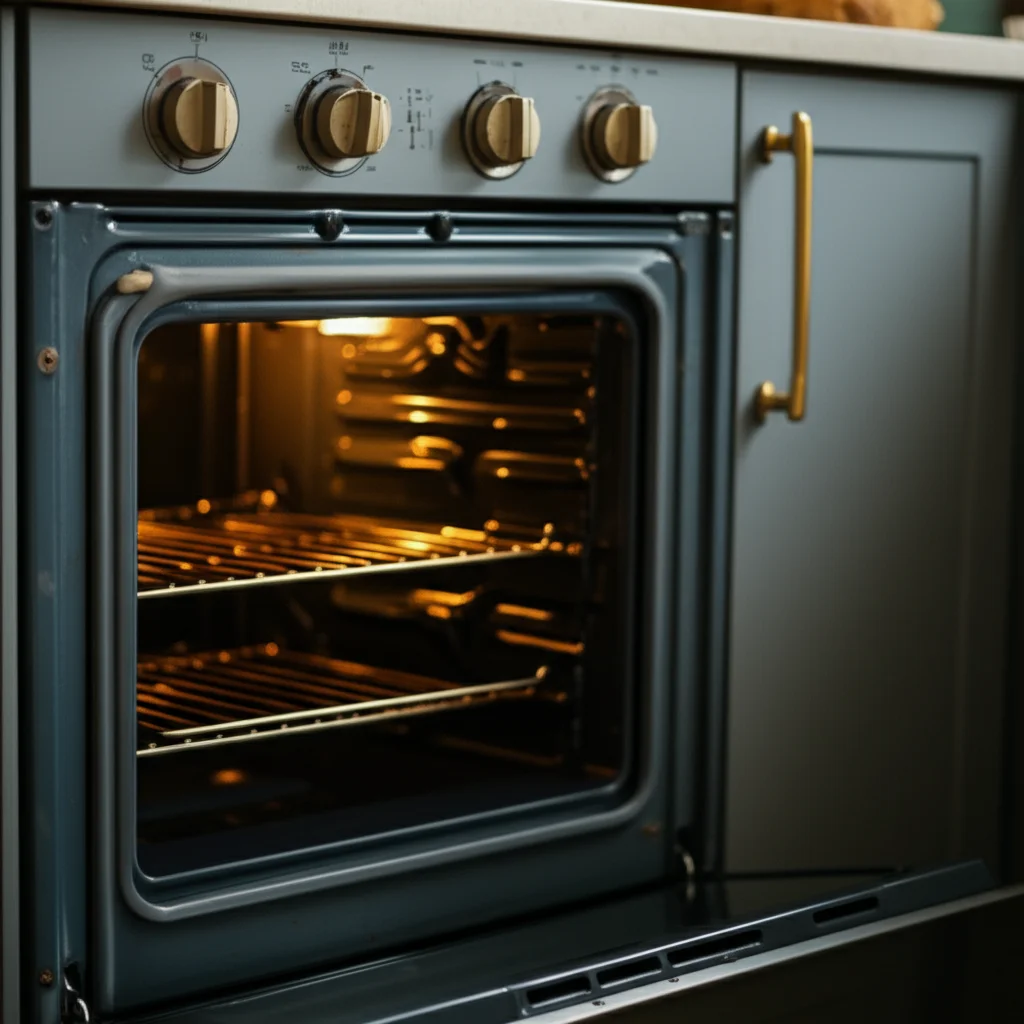
Many people consider removing their oven door for thorough cleaning. The internal glass can get quite dirty. Knowing the proper door removal technique makes this task much easier. A clean oven operates better. It also looks much nicer. For tips on keeping your oven looking its best, learn how to clean the glass on oven door. This resource helps improve your appliance’s appearance and function.
Hinge latches act as a safety mechanism. They keep the door from swinging freely during removal. If your oven does not seem to have these latches, do not worry. It means your door uses a different design. We will explain those methods. The goal is always to lift the door straight up. This disengages the hinge arms from their slots. Proper identification of your door type is the first step. This ensures a smooth and safe removal process.
Safety First: Essential Preparations Before Door Removal
Before you attempt to remove your GE oven door, prioritize safety. This step cannot be stressed enough. First, make sure the oven is completely cool. A hot oven can cause severe burns. Give it plenty of time to cool down. Overnight cooling is ideal if you used the oven recently.
Next, unplug the oven from the electrical outlet. This eliminates any risk of electrical shock. If your oven is hardwired, turn off the circuit breaker. This ensures no power reaches the appliance. Do not skip this step. Electrical safety is paramount.
Clear the area around the oven. Remove any items from the stovetop. Move anything on the floor nearby. You need ample space to maneuver the heavy door. Oven doors are surprisingly heavy and awkward. They can cause injury if they fall. Consider having a second person help you. This provides an extra set of hands and increases stability.
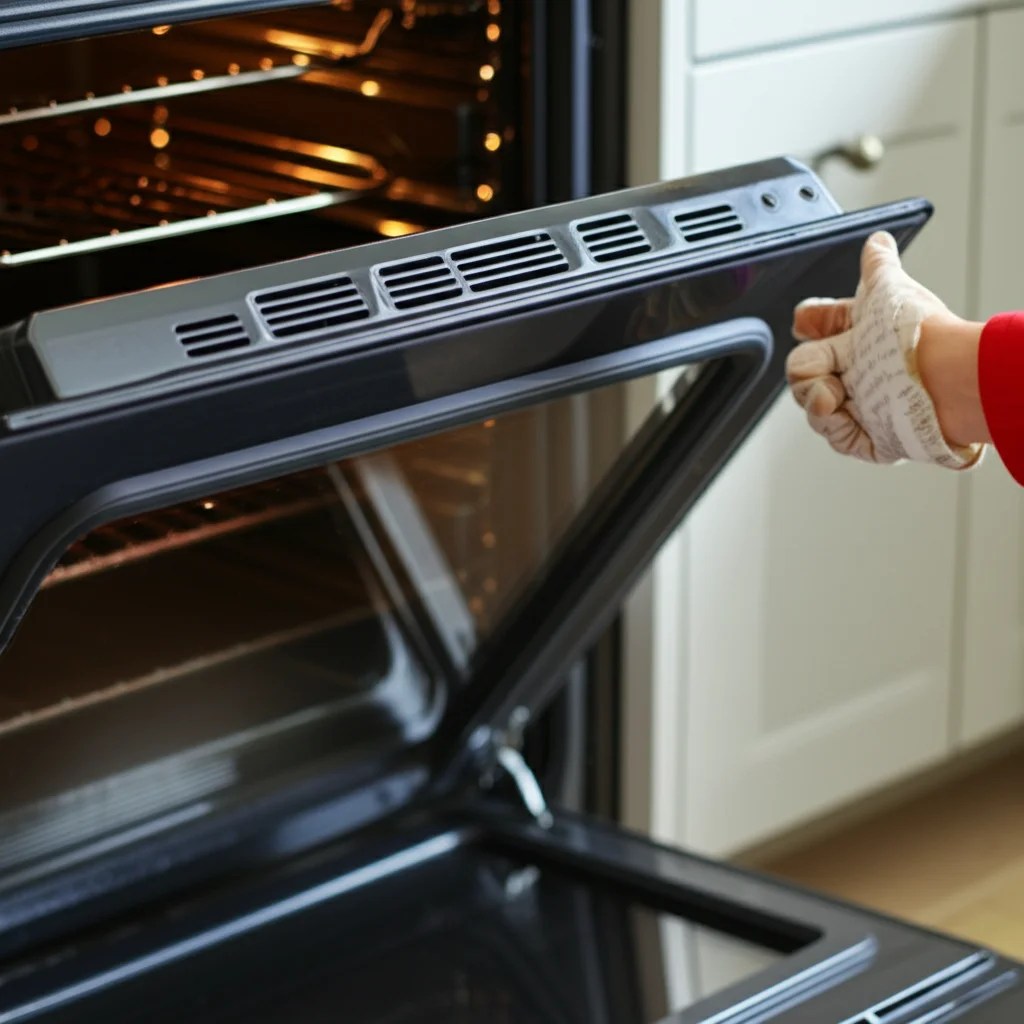
Wear sturdy work gloves. These gloves protect your hands from sharp edges. They also provide a better grip on the door. Gather any tools you might need. A flathead screwdriver is often useful. A towel or blanket is also helpful. You can use it to protect the door once it is removed. Lay the towel on a flat surface. This prevents scratches. Always approach the task with patience. Rushing can lead to mistakes or injuries.
Step-by-Step: Removing a GE Oven Door with Visible Hinge Locks
Many GE oven models feature visible hinge locks. These locks make door removal straightforward. I find this method the most common for modern GE appliances. First, open the oven door fully. Pull it all the way down until it rests flat. Look at the hinges on both sides of the door. You should see small metal levers or clips. These are the hinge locks.
Locate these hinge locks. They are usually found at the very end of the hinge arms, closest to the oven frame. Flip each hinge lock forward or up. They should pivot easily. The locks move into an “open” or “locked” position. This prevents the hinge arms from retracting. Make sure both locks are fully engaged. They need to point away from the oven.
Once the locks are set, slowly begin to close the oven door. Do not close it completely. The door should stop at a specific angle. This angle is often about 10 to 15 degrees from fully closed. The hinge locks will catch on the oven frame. This holds the door slightly open. This specific position allows the hinge arms to align.
Now, firmly grasp both sides of the oven door. Place your hands on the outer edges. Lift the door straight up and out. The hinge arms should slide out of their slots on the oven frame. This requires a smooth, even upward motion. Do not wiggle or force the door. If it resists, check the hinge locks again. Ensure they are fully engaged. Once removed, carefully place the door on your protected surface. This method makes cleaning the inner door glass much easier. If you need a refresher on this, check out our guide on how to clean an oven door window.
Alternative Methods: Handling GE Oven Doors Without Obvious Latches
Not all GE oven doors have those easy-to-spot flip-up hinge latches. This can be confusing. However, alternative removal methods exist for these models. Often, these designs rely on a specific door angle. The angle allows the door to lift free.
One common method for older GE models or specific designs involves opening the door fully. Once the door is flat, you simply lift it straight up. This requires precise alignment and a firm grip. The hinge arms must clear their slots evenly. Sometimes, a slight rock or gentle wiggle helps. However, avoid forcing the door. Forcing it can bend the hinges.
Another method involves finding a “service” or “balancing” angle. This angle is usually very narrow, perhaps 10 to 15 degrees from closed. Slowly close the door from its fully open position. As you close it, you might feel a slight resistance or a point where the door seems balanced. At this point, lift the door straight up. The hinge arms are designed to disengage at this specific angle. This method is common for doors with cam-style hinges. These hinges do not use external locks.
In rare cases, some GE oven doors require more disassembly. This could mean removing trim pieces or screws near the hinges. This allows access to internal hinge mechanisms. This is less common for standard removal. Always check your user manual for model-specific instructions. It is the best resource for your exact oven. Understanding these methods helps tackle even the toughest cleaning jobs. For instance, cleaning the space between the glass panels is much simpler with the door off. Our article on how to clean the glass inside your oven door offers detailed steps once the door is detached.
Remember, patience is key. If the door does not lift easily, re-evaluate its position. Try slightly different angles. Never use excessive force. Forcing the door can bend the hinge pins. This makes reinstallation very difficult. It can even damage the oven frame. A smooth, controlled lift is always the goal.
Troubleshooting Common Issues During GE Oven Door Removal
Sometimes, despite following the steps, you might encounter problems when removing your GE oven door. Do not get discouraged. Many common issues have simple solutions. My personal experience has taught me that patience truly pays off here.
One common problem is a stuck door. If the door does not lift easily, first re-check the hinge locks. Are they fully engaged? Have they slipped out of position? Make sure both locks are flipped correctly. If your door does not have visible locks, ensure you are at the precise removal angle. Try slightly opening or closing the door a few degrees. Sometimes, just a small adjustment makes the difference.
Another issue is the door feeling too heavy to lift. Oven doors are surprisingly weighty. If you are struggling, ask for help. A second person can stabilize the door. They can also help lift it evenly. Do not strain yourself. Dropping the door can cause serious injury or damage to the door itself.
Damaged hinges can also cause problems. If the hinges are bent, rusted, or broken, removal becomes very difficult. You should never force a door with damaged hinges. Forcing it can worsen the damage. In such cases, professional repair might be necessary. Attempting to force a damaged hinge can also damage the oven frame. This leads to more expensive repairs.
Reinstallation can also pose challenges. If the door does not slide back into place smoothly, do not force it. The hinge arms must align perfectly with the slots in the oven frame. Slight adjustments may be necessary. If the door goes in but does not close properly, the hinges might not be fully seated. Open the door fully and lift it slightly. Then, try reseating it. Improper door closure can affect oven performance and temperature. For example, if your oven turns off when the door opens, it could indicate a sensor issue, but also sometimes relates to overall door function. Our guide, why does my GE oven turn off when I open the door, explores common reasons for such behavior. This can often be a symptom of various oven issues.
Always take your time. Double-check each step. A careful approach prevents further complications. Remember, this is a repair, not a race.
Reinstalling Your GE Oven Door Safely and Correctly
Once you have finished cleaning or repairing your oven, reinstalling the door is the next step. This process is essentially the reverse of removal. I always find this part just as important as taking the door off. Proper reinstallation ensures your oven operates safely and efficiently.
First, hold the oven door firmly with both hands. Position yourself directly in front of the oven. This gives you a clear view of the hinge slots. Align the hinge arms on the door with the receiving slots on the oven frame. These slots are where the hinge arms originally came out. Ensure both arms are lined up evenly.
Carefully lower the door into the slots. It should slide in smoothly. You might need to wiggle it gently to guide the hinge arms into place. Do not force the door down. If it resists, lift it back up slightly. Then, re-align and try again. For models with hinge locks, the door will likely need to be at the same specific angle as when you removed it. This is usually the 10-15 degree angle from fully closed.
Once the hinge arms are fully seated, open the oven door all the way. For doors with hinge locks, flip these locks back to their original “open” or “unlocked” position. They should lie flat against the hinge arms. This secures the door in place. If you do not unlock the hinges, the door will not close properly. It will also be stuck in the partially open position.
Test the door’s movement. It should open and close freely and smoothly. It should also seal tightly against the oven frame when closed. A good seal is vital for maintaining oven temperature. If the door does not close fully, re-check the hinge locks. Also, ensure the hinge arms are completely seated. A loose door can lead to heat loss. This makes your oven less efficient. This also affects cooking performance. You want the door to be as tight as possible. A well-sealed door makes a difference when you are cooking. This also affects how well your oven can clean itself. After reinstalling, you might notice other areas needing attention. For example, cleaning the bottom of your oven is often a good next step. Our guide, how to clean bottom of oven, offers helpful tips for this task.
Maintenance Tips for Your GE Oven Door and Hinges
Maintaining your GE oven door is important. Proper care prevents future problems. It also extends the life of your appliance. I have learned that a little regular attention goes a long way.
Regular cleaning is essential. Food spills and grease can build up around the hinges. This buildup can make the hinges stiff. It can also cause them to operate poorly. Use a damp cloth and mild soap to wipe down the hinges. Ensure no debris obstructs their movement. Always dry the area completely afterward.
Inspect the hinges periodically. Look for any signs of wear or damage. Check for bends, cracks, or excessive rust. Addressing these issues early can prevent more serious problems. If you notice squeaking, a food-grade lubricant can help. Apply it sparingly to the hinge points. Do not use regular oil, as it can attract dirt. Always ensure the lubricant is safe for high-temperature use.
Avoid slamming the oven door. This puts unnecessary stress on the hinges. Repeated slamming can bend the hinge arms. It can also break the hinge springs inside the door. Always close the door gently. Teach others in your household to do the same. This simple habit saves your hinges from premature wear.
Proper use contributes to longer door life. Do not hang heavy items on the door handle. This can strain the hinges. It can also warp the door frame. Ensure the door seal, or gasket, is clean and intact. A damaged gasket leads to heat loss. This wastes energy. It also makes the oven less efficient. Keeping the outer glass clean is also part of good maintenance. If you’re looking for tips on keeping the exterior of your oven glass sparkling, read our guide on how to clean over glass door.
By following these maintenance tips, your GE oven door will operate smoothly for years. This will reduce the need for repairs. It also ensures your oven remains safe and effective for all your cooking needs. A well-maintained oven is a happy oven, and it certainly makes my cooking experience better.
FAQ Section
Q1: Why would I need to remove my GE oven door?
You might need to remove your GE oven door for several reasons. The most common reason is for deep cleaning, especially between the glass panels. It also helps with repairs. You might need to replace a damaged hinge. Sometimes, you need to replace the door itself. Accessing the oven’s interior for other maintenance tasks can also require door removal.
Q2: Are all GE oven doors removed the same way?
No, not all GE oven doors are removed the same way. GE manufactures various models with different hinge designs. Newer models often have flip-up hinge latches. Older models or specific designs might require lifting the door at a particular angle without visible latches. Always refer to your specific oven model’s owner’s manual for the precise method.
Q3: What if my GE oven door doesn’t have visible hinge latches?
If your GE oven door lacks visible hinge latches, it likely uses an alternative removal method. This often involves opening the door to a specific “service” angle, usually 10-15 degrees from closed. At this angle, the hinge arms align, allowing you to lift the door straight up and out. Some very old models simply lift straight up from a fully open position.
Q4: How heavy is a GE oven door?
GE oven doors vary in weight. Smaller, older models might weigh around 20-30 pounds. Larger or newer models with multiple glass panes can weigh 40-50 pounds or more. They are often awkward to handle due to their size. It is always recommended to have a second person help you. This prevents injury and damage to the door or oven.
Q5: Can I remove a GE oven door by myself?
Yes, you can often remove a GE oven door by yourself. Many individuals successfully complete this task alone. However, it is much easier and safer with two people. The door can be heavy and bulky. Having a helper ensures better stability and reduces the risk of dropping the door. Always assess your comfort level and strength before attempting it alone.
Q6: What tools do I need to remove a GE oven door?
For most GE oven door removals, you will need minimal tools. Essential items include sturdy work gloves for grip and protection. A flathead screwdriver might be useful for engaging some hinge latches. A towel or blanket is good to protect the door once it is removed. Most importantly, bring patience and caution to the task.
Conclusion
Successfully removing your GE oven door, even when it seems to lack traditional hinge latches, is a manageable task. We have covered the critical steps needed to approach this job safely and effectively. Understanding your specific GE model’s hinge design is the first key step. Whether your oven has flip-up locks or relies on a precise lifting angle, knowing the right technique prevents frustration and potential damage. Safety precautions, such as unplugging the oven and allowing it to cool, are absolutely vital.
Remember, reinstalling the door correctly is just as important as removing it. Proper alignment ensures your oven operates efficiently and safely. By following these clear instructions, you can confidently remove GE oven door without hinge latches, complete your cleaning or repair, and reinstall it with ease. A little DIY knowledge can go a long way in maintaining your home appliances. Do not hesitate to consult your oven’s manual for specific details. If you feel uncertain at any point, consider seeking professional assistance. Taking control of your home maintenance tasks empowers you. This approach also helps keep your kitchen in top working order.
- GE oven
- oven door removal
- hinge latches
- appliance repair
- DIY oven
- kitchen maintenance
- oven cleaning

Todd Martin
Senior Writer
With over 15 years of experience in home renovation and design, I started HEG to share what I’ve learned with homeowners who want to create spaces that are both beautiful and functional. I’ve always believed in a hands-on approach, and over the years, I’ve picked up practical solutions that actually work. Through HEG, I aim to make home improvement more approachable, sharing real tips that help you create a home you truly love.