· Todd Martin · Appliance Repair · 22 min read
How To Remove Lg Washing Machine Drain Hose
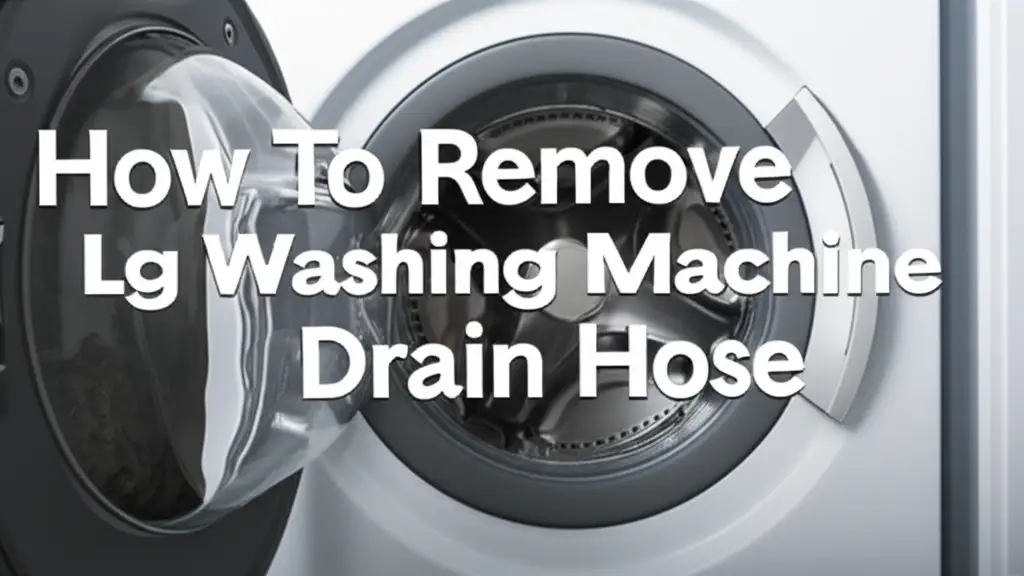
Safely Remove Your LG Washing Machine Drain Hose
Ever wondered how to tackle a specific appliance task yourself? Removing your LG washing machine drain hose can seem like a daunting task. However, with the right information and a methodical approach, it is a straightforward process. This guide provides clear steps to help you safely remove your LG washing machine drain hose.
This article will walk you through the essential preparations, tools you need, and a detailed step-by-step removal process. We will also cover how to handle common issues and offer advice on reattachment or replacement. By the end, you will feel confident in your ability to manage this specific home maintenance chore.
Takeaway:
- Always disconnect power and water supply before starting work.
- Prepare the right tools, including towels and a bucket for water.
- Carefully disconnect the hose from the standpipe/sink and the washer’s pump.
- Inspect the hose for damage or clogs during removal.
- Reattach new hoses securely to prevent leaks.
How do you remove an LG washing machine drain hose?
To remove an LG washing machine drain hose, first, unplug the machine and turn off water supply valves. Next, pull the machine away from the wall and place towels and a bucket under the hose connection point. Carefully detach the hose from the standpipe or utility sink. Then, locate and disconnect the hose from the washing machine’s rear or bottom pump connection, often secured by a clamp.
Why You Might Need to Remove Your LG Washing Machine Drain Hose
Your washing machine is an essential household appliance. Sometimes, issues arise that require direct intervention. Removing the drain hose is a common task for several reasons. Understanding these reasons helps you determine if this DIY project is right for you.
One primary reason for removal is a clogged drain hose. Lint, fabric softener residue, and small items can accumulate inside the hose. This buildup restricts water flow, leading to poor drainage or even standing water in the drum. A clogged hose often results in your washer not draining properly. If your LG washing machine is not draining, checking the drain hose is a good starting point. You can learn more about general washing machine drainage issues in this article: How to Drain Water in Whirlpool Washing Machine.
Another common reason is hose replacement. Over time, drain hoses can crack, split, or become brittle. These issues lead to leaks, which can damage your laundry room floor or surrounding structures. A damaged hose needs immediate replacement to prevent water damage. Regularly inspecting your washing machine parts helps you catch problems early.
You might also remove the hose for thorough cleaning or maintenance. Even without a full clog, residue can build up, leading to unpleasant odors. A deep clean of the hose can eliminate these smells and ensure optimal performance. This is part of broader washing machine maintenance, which includes tasks like cleaning the washer itself. For instance, How to Clean LG HE Washing Machine discusses similar maintenance. If you are cleaning your washing machine filter, the drain hose is a natural extension of that task. Check out our guide on How to Clean Top Load LG Washing Machine Filter for related tips.
Finally, you may need to remove the drain hose for machine relocation or other repairs. Moving the washer to a new spot requires disconnecting all hoses. Accessing internal components, like the drain pump, might also necessitate drain hose removal. Knowing how to safely remove it allows you to perform these tasks with confidence.
Safety First: Essential Preparations Before You Start
Before you even touch your LG washing machine’s drain hose, safety must be your top priority. Working with appliances that involve water and electricity carries risks. Taking proper precautions prevents injuries and protects your home from damage. I always ensure these steps are followed for peace of mind.
The first and most critical step is to disconnect the power supply. Reach behind your LG washing machine and unplug it from the wall outlet. This eliminates any electrical hazard during the removal process. Never work on an appliance that is still connected to power. If you cannot reach the plug, trip the circuit breaker that controls your laundry area.
Next, shut off the water supply to the washing machine. Look for the hot and cold water faucets usually located behind the machine. Turn the handles clockwise until they are fully closed. This prevents any water from flowing into the machine while you work. Even if the machine is off, water can still enter if the supply is open.
After shutting off the water, you need to drain any residual water from the machine. Even after a wash cycle, some water can remain in the drum or hoses. Most LG washing machines have a small drain hose or filter access near the bottom front. Place a shallow pan or towels underneath to catch the water. Allow all water to drain completely before proceeding. For a more general approach to draining, consider how you might Drain Water from Samsung Washing Machine Manually.
Finally, prepare your workspace. Pull your LG washing machine a few feet away from the wall to give yourself ample room to work. This also allows easier access to the back of the machine where the drain hose connects. Lay down old towels or a large tarp on the floor to absorb any spills. Have a bucket or shallow pan ready to collect any water that might spill when disconnecting the hose. These preparations ensure a clean and safe working environment.
Tools and Materials You Will Need
Having the right tools makes any DIY job much easier. When preparing to remove your LG washing machine drain hose, gather everything beforehand. This saves you time and frustration during the process. I always lay out my tools on a clean towel before I start.
Here is a list of the basic tools and materials you will likely need:
- Pliers: These are essential for loosening or tightening hose clamps. You might encounter spring clamps or screw clamps on your LG washer. Channel lock pliers or slip-joint pliers work well for most spring clamps. For screw clamps, regular pliers or a nut driver are suitable.
- Screwdriver (Phillips and/or Flathead): Many washing machines have a rear access panel secured by screws. You will need a screwdriver to remove these. Also, some hose clamps use a screw mechanism that requires a screwdriver.
- Bucket or Shallow Pan: Absolutely necessary for catching residual water. Even after draining the machine, some water will remain in the hose itself. A bucket placed under the connection point will prevent a mess.
- Old Towels or Rags: Keep plenty of absorbent towels handy. These are great for wiping up spills and protecting your floor. I usually have a stack ready to go.
- Flashlight or Headlamp: The area behind and under the washing machine can be dark. A good light source helps you see connections and clamps clearly. This is especially helpful if you are working in a dimly lit laundry room.
- Replacement Drain Hose (if needed): If you are removing the old hose because it is damaged, make sure you have a new one ready. Ensure it is the correct length and diameter for your LG washing machine model. Taking a picture of the old hose or checking your owner’s manual for specifications is a good idea.
- Zip Ties or Hose Clamps (if needed for replacement): If your new hose does not come with clamps, you will need new ones. Reusing old clamps is not always advisable, especially if they are corroded or worn.
Having these items within reach will streamline the entire drain hose removal process.
Step-by-Step Guide to Removing the Drain Hose
Now that you are ready with all safety precautions and tools, let’s get into the step-by-step process of how to remove your LG washing machine drain hose. This process typically involves two main disconnection points: the standpipe/utility sink and the washing machine itself. I find breaking it down into manageable steps makes it much easier.
1. Disconnect from the Drain Standpipe or Utility Sink
Your LG washing machine’s drain hose usually hooks over the edge of a standpipe or utility sink. This is the first point of disconnection.
- Locate the Hose: Find where the drain hose ends. It will be either in a tall PVC pipe (standpipe) or hooked onto the side of a laundry tub or utility sink.
- Remove the Hose: Simply lift the curved end of the hose out of the standpipe or off the sink. Be prepared for a small amount of water to drip out, especially if the hose has a P-trap curve at the end. Have your towels ready to wipe any drips.
- Position for Drainage (Optional but Recommended): Once detached from the standpipe, guide the hose end into your prepared bucket or shallow pan. This allows any water still inside the hose to drain out, preventing spills when you disconnect it from the machine.
2. Access the Rear of the Washing Machine
The next step is to access the connection point on the washing machine itself. This is typically at the rear of the unit.
- Pull Out the Washer: Gently pull your LG washing machine away from the wall. Ensure you have enough space to work comfortably behind it. Be careful not to trip over the power cord or water lines.
- Locate the Drain Hose Connection: On most LG front-load and top-load washing machines, the drain hose connects near the bottom rear. It might connect directly to the drain pump or a specific outlet port. Some models might have a rear access panel you need to remove first.
3. Disconnect from the Washing Machine
This is the most crucial part. The hose is secured to the washing machine with a clamp.
- Identify the Clamp Type: LG washing machines typically use either a spring clamp or a screw clamp.
- Spring Clamp: These look like metal rings with two “ears” that you squeeze together. Use your pliers to squeeze the ears, which expands the clamp.
- Screw Clamp: These have a screw head (usually Phillips or flathead) that you turn to loosen the band. Use your screwdriver to loosen it until the clamp is no longer tight around the hose.
- Loosen the Clamp:
- For a spring clamp, use your pliers to squeeze the clamp’s ears. Slide the loosened clamp a few inches down the hose, away from the machine’s connection point.
- For a screw clamp, turn the screw counter-clockwise until the clamp is loose.
- Remove the Hose: Once the clamp is loose or moved, gently pull the drain hose off the machine’s connection nipple. Be ready for more water to drain out, so ensure your bucket or towels are in place. Sometimes, the hose might be stuck due to suction or hardened residue. Gently twist and pull, but do not yank forcefully to avoid damaging the connection point on the machine. You might need to wiggle it a bit to break the seal.
- Inspect the Area: Once the hose is off, quickly inspect the drain pump’s outlet port for any remaining debris or damage. This is a good time to clear any obvious blockages you see. For context on drain pumps, you can look at related guides like How to Replace GE Washing Machine Drain Pump.
With the hose disconnected from both ends, you have successfully removed your LG washing machine drain hose.
Dealing with Stubborn or Stuck Hoses
Sometimes, removing a drain hose is not as simple as a gentle pull. Older hoses or those exposed to hard water can become stubbornly stuck to the machine’s connection point. This can be frustrating, but with patience and the right techniques, you can free it. I have faced this many times, and a bit of persistence always pays off.
The main reason for a stuck hose is often calcification or accumulated gunk. Mineral deposits from hard water can essentially glue the rubber hose to the plastic or metal nipple of the drain pump. Over time, the rubber itself can also harden and fuse to the connection point. Trying to pull too hard can damage the drain pump or tear the hose.
Here are some strategies for dealing with a stubborn drain hose:
- Twist and Wiggle: Instead of just pulling, try twisting the hose back and forth while pulling gently. This can help break any seal formed by mineral deposits or hardened rubber. Imagine unscrewing it, even though it is not threaded.
- Warm Water or Heat: You can try pouring some warm (not boiling) water over the connection point. The heat can slightly soften the rubber hose, making it more pliable. Be very careful with this method, especially if the connection is plastic. A hairdryer on a low setting might also work, but keep it moving to avoid overheating any single spot.
- Lubricant (Carefully): A small amount of dish soap or silicone spray applied around the connection point can act as a lubricant. Apply it to the outside of the hose where it meets the machine’s nipple. Let it sit for a few minutes to penetrate, then try twisting and pulling again. Ensure you do not get too much lubricant inside the drain system.
- Prying (Last Resort): If all else fails, you might need to gently pry the hose away from the connection point. Use a flathead screwdriver, but be extremely cautious. Insert the tip between the hose and the nipple, and gently twist the screwdriver to create a gap. Work your way around the connection. The risk here is damaging the plastic nipple on the drain pump, which is much more expensive to replace than the hose. Only use minimal force.
- Cut the Hose (If Replacing): If you are planning to replace the drain hose anyway, and it is truly stuck, you can carefully cut the hose lengthwise along the connection point using a utility knife. Make sure you cut only the hose and not the machine’s plastic nipple. Once cut, the hose will usually peel off easily. This method is only for when you are installing a new hose.
Remember to maintain a steady hand and prioritize not damaging the washing machine’s components. Patience is key when dealing with stubborn connections.
Inspecting and Maintaining Your Drain Hose
Once you have removed the drain hose, it is the perfect opportunity to inspect it thoroughly. Regular inspection and maintenance can prevent future clogs, leaks, and unpleasant odors. I always take a few minutes to check the hose whenever it is accessible.
What to Look For During Inspection:
- Cracks and Fissures: Carefully examine the entire length of the hose for any visible cracks, splits, or small holes. Pay close attention to the ends, as these areas experience the most stress. Even tiny cracks can lead to significant leaks during a wash cycle.
- Kinks and Bends: Check if the hose has any sharp kinks or permanent bends. These can restrict water flow, similar to a clog. Kinked hoses also weaken over time, making them more prone to splitting. Ensure the hose has smooth curves.
- Hardening or Brittleness: Feel the hose. Is the rubber still flexible, or does it feel hard and brittle? Hoses become brittle with age and exposure to hot water and detergents. Brittle hoses are much more likely to crack or break.
- Residue and Buildup: Look inside the hose for any slimy residue, lint, pet hair, or other debris. This buildup is a common cause of drainage issues. If you notice a foul odor from your washer, it often originates from this type of residue. This can also happen in dishwashers, as described in How to Fix an LG Dishwasher That Won’t Drain.
- Mold or Mildew: In humid environments, mold or mildew can grow inside the hose, contributing to odors.
Cleaning Your Drain Hose:
If your hose is in good physical condition but has buildup or odors, a good cleaning can extend its life.
- Rinse Thoroughly: Take the hose outdoors or to a large utility sink. Use a garden hose or a strong faucet to flush water through it. Force water from both ends to dislodge any loose debris.
- Use a Brush (Optional): For stubborn grime, you can use a long, flexible brush (like a bottle brush or a plumbing snake brush) to scrub the inside of the hose. Work it through the entire length.
- Soak in Solution: For heavy buildup or odors, you can soak the hose in a cleaning solution. A mixture of hot water and white vinegar, or hot water and baking soda, works well. Let it soak for an hour or two, then rinse thoroughly. Avoid harsh chemical cleaners, as they can damage the hose material.
- Dry Completely: Before reattaching, ensure the hose is completely dry to prevent mold or mildew regrowth. You can hang it up to air dry or wipe the inside as much as possible.
Regular inspection and cleaning ensure your LG washing machine continues to drain efficiently and without issues. This simple maintenance step can save you from bigger problems down the line.
Reattaching or Replacing Your LG Washing Machine Drain Hose
Once you have successfully removed your old drain hose, you are ready to either reattach it (if you were just cleaning it) or install a new one. This process is essentially the reverse of removal. Performing this step correctly ensures your washing machine operates without leaks. I always double-check my connections after reattaching the hose.
1. Prepare the New or Cleaned Hose
If you are installing a new drain hose, ensure it is the correct type and length for your LG washing machine. Check your washer’s manual or the old hose’s specifications. If you cleaned your old hose, make sure it is completely dry inside before proceeding.
2. Connect to the Washing Machine
This is the most critical connection. A tight seal here prevents leaks directly from the machine.
- Position the Clamp: If using a spring clamp, slide it onto the hose before attaching the hose to the machine. Push it far enough down so it does not interfere with the connection. If using a screw clamp, position it loosely around the hose.
- Attach the Hose: Carefully push the end of the drain hose onto the machine’s drain pump nipple. Ensure it slides all the way on, covering the nipple completely. It should form a snug fit.
- Secure the Clamp:
- Spring Clamp: Use your pliers to squeeze the clamp’s ears and slide it into its original position, right over the connection point. Release the pliers to let the clamp grip the hose firmly.
- Screw Clamp: Position the screw clamp over the connection point and use your screwdriver to tighten the screw. Tighten it firmly, but do not overtighten, as this can strip the screw or damage the hose/nipple. The hose should feel secure and not twist easily.
3. Position the Washing Machine
- Push the Washer Back: Gently push your LG washing machine back into its original position against the wall. Be careful not to kink or pinch the drain hose against the wall or other objects. Ensure there is enough slack for the hose to curve naturally.
4. Connect to the Drain Standpipe or Utility Sink
This is the final connection point.
- Insert the Hose: Place the curved end of the drain hose into the drain standpipe or hook it over the edge of your utility sink. Ensure the hose is inserted deeply enough into the standpipe (at least 6-8 inches) to prevent it from coming out during the wash cycle due to water pressure. Do not push it in too far, as this can create a siphon effect.
- Secure the Hose (Optional but Recommended): Some drain hoses come with a J-hook or a strap to secure them to the standpipe or wall. Use these to prevent the hose from flopping out during aggressive draining. If not, ensure it is stable.
5. Restore Power and Water
- Turn on Water Supply: Open the hot and cold water supply valves behind the washing machine by turning them counter-clockwise.
- Plug in the Machine: Plug your LG washing machine back into the electrical outlet.
- Test for Leaks: Before doing a full load of laundry, run a short test cycle (like a rinse and spin cycle) to check for any leaks at the hose connections. Watch closely at both the machine’s connection point and the standpipe. If you see any drips, immediately shut off power and water, then re-tighten the connections.
By following these steps, you can confidently reattach or replace your LG washing machine drain hose.
Common Issues and Troubleshooting During Removal
Even with a detailed guide, you might encounter unexpected problems when trying to remove your LG washing machine drain hose. Knowing how to troubleshoot these common issues can save you time and frustration. I have run into these challenges myself, and a quick solution is always helpful.
- Water Spills: This is the most frequent issue. Despite draining the machine, residual water often remains in the drain hose itself.
- Solution: Always have a bucket or shallow pan directly under the connection point on the machine when you pull the hose off. Keep a generous supply of towels on hand to quickly absorb any spills. If you anticipate a lot of water, consider manually draining the machine more thoroughly before starting. Remember, Will a Washing Machine Drain if Turned Off? can offer insights into the machine’s internal drainage.
- Stubborn Clamps: Hose clamps, especially spring clamps, can be very tight and difficult to open. Old screw clamps might have rusted or stripped screws.
- Solution: For spring clamps, ensure you are using the right type of pliers (channel lock or slip-joint pliers work best). Squeeze firmly on the “ears” and push the clamp down the hose. For screw clamps, make sure your screwdriver fits snugly to avoid stripping. If a screw is stripped, you might need to carefully cut the clamp with wire cutters, making sure not to cut the hose itself (only if replacing the hose).
- Hose Stuck to the Nipple: As discussed, mineral deposits can make the hose hard to remove.
- Solution: Try twisting and wiggling the hose while pulling. A small amount of warm water or lubricant (like dish soap) can help loosen it. As a last resort, if you are replacing the hose, carefully slice it lengthwise along the nipple with a utility knife to peel it off.
- Damage to the Drain Pump Nipple: This is a serious concern. Applying too much force when pulling or prying can break the plastic nipple on the drain pump.
- Solution: Always use gentle, controlled force. If the hose is stuck, use the twisting and lubricating methods rather than brute force. If the nipple breaks, you will likely need to replace the entire drain pump, which is a more involved repair.
- Incorrect Replacement Hose: If you are installing a new hose, it might not fit properly.
- Solution: Before purchasing, verify the diameter and length needed for your specific LG washing machine model. Taking the old hose to the store for comparison is a good idea. A hose that is too small will not fit, and one that is too large will not seal properly, leading to leaks.
- Leaking After Reattachment: Even if you think everything is secure, a small drip can appear.
- Solution: Immediately shut off power and water. Recheck the clamp at the machine’s connection point. Ensure it is tight and positioned correctly over the nipple. Sometimes, pushing the hose on further helps. Check the hose for any unnoticed cracks or punctures if it is an old hose being reattached.
Addressing these common problems ensures a smoother and more successful drain hose removal and reattachment process.
Frequently Asked Questions
Q1: How often should I check my LG washing machine drain hose?
You should visually inspect your LG washing machine drain hose at least once a year, or more often if you notice drainage problems or foul odors. Check for kinks, cracks, and any signs of wear. Proactive inspection helps prevent issues before they become major problems, saving you time and repair costs.
Q2: Can a clogged drain hose damage my washing machine?
Yes, a severely clogged drain hose can potentially damage your washing machine. It can cause the drain pump to overwork and eventually burn out, as it struggles to push water through the obstruction. Persistent standing water in the drum due to a clog can also lead to mold growth and unpleasant odors inside the machine.
Q3: What size drain hose does an LG washing machine use?
Most LG washing machines use a standard drain hose diameter, typically around 1 inch (2.5 cm) for the inner diameter. However, lengths can vary. It’s always best to check your specific model’s manual or measure your existing hose to ensure you purchase the correct replacement size and length.
Q4: Do I need special tools to remove the drain hose?
While a basic screwdriver and pliers are often sufficient, specific types like channel lock pliers can make dealing with spring clamps much easier. Having a bucket and towels is also essential for managing water spills. These common household tools are usually all you need for this task.
Q5: Can I clean my drain hose without removing it?
You can attempt to clean a drain hose without full removal by running a washing machine cleaning cycle with hot water and white vinegar or a dedicated cleaner. However, for a thorough cleaning or to remove stubborn clogs, disconnecting and manually flushing or brushing the hose is much more effective.
Q6: What if my washing machine still won’t drain after cleaning the hose?
If your LG washing machine still has draining issues after cleaning or replacing the drain hose, the problem likely lies elsewhere. Possible culprits include a clogged drain pump filter, a faulty drain pump, or an issue with the house’s plumbing system. You may need to investigate these other components.
Conclusion
Taking on household repairs like learning how to remove your LG washing machine drain hose can feel like a big step. However, by following a clear, step-by-step guide, it becomes an achievable and rewarding task. We covered everything from essential safety precautions and necessary tools to the actual removal process and troubleshooting common issues. You now have the knowledge to confidently inspect, clean, or replace your washing machine’s drain hose.
Remember, proper maintenance extends the life of your appliances and prevents inconvenient breakdowns. Regular checks of your drain hose, alongside other parts of your LG washing machine, contribute to its efficient operation. If you ever face drainage problems, you now know where to start your investigation. Empower yourself with these DIY skills and keep your home running smoothly.
- LG washing machine
- drain hose
- appliance repair
- washing machine maintenance
- DIY repair
- hose removal
- plumbing

Todd Martin
Senior Writer
With over 15 years of experience in home renovation and design, I started HEG to share what I’ve learned with homeowners who want to create spaces that are both beautiful and functional. I’ve always believed in a hands-on approach, and over the years, I’ve picked up practical solutions that actually work. Through HEG, I aim to make home improvement more approachable, sharing real tips that help you create a home you truly love.