· Katria Melrose · Air Fryer Cooking · 21 min read
How To Use Gourmia Air Fryer For Chicken Breast
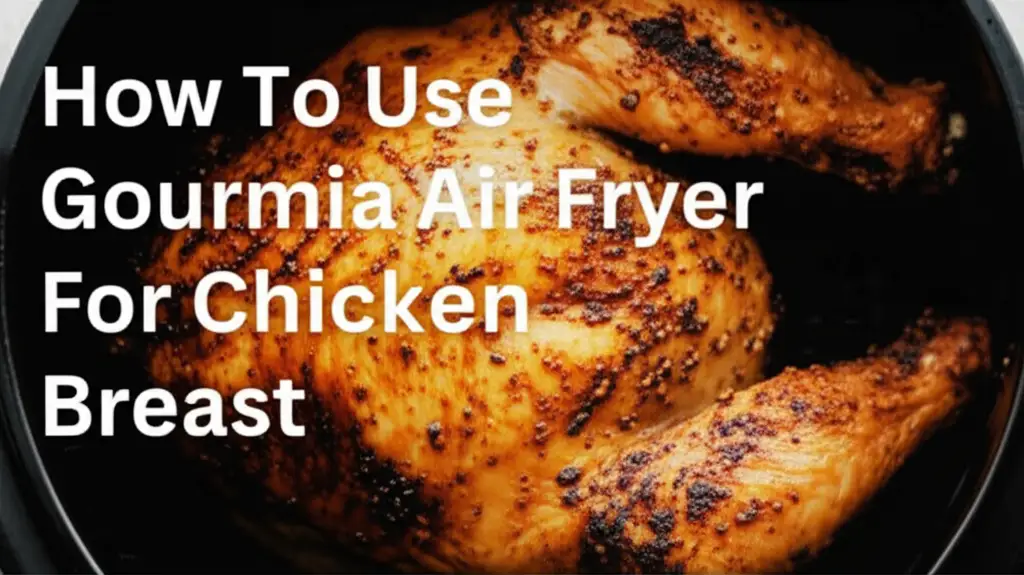
Gourmia Air Fryer Chicken Breast: A Complete Guide
The air fryer has become a kitchen favorite for many people. It cooks food fast and uses less oil. Today, we focus on making chicken breast in your Gourmia air fryer. This method creates tender, juicy chicken every time. It is perfect for quick dinners or meal prep. Cooking chicken breast in an air fryer saves time and delivers great taste. This guide will walk you through every step. You will learn how to prepare, cook, and season your chicken. We will also cover essential tips to avoid common cooking mistakes. Get ready to enjoy perfectly cooked chicken breast with your Gourmia air fryer.
Takeaway
- Prepare Chicken Properly: Ensure chicken breast is clean, patted dry, and seasoned well before cooking.
- Preheat Your Gourmia: Always preheat the air fryer to achieve even cooking and a good sear.
- Do Not Overcrowd: Arrange chicken in a single layer for proper air circulation and crispy results.
- Monitor Temperature: Use a meat thermometer to ensure chicken reaches 165°F (74°C) for safety.
- Rest After Cooking: Allow cooked chicken to rest for 5-10 minutes to lock in juices and flavor.
How do I use a Gourmia air fryer for chicken breast?
To use your Gourmia air fryer for chicken breast, first preheat it to 375°F (190°C). Season your chicken breast as desired. Place the chicken in a single layer in the air fryer basket. Cook for 15-20 minutes, flipping halfway through. Ensure chicken reaches an internal temperature of 165°F (74°C) before serving.
Understanding Your Gourmia Air Fryer for Poultry
Your Gourmia air fryer uses hot air circulation to cook food. This process is similar to a convection oven. It creates a crispy outside and a tender inside for chicken breast. Gourmia models come with various features. Some have preset functions for poultry. Others require manual temperature and time settings. Knowing your specific model helps you get the best results.
Before you start cooking, it is good to understand your appliance. The basket design in Gourmia air fryers promotes even airflow. This is why food cooks so well. The power of the Gourmia air fryer also matters. Higher wattage models often cook faster. You should always read your user manual. It provides specific instructions for your Gourmia air fryer model. I found my manual very helpful when I first started using it. If you are using your Gourmia air fryer for the first time, a quick review of its basic functions will be beneficial. You can find general guidance on how to use Gourmia air fryer for the first time to familiarize yourself with its controls.
Air frying chicken breast in a Gourmia is efficient. It reduces cooking time compared to traditional ovens. It also uses less oil, making your meal healthier. The crisper tray is crucial for airflow. It lifts the food, allowing air to circulate completely around it. This ensures uniform cooking and a crispy texture on all sides. Some people wonder if they can use the air fryer without this tray. However, for best results with chicken breast, always use the crisper tray. It ensures the fat drips away and the hot air moves around the food effectively.
The Gourmia air fryer also has precise temperature controls. You can adjust settings based on the thickness of your chicken breast. Some models even allow you to change the temperature display from Celsius to Fahrenheit. This feature is very helpful if you prefer one unit over the other. Knowing how to change Gourmia air fryer from C to F can make following recipes easier. This exact control helps prevent overcooking or undercooking your chicken. It gives you confidence in your cooking.
Essential Preparation for Perfect Chicken Breast
Proper preparation is the first step to delicious Gourmia air fryer chicken breast. This includes selecting the right chicken. It also involves cleaning it and seasoning it well. Good preparation ensures your chicken cooks evenly and tastes great. Do not skip these initial steps. They make a big difference in the final dish.
Selecting Quality Chicken Breast
Choose fresh chicken breasts for the best flavor and texture. Look for chicken that is pink and firm. Avoid any chicken that looks pale or has a strong smell. Boneless, skinless chicken breasts are easiest to use in the air fryer. They cook quickly and evenly. If your chicken breasts are very thick, you might want to slice them horizontally. This creates thinner cutlets. Thinner pieces cook faster and more uniformly. This also helps in absorbing marinades better. I always check the expiry date when buying chicken.
Cleaning and Patting Dry
Cleaning your chicken breast is an important step. Rinse the chicken breast under cool water. This removes any surface impurities. After rinsing, pat the chicken breasts completely dry with paper towels. This step is critical. Excess moisture prevents the chicken from getting a crispy exterior. It also helps seasoning stick better. Damp chicken will steam instead of crisp. Patting dry is a quick step that yields big results. For a detailed guide on how to clean chicken breast, you can refer to this resource: how to clean chicken breast. Ensure your chicken is as dry as possible before moving on to seasoning.
Seasoning for Flavor
Seasoning adds taste to your chicken breast. You can use a simple salt and pepper mix. Or, you can try more complex spice blends. Popular choices include paprika, garlic powder, onion powder, and dried herbs. Rub the seasoning evenly over both sides of the chicken. A little oil helps the seasoning adhere to the chicken. A light spray of olive oil or avocado oil is perfect. This also promotes a golden, crispy crust.
My Favorite Seasoning Blend for Gourmia Air Fryer Chicken Breast:
- 1 teaspoon smoked paprika
- 1/2 teaspoon garlic powder
- 1/2 teaspoon onion powder
- 1/4 teaspoon cayenne pepper (optional, for a kick)
- 1/2 teaspoon dried thyme or oregano
- Salt and black pepper to taste
- 1 tablespoon olive oil (for rubbing)
Mix these spices in a small bowl. Then, rub the mixture onto the dry chicken breasts. Make sure to cover all surfaces. You can also marinate your chicken. A marinade adds even more flavor and moisture. Allow at least 30 minutes for marinating. Overnight is even better. This infuses the chicken with deep flavor.
Preheating Your Gourmia for Optimal Results
Preheating your Gourmia air fryer is a vital step. It ensures your chicken breast starts cooking immediately at the correct temperature. This leads to a better sear and more even cooking. Skipping preheating can result in chicken that is less crispy. It might also cook unevenly. Think of it like preheating an oven. You would not put a cake into a cold oven. The same rule applies to your air fryer for chicken.
When you preheat, the air fryer basket and crisper tray reach the set temperature. This initial heat cooks the outside of the chicken quickly. It forms a delicious crust. It also helps to lock in the juices inside. Many Gourmia models have a specific preheat function. If yours does not, simply set the desired temperature and time for 3-5 minutes. This allows the internal components to warm up. Most Gourmia air fryers will give you an indication when they are preheated. You can learn more about this by checking how to know when Gourmia air fryer is preheated. This usually involves a beep or a light indicator.
I always preheat my Gourmia air fryer. I have found it makes a significant difference. The chicken breast cooks more consistently. It also gets that perfect golden-brown color. A good rule of thumb is to preheat for 5 minutes at the desired cooking temperature. For chicken breast, this is typically 375°F (190°C) or 400°F (200°C). The higher temperature helps achieve a crispier exterior. It also reduces overall cooking time slightly.
Preheating also helps prevent the chicken from sticking. When the surface is hot, the chicken sears quickly. This creates a barrier. This barrier reduces the chances of the chicken sticking to the basket. If you are concerned about sticking, you can lightly spray the basket with oil. Use a non-aerosol oil spray. Some aerosol sprays can damage the non-stick coating of your air fryer over time. A quick spray just before adding the chicken is usually enough.
Loading the Air Fryer Basket Correctly
Properly loading the air fryer basket is crucial for successful Gourmia air fryer chicken breast. Overcrowding is a common mistake. It leads to steamed chicken instead of crispy, evenly cooked chicken. The air fryer works by circulating hot air around the food. If the basket is too full, this air cannot move freely. This means some parts of the chicken will not cook well. They will also not get crispy.
Always place chicken breasts in a single layer. Make sure there is space between each piece. This allows the hot air to surround each chicken breast. If you have too many chicken breasts, cook them in batches. It might take a bit longer, but the results are worth it. Each batch will cook perfectly. For example, if you are cooking for a family, you may need to do two or three rounds. I often cook two large chicken breasts at a time in my Gourmia. This leaves enough space for proper airflow.
Consider the size and shape of your Gourmia air fryer basket. Some models have square baskets. Others have round ones. Arrange the chicken to fit the shape of your basket efficiently. Avoid stacking or overlapping the pieces. If your chicken breasts are very thick, you might need to flatten them slightly. You can use a meat mallet or the back of a pan for this. Flattening ensures more even cooking. It also helps them cook faster.
The crisper tray inside the basket is designed for air circulation. It allows fats and juices to drip below. This prevents the chicken from sitting in its own grease. You should always use this tray. Some people wonder if they can cook without it. However, for chicken breast, the crisper tray is essential for optimal results. It ensures your Gourmia air fryer chicken breast is crispy and not soggy. If you want to know more about the function of the crisper tray, you can check out can you use the Gourmia air fryer without the crisper tray. This component is key to the air fryer’s unique cooking ability.
You can also use parchment paper liners or aluminum foil. These can make cleanup easier. However, be careful not to block airflow. Do not cover the entire basket bottom. Leave plenty of space around the edges for air to circulate. I usually prefer not to use liners for chicken breast. The direct contact with the crisper tray helps with browning. If you are considering using aluminum foil, you can read can I put aluminum foil in Gourmia air fryer for guidelines on safe usage. Proper loading guarantees that your Gourmia air fryer chicken breast comes out perfectly cooked and wonderfully crispy every time.
Cooking Time and Temperature for Gourmia Air Fryer Chicken Breast
Setting the correct cooking time and temperature is vital for delicious Gourmia air fryer chicken breast. The goal is perfectly cooked, juicy chicken, not dry and tough meat. Many factors influence cooking time. These include the thickness of your chicken breasts and your air fryer model. Start with recommended settings and adjust as needed.
Standard Cooking Settings
For most Gourmia air fryer models, I recommend cooking chicken breast at 375°F (190°C) or 400°F (200°C).
- 375°F (190°C): This temperature works well for average-sized chicken breasts. It allows for a more gradual cook, ensuring juiciness. Cook for about 15-20 minutes.
- 400°F (200°C): This higher temperature provides a crispier exterior. It is ideal for thinner cutlets or if you like a more pronounced sear. Cook for about 12-18 minutes.
Remember to flip the chicken breast halfway through the cooking time. This ensures both sides cook evenly. It also helps achieve a consistent golden-brown color. For example, if cooking for 18 minutes, flip at the 9-minute mark. My Gourmia air fryer typically cooks average-sized chicken breasts (about 6-8 oz each) in about 16-18 minutes at 380°F (195°C).
Some Gourmia models allow you to change the temperature display from Celsius to Fahrenheit, which can be useful if you’re following recipes that use a different unit. If you need to adjust this setting, there are instructions available on how to change Gourmia air fryer from C to F. This small adjustment can make your cooking process smoother and more accurate. Always make sure your Gourmia air fryer is properly preheated before you place the chicken inside. This helps create that perfect crispy crust from the start.
Checking Doneness
The most important part of cooking chicken is ensuring it reaches a safe internal temperature. Chicken breast must reach 165°F (74°C) to be safe to eat. Use a meat thermometer to check this. Insert the thermometer into the thickest part of the chicken breast. Avoid touching any bone if applicable. If the chicken is not yet at 165°F, return it to the air fryer. Cook for an additional 2-3 minutes. Then check again.
Visual cues can also help. Cooked chicken breast should be opaque throughout. There should be no pink areas. The juices should run clear when you pierce the chicken. However, relying solely on visual cues can be misleading. Always use a thermometer for food safety. Overcooking chicken breast will make it dry and tough. Therefore, pull it out as soon as it hits 165°F. Each Gourmia air fryer might cook slightly differently. Start with the suggested times. Then adjust based on your specific model and the thickness of your chicken.
Achieving Crispy Skin and Juiciness
Making Gourmia air fryer chicken breast crispy on the outside and juicy inside is the ultimate goal. It requires a few simple techniques. These methods ensure a great texture and rich flavor. Getting this balance right elevates your air-fried chicken.
First, patting the chicken dry is paramount. As I mentioned earlier, moisture on the surface creates steam. Steam makes food soggy, not crispy. Use paper towels to absorb all surface liquid. This allows the hot air to crisp the exterior effectively. Do not skip this step. It is a fundamental part of getting a good crust.
Next, a light coating of oil helps with crisping and browning. A very thin layer of olive oil or avocado oil is sufficient. You can brush it on or use a non-aerosol spray bottle. The oil helps conduct heat to the chicken surface. It also prevents the chicken from sticking to the basket. Too much oil, however, can make the chicken greasy. It can also create smoke. Use just enough to coat lightly. I often spray my chicken with oil after seasoning. This helps the spices adhere better. It also promotes a beautiful golden-brown color.
Proper airflow inside the Gourmia air fryer is also key. Arrange chicken breasts in a single layer in the basket. Leave space between each piece. Overcrowding blocks hot air circulation. This leads to uneven cooking and less crispiness. If you have many pieces, cook them in batches. This might take a little longer. But the outcome will be far superior. I prioritize spacing when cooking chicken breast. This ensures every piece gets equal attention from the hot air.
Finally, flipping the chicken halfway through cooking is essential. This ensures both sides receive even exposure to the circulating hot air. It promotes uniform browning and crispiness on all surfaces. If you do not flip, one side might be golden and crisp while the other remains pale. This simple action helps achieve that desirable crispy exterior all around. Combining these tips will help you master the art of making perfectly crispy and juicy Gourmia air fryer chicken breast.
Post-Cooking Care and Resting
Once your Gourmia air fryer chicken breast reaches 165°F (74°C), it is ready. But your work is not quite done. Proper post-cooking care ensures maximum juiciness and flavor. This involves resting the chicken. It also involves knowing how to carve it. This step is often overlooked. However, it is critical for a truly delicious result.
Why Resting Is Essential
After cooking, the internal temperature of the chicken continues to rise slightly. This is called carryover cooking. More importantly, the juices inside the chicken redistribute. When meat cooks, its muscle fibers contract. This pushes the juices to the center. If you cut into the chicken immediately, these juices will flow out. This leaves you with dry chicken.
Resting allows the muscle fibers to relax. This lets the juices spread back throughout the meat. The result is a more tender and juicy chicken breast. I always rest my chicken breast. I have noticed a huge difference in moisture content. The resting time for chicken breast is usually 5 to 10 minutes. Cover the chicken loosely with aluminum foil during this time. This keeps it warm without steaming it.
Serving Suggestions
After resting, you can slice or shred your Gourmia air fryer chicken breast. Thin slices are great for salads or sandwiches. Larger slices work well as a main dish. You can serve it with roasted vegetables, a side of quinoa, or a fresh salad. The simplicity of air-fried chicken breast makes it versatile. It pairs well with many flavors.
Ideas for Serving Gourmia Air Fryer Chicken Breast:
- Main Course: Serve with steamed broccoli and brown rice.
- Salad Topper: Slice thinly and add to your favorite green salad.
- Sandwiches/Wraps: Shred or slice for a quick and healthy lunch.
- Pasta Dishes: Dice and mix into pasta with your preferred sauce.
- Meal Prep: Cook a batch and store for quick meals throughout the week.
The beauty of Gourmia air fryer chicken breast is its simplicity. It offers a lean protein base. You can customize it with different seasonings and sauces. Enjoy the juicy results of your perfectly cooked chicken!
Troubleshooting Common Air Fryer Chicken Breast Issues
Even with the best instructions, you might encounter issues. This is normal. Understanding common problems and their solutions helps you master Gourmia air fryer chicken breast. My own cooking journey has had its share of learning moments. Here are some frequent concerns and how to address them.
Dry or Rubbery Chicken
This is the most common complaint with chicken breast. It happens from overcooking.
- Solution: Always use a meat thermometer. Pull the chicken out as soon as it hits 165°F (74°C). Not a degree more. Also, ensure you pat the chicken dry and use a light oil coating. This creates a barrier that locks in moisture. Resting the chicken for 5-10 minutes after cooking is also crucial. This allows juices to redistribute, making the chicken more tender. I found that reducing cooking time by a minute or two initially helped me avoid dryness.
Uneven Cooking or Browning
If some parts of your chicken are crispier or more cooked than others, it usually relates to airflow or placement.
- Solution:
- Do Not Overcrowd: Ensure chicken breasts are in a single layer with space between them. If necessary, cook in batches.
- Flip Halfway: Always turn the chicken over halfway through the cooking process. This ensures even exposure to hot air on both sides.
- Even Thickness: If your chicken breasts are of varying thickness, flatten the thicker parts. This promotes uniform cooking. You can pound them lightly with a meat mallet. This ensures all parts cook at the same rate.
Chicken Sticking to the Basket
Chicken sticking can be frustrating and make cleanup harder.
- Solution:
- Preheat: Always preheat your Gourmia air fryer. A hot surface helps to sear the chicken immediately, preventing sticking.
- Light Oil Spray: Lightly spray the air fryer basket with a non-aerosol cooking oil spray before adding chicken. You can also lightly oil the chicken itself.
- Do Not Flip Too Early: Let the chicken cook for a few minutes before attempting to flip. It often releases more easily once a crust has formed.
Chicken Not Getting Crispy
This usually indicates too much moisture or insufficient airflow.
- Solution:
- Pat Dry Thoroughly: This is the most important step for crispiness.
- Do Not Overcrowd: Again, give the chicken space.
- Use Higher Temperature: For extra crispiness, you can try raising the temperature to 400°F (200°C) for the last 2-3 minutes of cooking. Watch closely to prevent burning.
- Avoid Marinades with Too Much Liquid: While marinades add flavor, very wet marinades can hinder crisping. Pat off excess marinade before air frying.
By addressing these common issues, you can consistently achieve excellent Gourmia air fryer chicken breast results. Each cook is a chance to learn and refine your technique.
Cleaning Your Gourmia Air Fryer After Cooking Chicken
Cleaning your Gourmia air fryer after making chicken breast is important. It keeps your appliance in good condition. It also prevents food odors and buildup. A clean air fryer works more efficiently. Plus, it is more hygienic. I always clean my air fryer soon after cooking. This makes the job much easier.
First, unplug your Gourmia air fryer and let it cool completely. Never clean a hot air fryer. The heating element can be very hot. Once cool, remove the air fryer basket and crisper tray. These are usually dishwasher safe. Check your Gourmia model’s manual to confirm. If not, they are easy to hand wash.
For the basket and crisper tray:
- Wash with warm, soapy water. Use a non-abrasive sponge or cloth.
- For stubborn stuck-on food, you can soak them for about 15-20 minutes. This softens the residue.
- Avoid using metal scouring pads or harsh chemicals. These can damage the non-stick coating.
- Rinse thoroughly and dry completely before reassembling.
For the main unit (outside and inside):
- Wipe the exterior with a damp cloth. A little dish soap can help remove grease.
- For the interior, gently wipe down the visible heating element and inside walls. Use a damp cloth or sponge. You might need a small brush for hard-to-reach spots.
- Do not submerge the main unit in water. This will damage the electrical components.
- Make sure no water gets into the air vents.
Regular cleaning prevents grease buildup. This buildup can cause smoke during future cooking. It can also affect the taste of your food. Cleaning after each use ensures your Gourmia air fryer is ready for your next meal. For more comprehensive cleaning instructions, you can refer to guides like how to clean air fryer. Keeping your appliance clean extends its lifespan. It also ensures consistent cooking performance.
FAQ Section
How long does chicken breast take in a Gourmia air fryer?
Average-sized chicken breasts (6-8 oz) typically take 15-20 minutes in a Gourmia air fryer. Cook them at 375-400°F (190-200°C). Thicker pieces may require more time. Always check the internal temperature with a meat thermometer. Ensure it reaches 165°F (74°C) for food safety. Flip the chicken halfway through for even cooking.
Do I need to flip chicken breast in an air fryer?
Yes, it is highly recommended to flip chicken breast halfway through its cooking time in an air fryer. Flipping ensures even cooking and browning on both sides. It helps achieve a consistent crispy texture. It also promotes uniform heat distribution around the entire piece of chicken. This simple step makes a big difference.
Can I cook frozen chicken breast in a Gourmia air fryer?
Yes, you can cook frozen chicken breast in a Gourmia air fryer. The cooking time will be longer than for thawed chicken. Expect to add 10-15 minutes to the total cooking time. Cook at a slightly lower temperature, around 350°F (175°C), initially. Then increase the temperature towards the end. Always use a meat thermometer to ensure it reaches 165°F (74°C).
What internal temperature should air fryer chicken breast reach?
Air fryer chicken breast must reach an internal temperature of 165°F (74°C). Use a reliable meat thermometer to check this. Insert the thermometer into the thickest part of the chicken. Do not touch any bone. Reaching this temperature ensures the chicken is safe to eat. Remove chicken promptly at this temperature to avoid dryness.
How do I prevent chicken breast from drying out in the air fryer?
To prevent chicken breast from drying out, avoid overcooking. Use a meat thermometer to pull chicken at exactly 165°F (74°C). Pat chicken dry before cooking to encourage crisping, not steaming. Apply a light oil coating. Also, let the cooked chicken rest for 5-10 minutes. This allows juices to redistribute, keeping the meat moist and tender.
Conclusion
Using your Gourmia air fryer for chicken breast is a fantastic way to prepare healthy and delicious meals. You have learned every key step in this guide. We covered proper preparation, including seasoning and patting dry. We also discussed preheating your Gourmia. This ensures immediate cooking at the right temperature. You now understand the importance of not overcrowding the basket. This allows for optimal airflow.
We also looked at precise cooking times and temperatures for perfect Gourmia air fryer chicken breast. Using a meat thermometer is key for safety and juiciness. Remember to rest the chicken after cooking. This locks in all the flavorful juices. We addressed common troubleshooting issues. We also reviewed essential cleaning tips. This keeps your air fryer performing its best. With these insights, you are ready to cook delicious Gourmia air fryer chicken breast every time. Experiment with different seasonings to find your favorite flavors. Enjoy the ease and deliciousness that your Gourmia air fryer brings to your kitchen. Start air frying today and discover a new favorite meal!
- gourmia air fryer
- chicken breast recipes
- air fryer cooking
- healthy meals

Katria Melrose
Cleaning Specialist
With over 12 years of experience in commercial cleaning and a certification in workplace ergonomics, I’ve developed a deep understanding of what makes a workspace truly productive. At HEG, I specialize in helping people transform their home offices into clean, efficient, and comfortable environments. Through smart cleaning routines and strategic organization solutions, I empower readers to create spaces that support focus, comfort, and success—one well-organized desk at a time.