· Todd Martin · Air Fryer Cooking · 21 min read
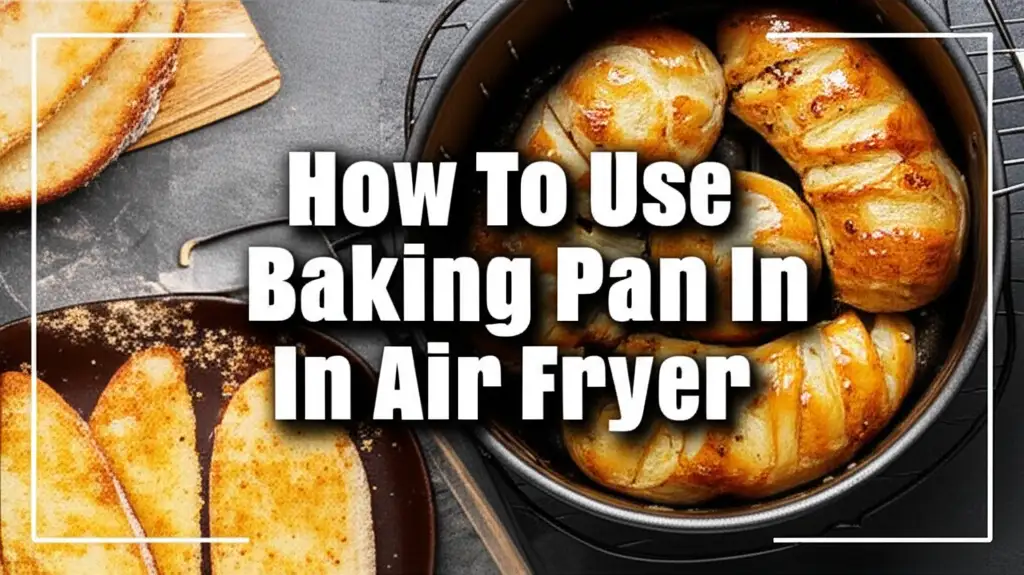
How To Use Philips Air Fryer Grill Pan
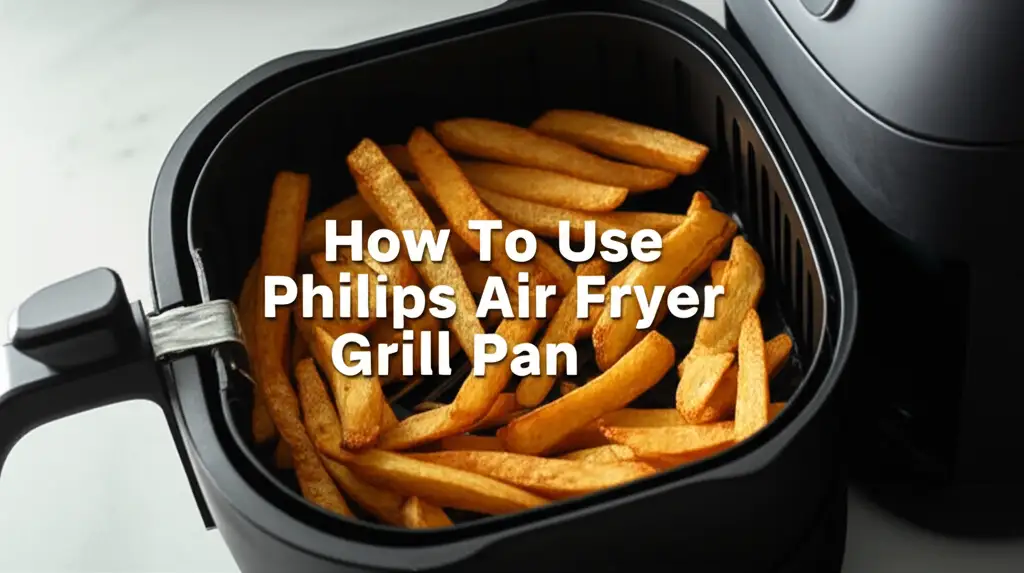
How To Use Philips Air Fryer Grill Pan
Have you ever wondered how to bring that perfect grill mark and smoky flavor to your food using an air fryer? Many home cooks seek the char and crispness of grilling without firing up an outdoor barbecue. The Philips Air Fryer Grill Pan offers a fantastic solution. This accessory transforms your air fryer into a versatile indoor grilling machine. I will guide you through using this innovative pan to create delicious, grill-style meals right in your kitchen.
This article provides a comprehensive guide on using your Philips Air Fryer Grill Pan. We will cover preparing the pan, specific cooking methods, and tips for achieving optimal grilling results. You will also learn about cleaning and maintaining your grill pan for long-term use. Get ready to elevate your air frying experience and enjoy the benefits of indoor grilling.
Takeaway
- Preheat your Philips Air Fryer Grill Pan before adding food.
- Brush food lightly with oil for better browning and grill marks.
- Do not overcrowd the grill pan; cook in batches if needed.
- Flip food halfway through cooking for even results.
- Clean the grill pan promptly after use for easy maintenance.
Using the Philips Air Fryer Grill Pan involves preheating the pan, lightly oiling your food, arranging items in a single layer, and flipping halfway through cooking to achieve beautiful grill marks and evenly cooked, delicious results, mimicking outdoor grilling indoors.
Understanding Your Philips Air Fryer Grill Pan
The Philips Air Fryer Grill Pan is a specialized accessory designed to fit various Philips air fryer models. It features a ridged surface, similar to a traditional grill pan, which allows fats to drip away. This design helps create distinctive grill marks and promotes airflow around the food. The grill pan provides a convenient way to achieve grilled textures and flavors without a large outdoor grill. It offers a healthier cooking option as it requires minimal oil.
This pan is typically made from non-stick materials, ensuring easy food release and simple cleanup. Its primary function is to replicate the searing and charring effects of grilling. You can cook a variety of foods, from meats and vegetables to sandwiches. Understanding the design helps you use it effectively. The ridges lift food, allowing hot air to circulate completely around each piece. This promotes even cooking and prevents food from sitting in its own juices. The Philips Air Fryer Grill Pan is a valuable addition for anyone wanting to expand their air fryer’s capabilities.
Benefits of Using the Grill Pan
Using the Philips Air Fryer Grill Pan brings many advantages to your cooking. One major benefit is achieving authentic grill marks and flavors indoors. This eliminates the need for an outdoor grill, especially useful in small spaces or bad weather. The pan’s design helps drain excess fat, making your meals healthier. Food cooked on the grill pan often has a pleasant crisp exterior and juicy interior.
Another benefit is speed and efficiency. Air fryers cook food quickly, and the grill pan leverages this speed for rapid grilling. You can enjoy grilled chicken, fish, or vegetables in a fraction of the time it takes on a conventional grill. Cleanup is also simpler compared to scrubbing a BBQ grate. The non-stick surface makes washing up easy. This combination of speed, health benefits, and flavor makes the grill pan a favorite accessory for many. It truly expands the versatility of your air fryer, letting you explore new recipes and cooking styles.
Compatibility and Installation
Before you begin, ensure your Philips Air Fryer Grill Pan is compatible with your specific air fryer model. Philips produces different sizes and models of air fryers, and accessories vary. Always check your air fryer’s manual or the grill pan packaging for compatibility details. Using an incompatible accessory can lead to poor cooking results or even damage. Once you confirm compatibility, installing the grill pan is straightforward.
You simply replace the standard air fryer basket or base with the grill pan. First, remove the existing basket or drawer from your air fryer. Then, carefully place the grill pan into the air fryer drawer, ensuring it sits securely. It should fit snugly without wobbling. Some models may require you to remove a previous base plate before inserting the grill pan. Always refer to your air fryer’s specific instructions for the correct installation method. Proper installation ensures safe operation and optimal cooking performance.
Preparing Your Grill Pan and Food
Proper preparation is crucial for getting the best results from your Philips Air Fryer Grill Pan. This involves getting the pan ready and preparing your food appropriately. A little effort here significantly improves the final dish. The goal is to ensure even cooking, prevent sticking, and enhance flavor. I always take a few extra minutes to do these steps.
Preparing the pan and food correctly helps create those desirable grill marks and juicy textures. It also makes cleanup easier later. Think of it as setting the stage for a great cooking performance. Missing these steps can lead to unevenly cooked food or food sticking to the pan. Your initial setup directly impacts the quality of your grilled meals.
Preheating the Grill Pan
Preheating is a vital step when using your Philips Air Fryer Grill Pan. Just like a traditional grill, the grill pan needs to reach the correct temperature before food touches its surface. This ensures immediate searing, which creates those attractive grill marks and locks in juices. Preheating also helps prevent food from sticking. I usually preheat for about 3-5 minutes, depending on the air fryer model and desired temperature.
To preheat, insert the grill pan into your air fryer drawer. Set your air fryer to the recommended grilling temperature, which often ranges from 350°F to 400°F (175°C to 200°C). Let it run for the specified preheating time. You might notice a slight smoke initially, which is normal as the pan heats up. A hot pan is key to achieving that perfect sear and crispy finish. Do not skip this step; it makes a big difference.
Oiling the Food or Pan
Although air frying is known for using less oil, a small amount is beneficial for grilling. Oiling helps improve browning and ensures those distinct grill marks form. You have two main options: oiling the food or lightly oiling the grill pan. I prefer to brush the food directly. This helps control the amount of oil used.
If oiling the food, brush a thin layer of high-smoke-point oil (like avocado, grapeseed, or canola oil) directly onto your ingredients. Do this just before placing them on the hot grill pan. If oiling the pan, use a silicone brush or a paper towel lightly dipped in oil. Carefully wipe the ridges of the preheated grill pan. Be very careful as the pan will be hot. Avoid using aerosol sprays, as they can damage the non-stick coating over time. The oil creates a better surface for searing.
Marinating and Seasoning
Marinating and seasoning your food before grilling adds tremendous flavor. Marinades tenderize meats and infuse them with deep taste. Always marinate food in the refrigerator. Ensure your marinade does not contain ingredients that burn easily at high temperatures, like excessive sugar. Patting marinated food dry before grilling can help achieve a better sear. Excess moisture can steam rather than grill.
Seasoning with dry rubs or spices is another excellent way to enhance flavor. Apply rubs generously to all surfaces of your food. For best results, let the seasoning sit on the food for at least 15-30 minutes before grilling. This allows the flavors to penetrate. Consider the thickness of your food when seasoning. Thicker cuts might benefit from longer marination or heavier seasoning. Proper seasoning makes a significant difference in the final taste of your grilled dishes.
Step-by-Step Guide to Grilling with Philips Air Fryer
Grilling with your Philips Air Fryer Grill Pan is a straightforward process once you know the steps. Following a clear sequence ensures safe and effective cooking. This method brings restaurant-quality grill marks and flavors right to your home kitchen. I will walk you through each stage, from loading food to the final flip.
Mastering these steps means consistently great results. You will find that cooking with the grill pan becomes intuitive very quickly. It’s about precision and understanding how your air fryer functions with this unique accessory. Let’s dive into the practical application.
Loading Food onto the Grill Pan
Once your grill pan is preheated and lightly oiled, it is time to load your food. Arrange the food in a single layer on the grill pan. Do not overcrowd the pan. Overcrowding reduces airflow, which is essential for air frying and grilling. It can lead to steamed rather than grilled results. Leave space between each piece for hot air to circulate freely. For larger items, you might need to cook in batches. This ensures even cooking and promotes better browning.
Place items carefully onto the hot pan using tongs. This protects your hands from the heat. Try to lay items parallel or perpendicular to the ridges to maximize contact for clear grill marks. For example, lay asparagus spears across the ridges. Or, place a chicken breast flat against the surface. Proper placement helps achieve those visually appealing char lines.
Setting Time and Temperature
Setting the correct time and temperature is crucial for perfect grilling results. Most grilling recipes in an air fryer call for temperatures between 350°F and 400°F (175°C to 200°C). The exact temperature depends on the type and thickness of your food. For thinner items like shrimp or vegetable slices, a higher temperature for a shorter time might work best. Thicker cuts, like chicken breasts or steaks, might need a slightly lower temperature for longer cooking.
Cooking times vary widely. A general rule for many items might be 8-15 minutes, flipping halfway. Always consult a reliable recipe or your air fryer’s cooking guide for specific recommendations. I often use a meat thermometer for proteins to ensure they reach a safe internal temperature. Remember, air fryers cook faster than conventional ovens. Start with less time and add more if needed. How to use Philips Air Fryer for the first time provides general guidance on initial air fryer setup and usage, which can be helpful.
Flipping Food for Even Grilling
To achieve even cooking and prominent grill marks on both sides of your food, you must flip it halfway through the cooking process. This ensures that both sides of your food get direct contact with the hot grill pan surface. It also allows hot air to circulate around previously unexposed areas. Flipping helps prevent one side from becoming overly browned or dry while the other remains undercooked.
Use heat-resistant tongs to carefully turn each piece of food. Be gentle to avoid damaging the grill pan’s non-stick coating. After flipping, return the drawer to the air fryer and continue cooking for the remaining time. For foods that require multiple flips, like thick vegetables or certain meats, plan your cooking time accordingly. Consistent flipping ensures thorough and even grilling.
Optimizing Results: Tips for Perfect Grilling
Achieving perfect grilling results with your Philips Air Fryer Grill Pan goes beyond basic steps. There are specific techniques and considerations that can significantly improve your dishes. I have learned these tips through trial and error, and they consistently lead to better food. These optimizations focus on heat management, food preparation, and understanding your appliance.
Applying these advanced tips helps you get the most out of your grill pan. You will produce food with excellent texture, flavor, and those desired grill marks. It’s about fine-tuning your approach for superior culinary outcomes. Let’s explore how to elevate your air-fried grilled meals.
Temperature Control and Consistency
Maintaining consistent temperature is vital for even grilling. While your air fryer has a thermostat, varying food thickness and pan loading can affect actual cooking temperatures. Always allow your air fryer to fully preheat before adding food. This creates a stable initial cooking environment. For denser items, a slightly lower temperature for a longer time can ensure the inside cooks fully without burning the outside.
For delicate items, a higher temperature for a shorter burst creates a quick sear. Avoid opening the air fryer drawer too frequently, as this causes temperature drops. Every time you open it, heat escapes, extending cooking time and potentially leading to uneven results. Trust the process and use the recommended times. If you need to check doneness, do it quickly.
Avoiding Overcrowding
Overcrowding the grill pan is one of the most common mistakes people make. It might seem efficient to cook everything at once, but it hinders proper air circulation. When the pan is too full, hot air cannot move freely around each piece of food. This leads to steaming rather than grilling or frying. Food will lack crispness and those desirable grill marks.
To avoid this, cook in batches if necessary. Give each piece of food ample space on the grill pan. This allows the hot air to circulate completely, ensuring all sides cook evenly and crisp up beautifully. While it takes a little longer to cook in batches, the quality of the final product is far superior. Patience here pays off in texture and flavor.
Managing Smoke and Odors
Grilling, even indoors, can sometimes produce smoke or odors, especially with fattier foods. The Philips Air Fryer Grill Pan helps render fat, but some smoke is still possible. To manage this, ensure your kitchen is well-ventilated. Turn on your range hood fan or open a window during grilling. For foods prone to high smoke, consider reducing the cooking temperature slightly or cutting down on oil.
Dripping fats can burn and create smoke. Regularly cleaning your air fryer’s main basket and drip pan helps prevent buildup that can cause smoke. If you experience excessive smoke, check the How to stop Philips Air Fryer from smoking guide for detailed troubleshooting. Using leaner cuts of meat for grilling can also minimize smoke. Proper ventilation is always your first line of defense.
Achieving Perfect Grill Marks
The hallmark of successful grilling is achieving clear, beautiful grill marks. Several factors contribute to this. First, ensure your grill pan is thoroughly preheated. A hot pan immediately sears the food. Second, light oiling of the food surface promotes browning and prevents sticking, allowing the grill ridges to make contact. Third, do not move the food once placed until it is time to flip. Letting it sit undisturbed allows the heat transfer to create those lines.
Finally, for more pronounced marks, you can slightly press down on the food with a heat-resistant spatula for a few seconds when you first place it on the pan. However, avoid excessive pressure, as this can squeeze out juices. Ensure food is reasonably flat and has good contact with the ridges. Consistent heat and minimal disturbance are key.
Popular Recipes to Try with Your Grill Pan
The Philips Air Fryer Grill Pan opens up a world of culinary possibilities. It is incredibly versatile, allowing you to prepare a wide array of grilled dishes. I love experimenting with different ingredients to see how they perform on the grill pan. From savory proteins to vibrant vegetables, the results are often healthier and full of flavor. These recipes are just a starting point for your grilling adventures.
Exploring various foods helps you understand the grill pan’s capabilities. You can adapt many traditional grilled recipes for your air fryer. The key is to adjust cooking times and temperatures to suit the air fryer’s efficiency. Let’s look at some popular and delicious options to get you started.
Grilled Chicken and Meats
Grilling chicken breasts, thighs, or thin steaks on your Philips Air Fryer Grill Pan yields fantastic results. For chicken, marinate it first for maximum flavor and tenderness. Chicken breasts might take 12-18 minutes at 375°F (190°C), flipping halfway. Ensure they reach an internal temperature of 165°F (74°C). For steaks, thicker cuts work best for achieving a good sear while remaining juicy inside. Cook steaks to your desired doneness, using a meat thermometer.
Rub or marinate your meat. Brush a little oil on the meat itself. Place it on the preheated grill pan. Cook until grill marks appear, then flip. The direct heat of the grill pan combined with the circulating hot air creates a delicious crust and a tender interior. Lean cuts are generally better for reducing smoke.
Grilled Vegetables
The grill pan is excellent for vegetables. Asparagus, bell peppers, zucchini slices, onions, and corn on the cob all grill beautifully. Toss vegetables with a little olive oil, salt, and pepper, or your favorite herbs and spices. Place them in a single layer on the preheated grill pan. Thinly sliced vegetables cook quickly.
Asparagus might take 6-10 minutes at 375°F (190°C). Bell peppers and zucchini slices could take 8-12 minutes. Flip halfway to ensure even grilling. The grill marks add a nice char and visual appeal. Grilled vegetables retain their crispness while gaining a smoky flavor. They make a healthy and delicious side dish or a main course.
Grilled Seafood
Delicate seafood, like shrimp, salmon fillets, or scallops, grills wonderfully on the Philips Air Fryer Grill Pan. Seafood cooks very quickly, so watch it closely to prevent overcooking. Marinate shrimp or scallops for 15-20 minutes. Salmon fillets benefit from a simple seasoning of salt, pepper, and lemon.
Shrimp might cook in 5-8 minutes at 375°F (190°C), flipping once. Salmon fillets typically take 8-12 minutes, depending on thickness. Ensure the fish flakes easily with a fork when done. The grill pan imparts a lovely seared texture without drying out the seafood. It is a fantastic way to prepare healthy and flavorful fish dishes.
Sandwiches and Paninis
Beyond meats and vegetables, your grill pan can make fantastic grilled sandwiches and paninis. Simply assemble your sandwich with your desired fillings. Lightly butter or oil the outer bread slices. Place the sandwich directly on the preheated grill pan. Press down gently with a spatula if your air fryer model allows or if you have a weighted press.
Cook for 3-5 minutes per side at about 350°F (175°C) until the bread is golden brown and crispy, with distinct grill marks. The cheese inside should be melted and gooey. This method creates a perfectly toasted and warm sandwich. It is a quick and easy way to make lunch or a light dinner.
Cleaning and Maintenance of Your Grill Pan
Proper cleaning and maintenance are essential for prolonging the life of your Philips Air Fryer Grill Pan. A well-maintained pan performs better and is always ready for your next grilling session. Neglecting cleanup can lead to food sticking, reduced efficiency, and potential damage to the non-stick coating. I make it a point to clean my grill pan soon after use.
Caring for your grill pan is generally straightforward, thanks to its non-stick properties. However, there are specific techniques that help preserve its integrity and make the cleaning process effortless. Let’s cover the best practices for keeping your grill pan in top condition.
Immediate Post-Use Cleaning
The best time to clean your grill pan is as soon as it cools down after use. This prevents food residue from hardening and sticking firmly to the surface. Hardened food is much more difficult to remove and might require harsher scrubbing, which can damage the non-stick coating. Once the pan is cool enough to handle, remove it from the air fryer drawer.
For light residue, a simple wipe with a soft cloth or paper towel might suffice. For more stubborn bits, a warm, soapy water soak is effective. Fill the pan with warm water and a small amount of dish soap. Let it soak for 10-15 minutes. This softens any stuck-on food, making it easy to wipe away. Prompt cleaning saves time and effort. You can also refer to How to clean grill pan for more general cleaning tips applicable to grill pans.
Hand Washing vs. Dishwasher Safety
Most Philips Air Fryer Grill Pans feature a non-stick coating and are often dishwasher safe. However, I always recommend hand washing when possible. Hand washing is gentler on the non-stick surface and helps preserve it over time. Dishwasher detergents and high heat can sometimes degrade coatings more quickly. Use a soft sponge or cloth and warm, soapy water. Avoid abrasive scrubbers, steel wool, or harsh chemicals. These can scratch or damage the non-stick finish.
If you choose to use a dishwasher, place the grill pan on the top rack. Use a mild detergent and a gentle cycle. Always check your specific grill pan’s instructions or the Philips website for definitive dishwasher safety information. Protecting the non-stick coating ensures longevity and easy food release. Knowing how to care for your pan properly helps maintain its performance. The guide Can you put Philips Air Fryer basket in dishwasher can offer additional insight into air fryer accessory cleaning if your specific model uses a basket similar to the grill pan material.
Storage Tips
Proper storage of your Philips Air Fryer Grill Pan helps protect it from damage. Ensure the pan is completely dry before storing it. Storing a wet pan can lead to water spots or, in some cases, corrosion over a long period. Find a dedicated spot for it in your kitchen cabinet or drawer.
If stacking other pans or accessories on top of your grill pan, place a soft cloth or paper towel between them. This prevents scratches to the non-stick surface. Avoid storing heavy, sharp, or metal objects directly on the grill pan’s cooking surface. Such items can cause dents or scratches, compromising the non-stick coating. Careful storage ensures your grill pan remains in excellent condition for many uses.
Troubleshooting Common Grill Pan Issues
Even with careful use, you might encounter minor issues when using your Philips Air Fryer Grill Pan. Knowing how to troubleshoot these problems can save you frustration and improve your cooking results. Most issues have simple solutions once you understand the cause. I often review common problems to ensure smooth operation.
Addressing these concerns quickly ensures you continue to enjoy the benefits of indoor grilling. It is about understanding the interaction between your food, the pan, and the air fryer’s heating mechanism. Let’s look at a few common challenges and their effective fixes.
Uneven Cooking
If your food cooks unevenly on the grill pan, several factors could be at play. The most common reason is overcrowding. Remember, air needs to circulate freely around each piece of food. If the pan is too full, some areas will block airflow, leading to parts that are undercooked or not properly browned. Always cook in single layers and in batches if necessary.
Another reason for uneven cooking can be inconsistent flipping. Ensure you flip all pieces of food halfway through the cooking process. This exposes both sides to the direct heat of the grill pan and the circulating hot air. Uneven thickness of food items can also cause issues. Try to cut pieces to a uniform size for more consistent results. Preheating the grill pan thoroughly also contributes to even cooking.
Food Sticking to the Pan
Food sticking to the non-stick grill pan is frustrating. This usually happens for a few key reasons. First, ensure you preheat the grill pan sufficiently. A properly hot pan creates an immediate sear that helps release food. Second, make sure you have lightly oiled the food or the pan itself. Even non-stick surfaces benefit from a thin layer of oil to aid release and promote browning.
Third, avoid flipping food too soon. Let the food cook for the initial recommended time to allow a crust to form. Once a crust forms, the food releases more easily. If you try to flip too early, it might tear or stick. Finally, check your pan for any signs of damage to the non-stick coating. Scratches can compromise its effectiveness.
Excessive Smoke Production
Excessive smoke from your air fryer grill pan usually indicates burning fats or marinades. If you are cooking fatty meats, the rendered fat can collect and smoke. Trim excess fat from meats before grilling. For highly marinated foods, pat them dry before placing them on the grill pan. Sugary marinades are particularly prone to burning at high air fryer temperatures.
Ensure your air fryer and grill pan are clean from previous food residues. Old, burnt-on grease can cause smoke. If smoking persists, consider reducing the cooking temperature slightly. You might need to cook for a longer duration at the lower temperature. Good kitchen ventilation is also crucial. A powerful range hood can help clear smoke and odors effectively.
Conclusion
Mastering the Philips Air Fryer Grill Pan truly transforms your cooking experience, allowing you to enjoy delicious, grilled meals with ease and convenience. We have explored everything from preparing your pan and food to achieving those perfect grill marks and understanding proper cleaning techniques. By following these guidelines, you can consistently create flavorful and healthy dishes that mimic outdoor grilling. The grill pan is more than just an accessory; it is a gateway to expanding your culinary repertoire right in your kitchen.
Remember the key steps: preheat your pan, lightly oil your food, do not overcrowd, and flip halfway. Clean your grill pan promptly after each use to maintain its non-stick properties. With a little practice, you will quickly become adept at using your Philips Air Fryer Grill Pan. Start experimenting with different meats, vegetables, and even sandwiches to discover your favorite grilled creations. Embrace the versatility of your air fryer and enjoy healthier, tastier meals every day. Happy grilling.
- Philips Air Fryer
- Grill Pan
- Air Frying Tips
- Grilling Techniques
- Kitchen Accessories

Todd Martin
Senior Writer
With over 15 years of experience in home renovation and design, I started HEG to share what I’ve learned with homeowners who want to create spaces that are both beautiful and functional. I’ve always believed in a hands-on approach, and over the years, I’ve picked up practical solutions that actually work. Through HEG, I aim to make home improvement more approachable, sharing real tips that help you create a home you truly love.