· Todd Martin · Home Cleaning · 19 min read
How To Use Rinse Aid On Shower Screen

Shine Your Shower Screen: How To Use Rinse Aid Effectively
Are you tired of staring at a shower screen covered in unsightly water spots and soap scum? It is a common problem for many homeowners. Hard water deposits and daily use leave residues on glass. These spots make your bathroom look less clean. I know the frustration of scrubbing and still seeing cloudy glass.
Many people think of rinse aid only for dishwashers. However, this product has surprising power beyond the kitchen. It can transform your shower screen from dull to dazzling. Rinse aid works by changing how water behaves on surfaces. It helps water sheet off, preventing spots. This article will show you exactly how to use rinse aid on shower screen surfaces. We will cover why it works, how to apply it, and tips for keeping your glass clear. Get ready for a crystal-clear shower experience.
Takeaway
- Rinse aid makes water slide off glass surfaces.
- It prevents water spots and soap scum on shower screens.
- Clean the screen thoroughly before applying rinse aid.
- Dilute rinse aid with water for best results.
- Apply regularly for ongoing shine and protection.
Rinse aid helps water run off surfaces without leaving spots. You can dilute rinse aid with water and spray it onto a clean shower screen. Wipe it down for a streak-free finish. This prevents future water marks and soap scum buildup.
Understanding Rinse Aid: A Secret Weapon for Spotless Surfaces
Rinse aid is a remarkable cleaning agent. It typically comes as a liquid product. People most often use it in dishwashers. Its main job is to help dishes dry without water spots. It achieves this through specific chemical properties.
Rinse aid contains surfactants. Surfactants are compounds that lower the surface tension of a liquid. Imagine water as tiny, sticky droplets. These droplets want to cling to surfaces. This clinging action is what causes water spots. Hard water contains minerals like calcium and magnesium. When these minerals dry on surfaces, they leave visible deposits. Rinse aid changes the behavior of these water droplets. It breaks their surface tension. This makes the water spread out thinly. Then, water flows off the surface more easily. It does not form beads that can dry into spots.
Think of it like a smooth slide. Water simply glides down instead of sticking. This sheeting action is key. It ensures less water remains on the surface. Less remaining water means fewer deposits. This is why dishes come out sparkling. This same principle applies perfectly to shower screens. Your shower screen faces constant water exposure. Water droplets dry on the glass, leaving behind minerals and soap residue. Rinse aid can help water move quickly off the glass. This reduces the chance of spots forming. It leaves a clear, clean surface behind. Understanding how rinse aid works helps you use it effectively. It transforms a common household product into a powerful cleaning tool for your bathroom. Knowing the science behind it gives you confidence in its application. It is a simple concept with big results. If you want to know how to know when rinse aid is empty in a dishwasher, the concept of its purpose remains the same. It is designed to ensure a spot-free finish by making water sheet away.
The Clear Advantages: Why Rinse Aid Excels for Shower Screens
Using rinse aid on your shower screen brings many benefits. It is not just about getting rid of current spots. It is also about preventing future problems. I have personally seen the difference it makes. My shower screen stays cleaner for longer. This saves me time and effort.
First, rinse aid prevents water spots. Hard water contains minerals. These minerals dry on glass, leaving behind ugly white spots. Rinse aid creates a thin film on the glass. This film makes water slide right off. It cannot cling to the surface. This means fewer mineral deposits form. Your shower screen looks crystal clear after every shower. You will not see those cloudy residues.
Second, it helps fight soap scum. Soap scum is a mix of soap, body oils, and hard water minerals. It sticks to shower surfaces, making them look dirty. Rinse aid reduces water’s ability to stick to the glass. This also reduces the stickiness of soap scum. The soap residue washes away with the water. This makes your shower screen less prone to scum buildup. It remains cleaner for a longer period.
Third, using rinse aid makes future cleaning easier. When water sheets off the glass, less residue remains. This means you do not need to scrub as hard or as often. A quick wipe or squeegee after a shower is often enough. The protective layer from the rinse aid keeps the surface smooth. Dirt and grime have less to grab onto. This extends the time between deep cleans. It simplifies your cleaning routine significantly. Many people ask, can I use rinse aid to clean windows? Yes, the same principles apply. Rinse aid helps water sheet off any glass surface. This makes it an excellent choice for a variety of glass cleaning tasks around the home. Its ability to create a smooth, repellent surface is highly valuable.
Finally, rinse aid can extend the life of your shower screen. Constant scrubbing with abrasive cleaners can scratch glass. Heavy mineral buildup can also etch the surface over time. By preventing spots and scum, rinse aid reduces the need for harsh cleaning. This keeps your glass smooth and clear. It maintains its appearance for many years. Using rinse aid is a smart choice for a low-maintenance, sparkling shower.
Essential Preparation: Getting Your Shower Screen Ready
Before you apply rinse aid to your shower screen, proper preparation is vital. Think of it like painting a wall. You would not paint over a dirty surface. The same rule applies here. Rinse aid works best on a truly clean slate. If you skip this step, you will not get the sparkling results you want. Instead, you might just lock in the existing dirt and spots.
Your first task is to deep clean your shower screen. This means removing all existing soap scum, hard water stains, and grime. Common household cleaners designed for bathrooms work well. You can use a commercial cleaner or a natural solution. Vinegar and baking soda are excellent for tackling tough buildup. Mix equal parts white vinegar and water in a spray bottle. Spray the solution generously on the glass. Let it sit for 5-10 minutes. This helps loosen the mineral deposits and soap scum. For stubborn spots, make a paste with baking soda and a little water. Apply it to the areas that need extra attention. Gently scrub with a non-abrasive sponge or brush.
Once you have applied your cleaner, scrub the entire shower screen. Use a microfiber cloth or a soft brush. Pay close attention to corners and edges. These areas often collect the most residue. After scrubbing, rinse the screen thoroughly with clean water. You want to wash away all cleaning product residue. Any leftover cleaner can interfere with the rinse aid’s effectiveness. Use a squeegee to remove excess water. Then, wipe the glass dry with a clean, lint-free microfiber cloth. The goal is to have a completely dry and spotless surface.
Having the right tools makes this job easier. I always keep a good quality spray bottle handy. Microfiber cloths are essential. They absorb water and grime without leaving lint. A squeegee is also very helpful for drying the glass quickly. Make sure your squeegee blade is in good condition. A damaged blade can leave streaks. This preparation step takes effort. However, it sets the stage for success. It ensures that the rinse aid creates a protective layer on clean glass. This maximizes its ability to repel water and prevent new spots. Remember, rinse aid prevents spots, but it does not remove existing ones. For more ideas on what else you can clean, consider exploring what else can rinse aid be used for. This can give you insights into its versatility.
Step-by-Step Application: How To Use Rinse Aid On Shower Screen
Once your shower screen is perfectly clean and dry, you are ready to apply the rinse aid. This process is straightforward. It takes little time. I find it surprisingly satisfying to watch the water bead off afterward. Follow these steps for the best results.
Proper Dilution Ratios
Rinse aid is concentrated. You do not need to use it straight from the bottle. Diluting it with water is essential. It prevents streaks. It also makes your product last longer. A common starting point is a ratio of 1 part rinse aid to 4-5 parts water. For example, if you use 1 ounce of rinse aid, add 4-5 ounces of water. Adjust this ratio as needed. If you see streaks, use more water. If the water is not sheeting off well, use slightly less water.
- For a standard spray bottle: Add about 2 tablespoons of rinse aid. Fill the rest of the bottle (around 16-20 ounces) with tap water.
- For stronger hard water areas: You might start with 1 part rinse aid to 3 parts water. Test this on a small area first.
- For general maintenance: 1 part rinse aid to 6-8 parts water can be effective. Mix the solution well. Gently shake the spray bottle to combine the liquids. Do not shake too vigorously. This can create excess foam.
Two Effective Application Methods
You have a couple of choices for applying the rinse aid solution. Both methods work well. Choose the one that suits your routine.
- Spray and Wipe Method:
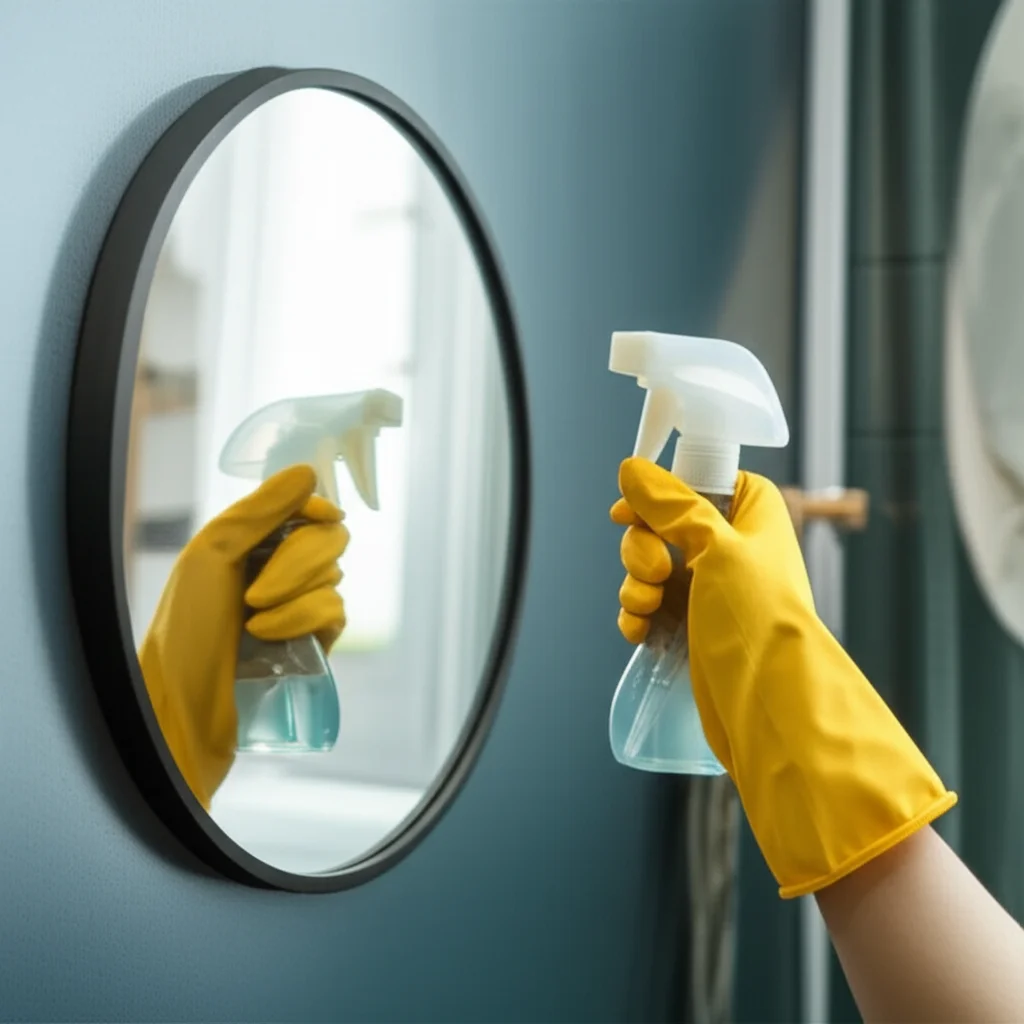
- Spray: Lightly mist the entire clean and dry shower screen with your diluted rinse aid solution. Ensure even coverage. Do not over-saturate the glass. A thin, even coat is what you need.
- Wipe: Use a clean, dry microfiber cloth. Gently wipe the entire surface. Work from top to bottom. Overlap your strokes. This spreads the rinse aid evenly. It also removes any excess solution. The goal is a uniform, invisible layer. You should not see any visible liquid remaining.
- Post-Shower Squeegee Method: This method is more about daily maintenance.
- Keep a small spray bottle of the diluted rinse aid solution in your shower.
- After your shower, spray the wet glass lightly.
- Immediately use a squeegee to remove the water. The rinse aid will help the water glide off. It leaves a streak-free shine. This method is great for preventing new spots daily. It works best if your screen is already relatively clean. For a deep cleaning solution that is often used in dishwashers, you might look into how to use vinegar as rinse aid in dishwasher. This shares the idea of using a diluted agent to improve water sheeting.
Frequency and Maintenance
How often you apply rinse aid depends on your water hardness and shower frequency.
- Initial application: After your deep clean, apply rinse aid using the spray and wipe method.
- For heavy hard water: Reapply the spray and wipe method weekly.
- For moderate hard water: Every 2-4 weeks might be sufficient.
- Daily maintenance: Use the post-shower squeegee method after each shower. This helps maintain the shine between full applications. Consistency is key. Regular application keeps the protective layer strong. This maximizes the spot-prevention benefits. My personal experience shows that a quick daily squeegee with a little rinse aid mist keeps my shower sparkling.
Overcoming Challenges: Common Issues with Rinse Aid Application
While using rinse aid on your shower screen is simple, you might encounter a few minor issues. Do not get discouraged if your first attempt is not perfect. Troubleshooting these problems is easy. I have faced them myself and found simple solutions.
One common issue is streaks or haziness. This usually happens for a few reasons. First, you might have used too much rinse aid. Remember, it is concentrated. A little goes a long way. Too much product leaves a visible film. Second, your shower screen might not have been perfectly clean before application. Rinse aid will not clean the glass. It enhances water sheeting. If dirt or residue remains, the rinse aid will simply spread it around. Third, the cloth or squeegee you used might be dirty. A dirty tool will leave streaks.
To fix streaks or haziness:
- Reduce product: Use less rinse aid in your dilution. Try a 1:6 or 1:8 ratio.
- Re-clean: Thoroughly clean the shower screen again. Ensure it is spotless and dry. Then reapply the rinse aid solution.
- Clean tools: Use a fresh, clean microfiber cloth. Ensure your squeegee blade is clean and soft.
Another problem might be a lack of noticeable improvement. You apply rinse aid, but water spots still appear. This can happen if your hard water buildup is severe. Rinse aid prevents new spots. It does not magically remove old, etched-in mineral deposits. If your screen has heavy hard water stains, you need a more aggressive initial cleaning. Use a dedicated hard water stain remover. Some people even use fine steel wool (0000 grade) very carefully for tough spots, but always test this in an inconspicuous area first. Also, check your dilution ratio again. If the solution is too weak, it will not be effective. Increase the rinse aid concentration slightly.
Sometimes, you might notice a slight residue. This is different from streaks. It feels a bit slippery or gummy. This typically means you over-applied the product. Or, you did not wipe it off thoroughly enough. The goal is an invisible layer.
To remove residue:
- Wipe more: Go over the screen again with a clean, dry microfiber cloth. Use firm, even pressure.
- Rinse lightly: In some cases, a very light rinse with clean water followed by immediate squeegeeing can help. Then, dry completely. The concept is similar to when people need to know how to get rinse aid out of dishwasher. Too much product, or improper rinsing, can leave a residue that needs extra steps to remove.
Finally, consider safety concerns. Rinse aid is a chemical product. Avoid direct skin or eye contact. If it gets in your eyes, rinse with plenty of water. Keep the product out of reach of children and pets. Use in a well-ventilated area. While it is generally safe for household use, caution is always wise. Store it properly when not in use. Following these tips helps you get the best results from rinse aid.
Enhancing Longevity: Combining Rinse Aid with Best Practices
Using rinse aid is a great step toward a sparkling shower screen. However, it works best when combined with other good habits. Think of rinse aid as a powerful aid, not a magic bullet. For truly lasting shine and minimal effort, integrate it into a broader maintenance routine. I have found that these extra steps make all the difference.
One of the most important habits is using a squeegee after every shower. This is perhaps the single most effective way to prevent water spots. After you finish showering, quickly squeegee the glass. Work from top to bottom. Overlap your strokes slightly. This pushes most of the water off the screen before it can dry. The rinse aid you applied earlier makes this process even more effective. The water beads up and slides off with ease. This daily action prevents minerals and soap from settling on the glass. It keeps the rinse aid working at its peak.
Good ventilation in your bathroom is also crucial. A steamy bathroom encourages moisture to linger. This moisture then dries on surfaces, leaving spots. Ensure your bathroom fan is working properly. Turn it on during your shower and leave it running for at least 15-20 minutes afterward. If you do not have a fan, open a window. Improving air circulation helps surfaces dry faster. Faster drying means less time for water to sit and leave deposits. It also prevents mold and mildew growth.
Regular, light cleaning is another key practice. Even with rinse aid and a squeegee, some residue can build up over time. Once a week, give your shower screen a quick wipe-down. Use a diluted general bathroom cleaner or just water with a microfiber cloth. This removes any minor buildup before it becomes a problem. This preventative approach means you avoid heavy scrubbing sessions later. It keeps the glass in top condition.
Consider the other surfaces in your shower too. Your tiles and grout also need attention. While rinse aid is for glass, keeping the whole shower clean creates a better environment. This holistic approach makes the entire bathroom feel fresher. It helps your shower screen shine even brighter by contrast.
Prevention truly is key. By combining the power of rinse aid with daily squeegee use, good ventilation, and regular light cleaning, you create a powerful defense. Your shower screen will stay cleaner for longer. You will spend less time cleaning and more time enjoying your sparkling bathroom. It is an investment in time that pays off with effortless maintenance.
Addressing Your Questions: Rinse Aid Safety and Myths Debunked
Many questions arise when people consider using a product like rinse aid outside its traditional purpose. It is natural to wonder about its safety, compatibility, and overall effectiveness. Let us address some common myths and concerns about using rinse aid on shower screens. I aim to provide clear answers based on common product properties.
Is rinse aid safe for all glass types, including treated or coated glass? Generally, rinse aid is safe for most standard glass shower screens. It is designed to be gentle on surfaces. However, some shower screens have special coatings. These coatings might be hydrophobic (water-repelling) or anti-spot treatments. Always check with the shower screen manufacturer if you have a special coating. You can also test rinse aid on a small, inconspicuous area first. This applies to any new cleaning product. Most modern shower glass is durable. It should tolerate rinse aid well.
Will rinse aid build up on the glass over time? When used correctly, rinse aid should not build up. The key is proper dilution and thorough application. A thin, invisible layer is what you want. If you use too much or do not wipe it properly, you might see a slight residue. This is not a permanent buildup. It washes away with water or a quick wipe. Consistent use of diluted rinse aid prevents thick layers from forming. The product is designed to disperse and help water run off, not accumulate.
Is rinse aid harmful to pets or children? Like most household cleaning products, rinse aid should be kept out of reach of children and pets. It is not intended for consumption. If ingested, seek medical advice. Direct skin contact can cause mild irritation for some people. Wear gloves if you have sensitive skin. Good ventilation is also wise during use. Once applied and dried on the shower screen, the minimal residue is generally not a concern for casual contact. Proper storage and handling are always important safety measures.
Does rinse aid leave a chemical smell? Most rinse aids are low-odor or have a very mild, fresh scent. Some are completely unscented. The smell is usually not strong or lingering. Any scent will dissipate quickly after application and drying. This is unlike some harsh bathroom cleaners. The goal is a neutral effect on the glass surface. So, you should not expect a strong chemical smell in your bathroom.
Is it environmentally friendly? The environmental impact of rinse aid varies by brand. Many rinse aid formulas are biodegradable. Some brands offer “eco-friendly” or plant-based options. If environmental impact is a concern for you, look for products with specific certifications. Always dispose of rinse aid containers responsibly. Pouring chemicals down drains in large quantities is never recommended. The diluted amounts used for shower screens are small. This makes the overall environmental footprint minimal compared to heavy cleaning agents.
Understanding these points helps you use rinse aid with confidence. It is a safe and effective tool when used as directed. You can enjoy a clean, spot-free shower screen without unnecessary worry.
FAQ Section
Can I use any type of rinse aid for my shower screen?
Yes, most standard dishwasher rinse aids work effectively on shower screens. They contain similar surfactants designed to reduce water tension and prevent spots. Look for a liquid rinse aid. Avoid gel or powder forms that might be harder to dilute and apply evenly.
How often should I apply rinse aid to my shower screen?
For initial treatment, apply after a deep clean. For daily maintenance, a light mist and squeegee after each shower helps. For a more thorough application, repeat the spray and wipe method weekly or every few weeks. This depends on your water hardness and how often you shower.
Will rinse aid damage my shower screen’s finish or seals?
Rinse aid is generally safe for glass and common shower screen materials. It is mild and non-abrasive. It should not harm finishes or seals when used diluted as directed. If your screen has a special coating, test in an unseen area first to ensure compatibility.
What if my shower screen still has spots after using rinse aid?
If spots remain, your screen likely had old, tough hard water buildup before application. Rinse aid prevents new spots, it does not remove old ones. Deep clean the screen thoroughly first with a dedicated hard water remover. Then apply rinse aid to maintain the clean surface.
Is rinse aid safe for shower tiles or grout?
Rinse aid is designed for smooth, non-porous surfaces like glass. While a little overspray on tiles or grout is fine, it is not intended as a tile or grout cleaner. It does not offer the same cleaning benefits on porous materials. Focus application on the glass screen for best results.
Can I mix rinse aid with other cleaning products?
No, you should not mix rinse aid with other cleaning products. Especially avoid mixing it with bleach or ammonia-based cleaners. This can create harmful fumes or reduce the effectiveness of both products. Always use rinse aid diluted with water only.
Conclusion
Achieving a spotless shower screen might seem like a constant battle. Hard water and soap scum often leave unsightly marks. But now you know a powerful secret: rinse aid. This product, commonly found in your kitchen, can revolutionize your bathroom cleaning routine. We have explored exactly how to use rinse aid on shower screen surfaces.
You learned that rinse aid works by reducing water’s surface tension. This makes water sheet off the glass instead of clinging. This simple action prevents mineral deposits and soap scum from forming. The benefits are clear: streak-free glass, easier future cleaning, and a more inviting bathroom. We walked through the crucial steps, from deep cleaning your screen to proper dilution and application techniques. Remember to always start with a truly clean surface. Dilute the rinse aid correctly. Then apply it evenly for the best results.
We also discussed common troubleshooting tips. Streaks or a lack of improvement often mean too much product or an unclean starting point. Addressing these issues makes the process smooth. Finally, combining rinse aid with daily squeegee use and good ventilation ensures lasting shine. You now have the knowledge to transform your shower screen.
Do not let water spots spoil your bathroom’s appeal any longer. Embrace the power of rinse aid. Try this method today. Enjoy the satisfaction of a sparkling, clear shower screen. Your clean bathroom awaits!
- rinse aid
- shower screen
- glass cleaning
- hard water stains
- cleaning tips


